Week 6 HW: Genetic Circuits Part1
Assignment: DNA Assembly
Documentation
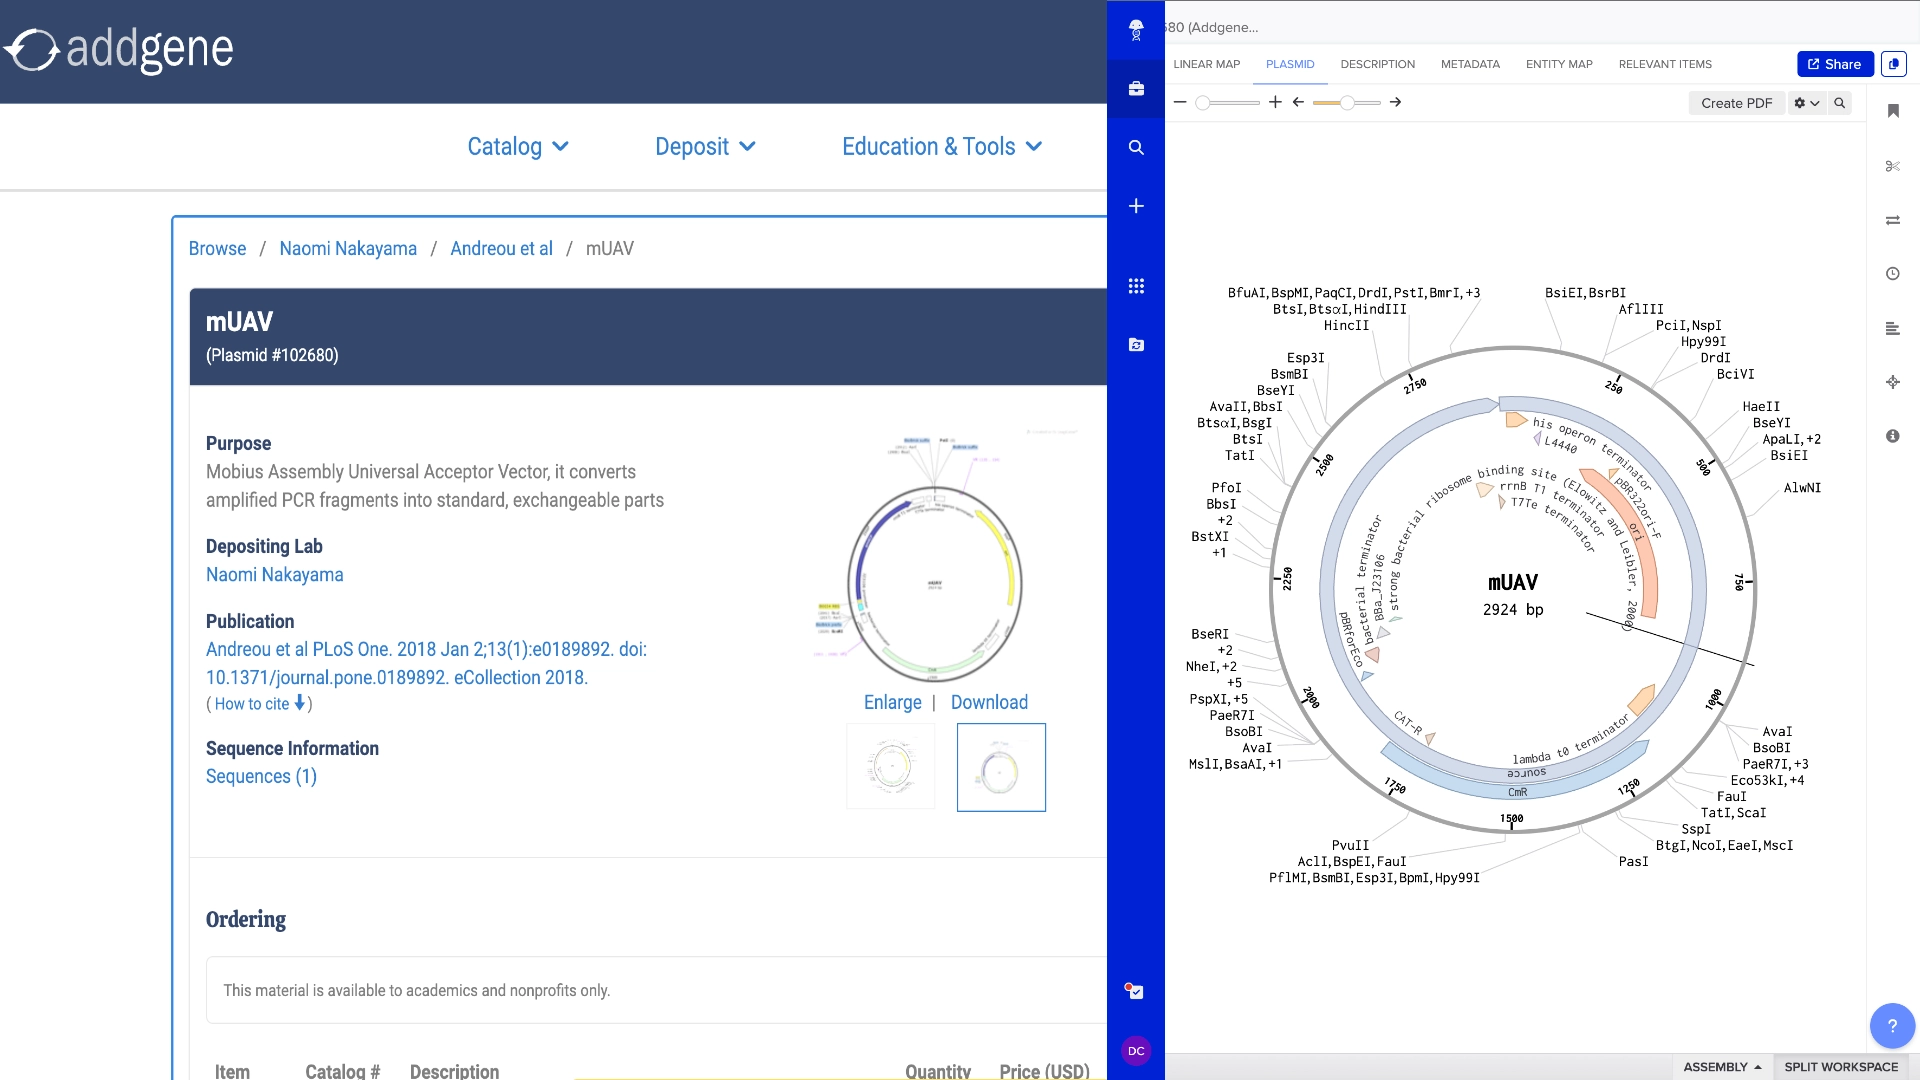
In order to model a Golden Gate assembly on Benchling I first got a mUAV plasmid backbone from Addgene
Then created a new linear DNA sequence by copying the amilCP gene from the HTGAA Benchling

Both fragments already had a Type IIS enzyme cut site in the right zones for assembly, using BsaI
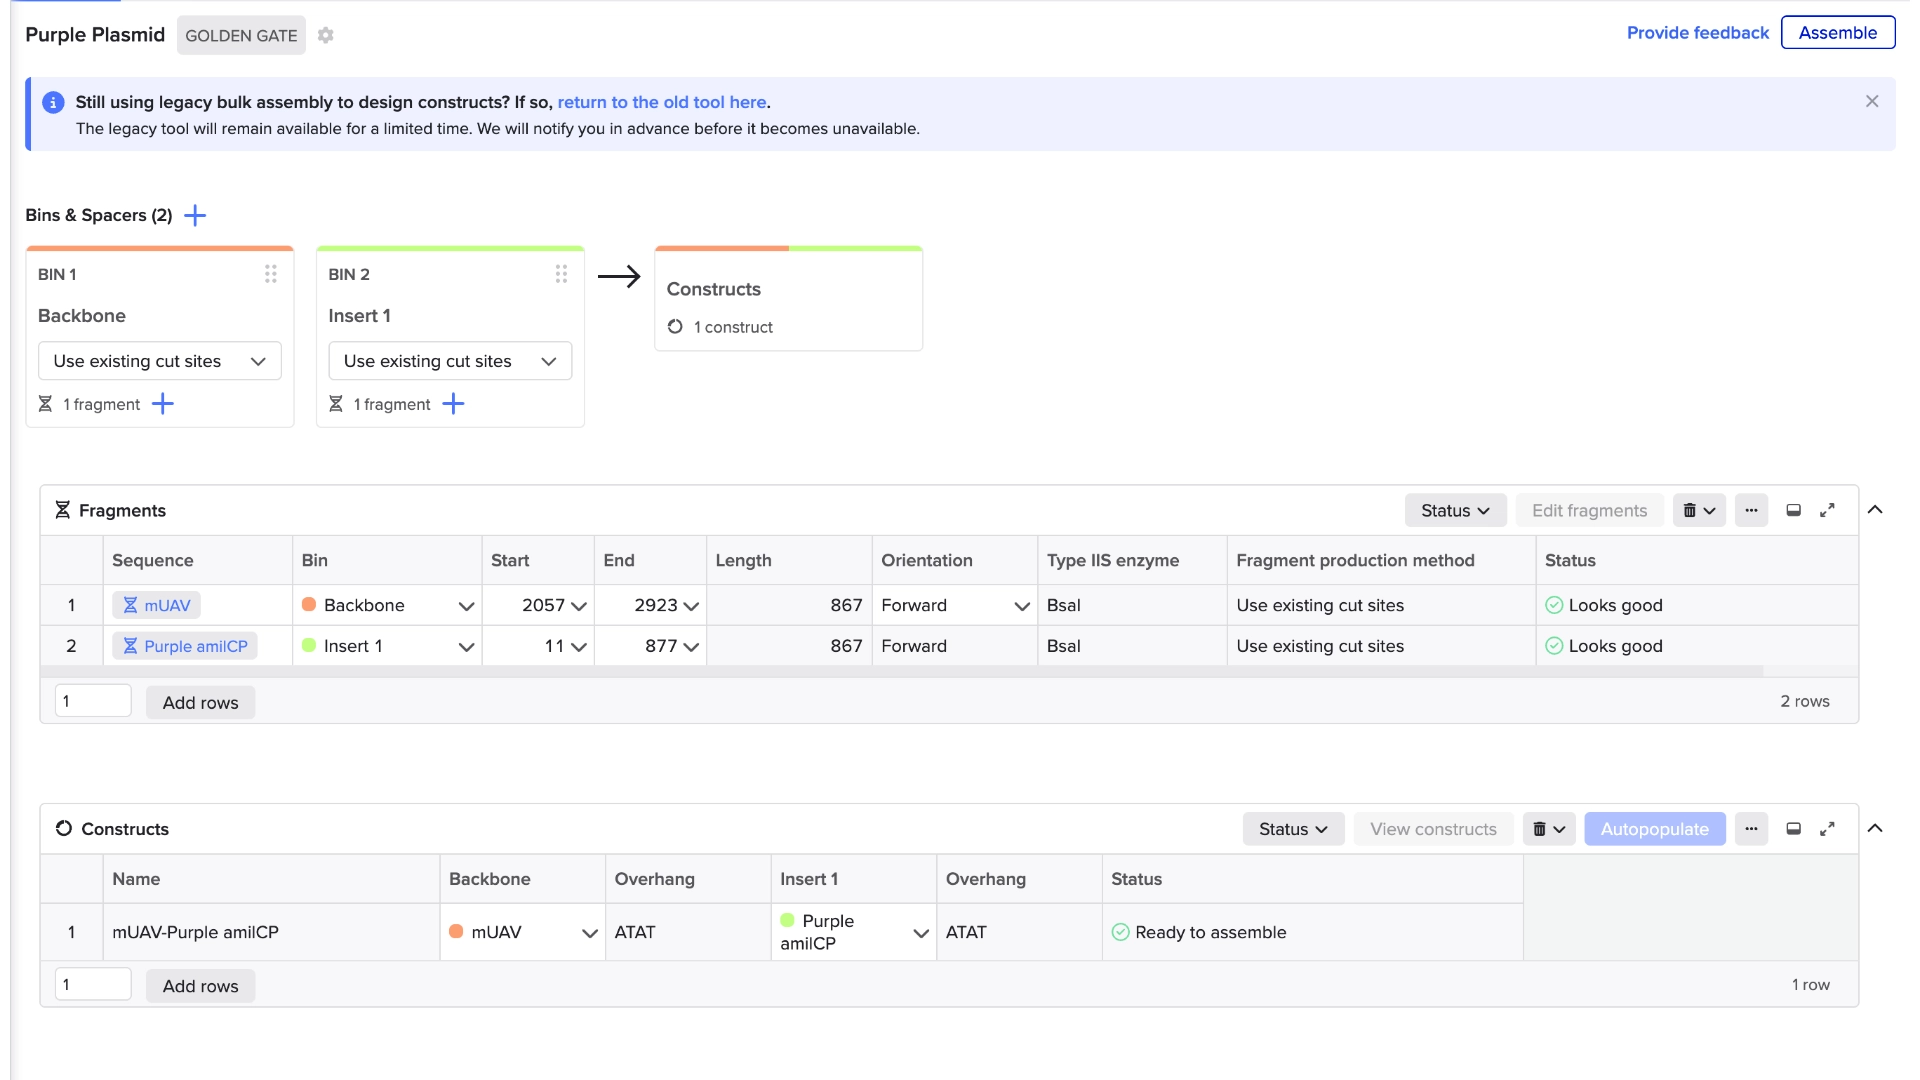
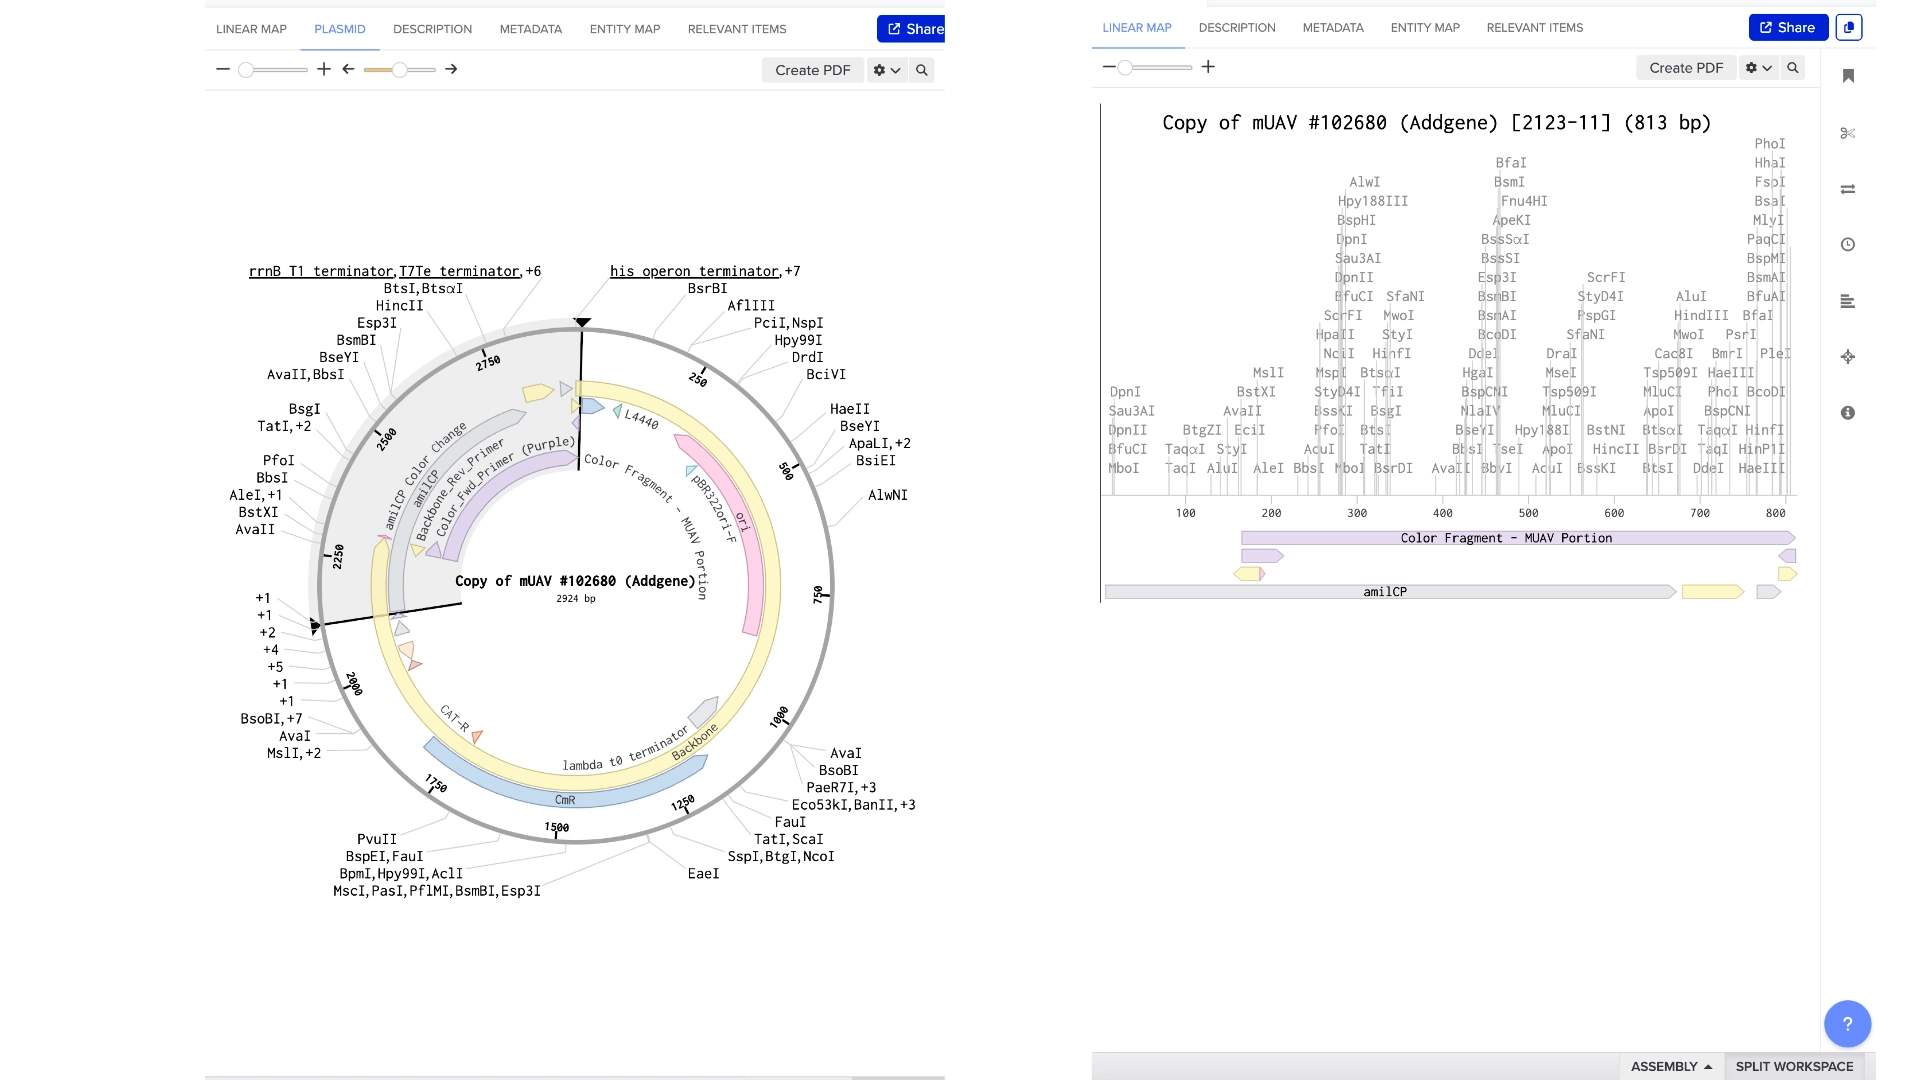
Created a Golden Gate assembly, using the mUAV as backbone and the amilCP (Purple) as insert
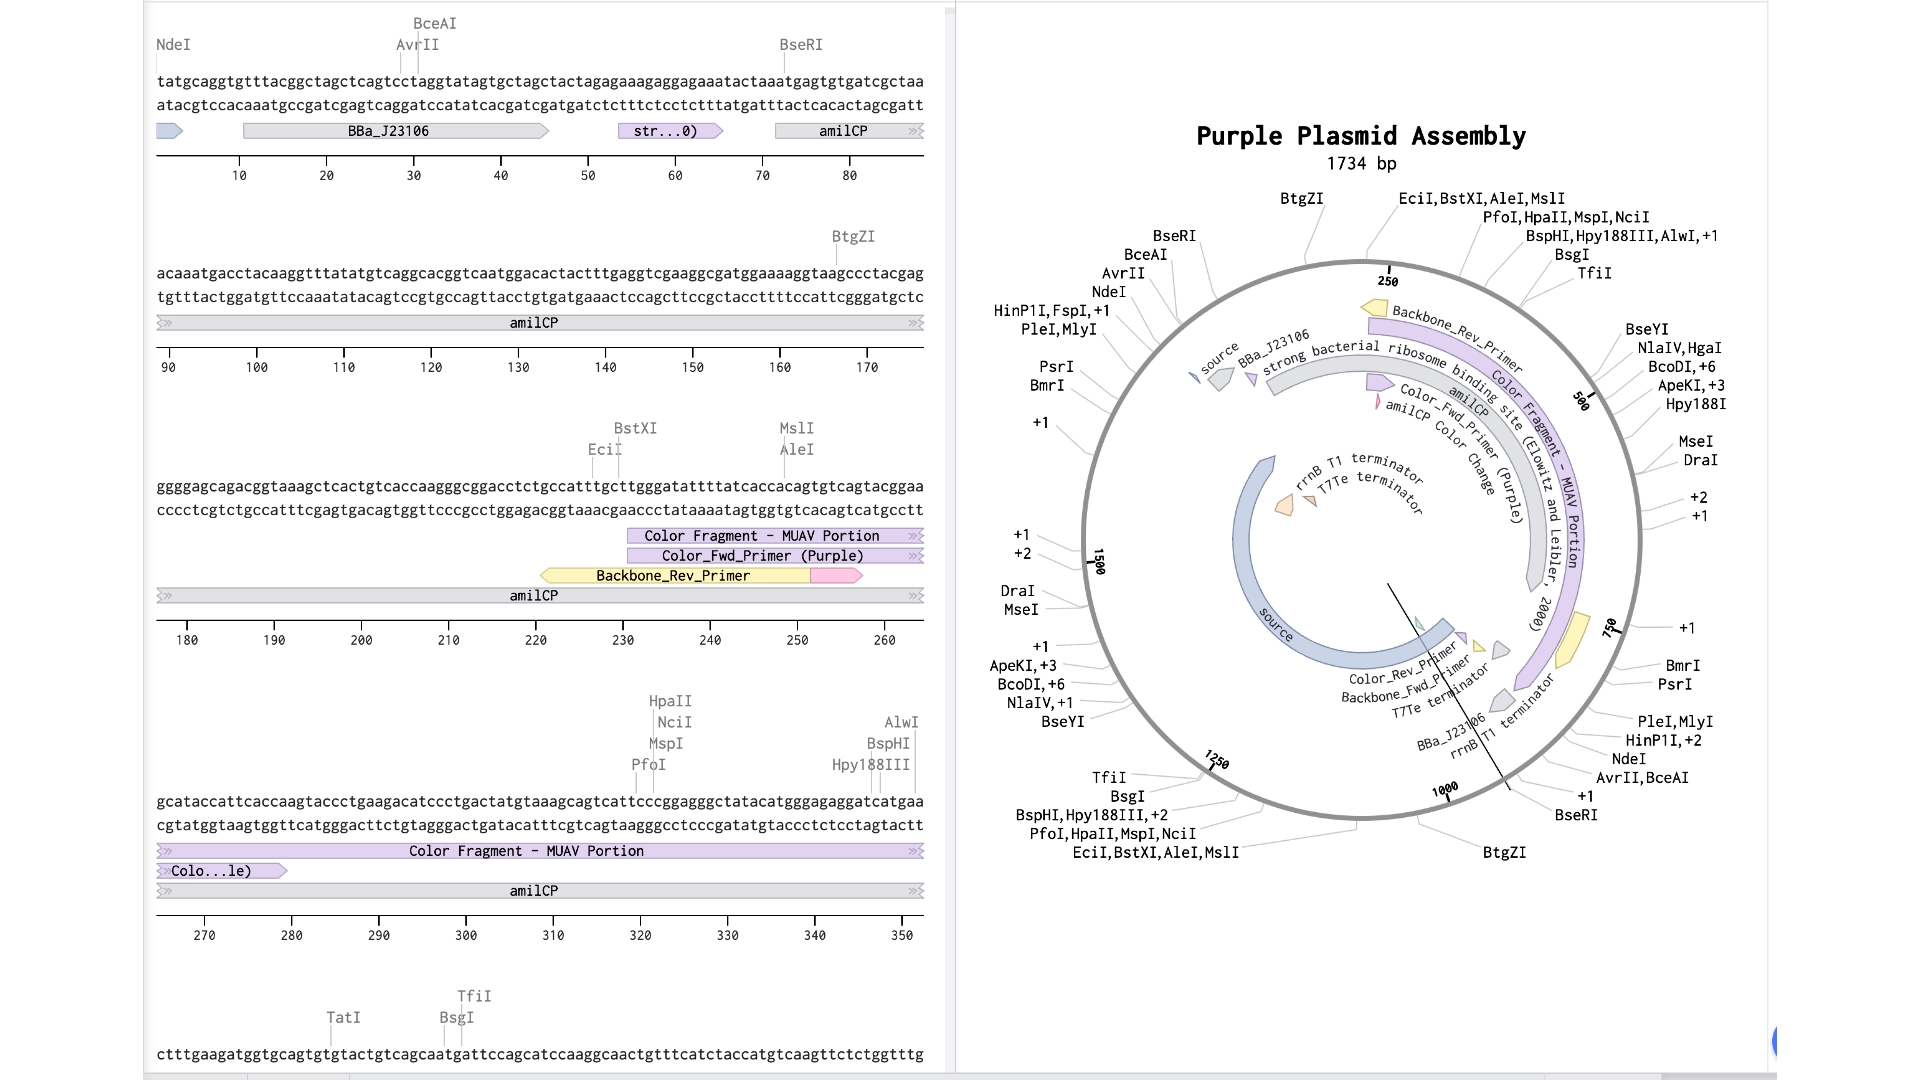
When the assembly was put together, I realized that it had been put together the wrong way— because of the orientation of the BsaI enzymes, the backbone being used was the 867 bp long instead of 2057 bp long
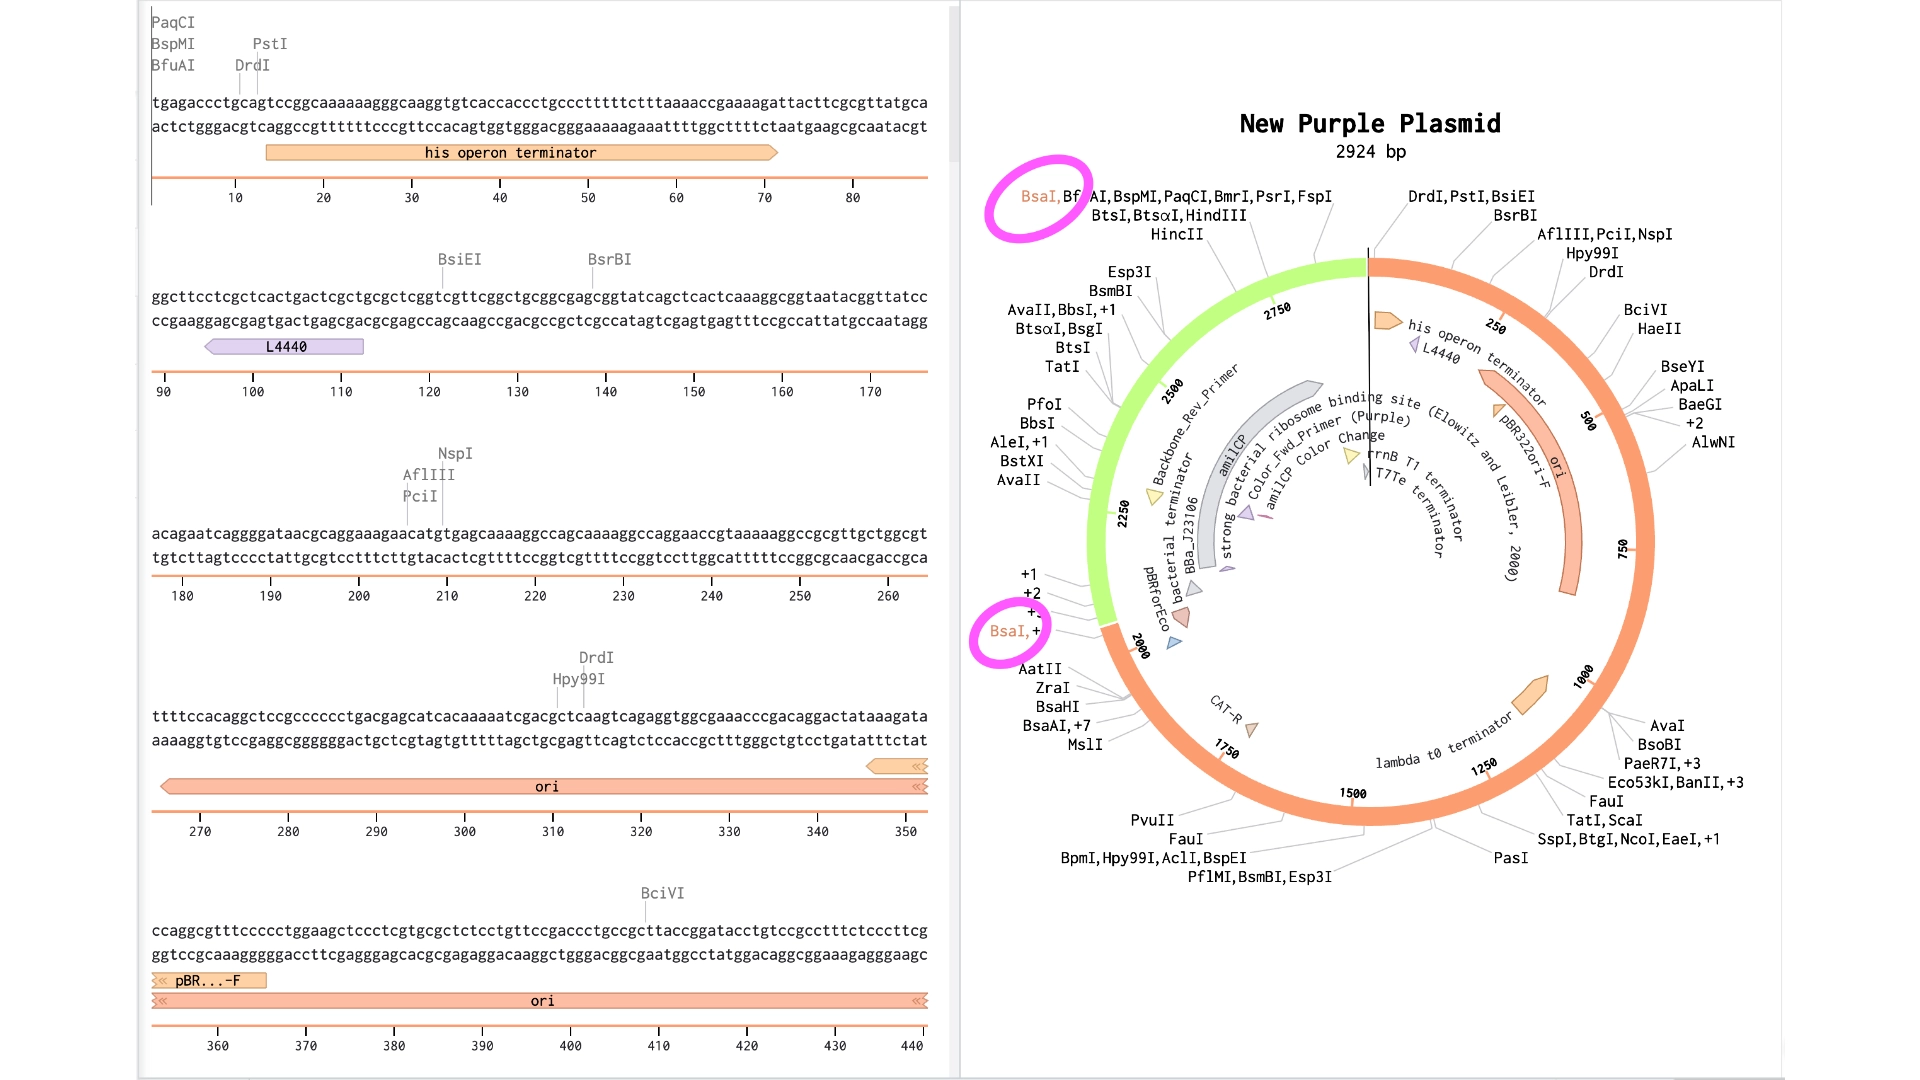
Created a new Golden Gate assembly and was able to output the plasmid in the correct order, although the recognition sites of BsaI enzymes of the backbone stayed inside the final plasmid which wasn’t supposed and would make a real golden gate assembly not work properly
To solve this the solution would be to create primers for the BsaI enzymes to be sure they pointed in the right direction and that their recognition sites would be eliminated with the process
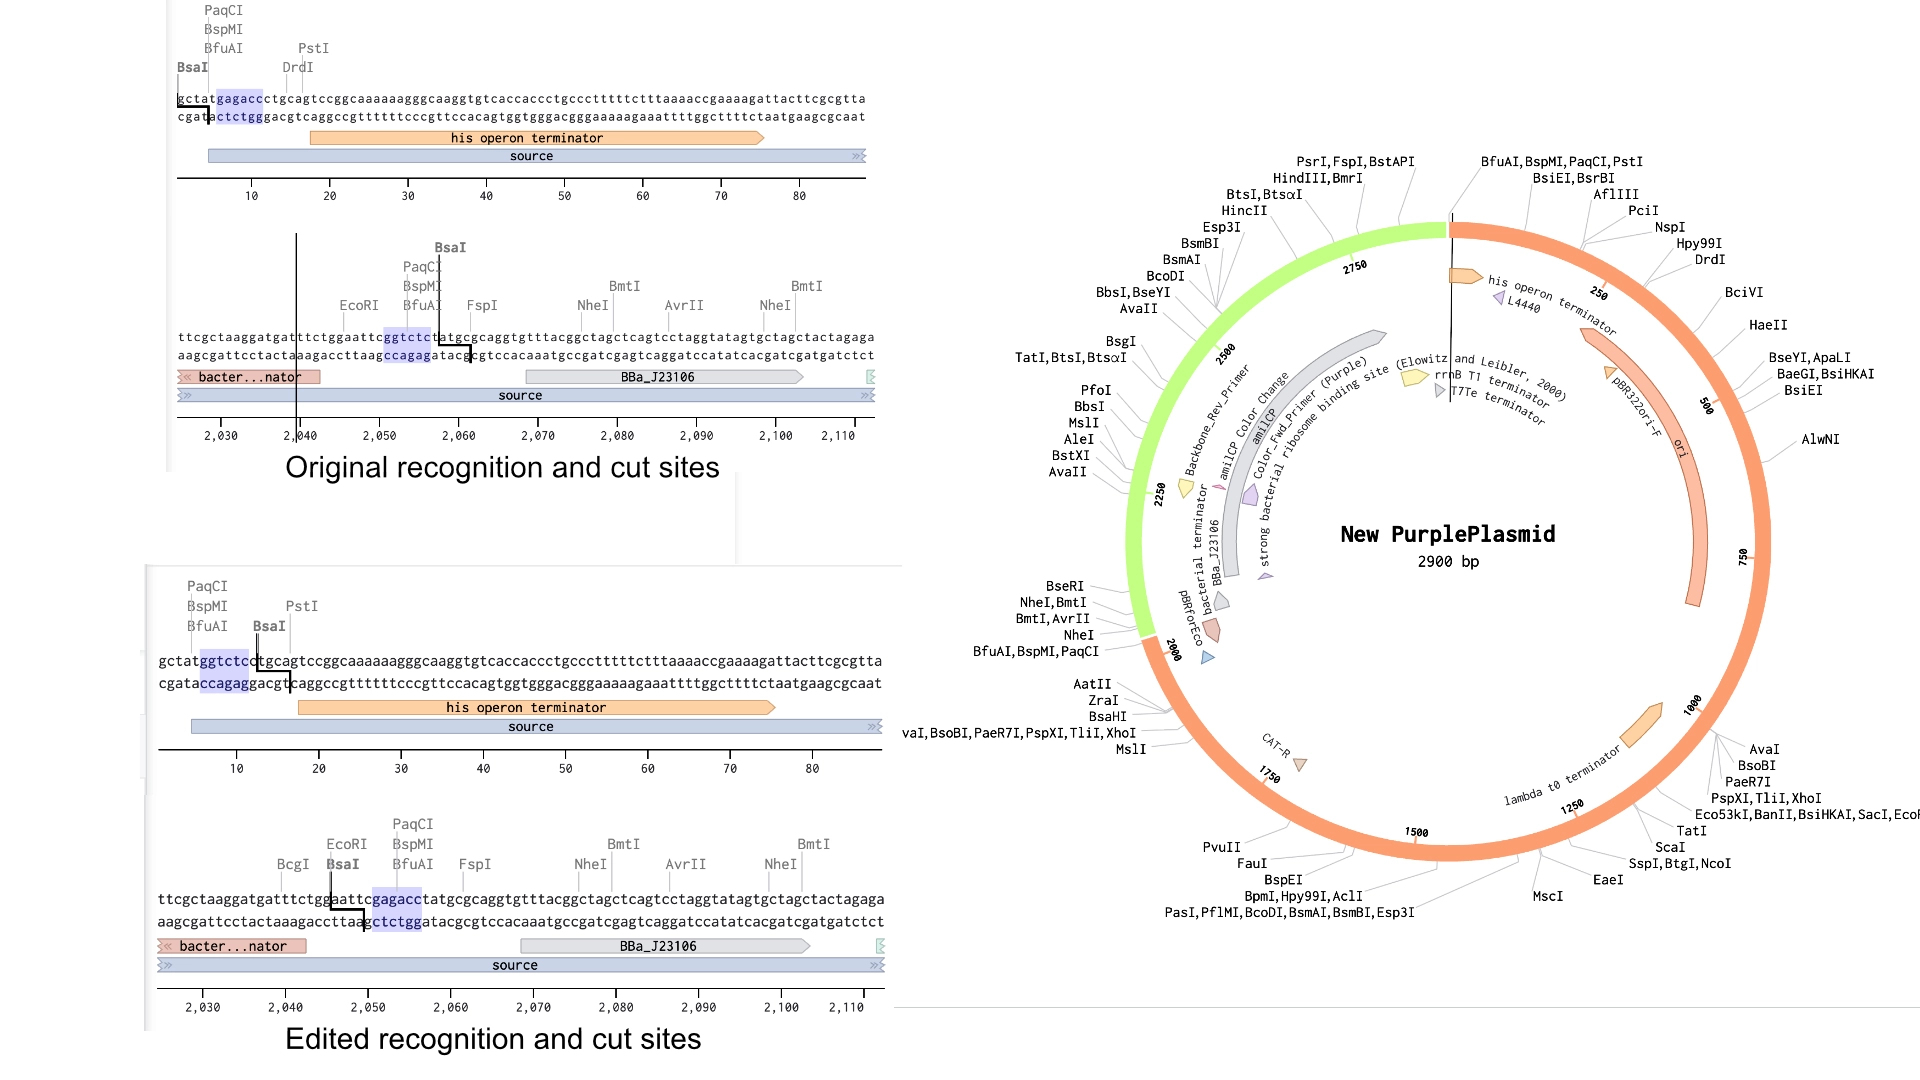
In the context of this exercise I manually edited the recognition sites of the BsaI enzymes in order to invert their cut site direction and was finally able to get a correct assembly
6. Describe another assembly method in detail (such as Golden Gate Assembly)
The Golden Gate Assembly relies on two Type IIS Restriction Enzymes that cut DNA outside their recognition sites, allowing for the use of unique and custom 4bp long sticky overhangs, and therefore, a really precise assembly of multiple small sequences at the same time. Having the constraint of ensure the used sequences are “domesticated”— free of internal Type IIS recognition sites.
The process goes as follows:
Creation of PCR primers that contain the Type IIS enzyme’s recognition sites and the unique 4bp overhangs in the right order for each of the segments.
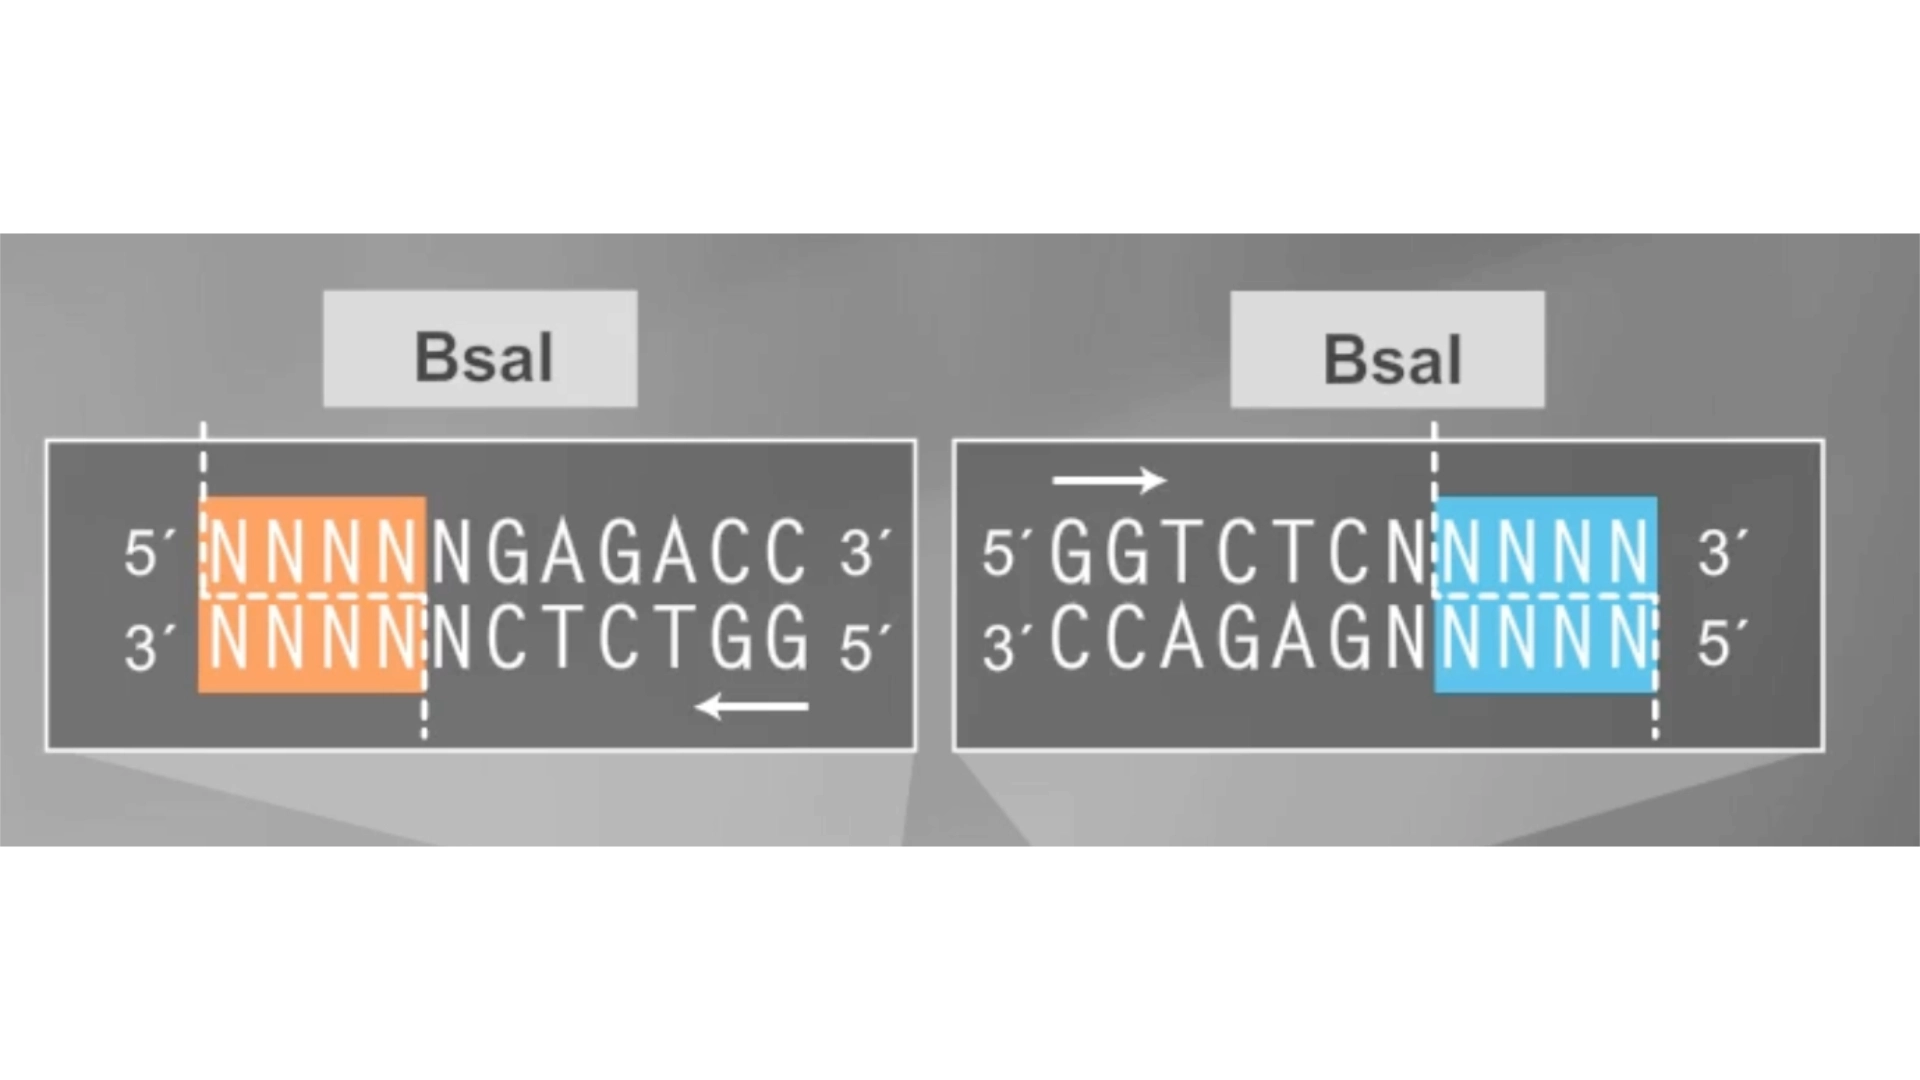
(Screenshot from Golden Gate Assembly video by New England Biolabs)
Restriction digestion, where the Type IIS enzyme cuts all fragments and the vector, producing the designed overhangs. Because the cut site is outside the recognition sequence, the recognition sequence itself is removed during assembly.
DNA ligase joins fragments that have matching overhangs. Since the restriction sites are removed after ligation, the assembled DNA cannot be cut again, making the reaction efficient.
Cycling digestion and ligation is performed through alternating temperatures for restriction digestion and ligation. This increases assembly efficiency because incorrectly assembled fragments can be cut again until the correct construct forms.
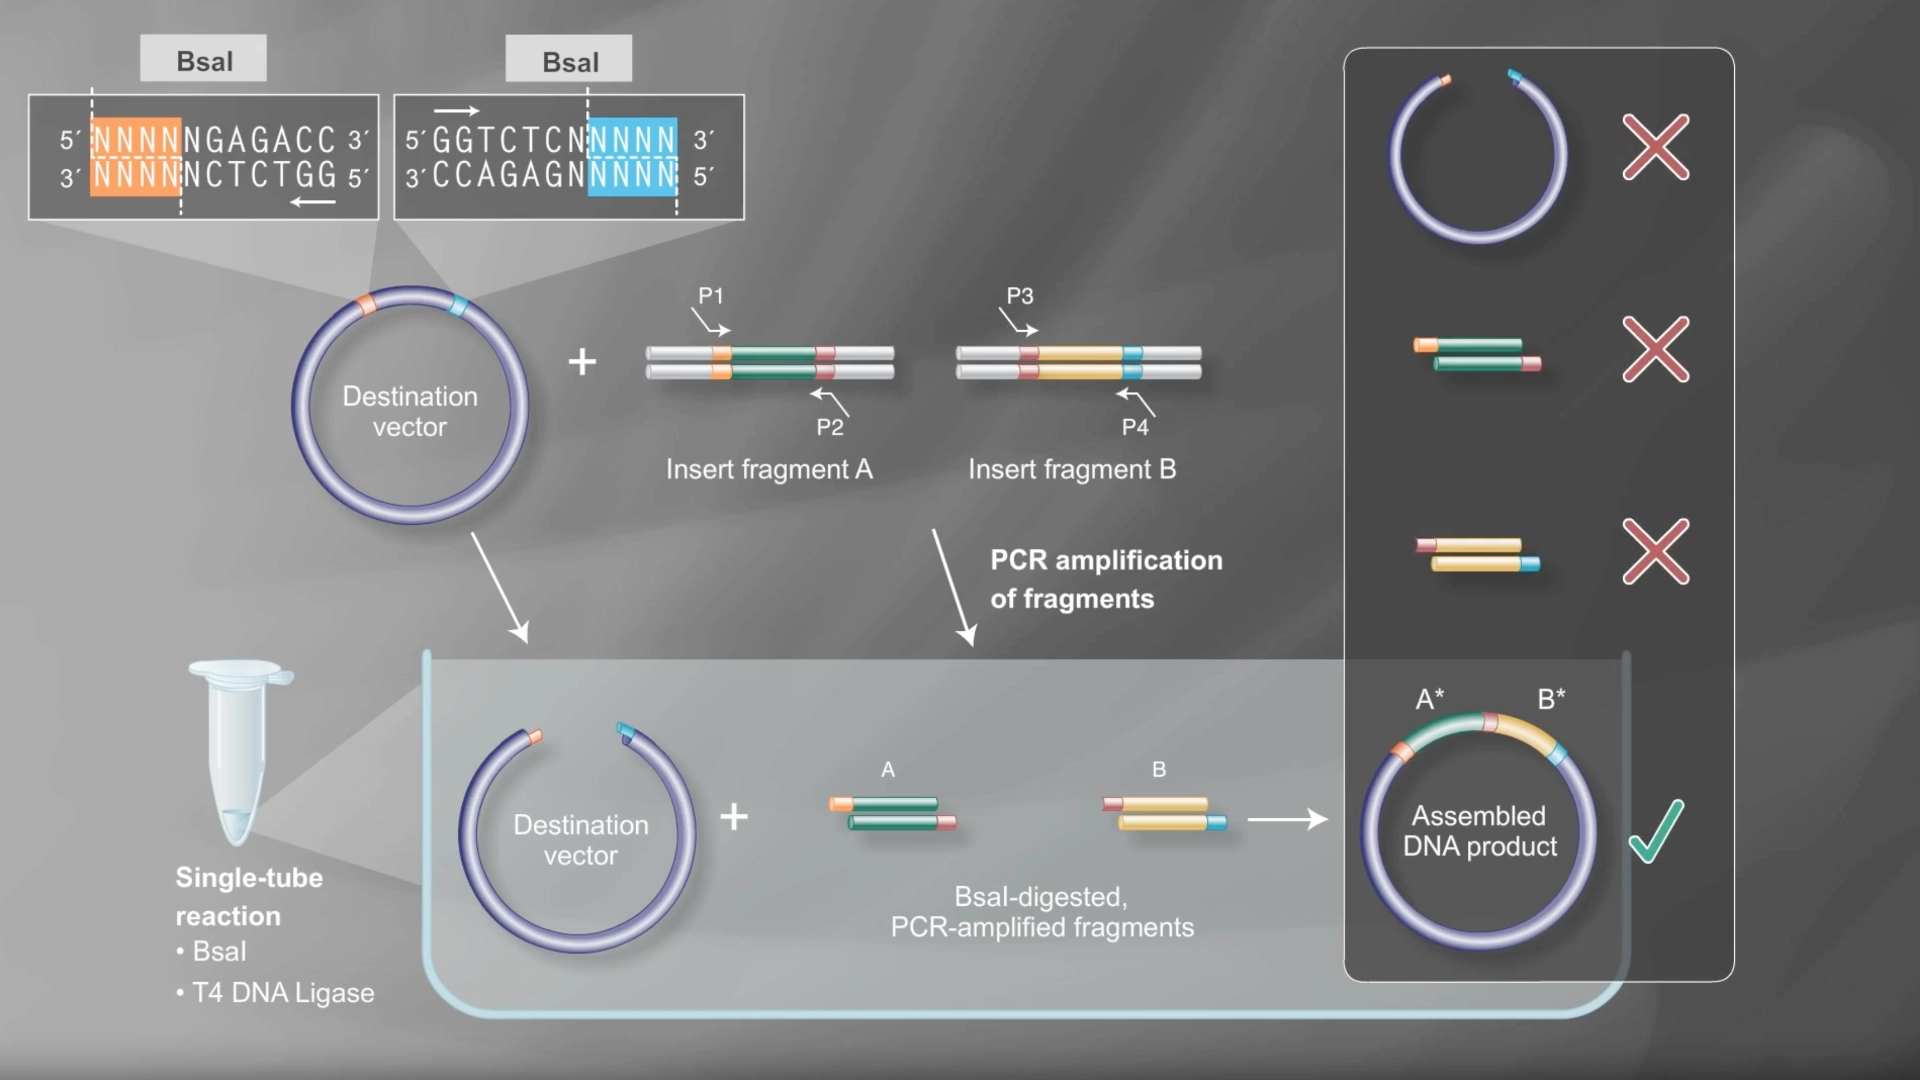
(Screenshot from Golden Gate Assembly video by New England Biolabs)
6.2 Model this assembly method with Benchling or Asimov Kernel!
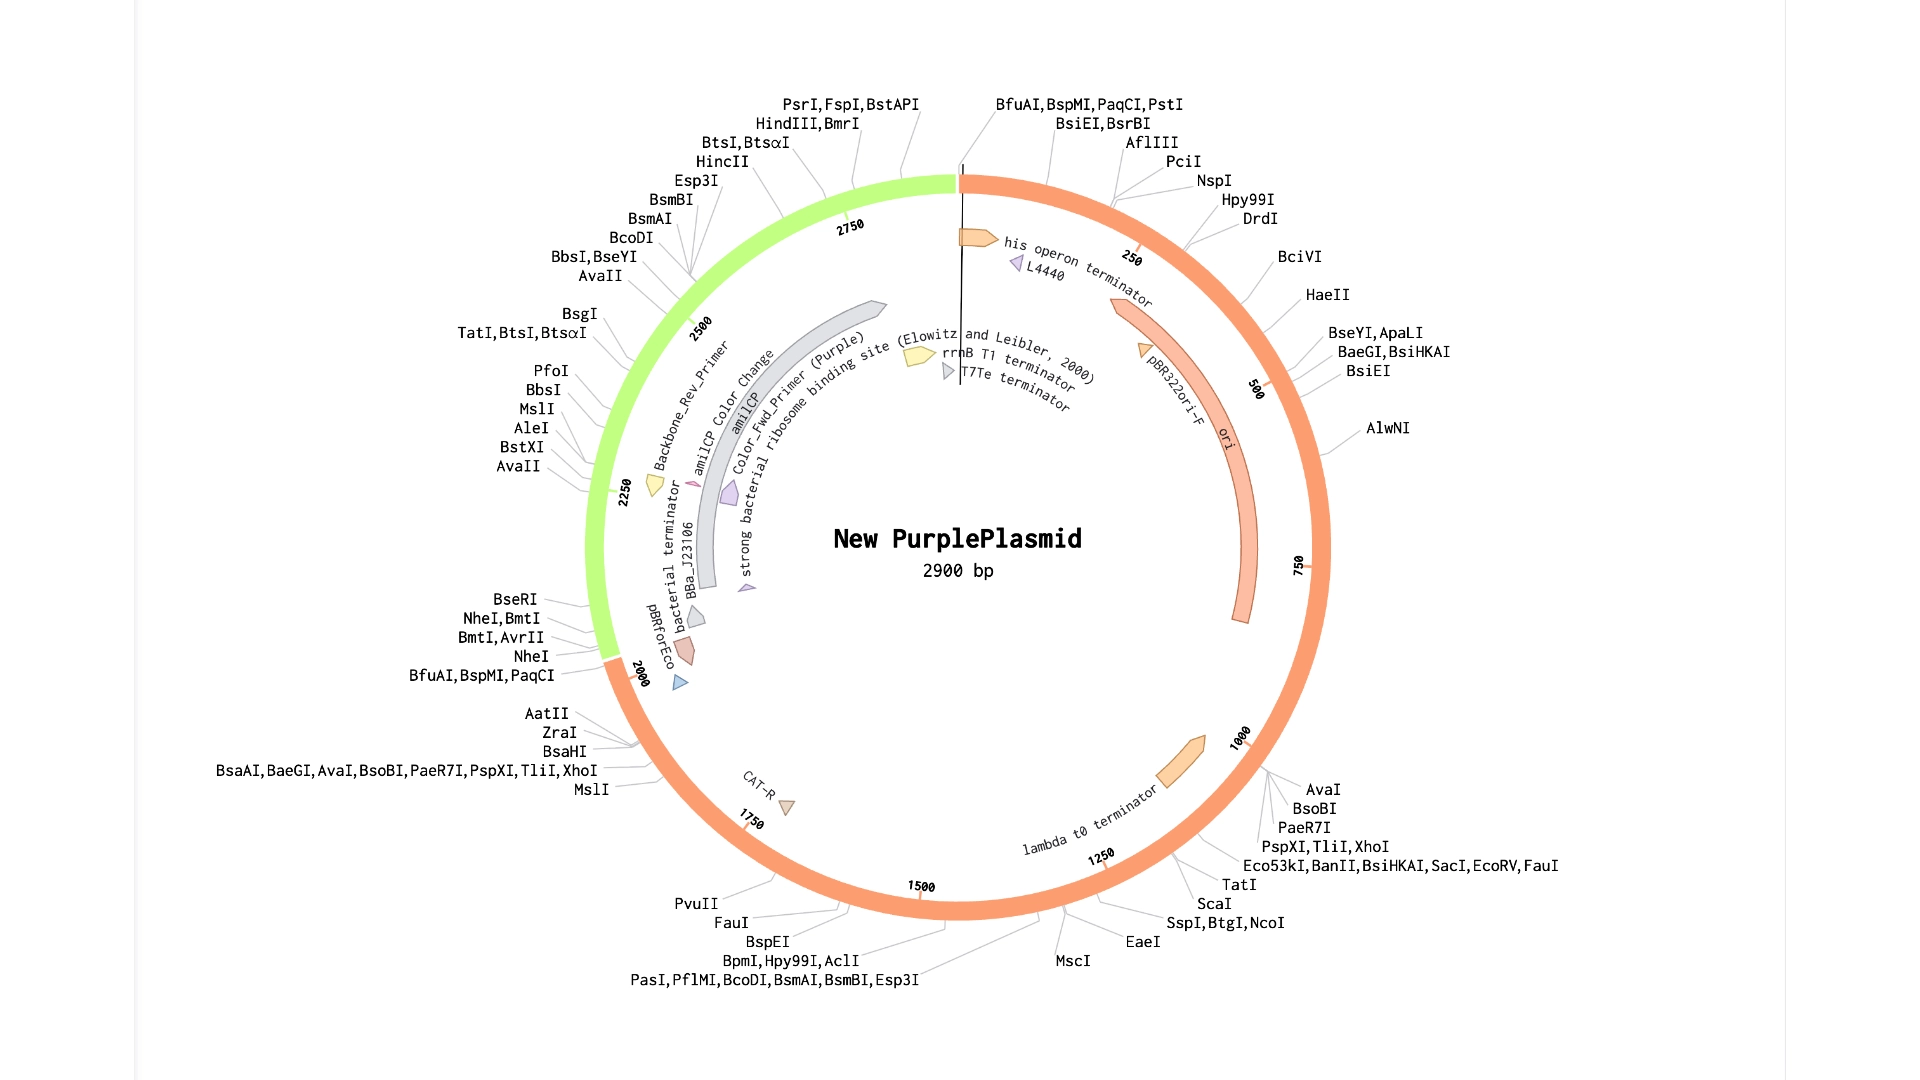
Final result of assembling a mUAV backbone with an insert of purple amilCP
Assignment: Asimov Kernel
Repressilator:
Glyph
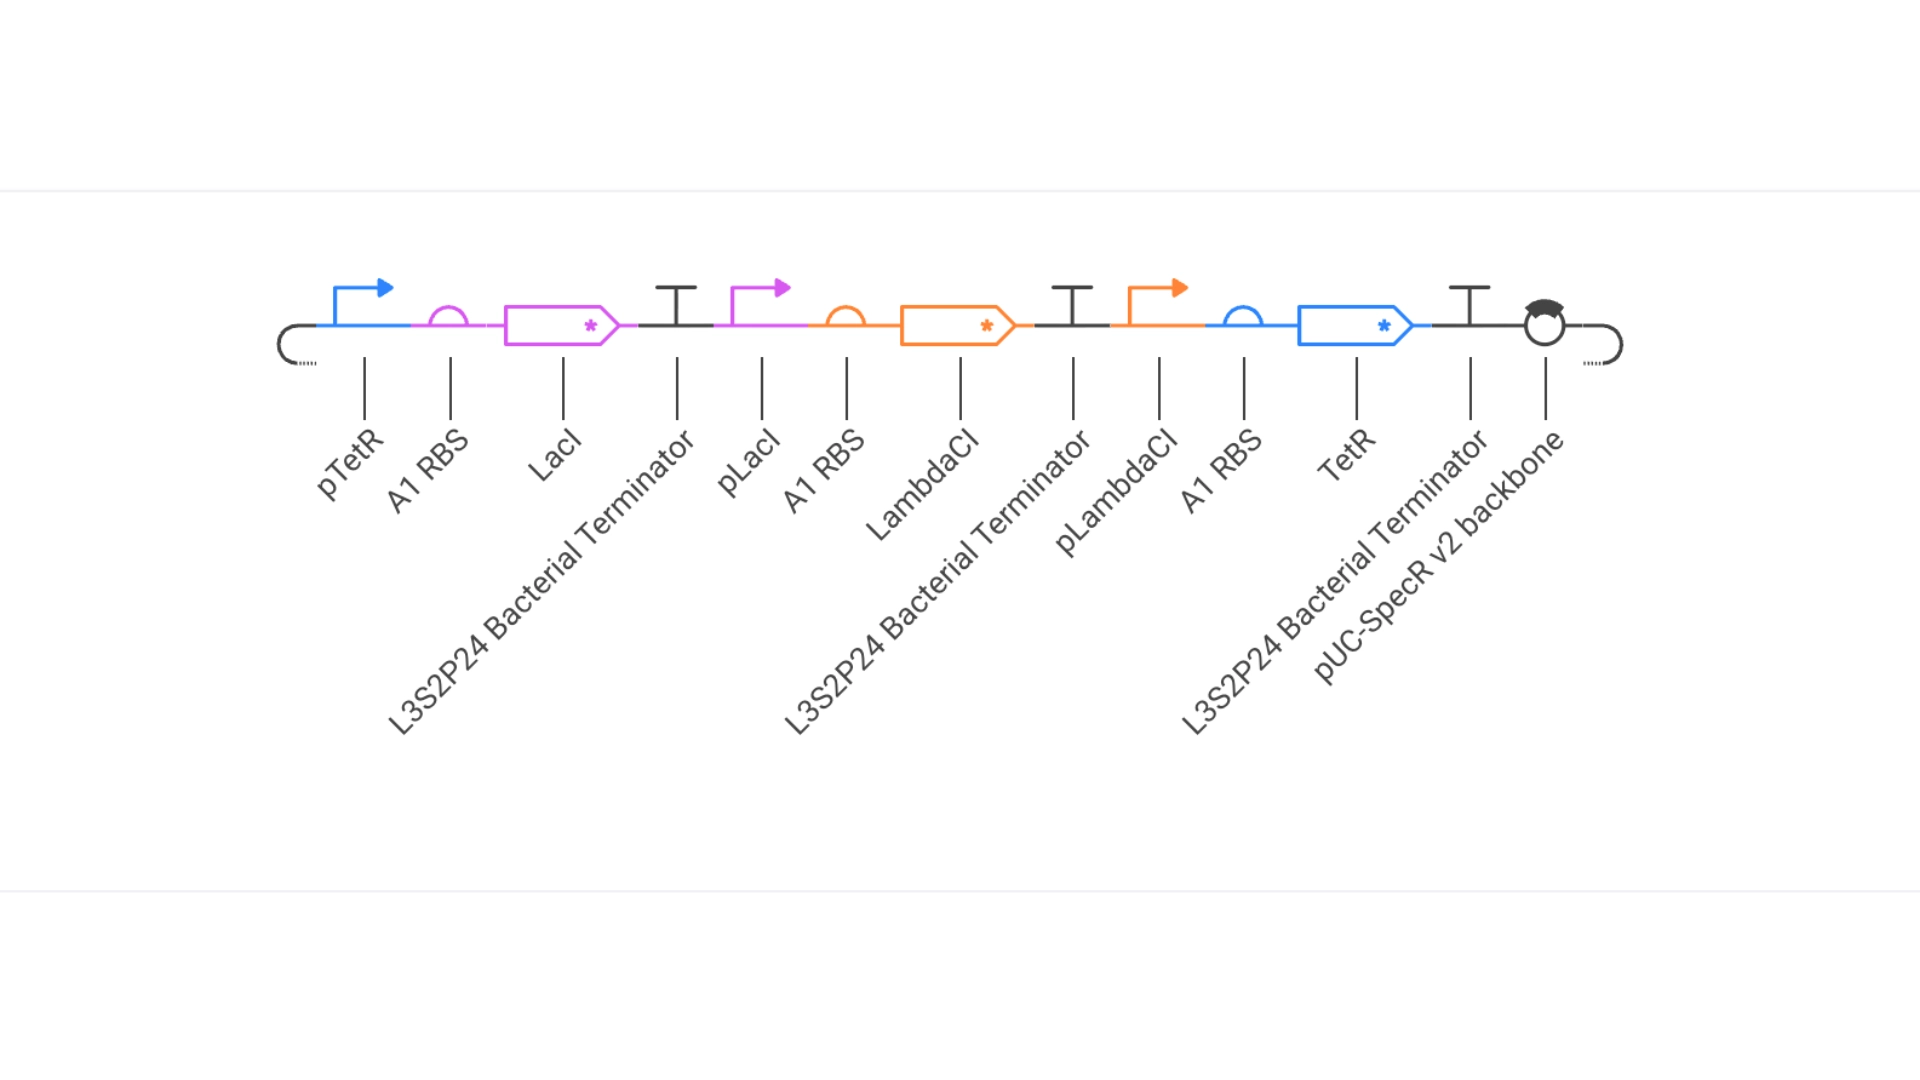 My Repressilator
Simulation
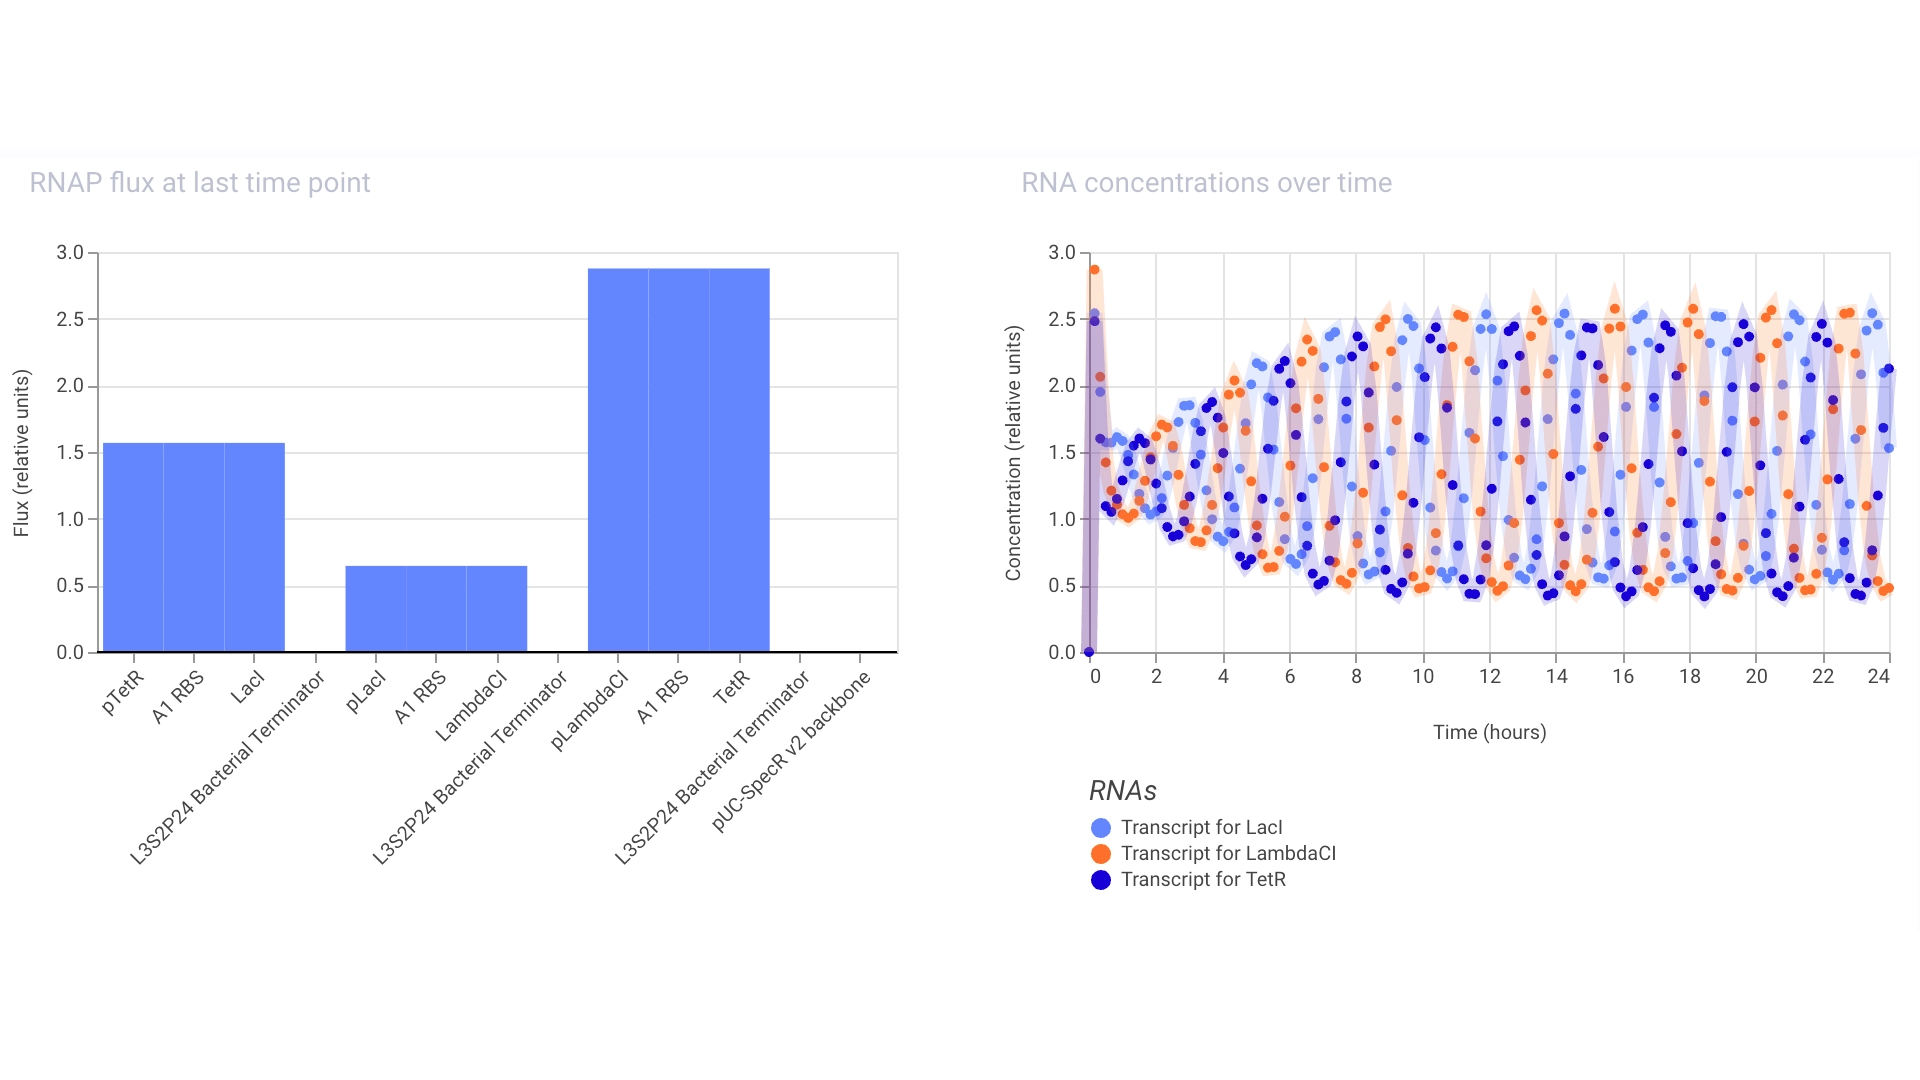 Proteins expressed by the Repressilator seem to alternate in the expected way!
Construct #1:
Objective: Create a simple construct that expresses the chlorophyll binding protein CP43
For this construct I created a new part — a CDS part coding for the CP43 protein
Then assembled the circuit using a strong promoter, RBS, terminator and pUC-SpecR v2 backbone
At first only the RNA for the protein was being expressed but not translated into the actual protein, then I found out that the construct had been created for Chinese hamster instead of E. coli
Glyph
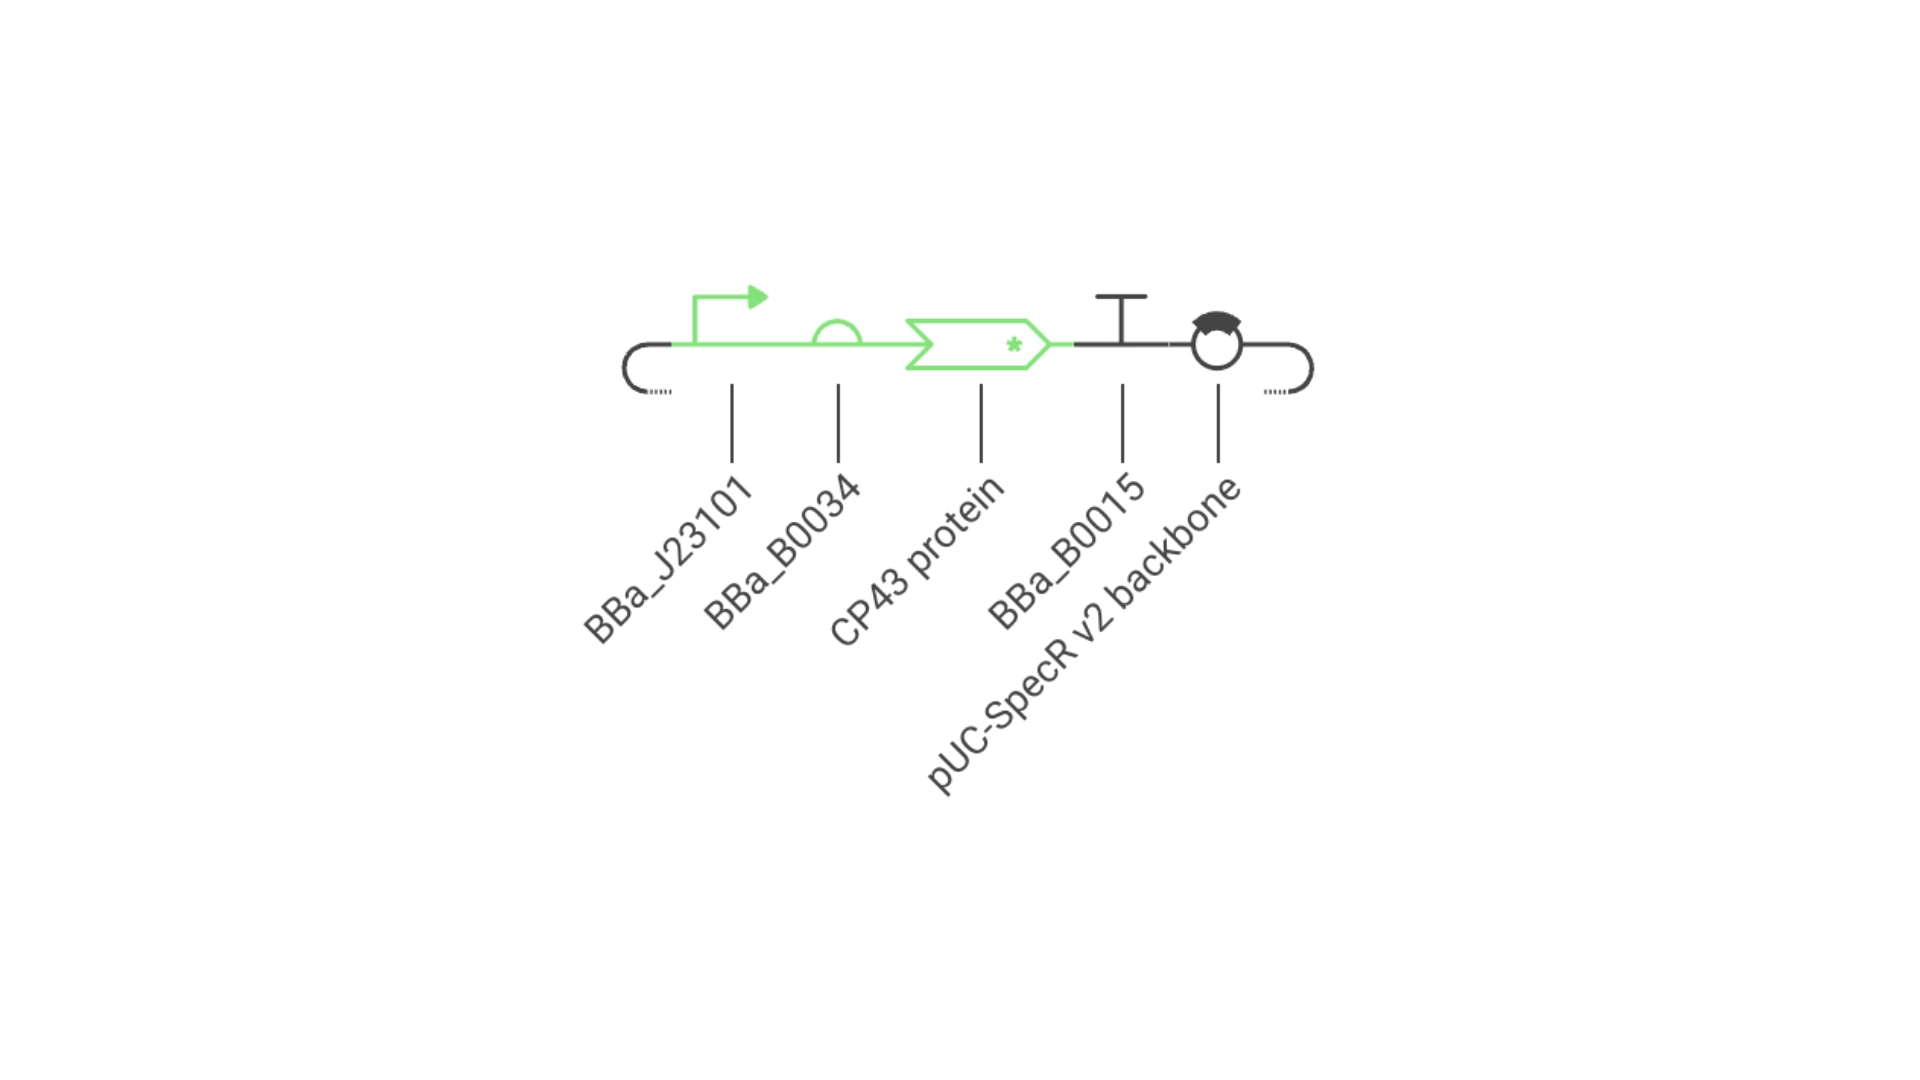 Construct #1
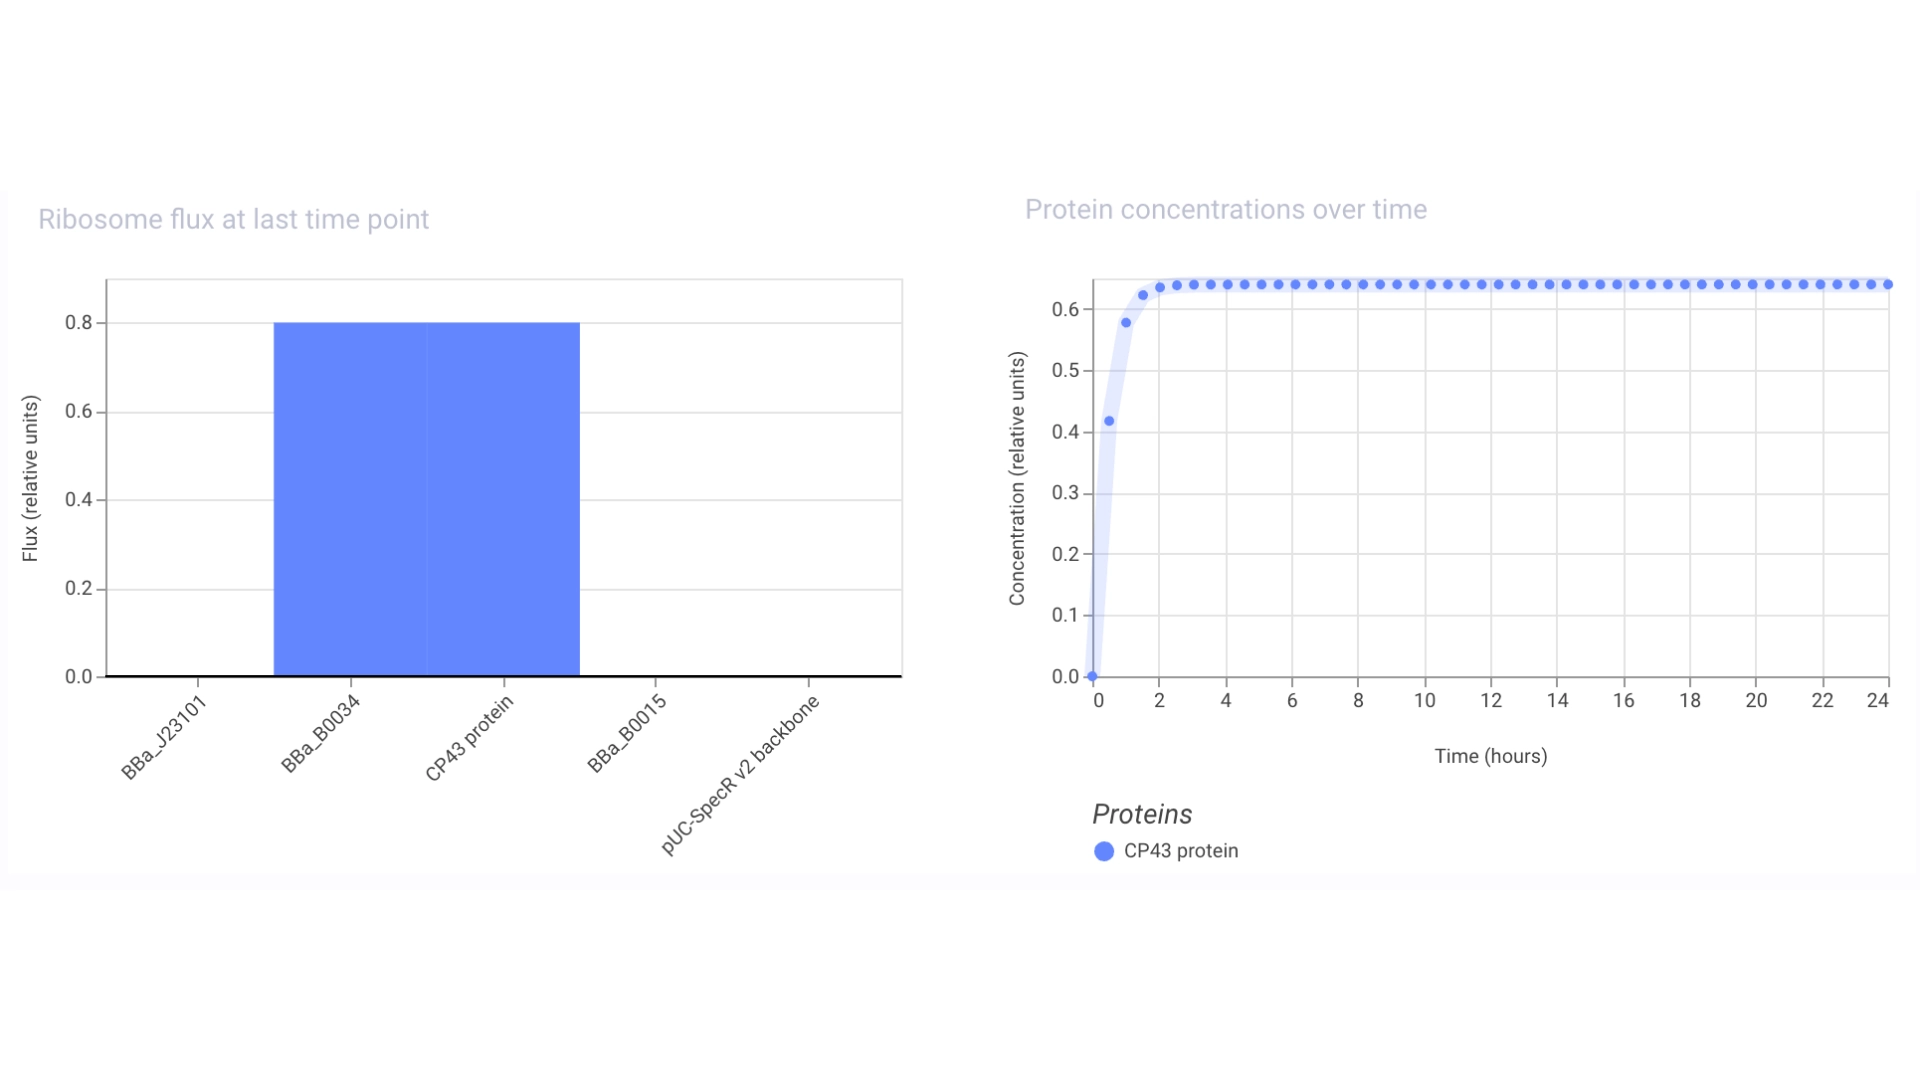
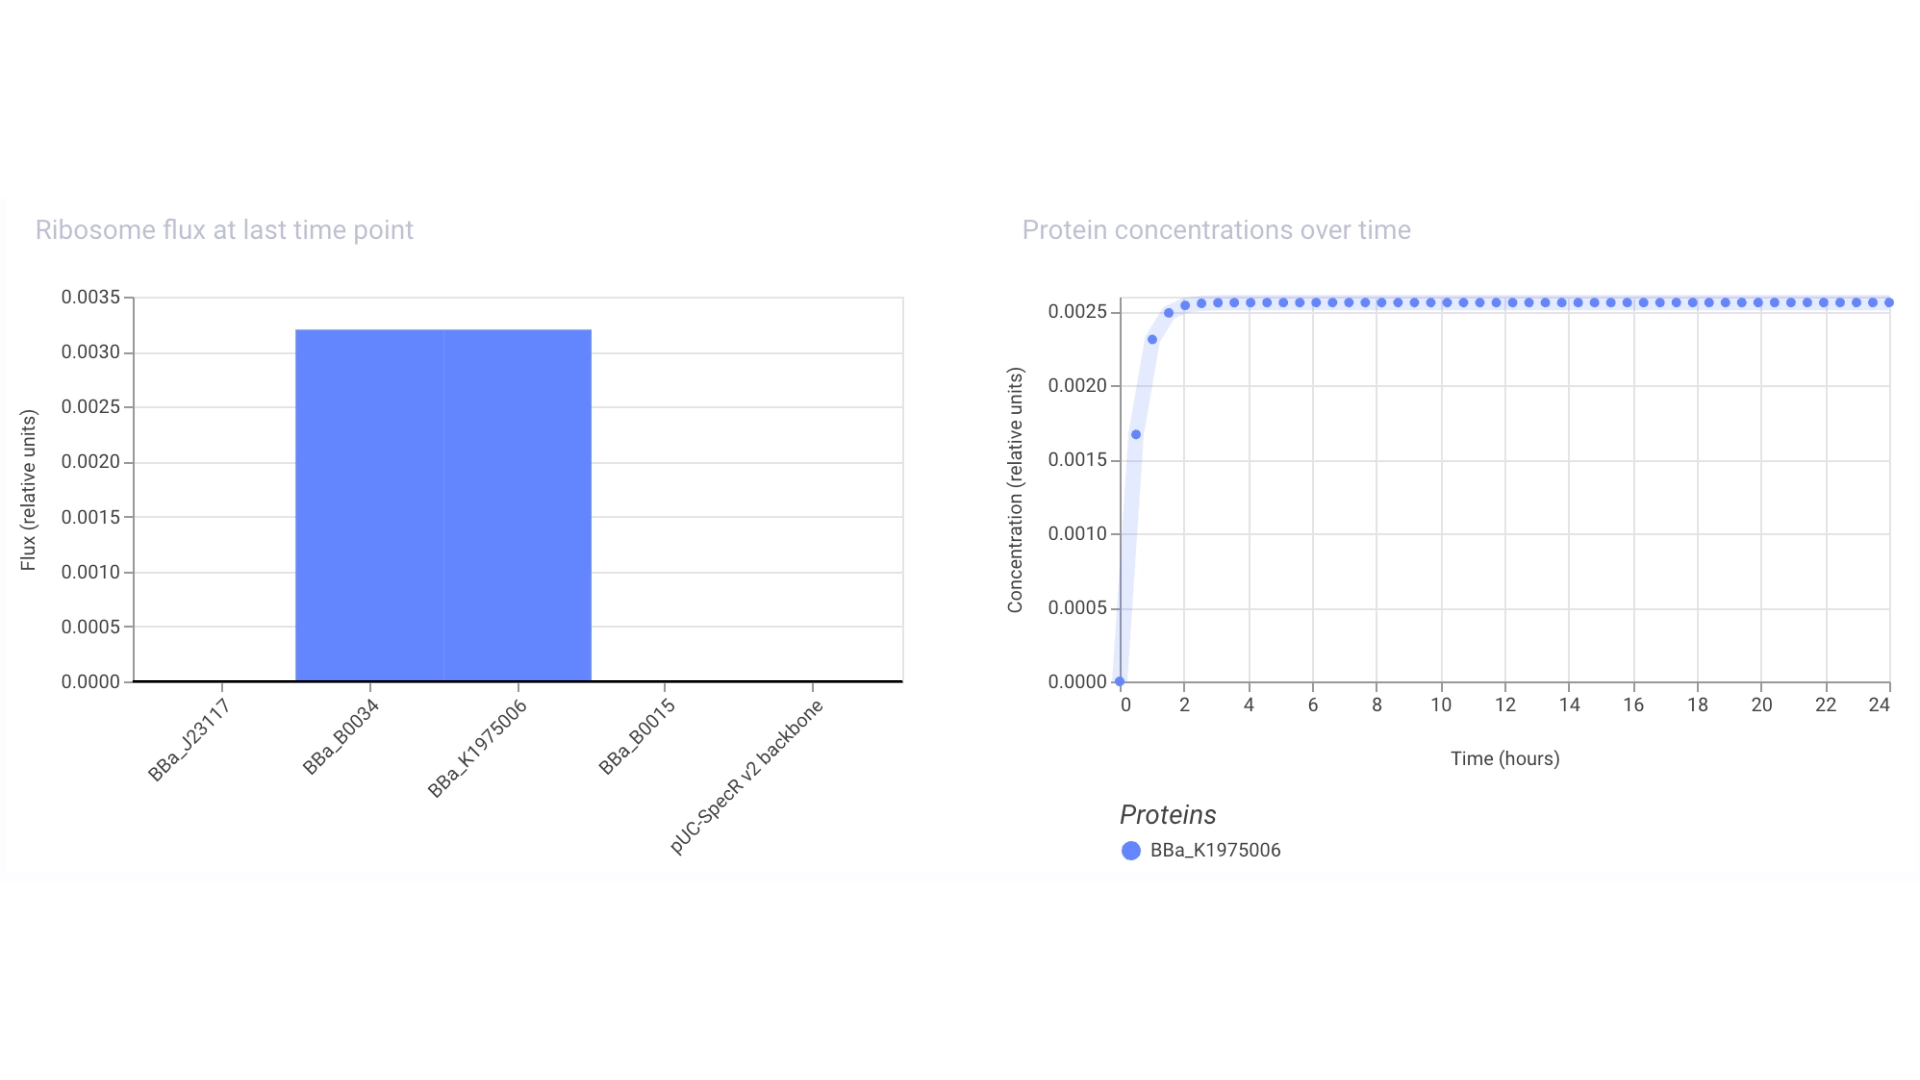
Simulation
Construct #2:
Objective: Create a simple construct that expresses a Red Fluorescent Protein
For this I had to change the RBS part I was using for the CP43 protein, presumably because the CP43 is a CDS (-Start,+Stop) and the RFP is CDS (+Start,+Stop)
Glyph
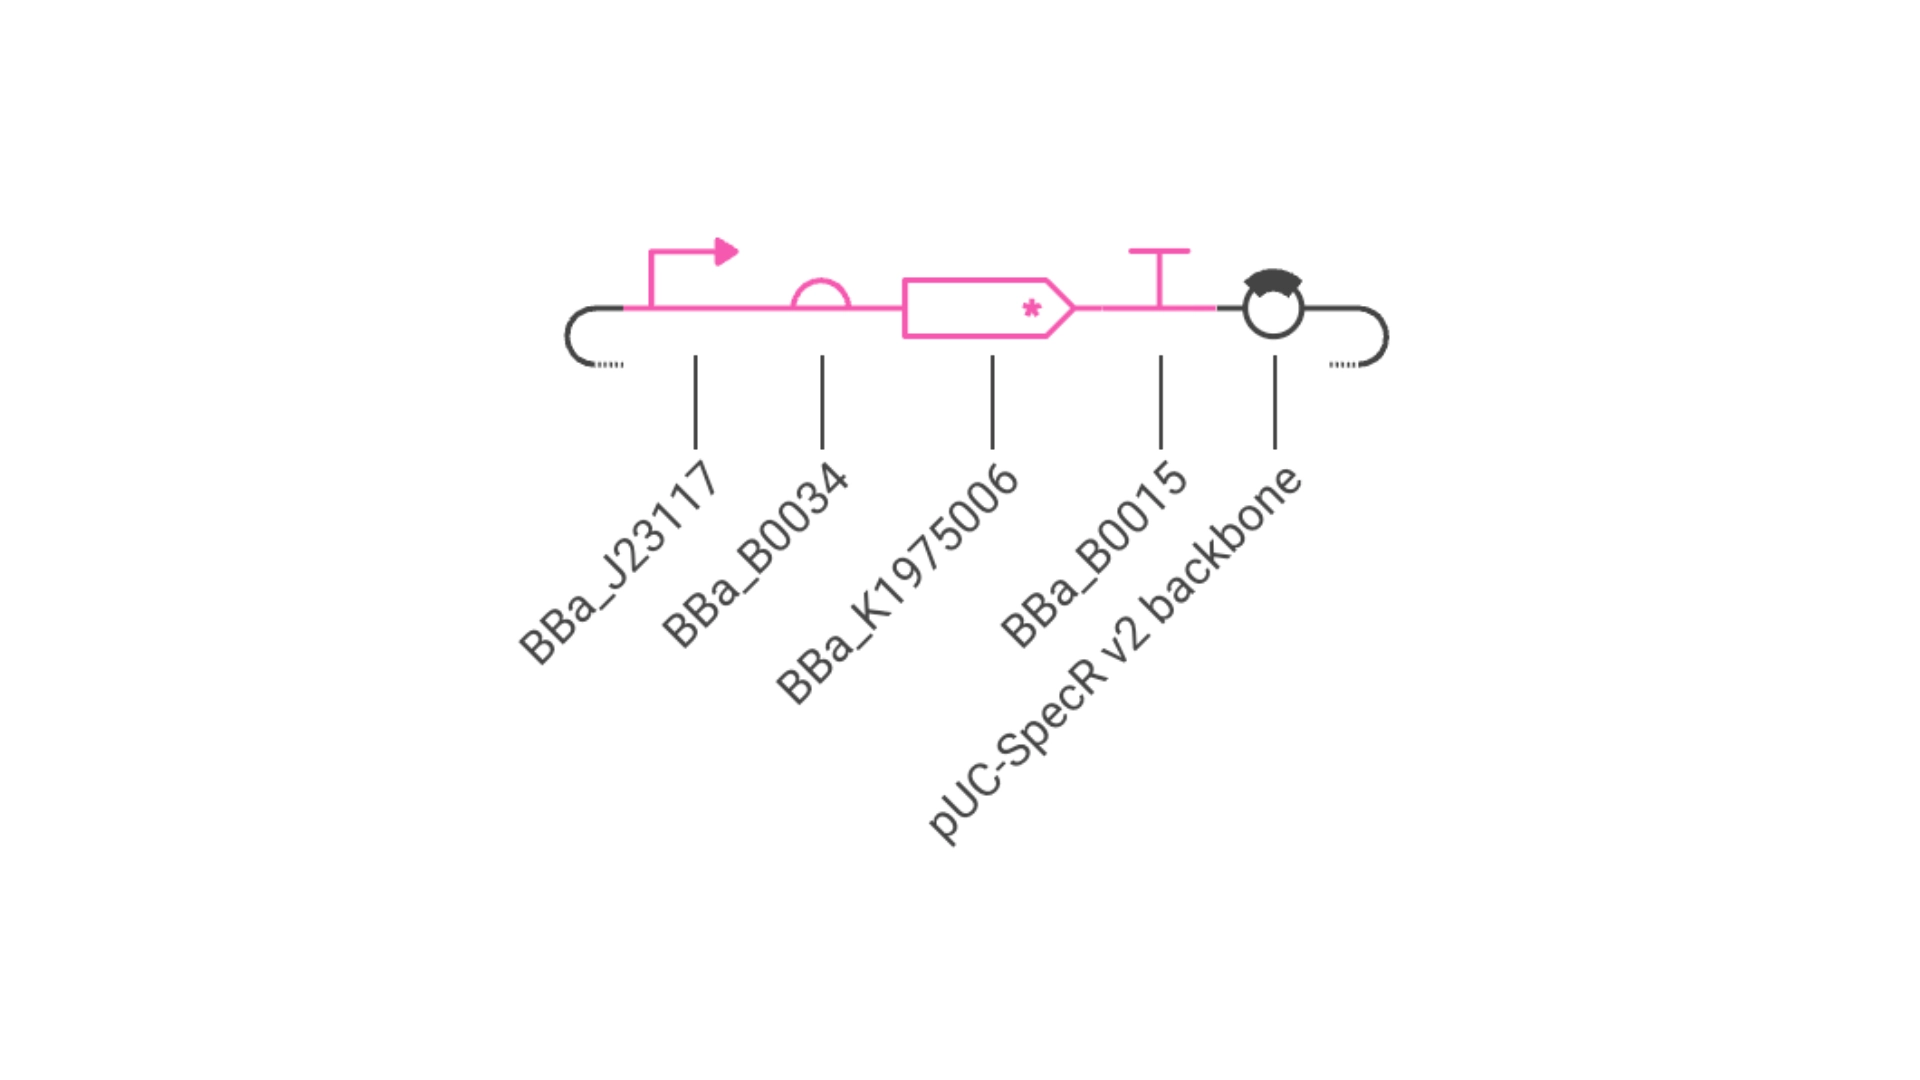 Construct #2
Simulation
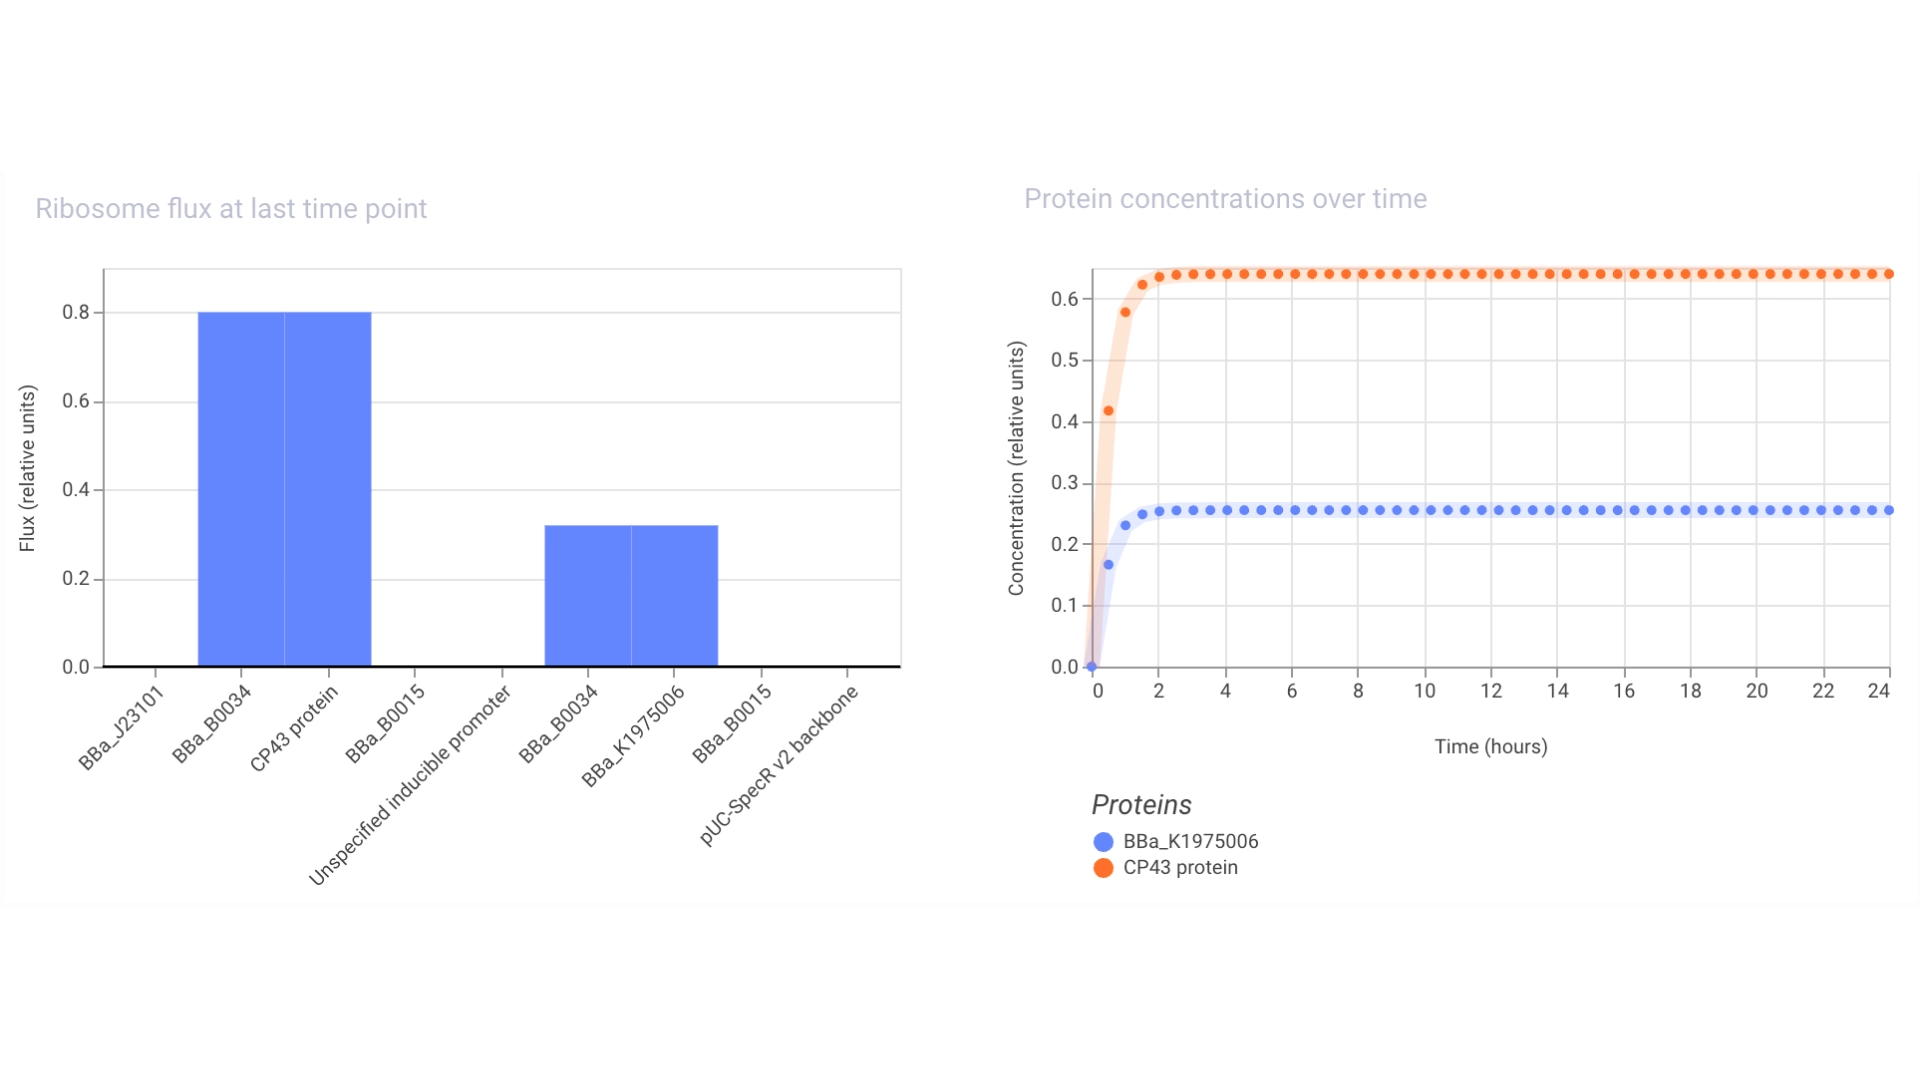
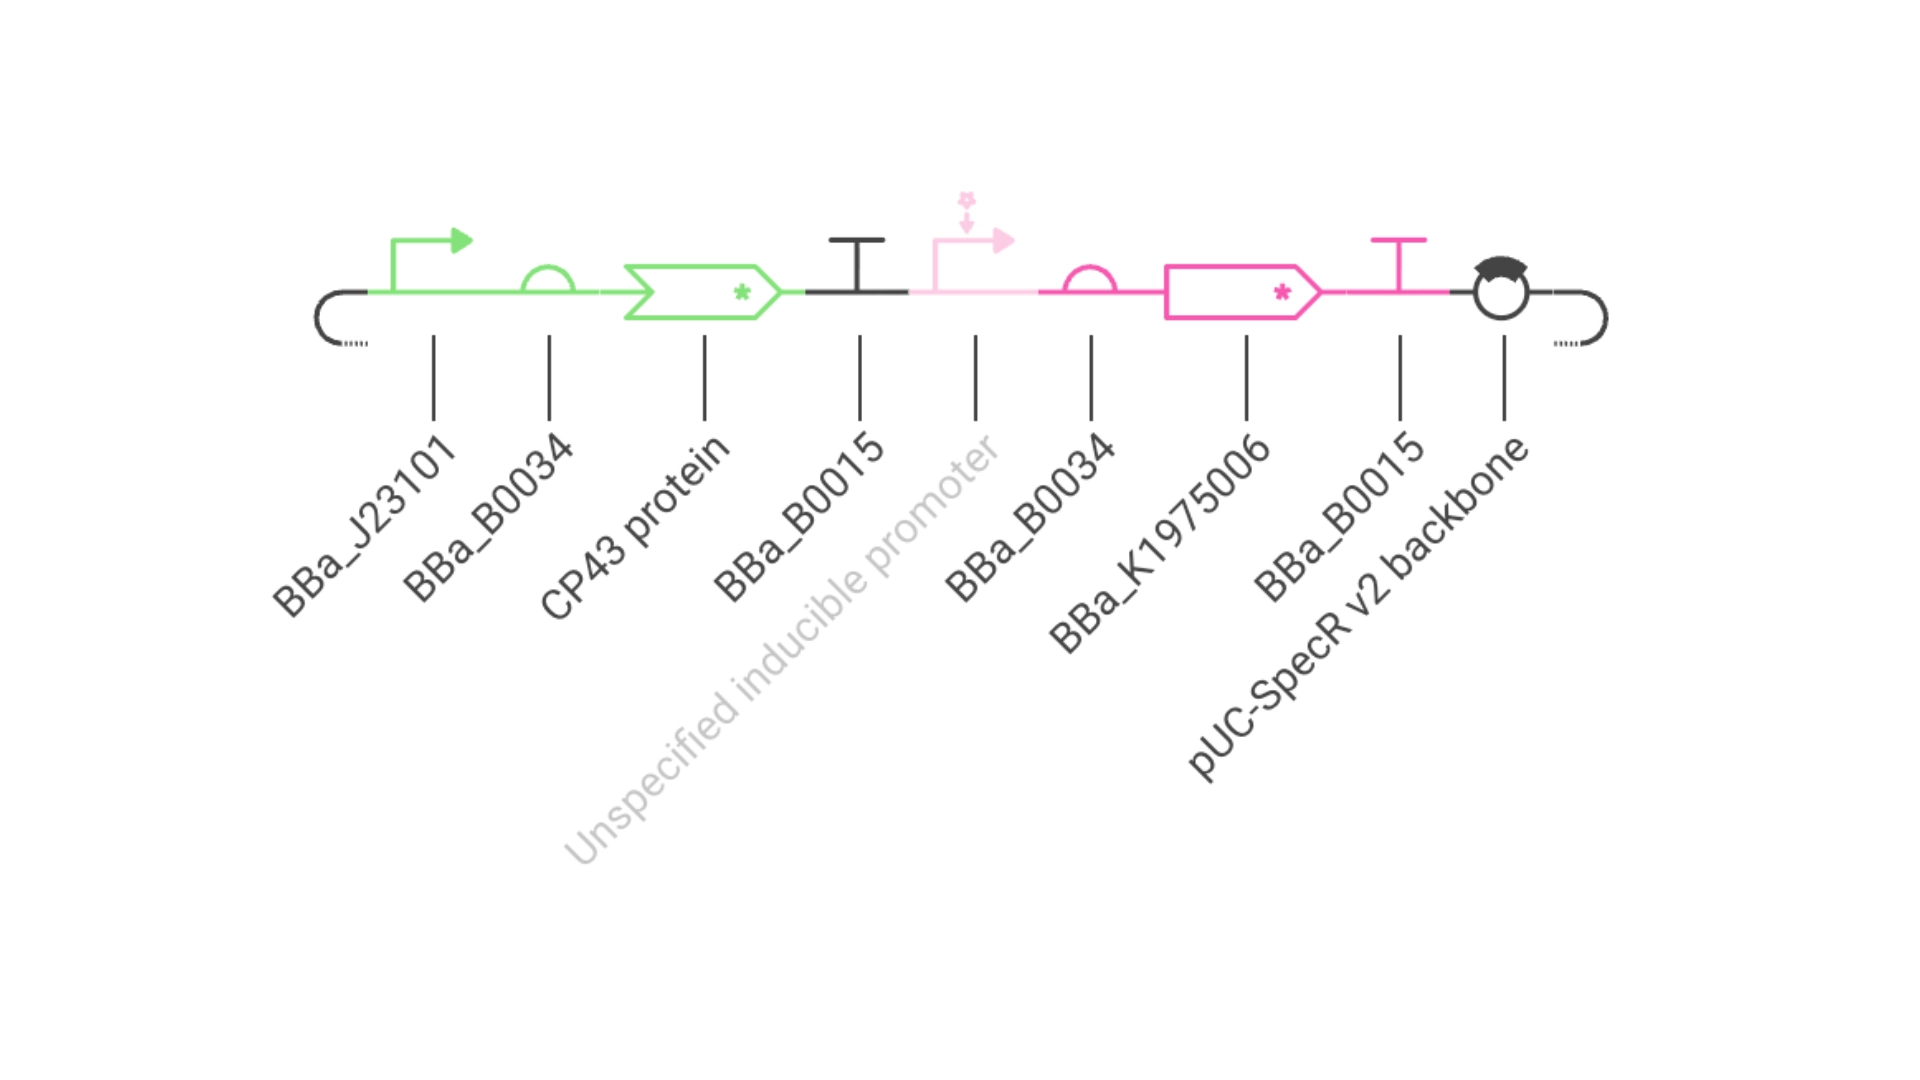
Construct #3:
The objective of this construct would be to create a circuit that only expressed a fluorescent protein if the CP43 folded correctly— as it is a lipoprotein it needs an environment with chlorophyll which acts as folding co-factor— and to achieve this an inducible promoter could be designed to be induced by the folded CP43 protein. This way we would have a construct that both expresses the needed protein and gives feedback on the success of the reaction.
For this exercise I just used an Unspecified Inducible Promoter part
Glyph
Construct #3
Simulation