Week 6 HW: Genetic Circuits Part I
Assignment: DNA Assembly
1. What are some components in the Phusion High-Fidelity PCR Master Mix and what is their purpose?
From New England Biolabs “Phusion High-Fidelity PCR Master Mix with HF Buffer is a 2X master mix consisting of Phusion DNA Polymerase, deoxynucleotides and reaction buffer that has been optimized and includes MgCl2. All that is required is the addition of template, primers and water.”
2. What are some factors that determine primer annealing temperature during PCR?
From ThermoFisher Scientific “The annealing temperature is determined by calculating the melting temperature (Tm) of the selected primers for PCR amplification. A general rule of thumb is to begin with an annealing temperature 3–5°C lower than the lowest Tm of the primers … One important consideration in Tm calculation is the use of PCR additives, co-solvents, and modified nucleotides. The presence of these reagents lowers the Tm of the primer-template complex.”
3. There are two methods from this class that create linear fragments of DNA: PCR, and restriction enzyme digests. Compare and contrast these two methods, both in terms of protocol as well as when one may be preferable to use over the other.
PCR is used to make many copies of a section of DNA. Restriction enzyme digests cut the DNA at specific points, and do not make multiple copies.
4. How can you ensure that the DNA sequences that you have digested and PCR-ed will be appropriate for Gibson cloning?
5. How does the plasmid DNA enter the E. coli cells during transformation?
6. Describe another assembly method in detail (such as Golden Gate Assembly)
7. Explain the other method in 5 - 7 sentences plus diagrams (either handmade or online).
8. Model this assembly method with Benchling or Asimov Kernel!
Assignment: Asimov Kernel
1. Create a Repository for your work
I created a repository called “Millikin Constructs HTGAA BUGSS HW06”
2. Create a blank Notebook entry to document the homework and save it to that Repository
I created a notebook called “HW06 Documentation Notebook”
3. Explore the devices in the Bacterial Demos Repo to understand how the parts work together by running the Simulator on various examples, following the instructions for the simulator found in the “Info” panel (click the “i” icon on the right to open the Info panel)
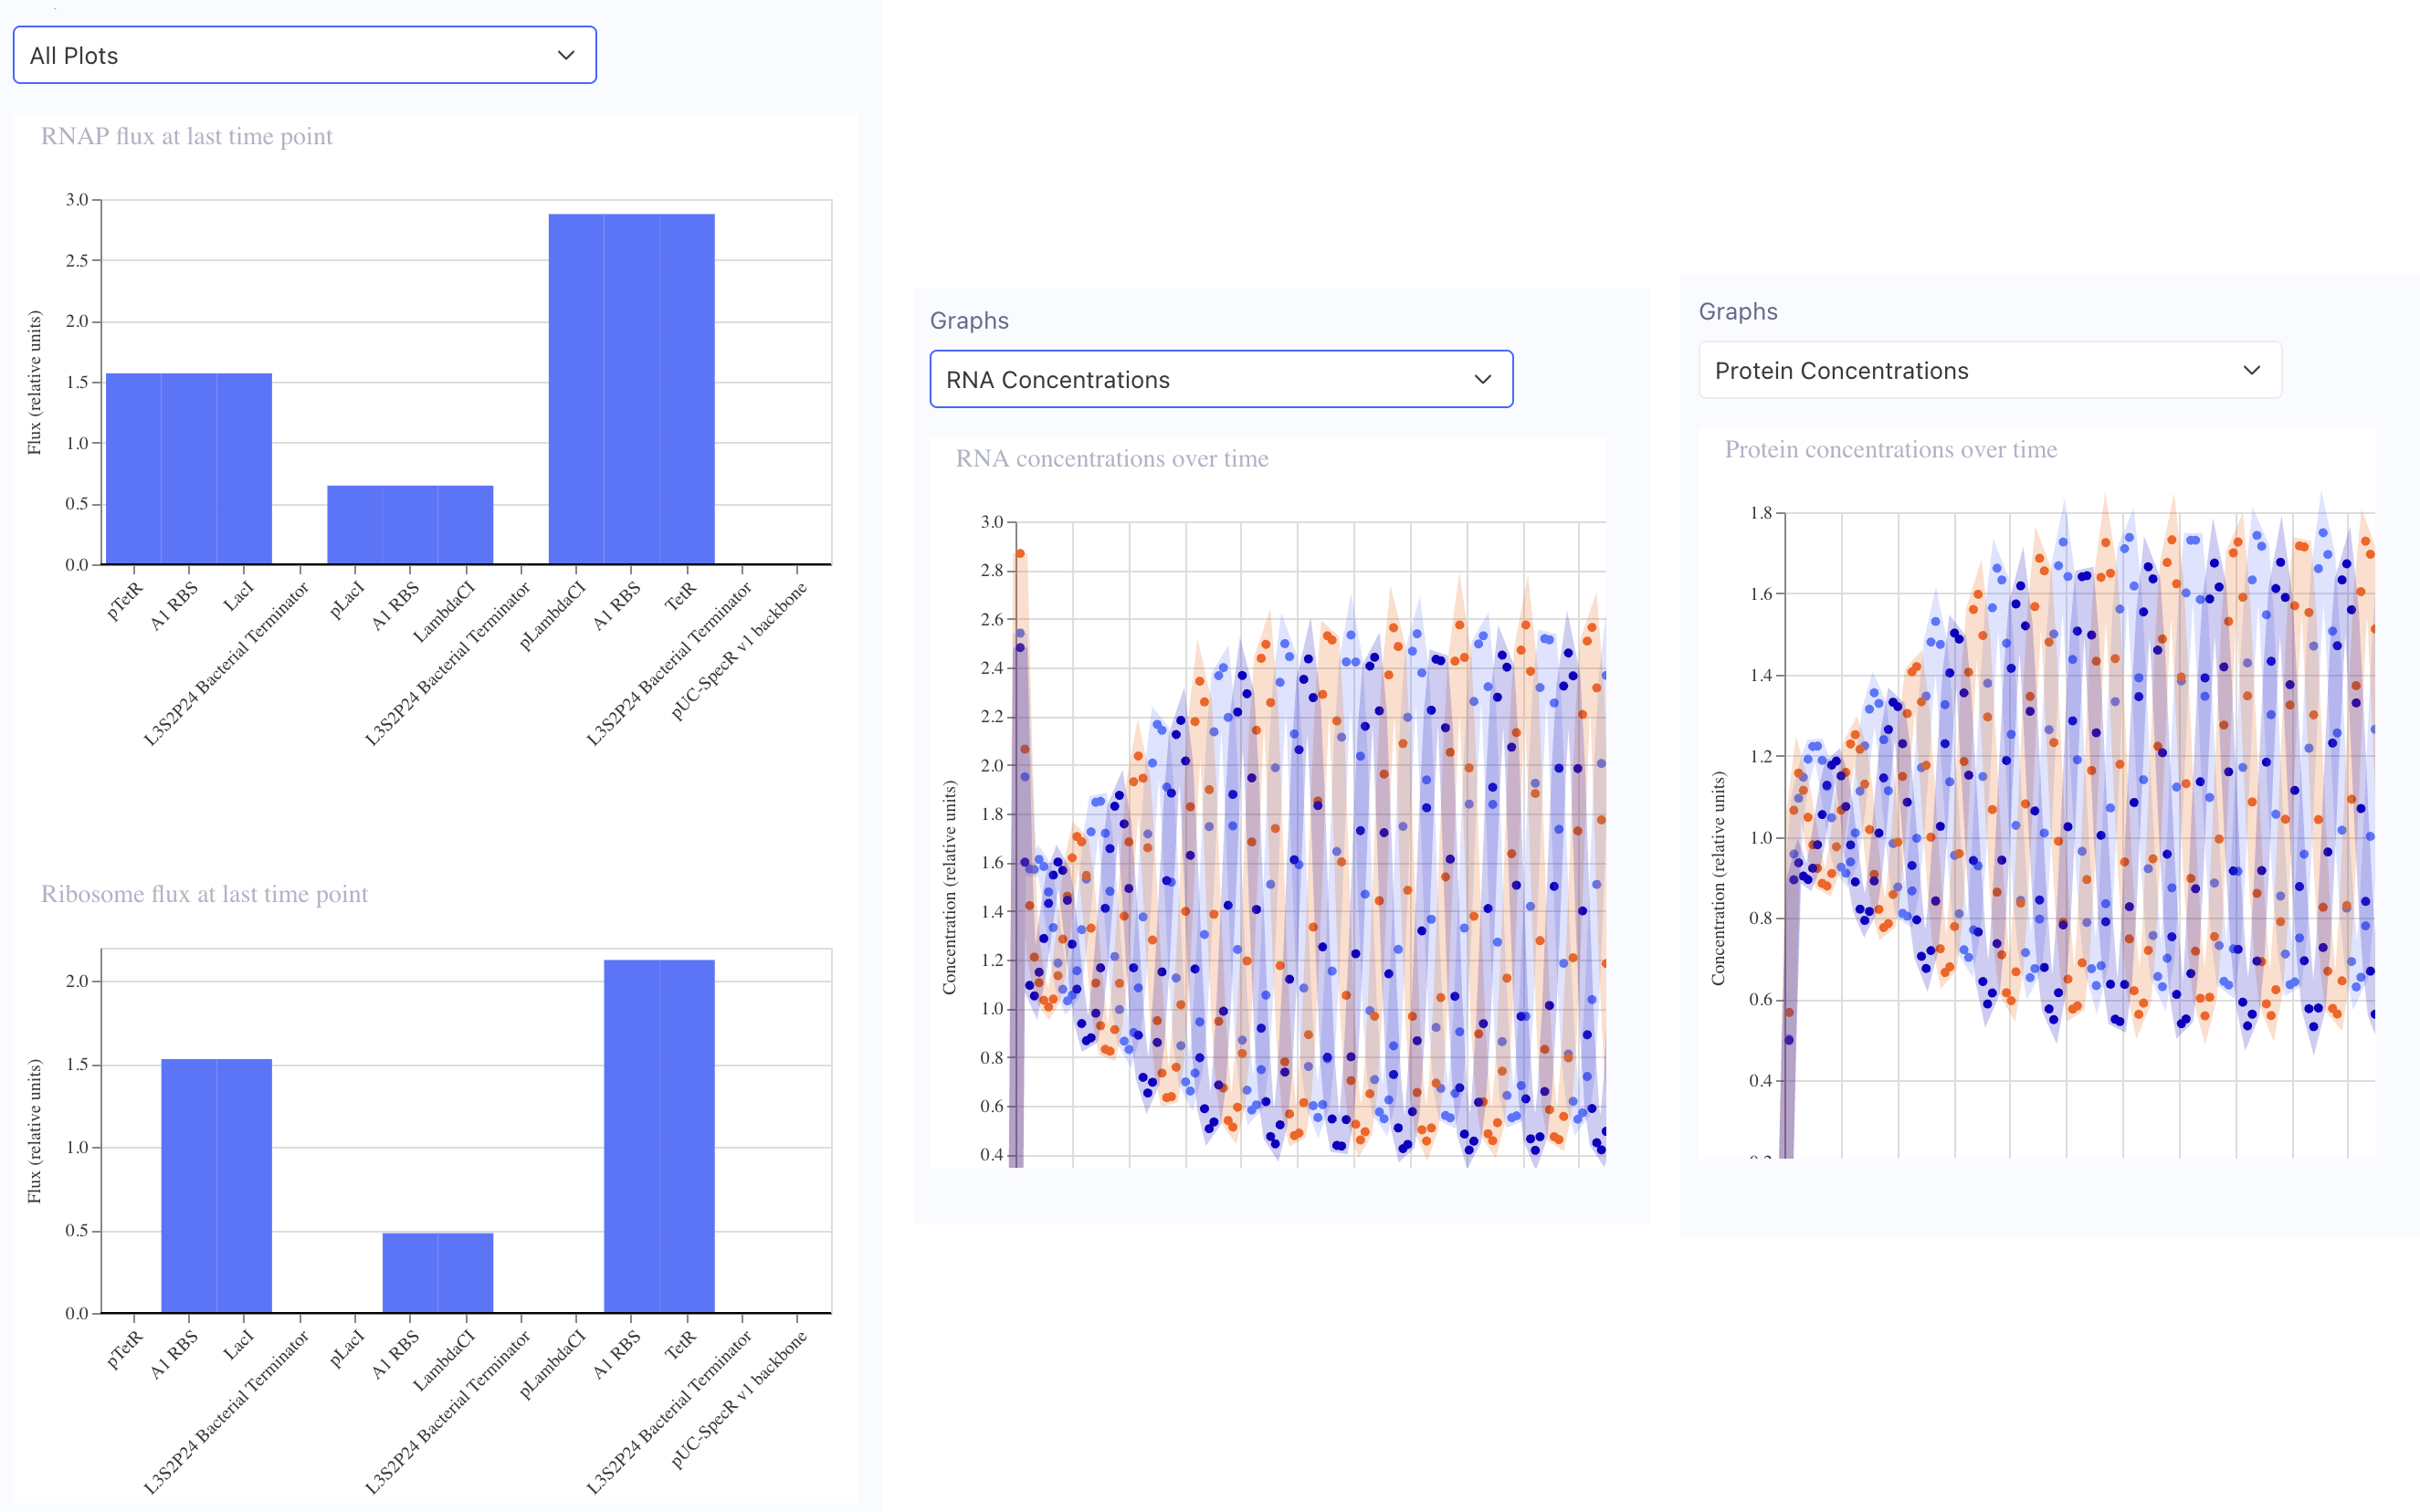
In the “Bacterial demos” repository, the “info” for the Reprissilator lists “Simulation parameters: Chassis: E. coli Duration: 24 hours Timestep: 10 minutes Transfection: Transient transfection.” I clicked the “Sim” button on the right, entered those parameters (only had to change duration) and then simulated at 10:14 AM 3/31/26. These are the graphs of my results:
4. Create a blank Construct and save it to your Repository
Recreate the Repressilator in that empty Construct by using parts from the Characterized Bacterial Parts repository. Search the parts using the Search function in the right menu.Drag and drop the parts into the Construct. Confirm it works as expected by running the Simulator (“play” button) and compare your results with the Repressilator Construct found in the Bacterial Demos repository. Document all of this work in your Notebook entry - you can copy the glyph image and the simulator graphs, and paste them into your Notebook*
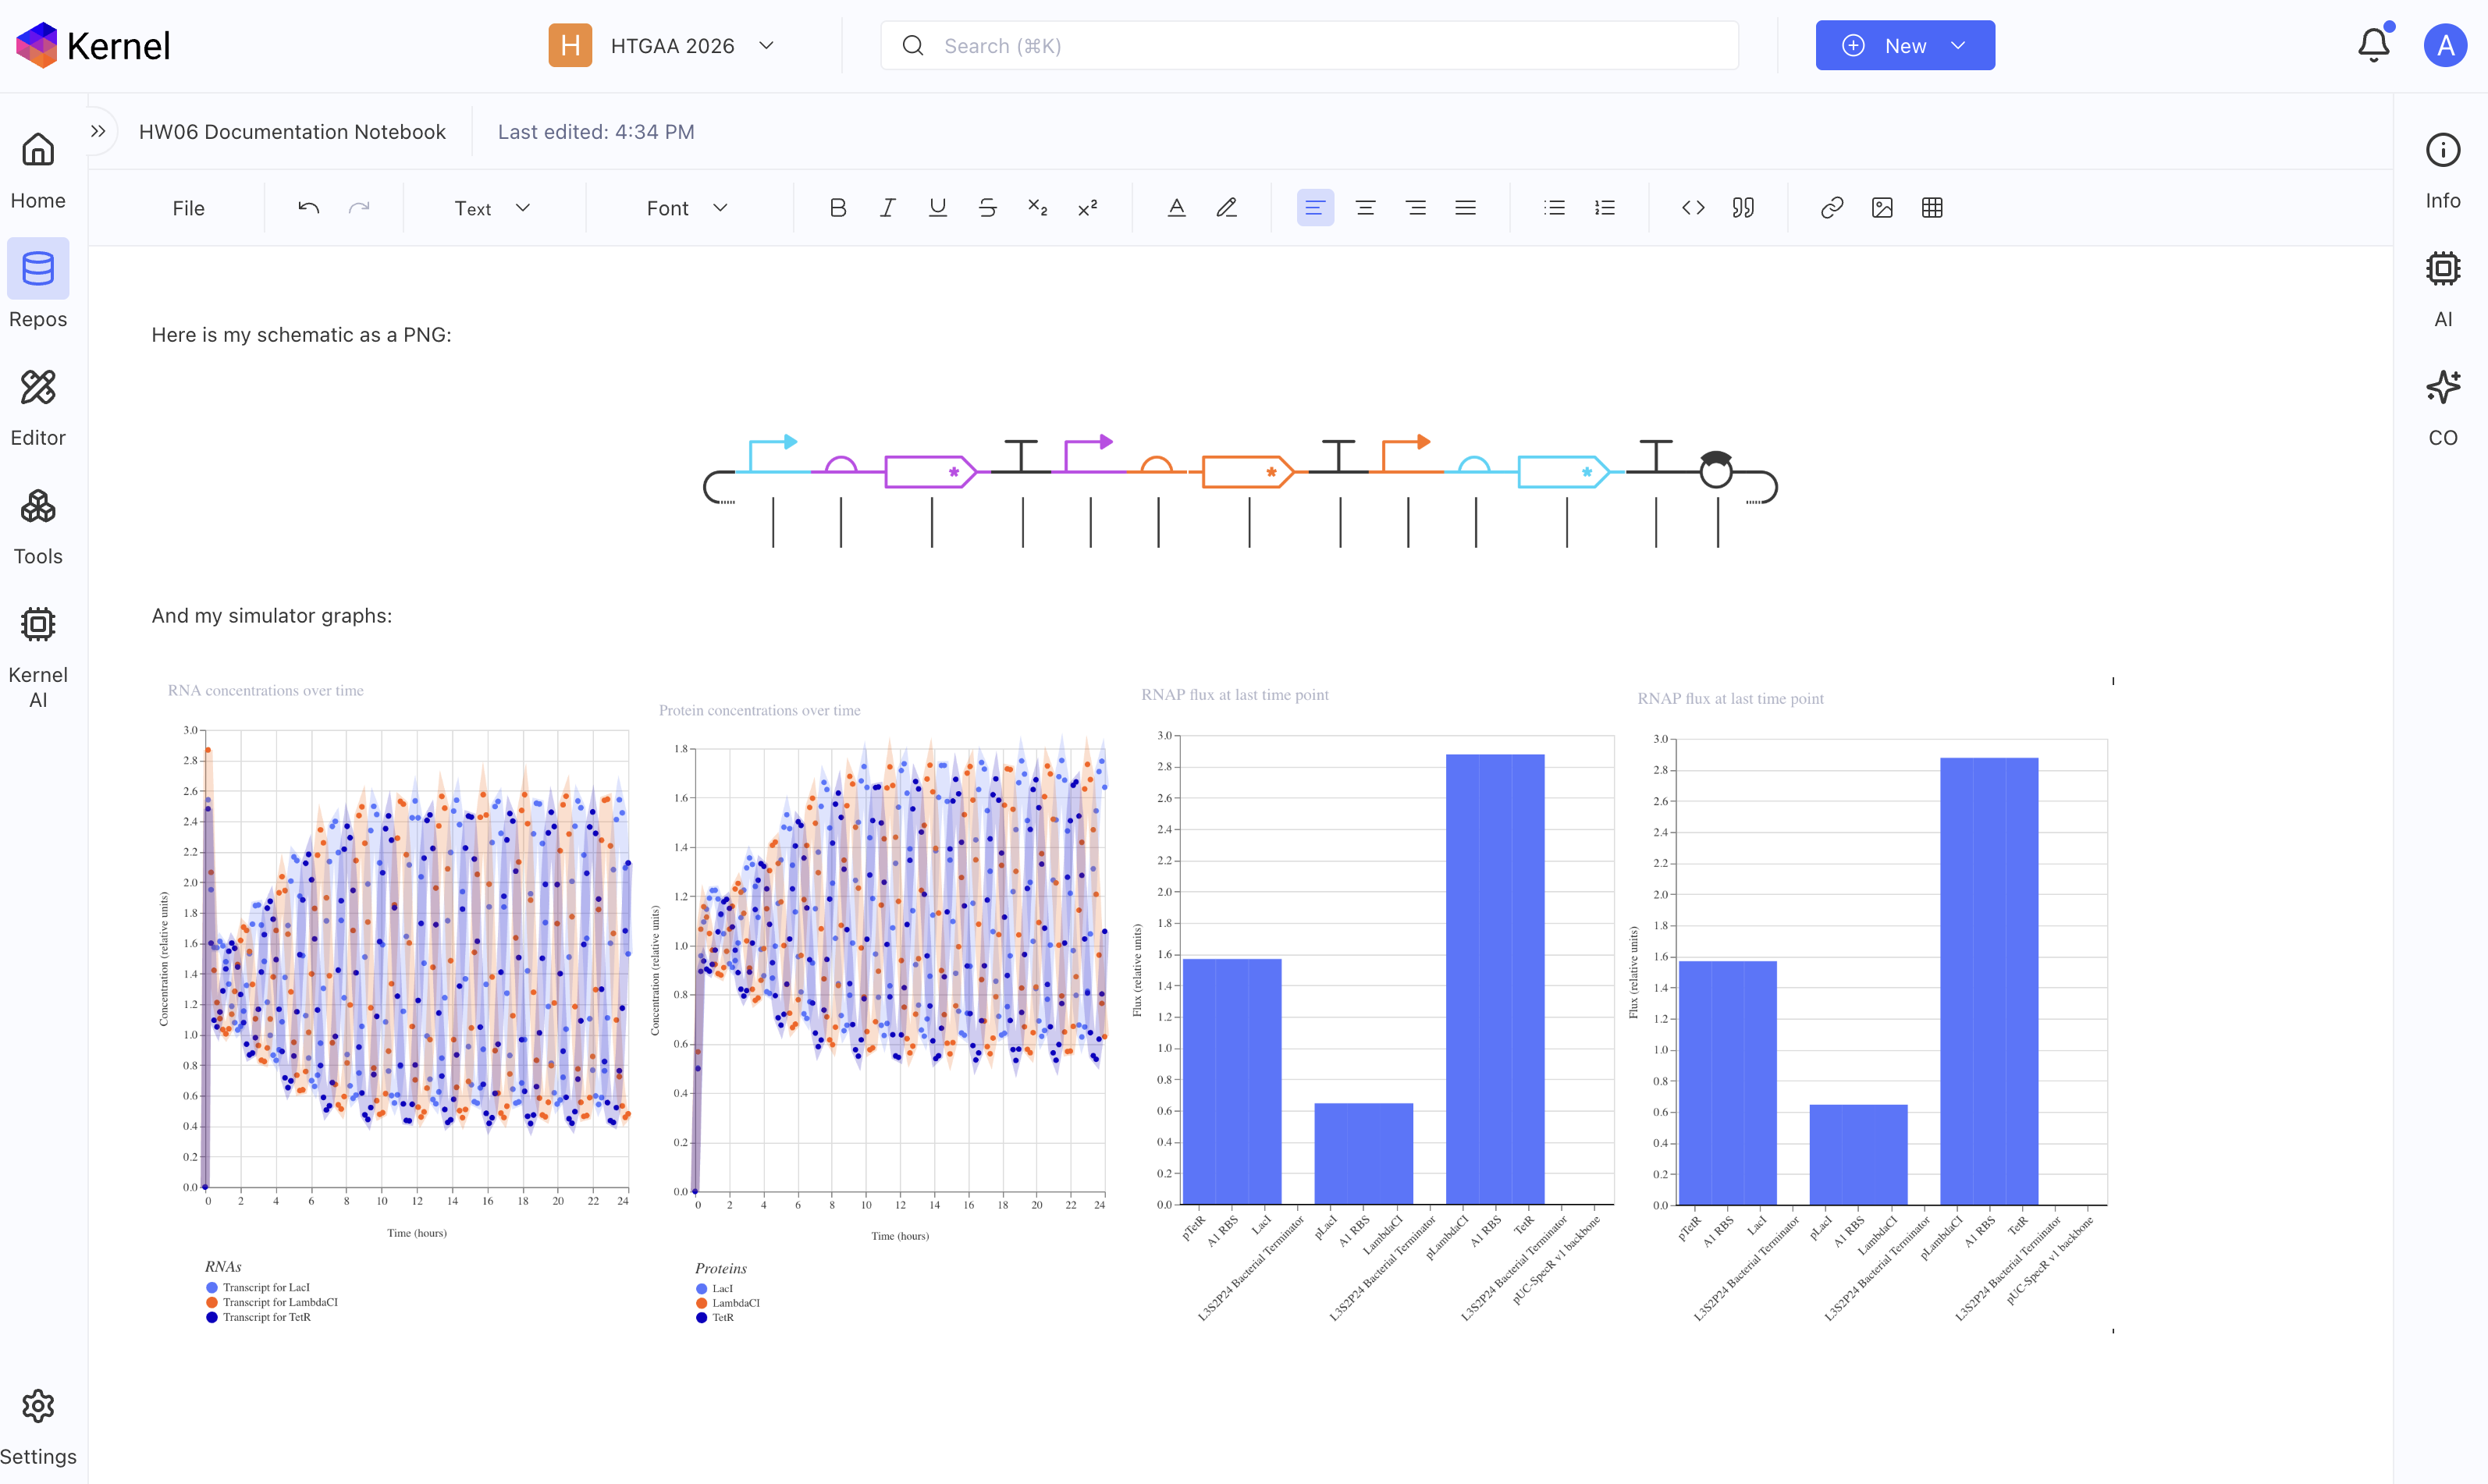
Yes! I did all of the above, below should be a screenshot of my notebook with my glyph image and simulator graphs from my recreated repressilator.
5. Build three of your own Constructs using the parts in the Characterized Bacterials Parts Repo
Explain in the Notebook Entry how you think each of the Constructs should function Run the simulator and share your results in the Notebook Entry If the results don’t match your expectations, speculate on why and see if you can adjust the simulator settings to get the expected outcome