Phase 10: CTP-GFP Reporter Constructs Design
Golden Gate Assembly of Reporter Constructs:
Golden Gate Assembly Design Strategy
To enable modular Golden Gate Assembly, all fragments were flanked with BsaI recognition sites and custom-designed overhangs. These overhangs were selected to guide the ordered assembly of the fragments into the pCAMBIA1300 backbone after digestion.
The same assembly architecture was used for all three constructs, with the only difference being the CTP sequence.
The assembly order was:
Vector → FMV promoter → AMV enhancer → CTP → eGFP → tE9 terminator
Design of Junction Overhangs
- Vector–Promoter Junction (TCCT)
The pCAMBIA1300 vector was linearized using XbaI digestion. The last four nucleotides remaining from the digested vector (“TCCT”) were directly incorporated as the assembly scar between the vector backbone and the FMV promoter fragment.
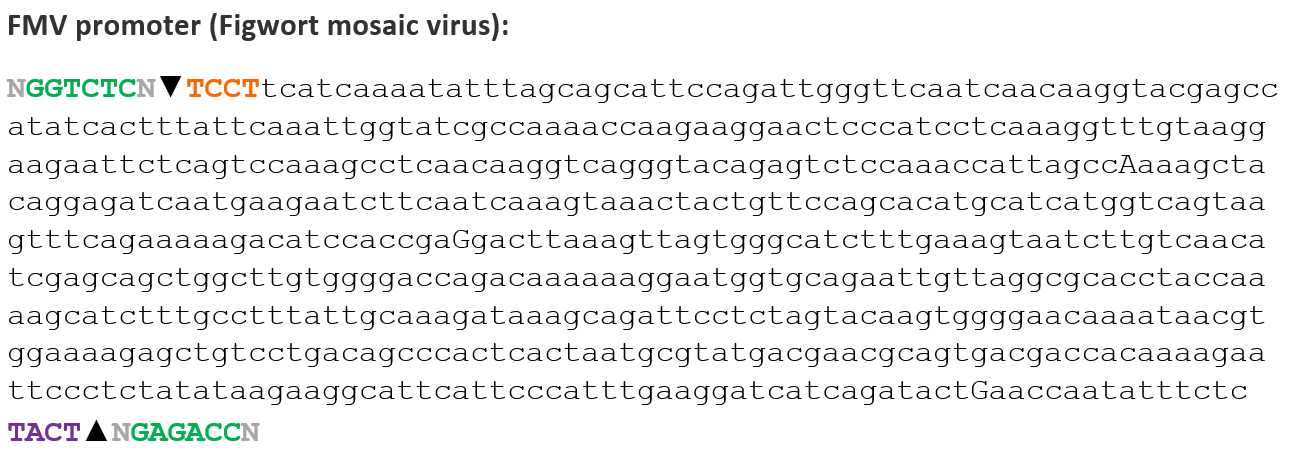 This strategy avoided unnecessary sequence modifications and maintained compatibility with the Golden Gate assembly design.
- Promoter–Enhancer Junction (TACT)
A custom “TACT” overhang was designed between the FMV promoter and the AMV RNA4 enhancer.
 This sequence functioned as a neutral assembly scar that allowed directional ligation while preserving the integrity of both regulatory elements.
- Enhancer–CTP Junction (AATG)
The “AATG” overhang was designed between the AMV enhancer and the chloroplast transit peptide (CTP) sequence.
 This overhang was selected because it contains the ATG start codon required for translation initiation. The design therefore allowed the translational start site to be incorporated directly into the assembly junction while preserving the correct reading frame.
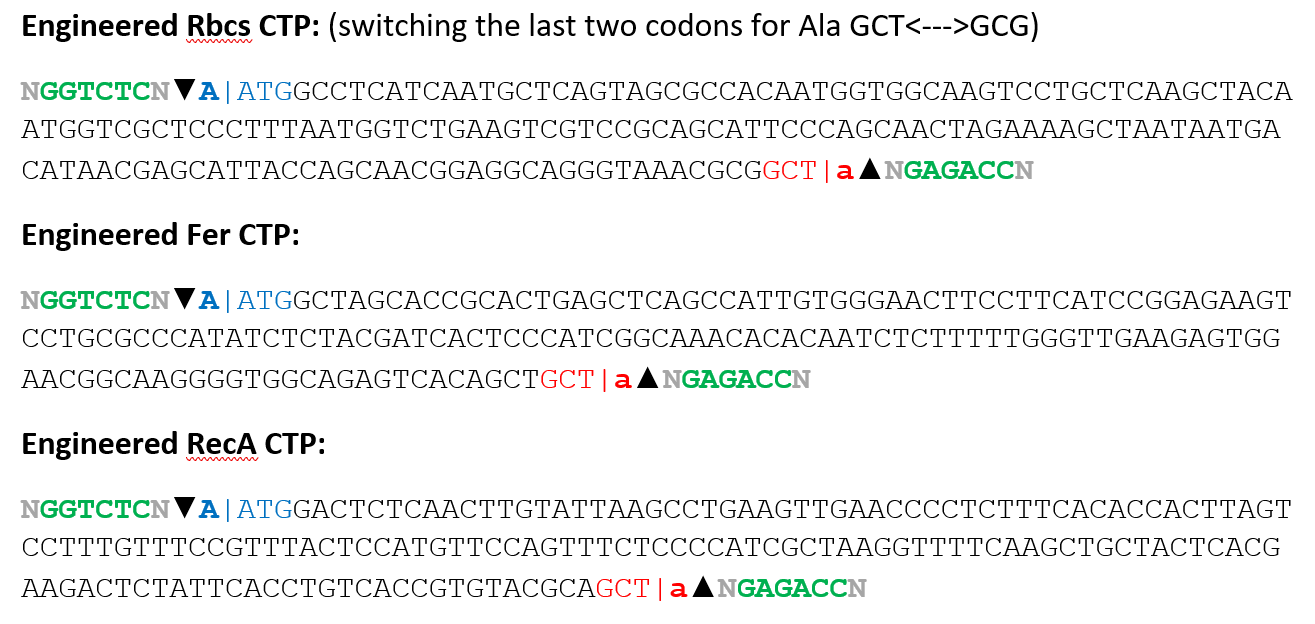
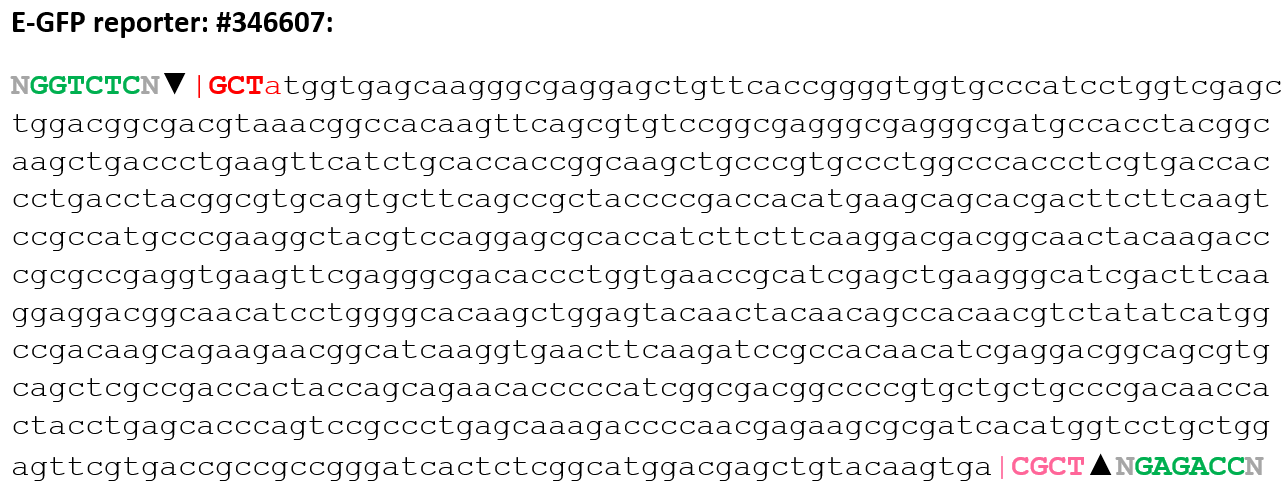
- CTP–eGFP Junction (GCTA)
The junction between the CTP coding sequence and eGFP was designed carefully to preserve the open reading frame and avoid frameshift mutations.
Because this junction connected two coding sequences, the overhang was designed using:
- “GCT” from the last codon of the CTP sequence
- “A” from the ATG start codon of eGFP
Together, these nucleotides formed the “GCTA” overhang.
For the RbcS chloroplast transit peptide construct, the last two alanine codons were simply rearranged by switching: GCT↔GCG
Because both codons encode alanine, this modification did not alter the amino acid sequence of the transit peptide. The change was performed only to expose the required “GCT” sequence needed for the Golden Gate Assembly overhang at the CTP–eGFP junction while preserving the correct reading frame and maintaining the native peptide composition.
This strategy allowed the translational reading frame to remain continuous across the fusion protein while minimizing unnecessary amino acid changes.
The reading frame continuity was verified during sequence design, as represented by the “|” positions in the coding sequences.
- eGFP–Terminator Junction (CGCT)
For the junction between eGFP and the tE9 terminator, the “CGCT” overhang was designed.
In this case:
- “GCT” originated from the beginning of the terminator-associated region
- An additional “C” nucleotide was added to complete the 4 bp overhang
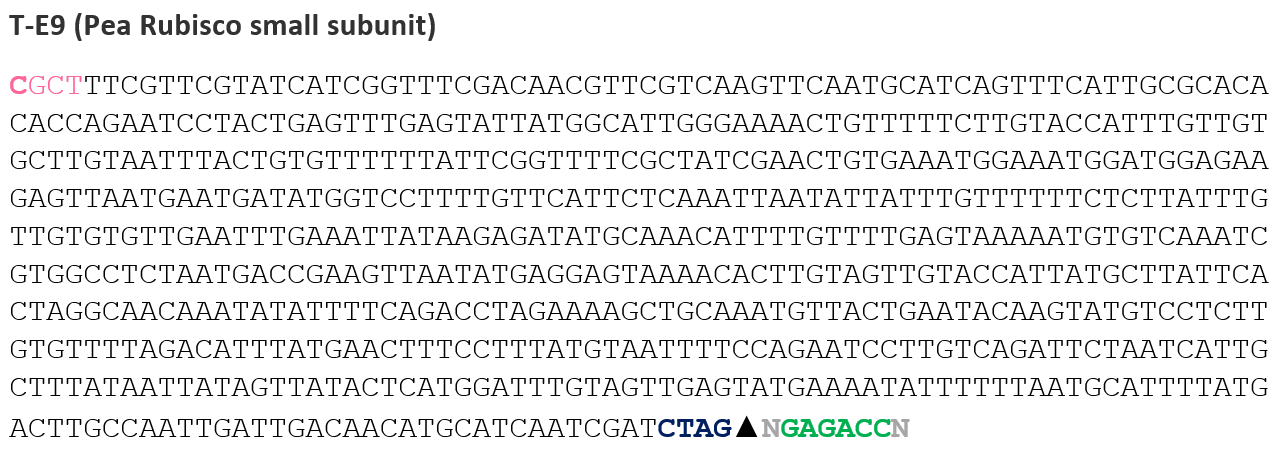 This overhang was added at the end of the eGFP fragment after the stop codon, ensuring proper assembly without affecting the translated protein sequence.
Golden Gate Assembly of Reporter Constructs in Benchling
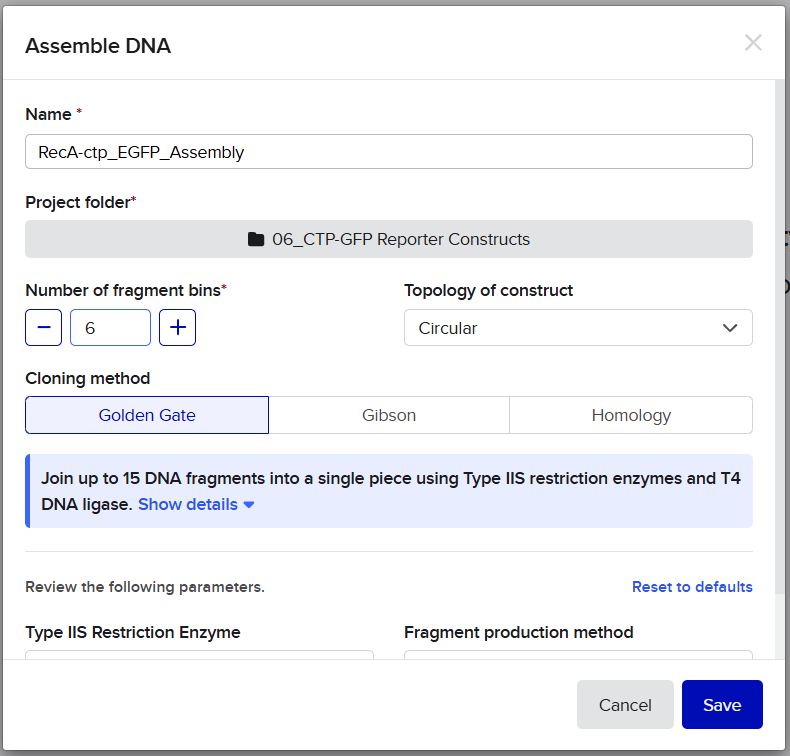
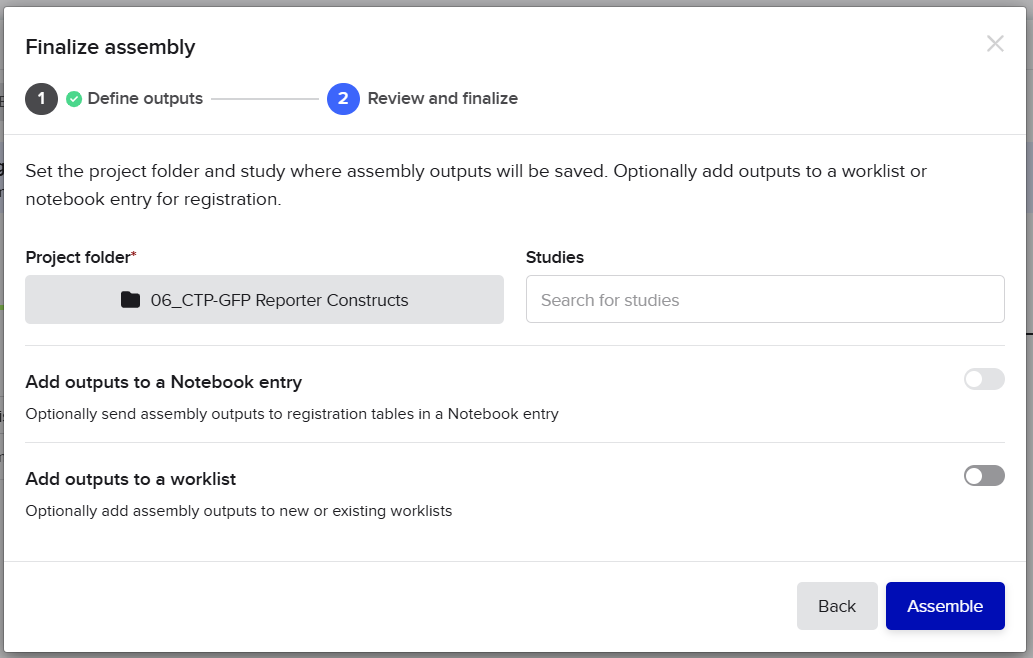
First, I opened Benchling and clicked on the Create (+) button from the left sidebar. From the cloning options, I selected “Assemble DNA sequences by cloning”, then chose the Golden Gate Assembly workflow. This opened the assembly interface where all cloning parameters were configured.
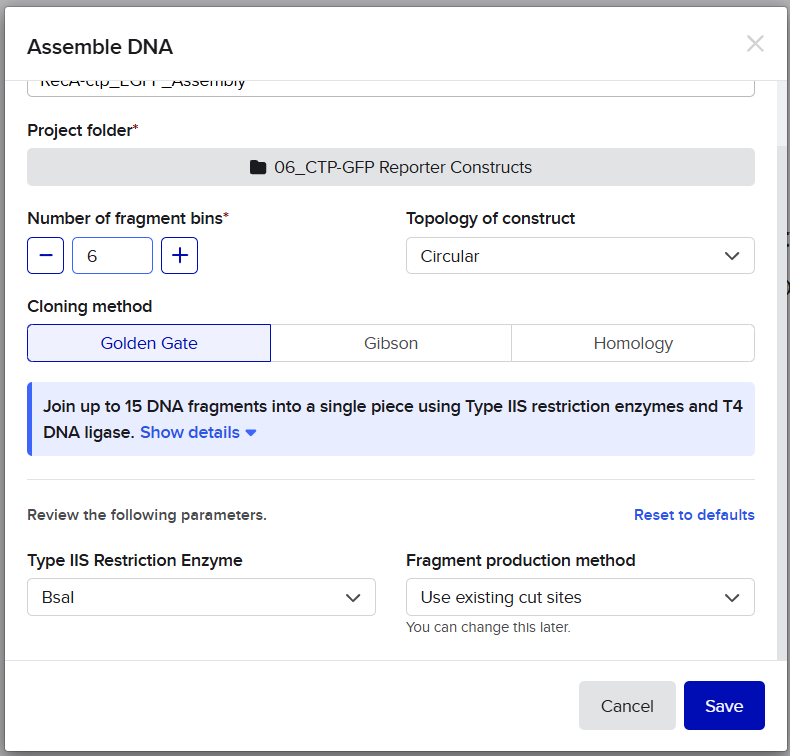
For the assembly settings, I selected the destination project folder dedicated to the reporter constructs. Since the final products were designed as plasmids, I set the construct topology to Circular. I then selected Golden Gate Assembly as the cloning method and specified BsaI as the Type IIS restriction enzyme used for assembly.
![]()
![]()
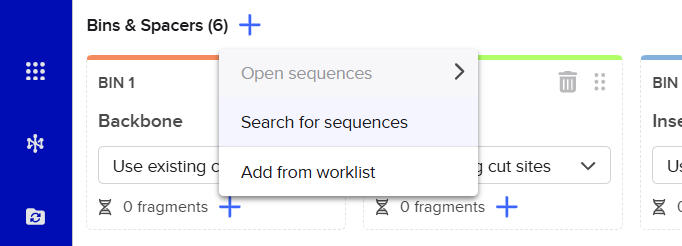
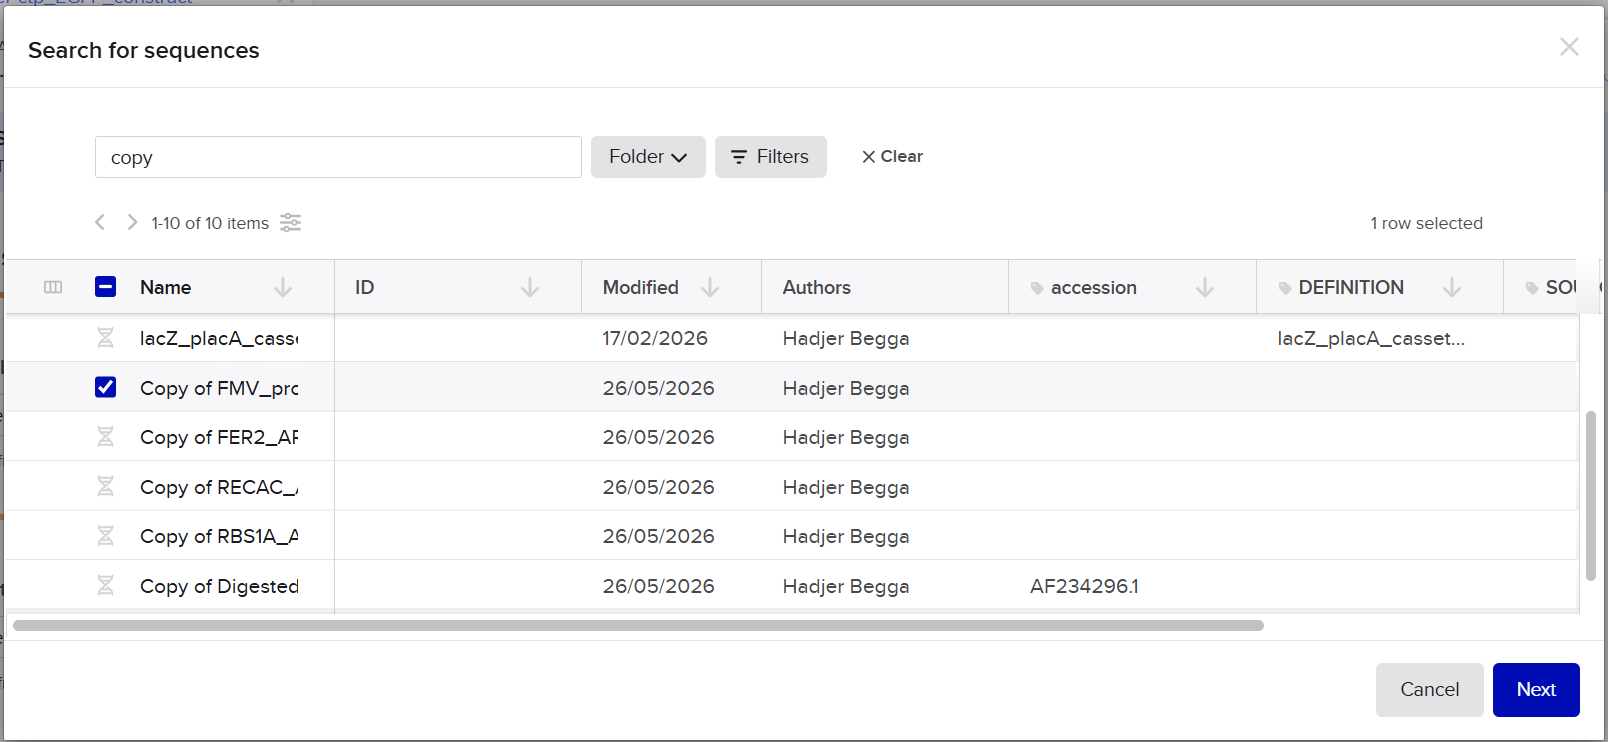
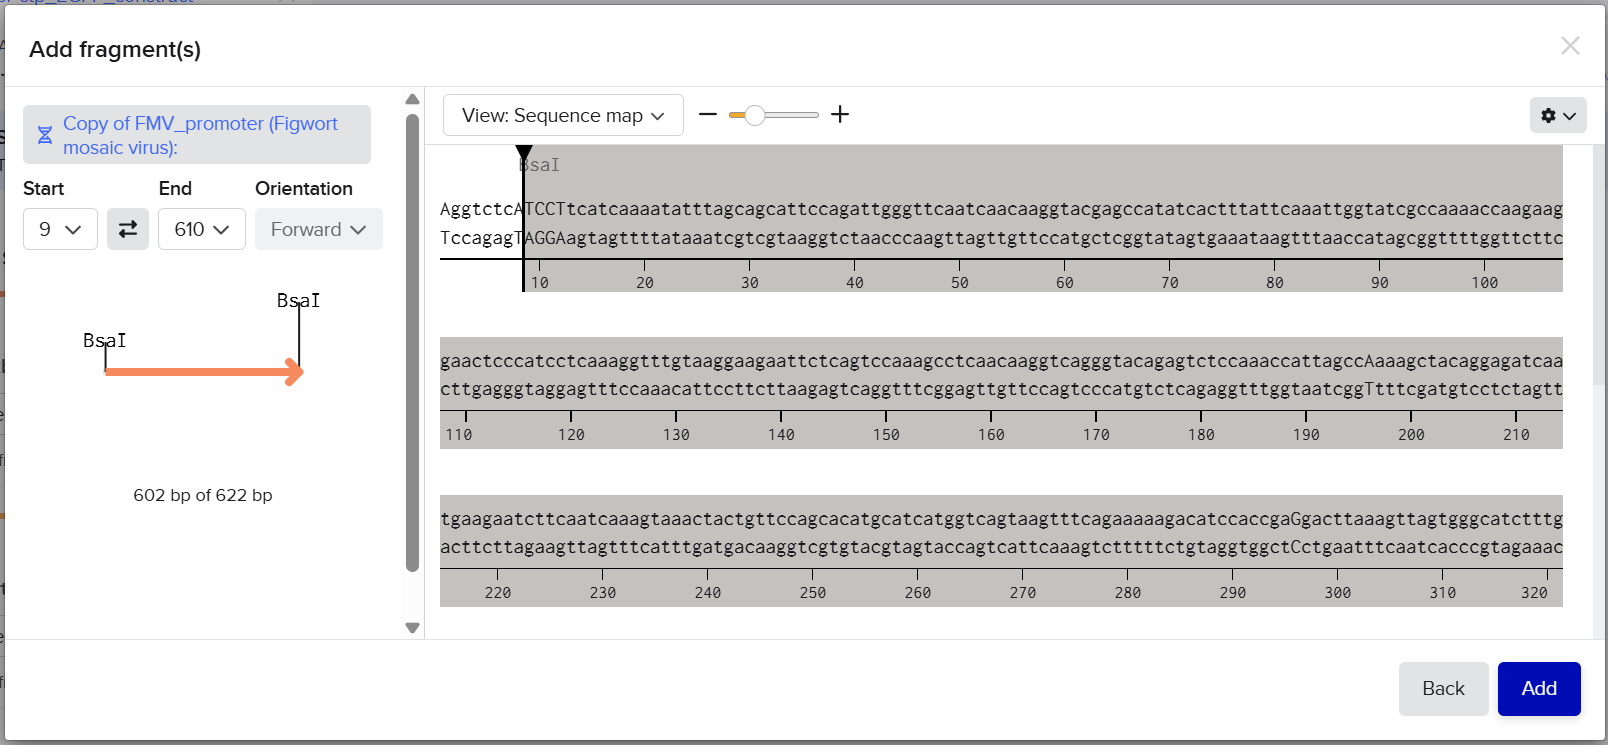
 Next, I imported all DNA fragments in their correct assembly order. The fragments included:
![]()
![]()
![]()
![]()
![]()
![]()
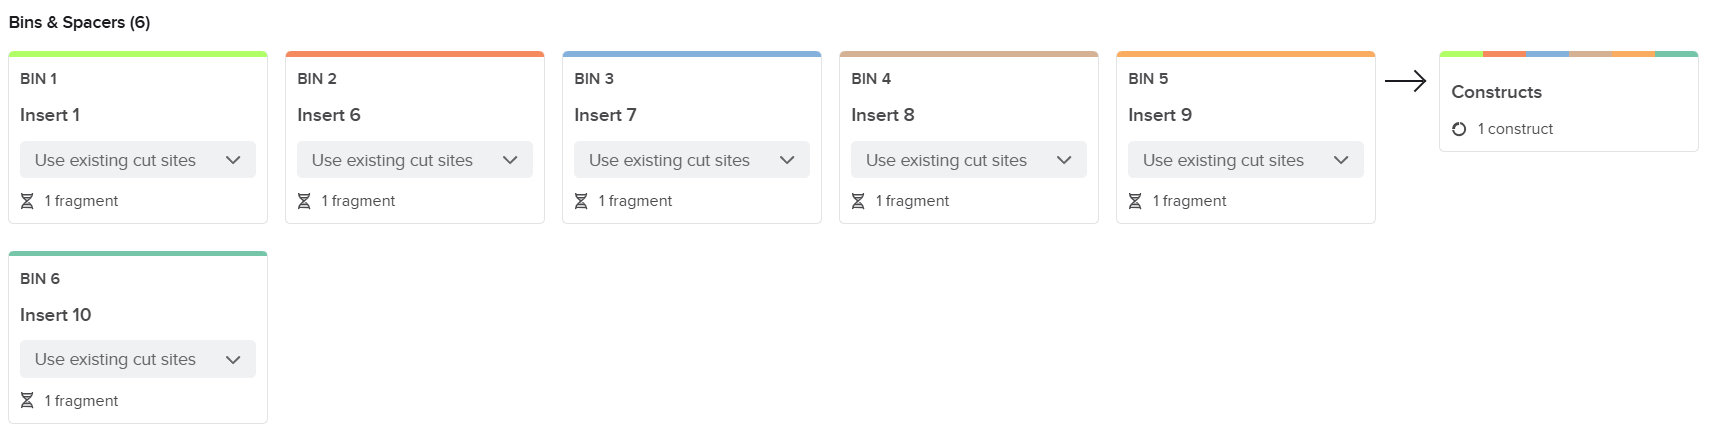
- Linearized pCAMBIA1300 backbone
- FMV promoter
- AMV RNA4 enhancer
- Chloroplast transit peptide (RbcS, Fer2, or RecA depending on the construct)
- eGFP reporter gene
- tE9 terminator
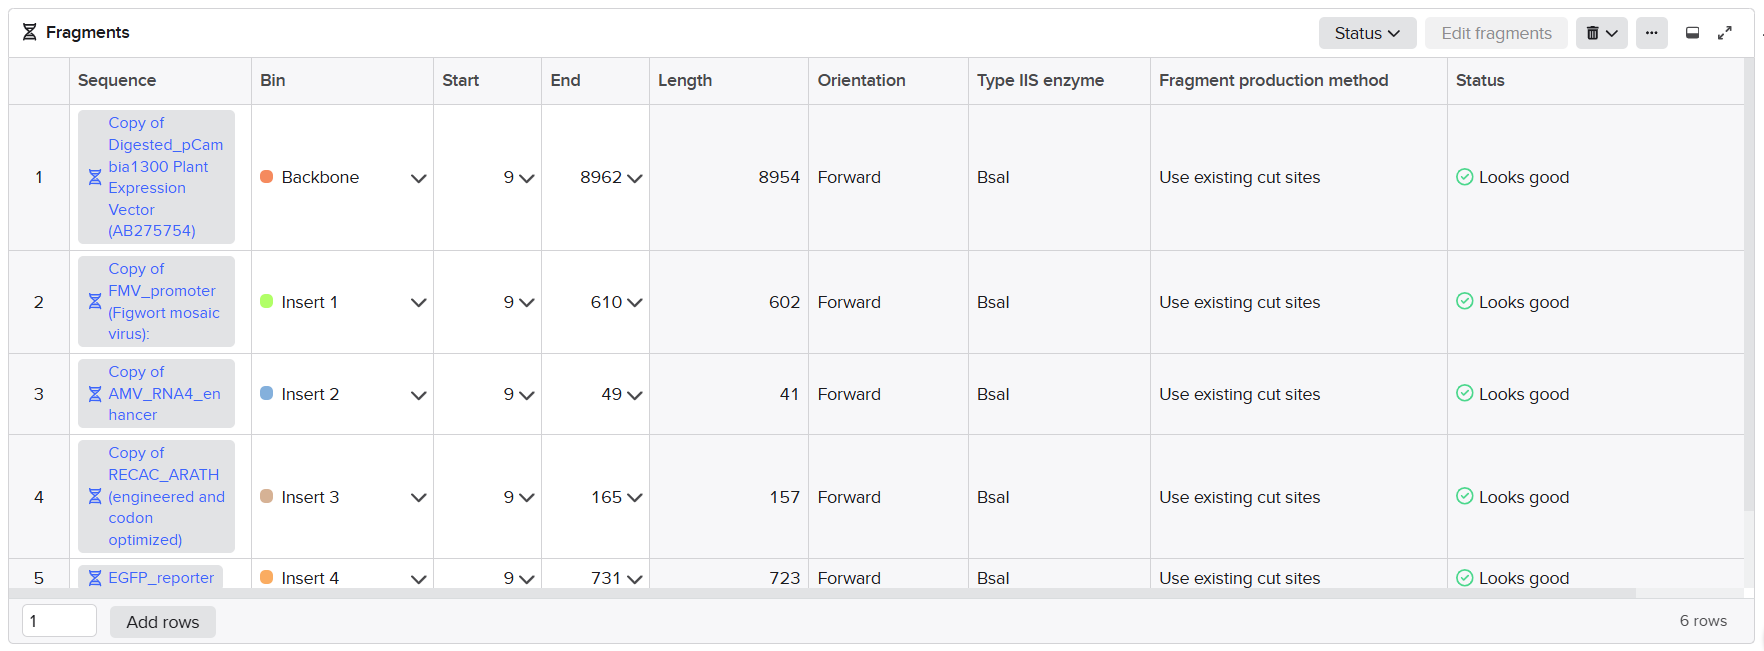
After importing all fragments, Benchling automatically analyzed the BsaI digestion products and checked the compatibility of all adjacent overhangs. When all overhangs matched correctly and fragment orientation was valid, Benchling generated a complete circular assembly product corresponding to the final reporter plasmid.
![]()
![]()
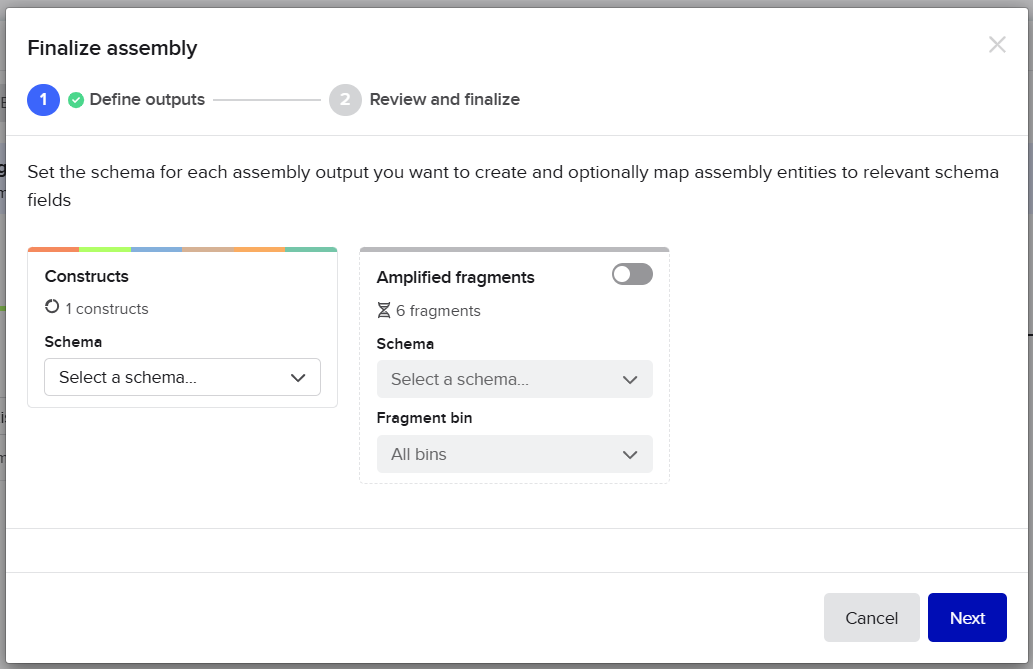
 I then clicked the “Assemble” button to generate the final constructs.
![]()
![]()
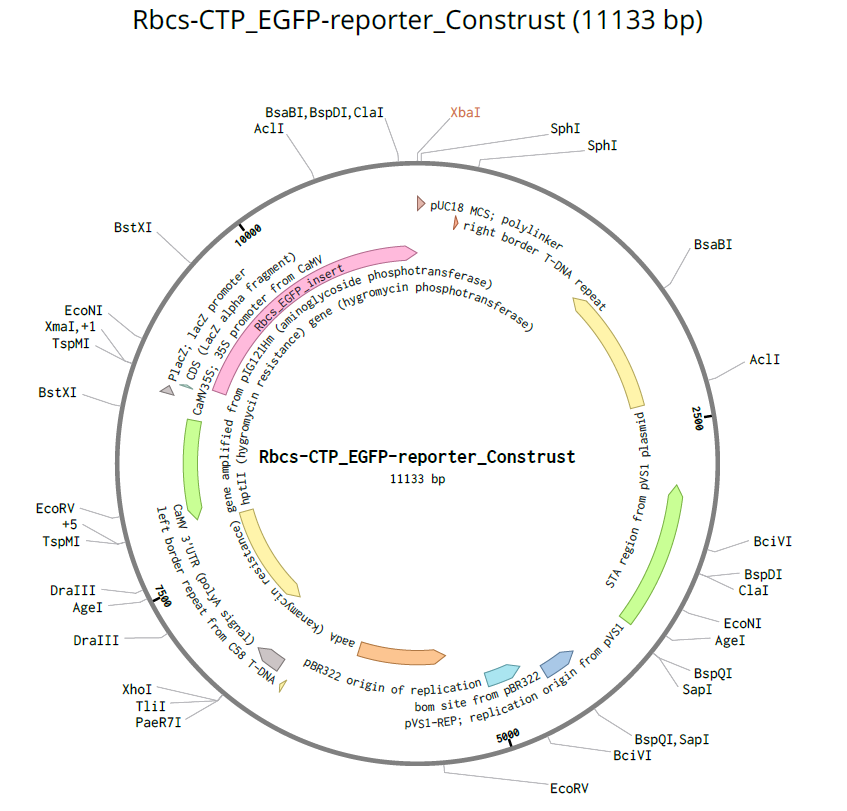
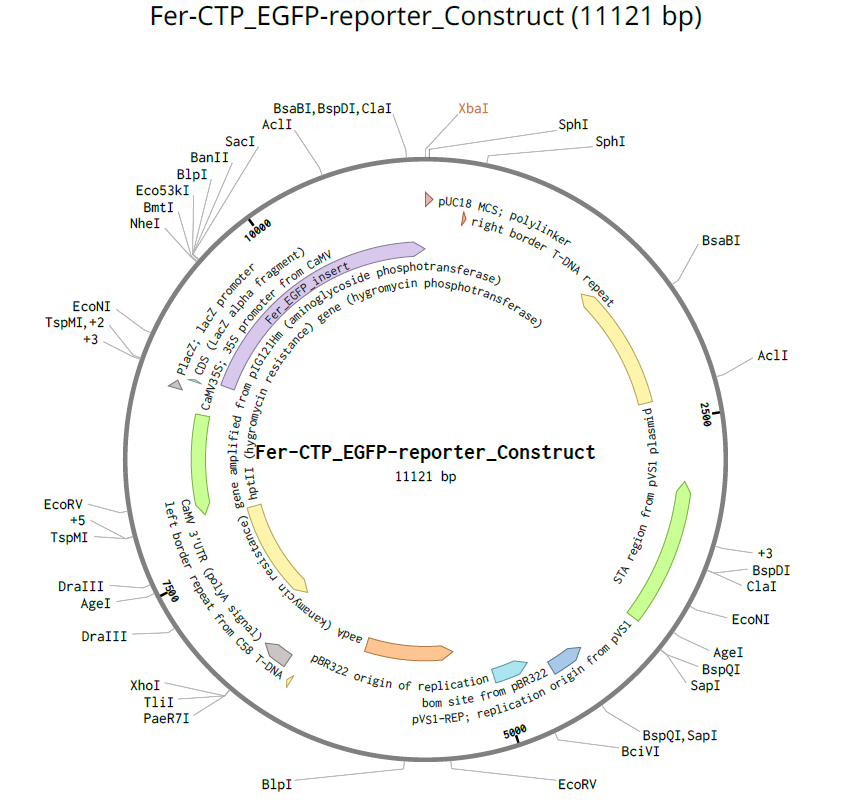
 Benchling created three independent circular plasmid sequences corresponding to:
Rbcs-CTP_EGFP_Benchling_Design: FMV promoter → AMV enhancer → RbcS CTP → eGFP → tE9
 Fer-CTP_EGFP_Benchling_Design: FMV promoter → AMV enhancer → Fer2(M→A) CTP → eGFP → tE9
 RecA-CTP_EGFP_Benchling_Design: FMV promoter → AMV enhancer → RecA CTP → eGFP → tE9
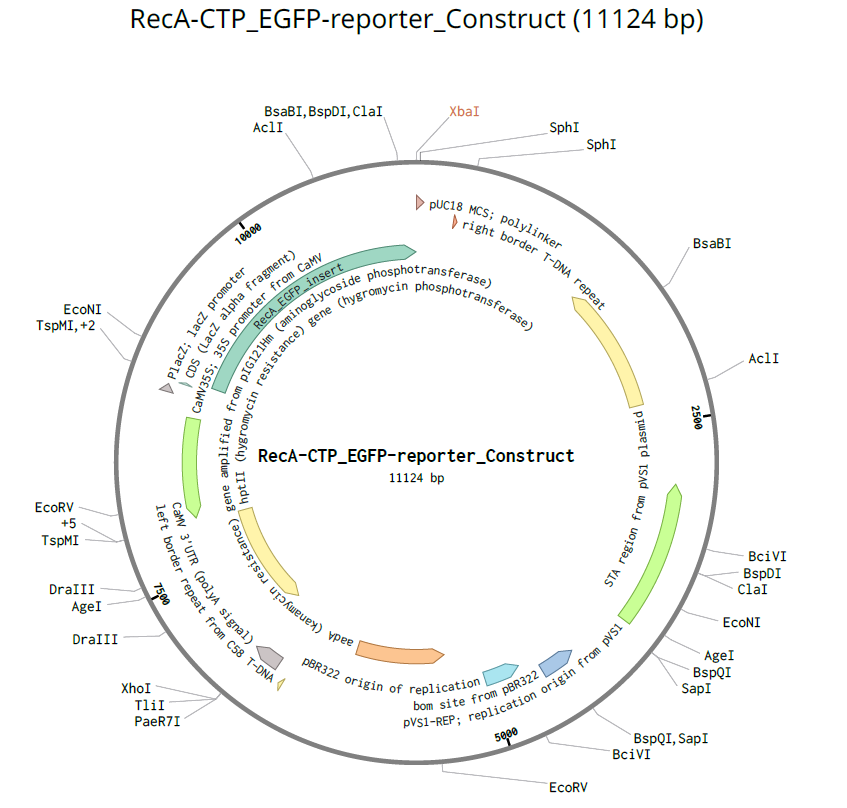
Finally, I opened the resulting plasmid maps to verify construct integrity. I carefully checked that all annotations were preserved correctly across the assembled plasmids, including promoters, enhancers, transit peptides, coding sequences, and terminators. I also verified that all junctions were seamless, that the reading frame remained continuous across fusion regions, and that no inversions, missing fragments, or unintended mutations were introduced during the assembly simulation.
Objective
The objective of this step was to design three plant expression constructs that could be efficiently assembled into circular plasmids using the Golden Gate Assembly (GGA) method. All three constructs were designed with the same regulatory and reporter elements, while only the chloroplast transit peptide (CTP) sequence was changed in order assess the correct localization of the three engineered ctp sequences using a GFP reporter and confocal microscopy. The final constructs were designed as follows:
- Reporter 1: FMV promoter → AMV enhancer → RbcS CTP + AA junction → eGFP → tE9
- Reporter 2: FMV promoter → AMV enhancer → Fer2(M→A) CTP → eGFP → tE9
- Reporter 3: FMV promoter → AMV enhancer → RecA CTP + AA junction → eGFP → tE9
Each construct was assembled using BsaI-mediated Golden Gate cloning with specifically designed 4 bp overhangs to ensure correct orientation and seamless ligation between adjacent fragments.