Week 2 Lab: Gel Electrophoresis Art
Contents:
Planning Notes:
- i don’t have lambda DNA, but i do have Escherichia coli BL21 genomic DNA and a small collection of various plasmids and PCR products of varying rates.
- we also have a handful of restriction enzymes but not a lot, and mostly not common ones.
- i think my strategy is going to be:
- sketch out a design
- run a restriction digest on the E. coli genomic DNA to get a bunch of different-sized fragments. doesn’t particularly matter which one i think.
- run the digest on a gel, and purify out the fragments of the size i want with a Qiagen or NEB kit; note: i am going to have to elute with pretty small volumes to keep them concentrated enough to show up in subsequent gels.
- run a new gel with the purified fragments based on the design (possibly augmenting with PCR products if desired for brightness/intensity).
- take photo to show off
- for whatever reason, neither uploading Genbank files and downloading accession files for the E. coli genomic assembly in Benchling is working for me. i suspect it probably has to do with the size of the files and speed (or lack thereof) of my internet. so i can’t do much in-silico planning and testing. but i think my plan will work without it. it just means i’ll have to do more testing during instead of thinking/planning prior.
Lab Prep:
Sketch out a design.
I found a photo of the Portland skyline with Mt. Hood in the background from the City of Portland’s Instagram. Photo credit: @james.is.jumbled. I traced the lines of primary visual components to get a line art style drawing, and then split it into a grid of 16 columns, for the 16 wells for the largest gel comb I have available. I recreated the gridded line art, scaled to a printout of the 1kb+ gel ladder, to approximate the size DNA fragments I would need in each column.

Restriction digest E. coli gDNA.
- 10 ul E. coli BL21 gDNA (125 ng/ul)
- 5 ul rCutSmart buffer
- 1 ul MspI (2018)
- 1 ul SpeI-HF (2015)
- 1 ul XbaI (2015)
- 2 ul NdeI (2009)
- 34 ul ultra-pure water
- Combined the above components in a microtube (50 ul total reaction volume) and vortexed to mix. Incubated at 37C for an hour. Note that all enzymes are from NEB and are all past their expiration dates, but have been stored in a -20C freezer the whole time.
Gel purification of DNA fragments.
I re-used an old gel for this first run. I combined 3ul of ladder with 2ul SYBR Green I dilution (diluted 1:50) and around 0.5ul loading dye on a scrap of parafilm, and loaded this mixture into well 5. I added 6ul of SYBR Green I dilution into the restriction digest along with 10ul of loading dye. I loaded around 33ul each into 2 lanes. I ran this electrophoresis for 40 minutes at 180mV. Lanes:- 1kb+ ladder (NEB)
- Multi-enzyme digested E. coli gDNA
- Multi-enzyme digested E. coli gDNA
- PCR product
- PCR product
- PCR product
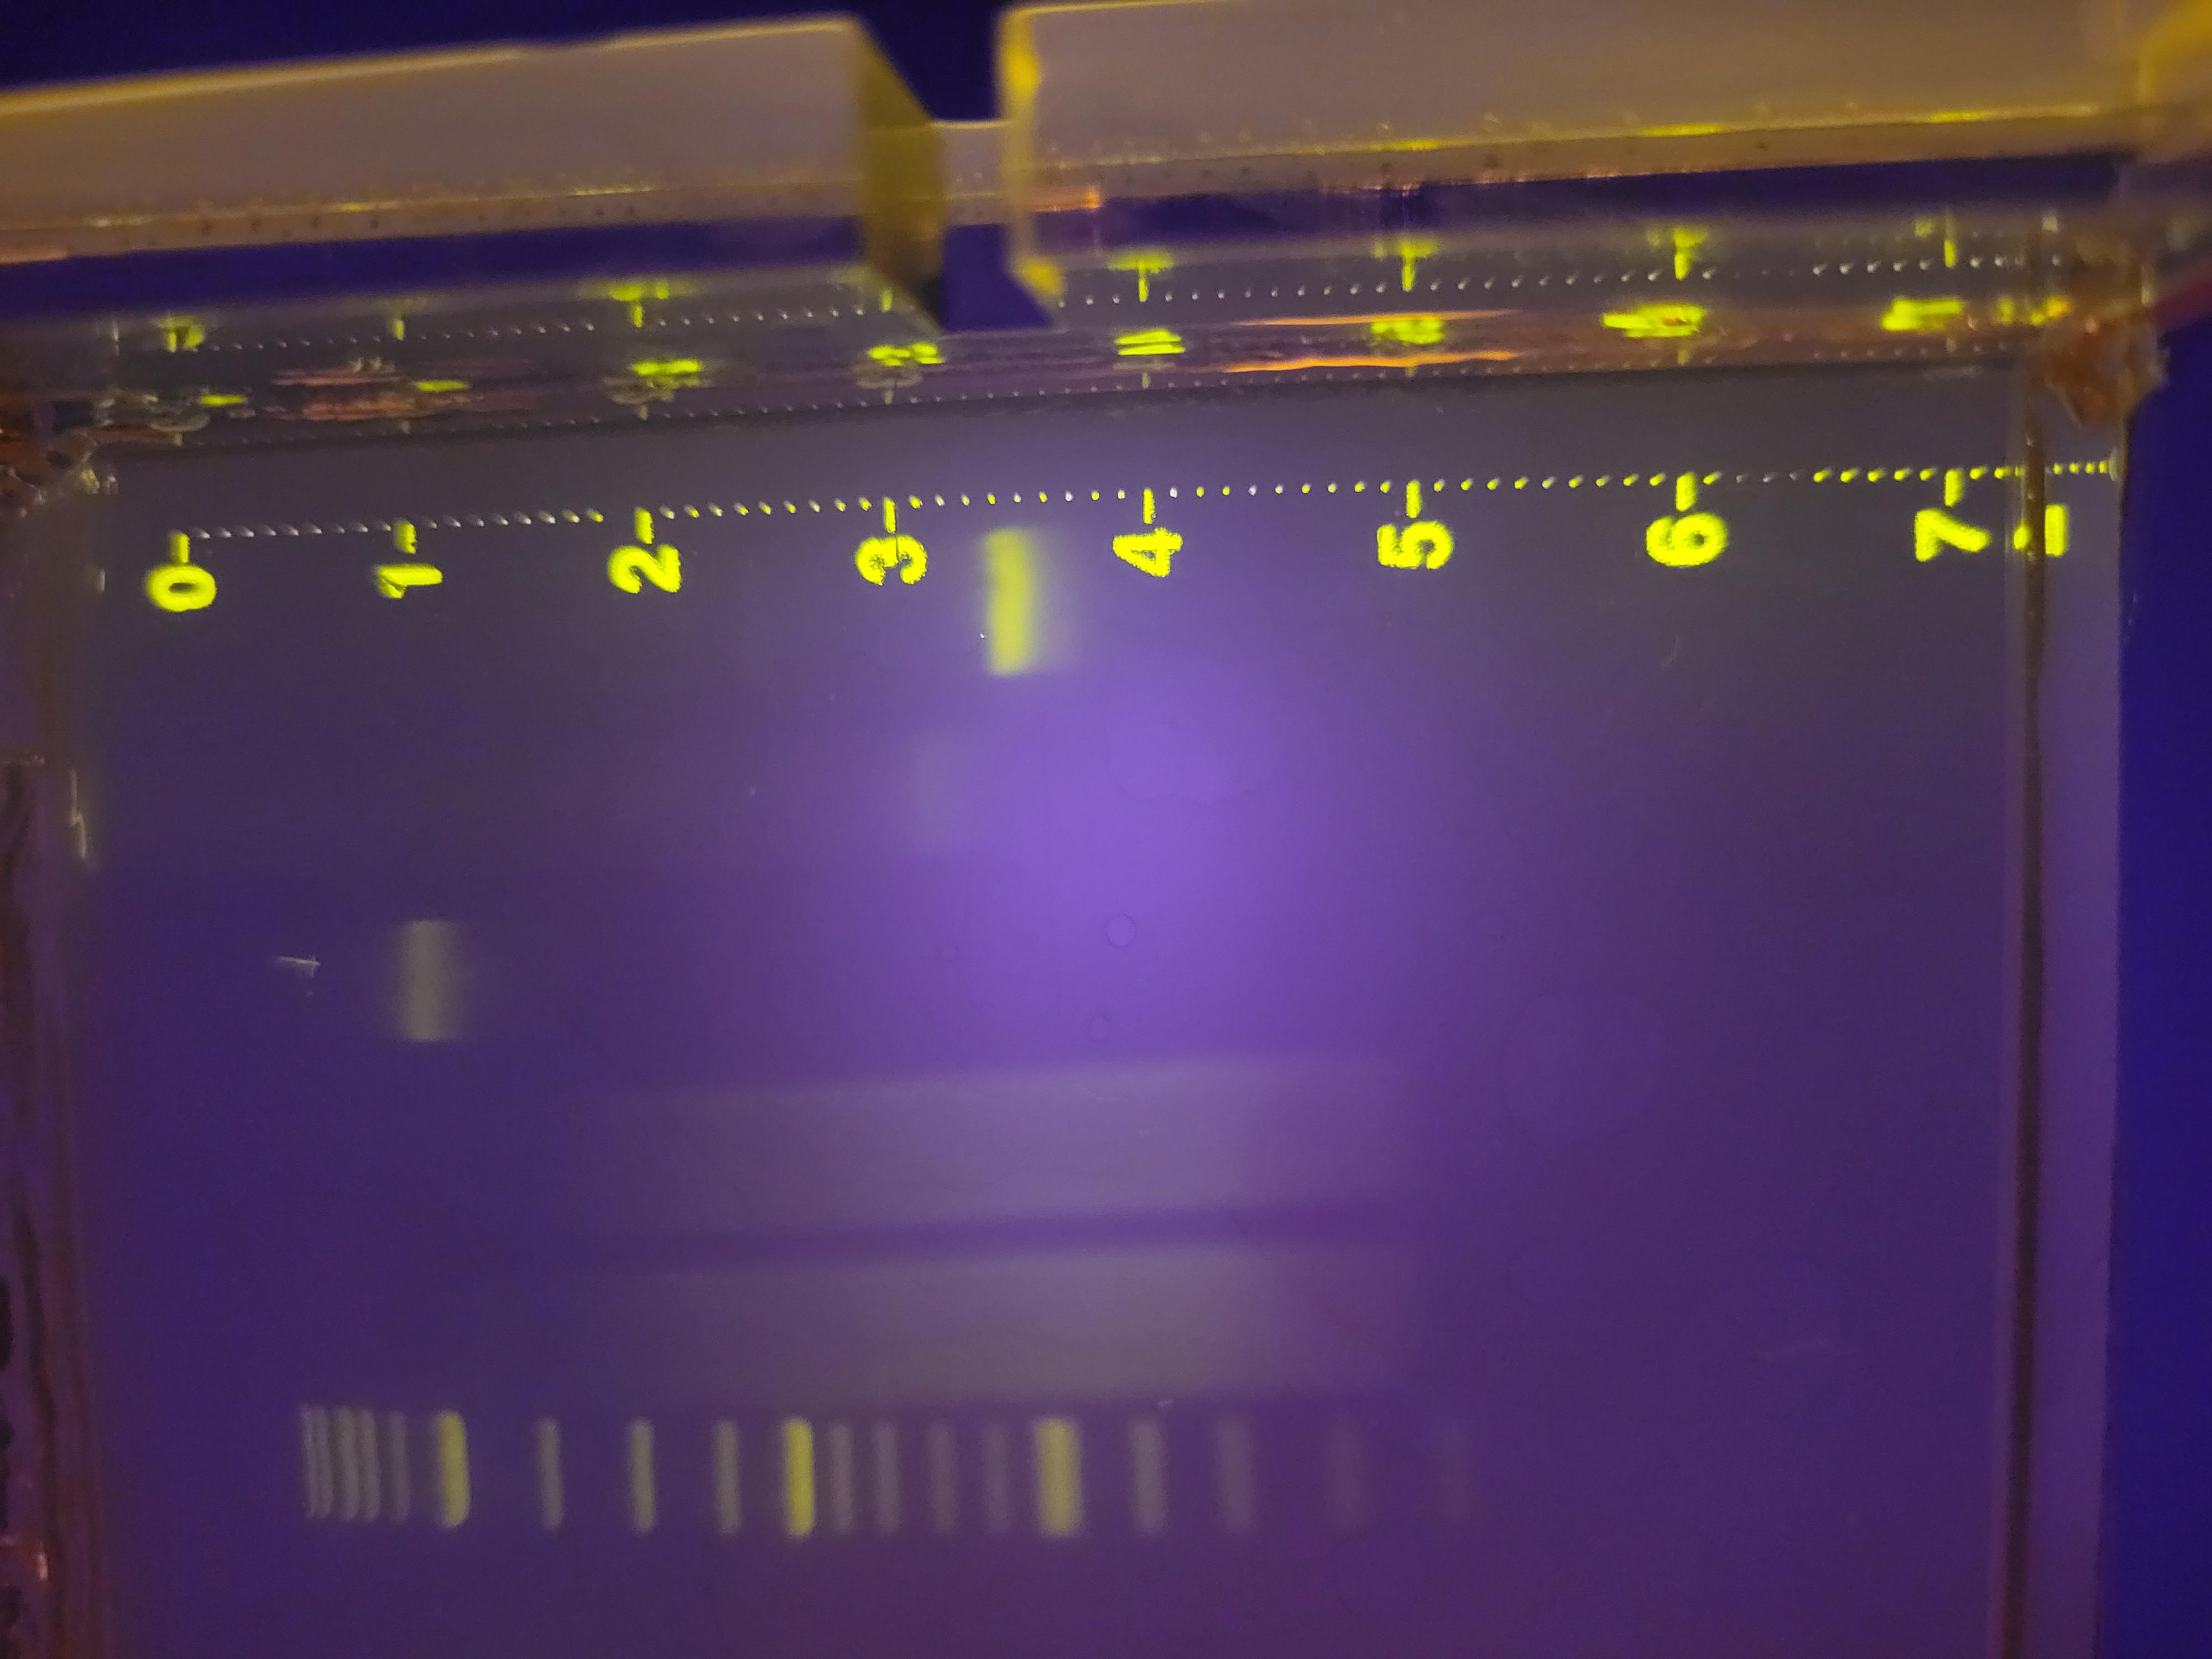
It was just smears, which I suppose isn’t too surprising, considering that I started with gDNA and all my enzymes were expired. From this gel, I cut out smears from the multi-enzyme digests at the following ranges: 1-0.1kb, 0.7-0.1kb. Using a Qiagen Qiaquick gel purification kit, I purified these semars individually. All purifications were eluted with 30 ul of elution buffer. I added these to tubes of PCR products for my gel art palette.
To another gel, I loaded the following into the wells, mixing each with 1ul of loading dye on parafilm prior to loading:
- ladder
- 10ul A
- 2ul A
- 1ul A
- linearized plasmid
- 15ul B
- 2ul B
- 1ul B
- 5ul A
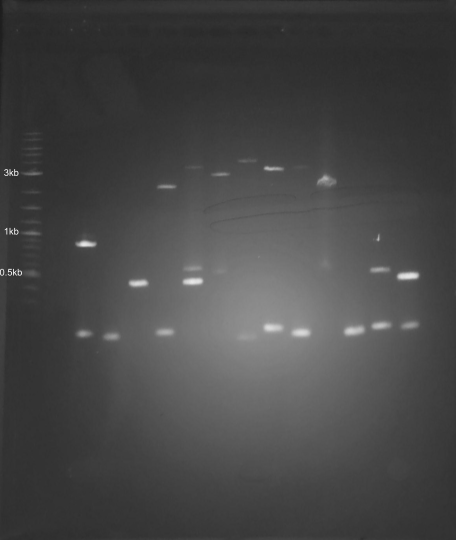
These are not super clear, but I cut out additional smears from lanes 1, 6, and 9 at the following ranges: 0.5-0.1kb, 0.2-0.1kb. Eluted these with 25ul of elution buffer. Added these to my palette above: tubes .
This left me with the following palette (all sizes and size ranges are approximate):
- A. PCR product: 6kb
- B. PCR product: 5kb
- C. PCR product: 4kb
- D. PCR product: 3kb
- E. PCR product: 1kb
- F. PCR product: 700bp
- G. PCR product: 650bp
- H. PCR product: 500bp
- J. PCR product: 200bp
- K. PCR product: 100bp
- L. smear from 100bp-1kb
- M. smear from 100bp-700bp
- N. smear from 100bp-500bp
- O. smear from 100bp-200bp
Note that J and K are low concentration, and the smears didn’t show up well on the test plate, so I’m going to use larger volumes of those than I am for the rest.
I re-drew my gridded lineart with the PCR products that I know I have.
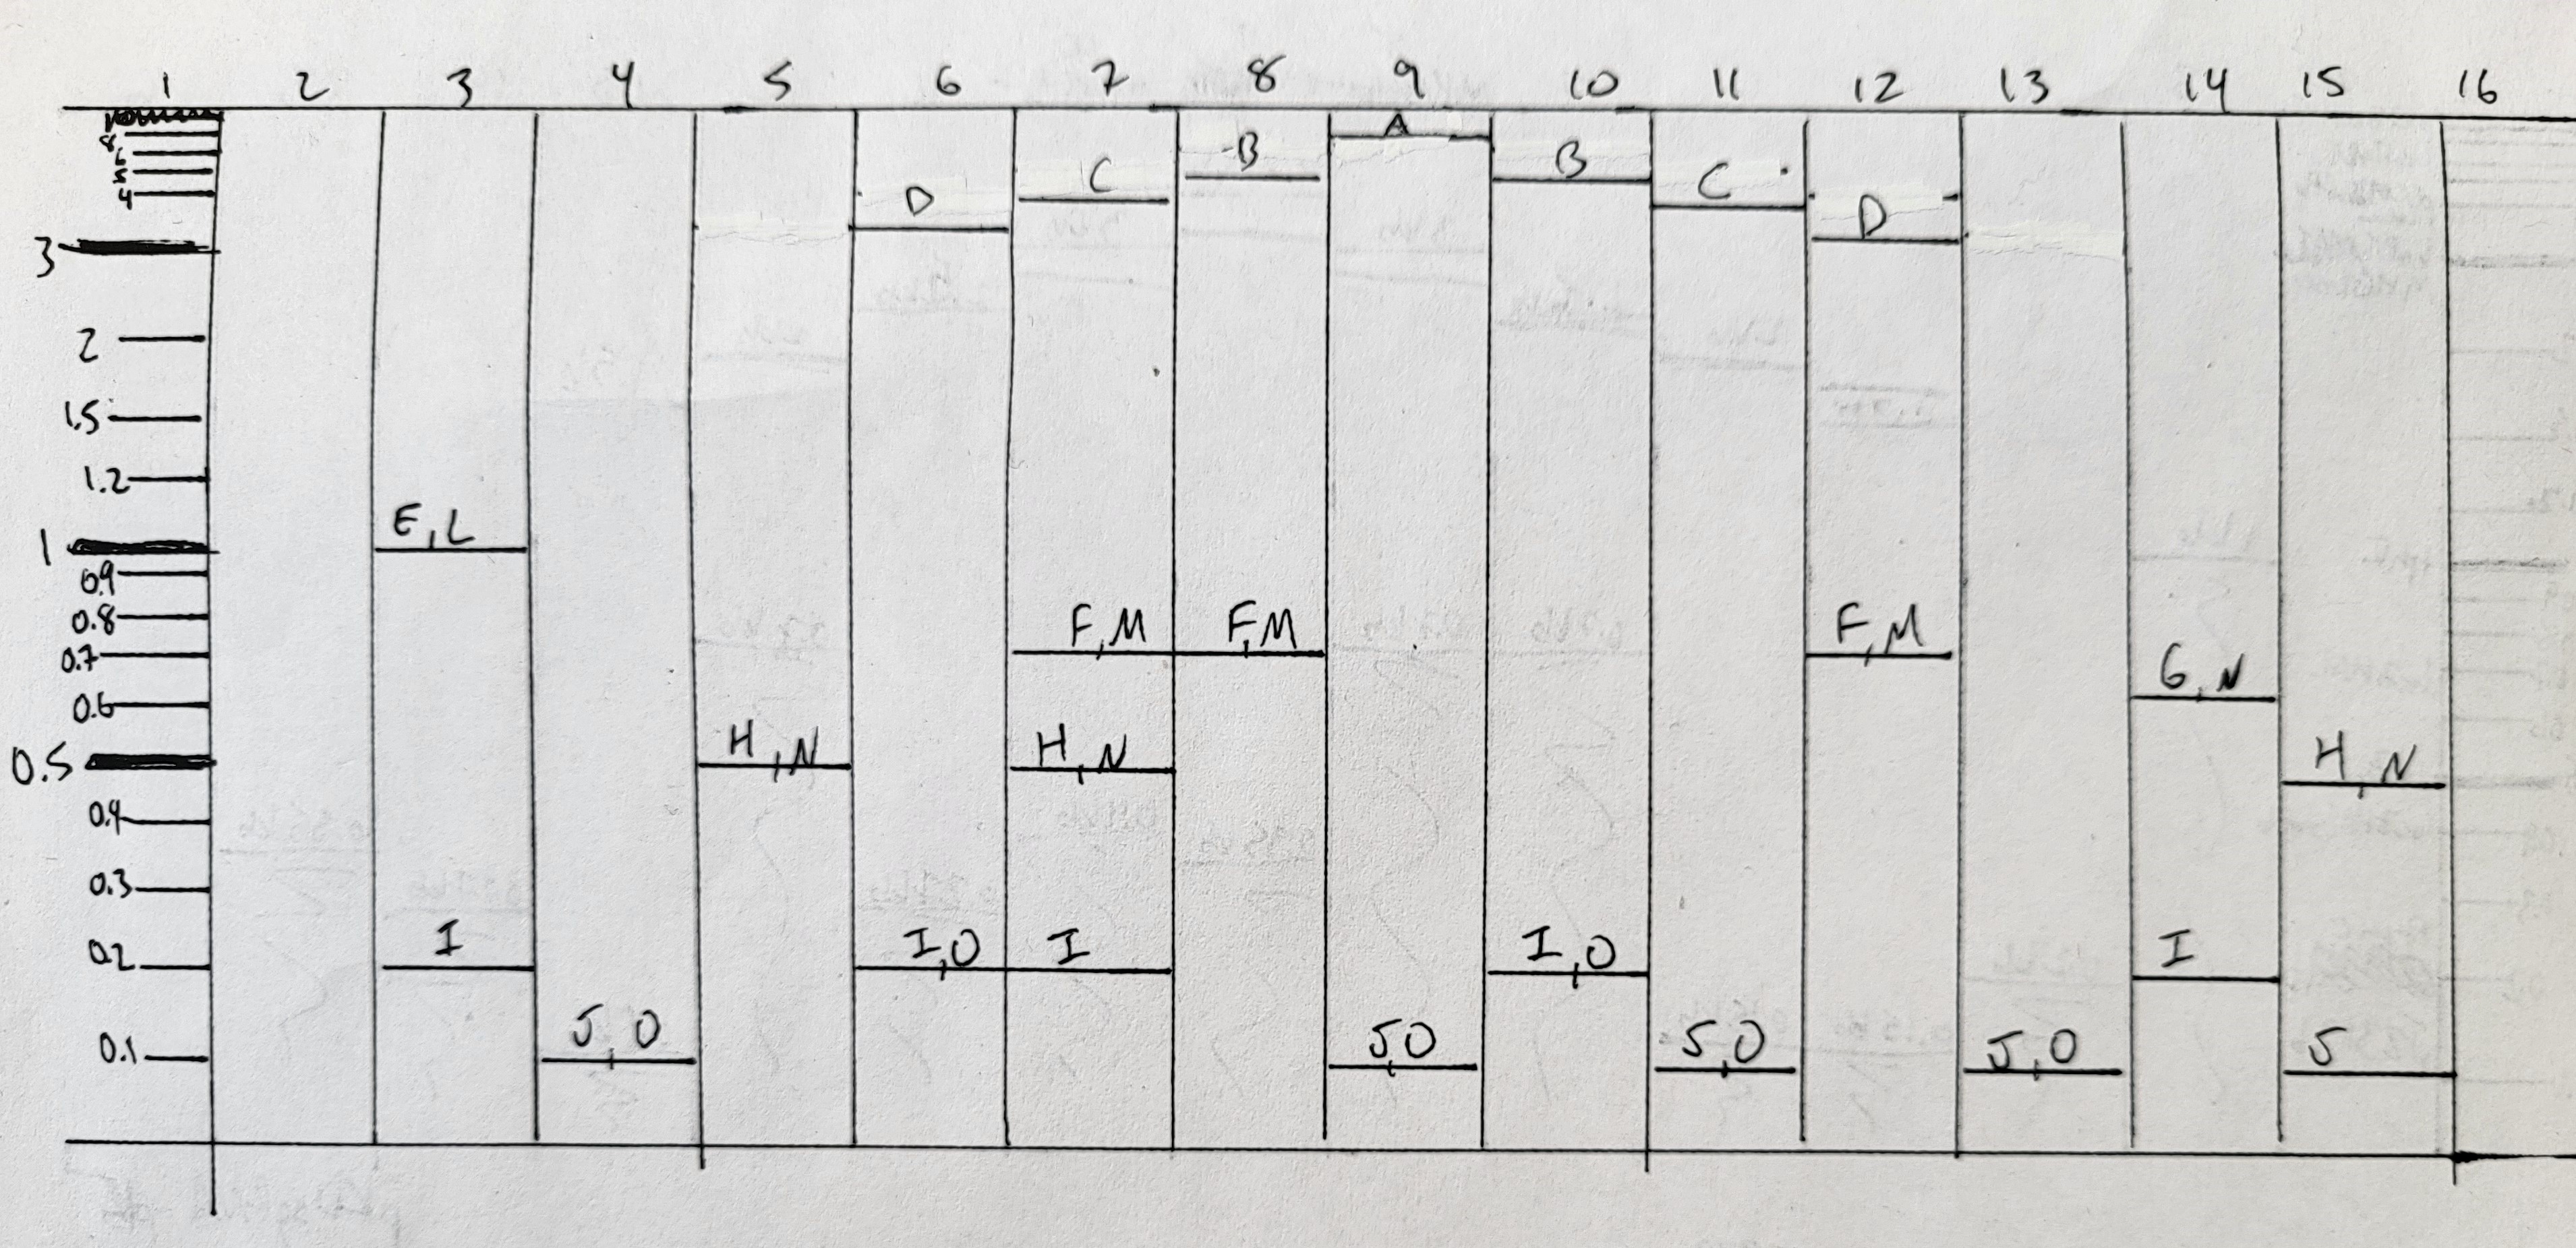
Gel Art lab
I cast a new electrophoresis gel by dissolving 1.3g agarose in 130ml 1x TAE, and pouring into a larger gel mold. This fit a comb with 16 wells. I allowed this to set before transferring into an electrophoresis set-up filled with 1x TAE. I loaded the following combinations into the wells, mixing each on parafilm with both 2ul of SYBR GreenI (50x dil) and appropriate volumes of loading dye, prior to loading. PCR products were 2ul each, except J and K which were 4ul each. Smears (L, M, N, O) were all in the range of 4-10ul per well.
- ladder
- empty well
- E, L, I
- J, O
- H, N
- D, I, O
- C, F, M, H, I
- B, F, M
- A, J, O
- B, I, O
- C, J, O
- D, F, M
- J, O
- G, N, I
- H, N, J
- empty well
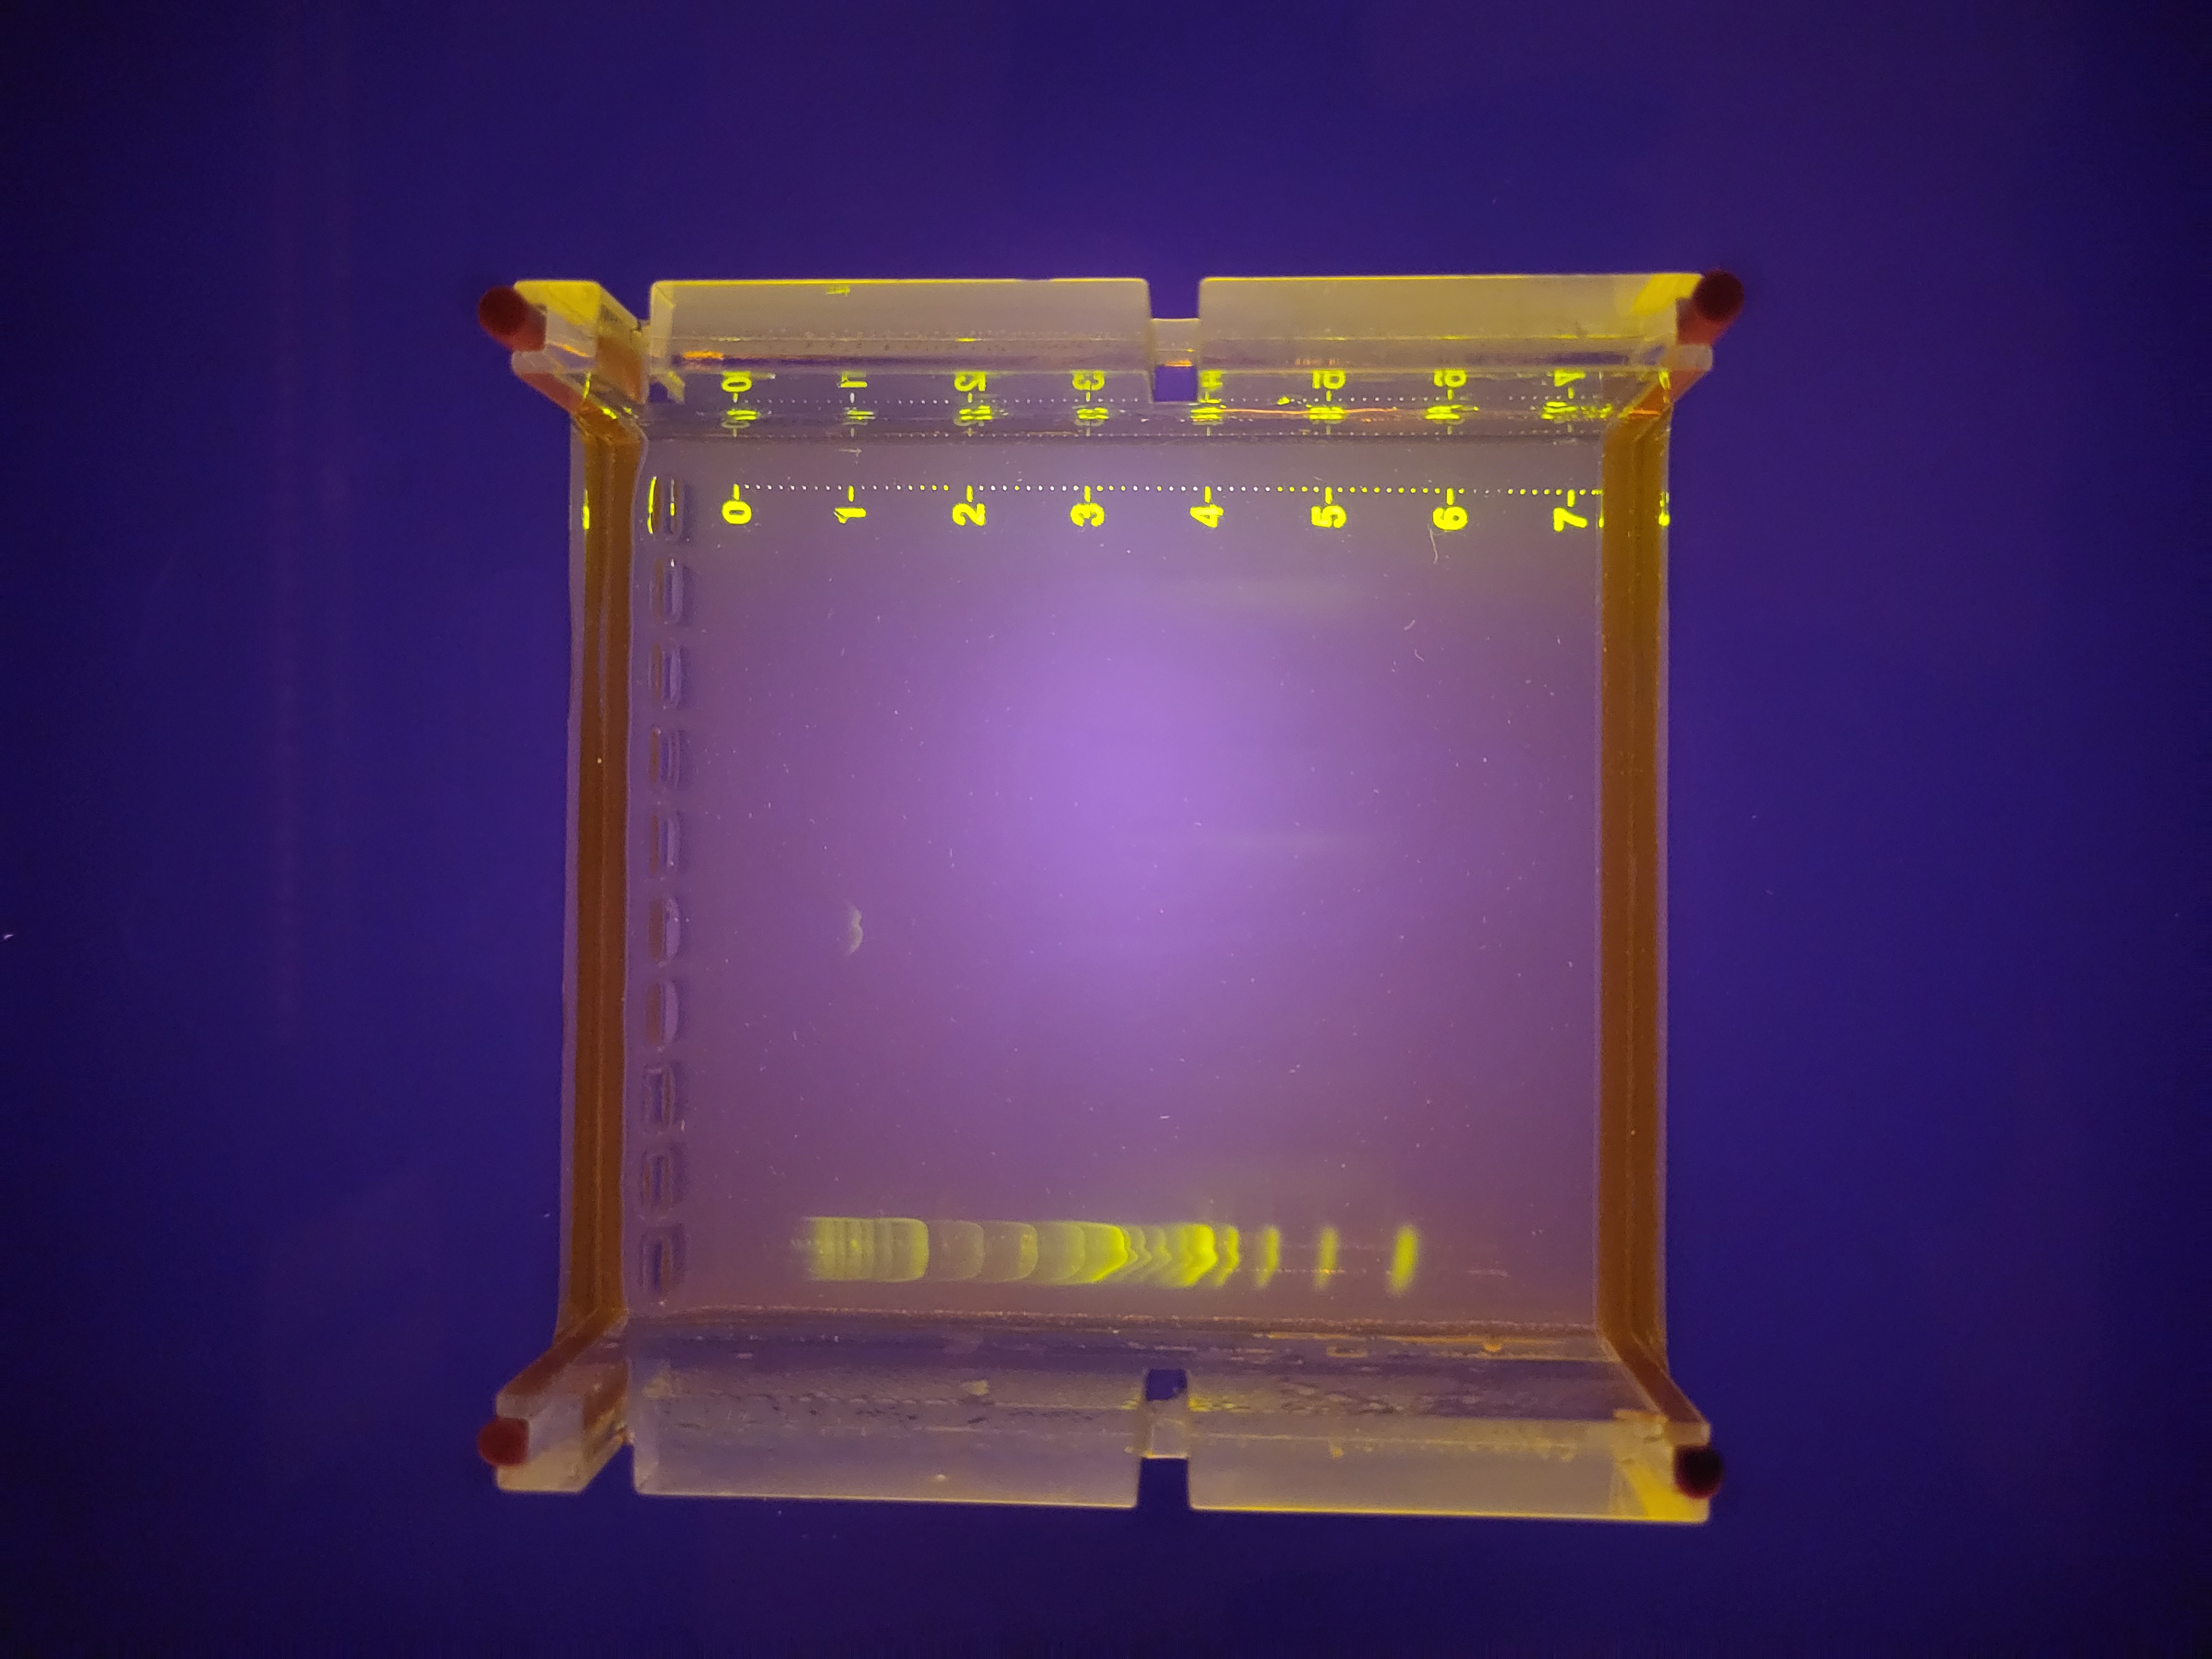
Ran gel at 200V for around a half hour.

Not all the bands are the same brightness, which I can probably attribute to the variable DNA concentration of my various PCR products. It also looks like I must’ve mixed up the 4kb and 5kb tubes. None of the smears showed up at all, which was a little disappointing. Overall though, the art turned out pretty well, I think, even if it was more trial and error than in-silico design and then execution.