DNA art
title: ‘DNA Gel Art’ weight: 10
Week 2 Lab: DNA Gel Art
This lab was about using restriction digests and gel electrophoresis to make DNA gel art. Instead of only using a gel as a diagnostic tool, we used the positions of DNA bands as a visual medium. The basic idea was that different restriction enzymes cut Lambda DNA into different fragment sizes, and those fragments separate into bands when run through an agarose gel.
I followed the lab protocol for designing the gel, preparing the restriction digests, casting the agarose gel, loading the samples, running electrophoresis, and imaging the final result.
Goal of the Lab
The goal was to create a visual pattern using DNA bands. Each lane of the gel was supposed to contain a different restriction digest. Since each enzyme cuts Lambda DNA at specific sites, each digest should produce a distinct set of DNA fragment sizes. When run on the gel, those fragments should migrate different distances and create the planned pattern.
This is the same principle used in normal molecular biology. If a DNA sequence is known, restriction digest software can predict what bands should appear. A real gel can then be compared against that prediction.
Design Process
Before the wet-lab steps, I planned the gel design digitally. The design process involved testing combinations of restriction enzymes on Lambda DNA and looking at the predicted band positions.
The enzymes available included:
- EcoRI-HF
- HindIII-HF
- BamHI-HF
- KpnI-HF
- EcoRV-HF
- SacI-HF
- SalI-HF
The “HF” versions are high-fidelity restriction enzymes, which are designed to reduce off-target cutting. The visual design was based on choosing enzyme combinations that would create useful bands in each lane.
The important thing I learned is that gel art is not drawn directly. The image comes from fragment sizes. The design has to be translated into enzyme choices, and the enzyme choices then determine the band positions.

Preparing the Agarose Gel
I prepared a 1% agarose gel. The gel was made by mixing agarose powder with 1x TAE buffer.
| Component | Amount |
|---|---|
| Agarose | 0.75 g |
| 1x TAE buffer | 75 mL |
| SYBR Safe DNA stain | 7.5 uL |
The agarose and TAE were heated in the microwave in short pulses until the agarose dissolved and the solution became clear. I swirled the flask between heating steps to help dissolve the agarose evenly.
After the solution cooled slightly, SYBR Safe DNA stain was added. This stain binds to DNA and makes the bands visible under blue light after the gel is run.
The liquid gel was then poured into a casting tray with a comb in place. The comb created the wells where the DNA samples would later be loaded. After the gel solidified, the comb was removed carefully.
Restriction Digest Setup
While the gel was setting, I prepared the restriction digest reactions. Each reaction corresponded to one lane of the gel.
The general digest reaction volume was 20 uL.
| Component | Amount |
|---|---|
| Lambda DNA | 3 uL |
| 10x enzyme buffer | 2 uL |
| Restriction enzyme | 1 uL per enzyme |
| Nuclease-free water | to 20 uL total |
The Lambda DNA stock was 0.5 ug/uL, so 3 uL gave 1.5 ug DNA. The enzyme buffer was added so the final buffer concentration would be 1x. If a lane used more than one enzyme, I adjusted the water volume so the final reaction volume stayed at 20 uL.
The tubes were labeled by lane number. This mattered because if two tubes were swapped, the gel would no longer match the intended design.
Digest Incubation
After setting up the digest reactions, I incubated the tubes at 37°C for 30 minutes. This allowed the restriction enzymes to cut the Lambda DNA.
During this step, the full Lambda DNA molecule should be cut into smaller fragments. The number and size of fragments depends on the enzyme or enzyme combination in that tube.
Adding Loading Dye
After incubation, I added loading dye to the samples before loading them into the gel.
Loading dye is useful for two reasons. It makes the sample denser so it sinks into the well, and it also provides a visible dye front that helps track the progress of electrophoresis.
The target loading volume per well was 20 uL.
| Component | Amount |
|---|---|
| 6x loading dye | 3.33 uL |
| DNA sample | variable |
| Nuclease-free water | to 20 uL total |
Loading the Gel
Once the gel had solidified, I placed it in the electrophoresis box and added 1x TAE buffer until the gel was covered. The wells were placed near the negative electrode because DNA is negatively charged and migrates toward the positive electrode.
I loaded the samples into the wells according to the lane plan. This was one of the harder parts of the lab because the wells are small. The pipette tip has to be close enough to the well to release the sample cleanly, but not so deep that it punctures the gel.
If the loading step goes wrong, the sample can leak out, diffuse, or fail to enter the well properly.
Running the Gel
After loading, I connected the gel box to the power supply and ran the gel. The protocol recommended running at around 80 to 115 V for about 45 minutes.
When the current is running properly, bubbles appear in the buffer. This shows that the circuit is connected and current is passing through the system.
The DNA fragments separate by size as they move through the agarose. Smaller fragments travel farther, while larger fragments stay closer to the wells.
Imaging
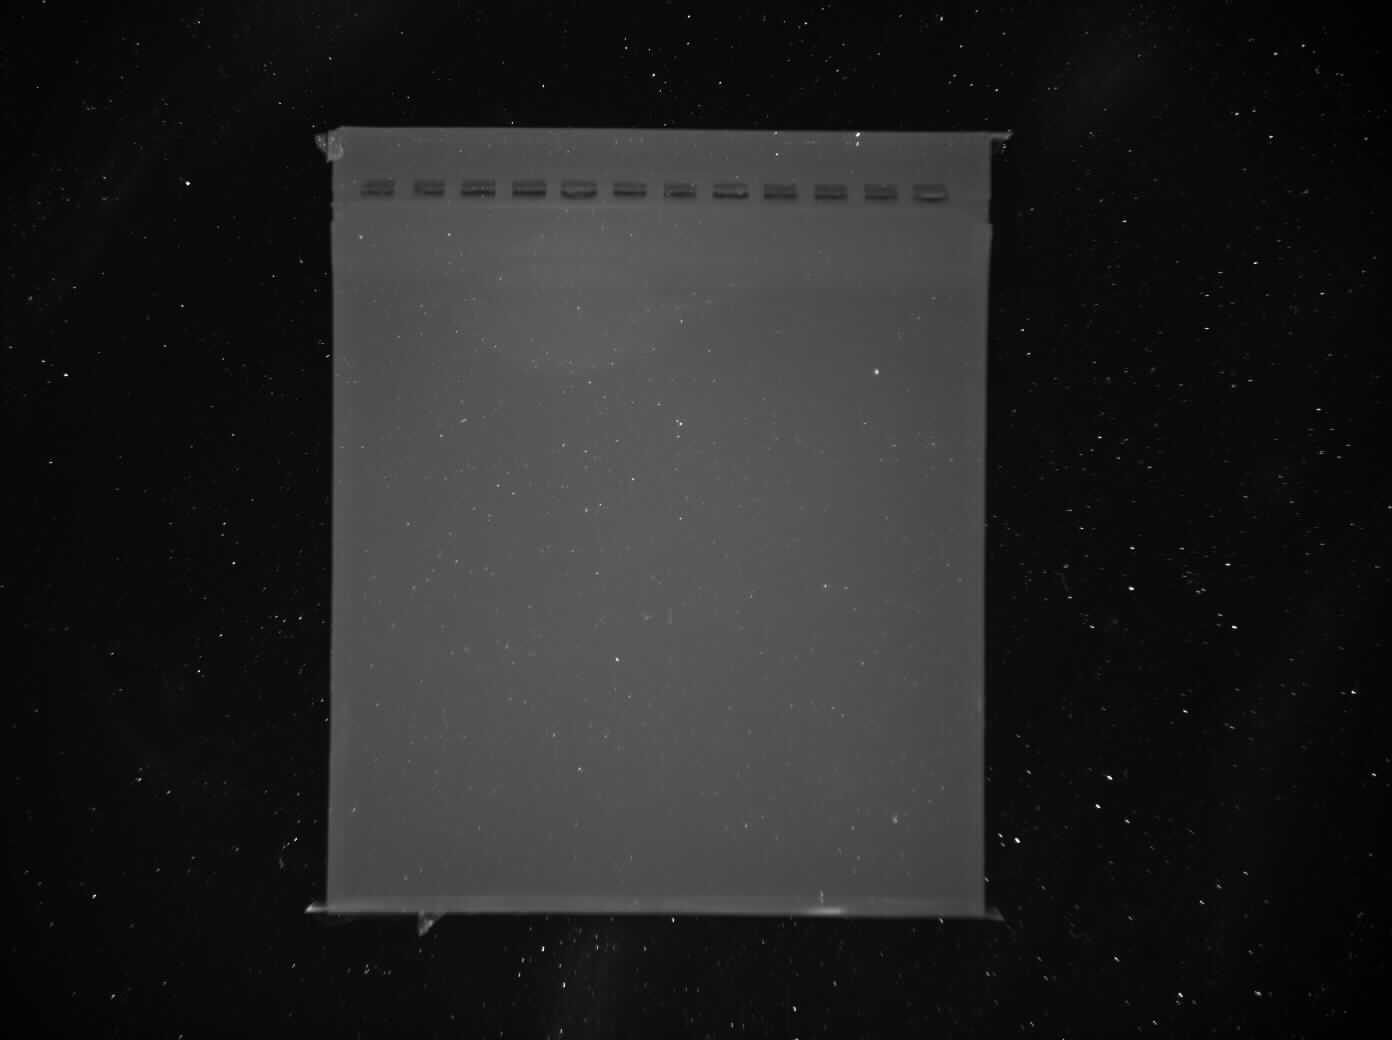
After the gel run, the gel was placed on a blue light transilluminator. Since the gel contained SYBR Safe, DNA bands should fluoresce under blue light and become visible.
In my final image, the gel itself and the wells were visible, but the band pattern was extremely faint or absent. This means the final gel art did not come through clearly.
Potential Failure Modes
Since the final image was mostly blank, there are several possible failure modes.
| Possible issue | Why it would matter |
|---|---|
| Too little DNA loaded | Bands would be too faint to see clearly |
| DNA was not loaded into the wells correctly | Sample could have floated away or leaked out |
| Restriction digest did not work | DNA fragments would not match the expected pattern |
| Enzyme mix-up | The lane pattern would not match the design |
| Missing or incorrect buffer | Enzymes or electrophoresis may not work properly |
| Gel ran for the wrong amount of time | Bands could stay near the top or migrate too far |
| Voltage issue | DNA may not migrate properly |
| Stain issue | DNA may be present but not visible |
| Imaging issue | Bands may be weak and not captured well by the camera |
| Pipetting error | Small volume mistakes can strongly affect final band brightness |
Based on the final image, the most likely issues are low DNA visibility, loading problems, or an issue with digestion/loading concentration. Since the wells are visible but the bands are not, the gel itself formed correctly, but the DNA signal did not show up clearly.
Technical Understanding
The lab helped me understand why gel electrophoresis works. DNA has a negatively charged phosphate backbone, so it moves toward the positive electrode in an electric field. The agarose gel acts like a molecular sieve. Smaller DNA fragments pass through the gel more easily and move farther, while larger fragments move more slowly.
Restriction enzymes make the band pattern predictable. Each enzyme recognizes specific DNA sequences and cuts at those sites. If we know the Lambda DNA sequence, we can predict the sizes of fragments produced by each enzyme. The gel result should then show bands corresponding to those predicted fragment sizes.
In this lab, that same molecular biology logic was used creatively. Instead of asking “is this plasmid correct?”, we asked whether enzyme choices could produce a visual pattern.
Reflection
Even though my final DNA art did not work well, this lab helped me understand the full gel electrophoresis workflow. I got practice preparing an agarose gel, setting up restriction digests, adding loading dye, loading wells, running the gel, and imaging the result.
The most difficult part was the precision required. Small errors in pipetting, labeling, loading, or timing can make the final gel unclear. I also saw that a gel result depends on many steps working together. If the design is correct but the DNA is not visible, the final art still fails.
The main takeaway for me was that gel electrophoresis is both conceptually simple and experimentally delicate. The idea is straightforward: cut DNA, separate fragments, and visualize bands. But getting clean bands requires careful execution at every step.
Final Result
My final result did not really show the intended DNA art pattern. The gel image was mostly blank, with the wells visible at the top but very little clear banding across the gel.
Even though the final image did not work well, the lab was still useful because it showed how many steps have to work correctly for a gel to produce a clear image.