Overview Materials: The following items were used in the lab:
P200 Pipette: 20-200uL Pipette tips Eppendorf tubes PCR Tubes Petri dish Sharpie Tube holder invitrogen E-Gel EX: Agarose 1% Solutions I used included:
Blue & Red food dye solutions DNA ladder solution (I was not able to get the exact details as the photo of the tube I took was blurry) H2O Machines I used included:
This laboratory module introduces Liquid Chromatography-Mass Spectrometry (LC-MS) as a premier tool for protein characterization, focusing on enhanced Green Fluorescent Protein (eGFP). The experiment follows a logical progression from “minimally perturbative” measurements to increasingly disruptive techniques, allowing students to determine three critical pieces of information: molecular weight, protein folding/structure, and primary amino acid sequence. By moving from intact protein analysis under both native and denaturing conditions to bottom-up peptide mapping, the lab demonstrates how a protein’s physical state directly influences its behavior in a mass spectrometer.Beyond standard eGFP analysis, the curriculum highlights the biochemical nuances of the protein, such as the autocatalytic self-cyclization of its fluorophore which involves a specific $20\text{ Da}$ mass loss. As a specialized bonus, the lab introduces Charge Detection Mass Spectrometry (CDMS) to analyze macromolecular structures that are too large for conventional MS. Students will use this technology to investigate the quaternary structure of Keyhole Limpet Hemocyanin (KLH), a massive complex that exists in multiple oligomeric states within the megadalton range.
Overview Materials: The following items were used to prepare the agarose gel:
Microwavable media storage bottles Agarose TAE buffer SYBR Safe DNA stain Gel tray & comb Eppendorf tubes PCR Tube rack Blue light transilluminator Imaging device Biological material I used included:
Overview Pre-Lab Process The idea of having to write my own code to create this art sounded terrifying at first given that I probably barely passed 6.100A. Then I found out a lot of it was written in Google Colab and felt relieved, until I kept running into issues so I decided to give up and just use Ronan’s code from his website: https://opentrons-art.rcdonovan.com/
Day One Materials: The following items were used:
PCR tubes Centrifuge tubes P200 pipette with 200uL tips P20 pipette with 20uL tips Nuclease-free water Sharpie Tube holder invitrogen E-Gel EX: Agarose 1% Biological material I used included:
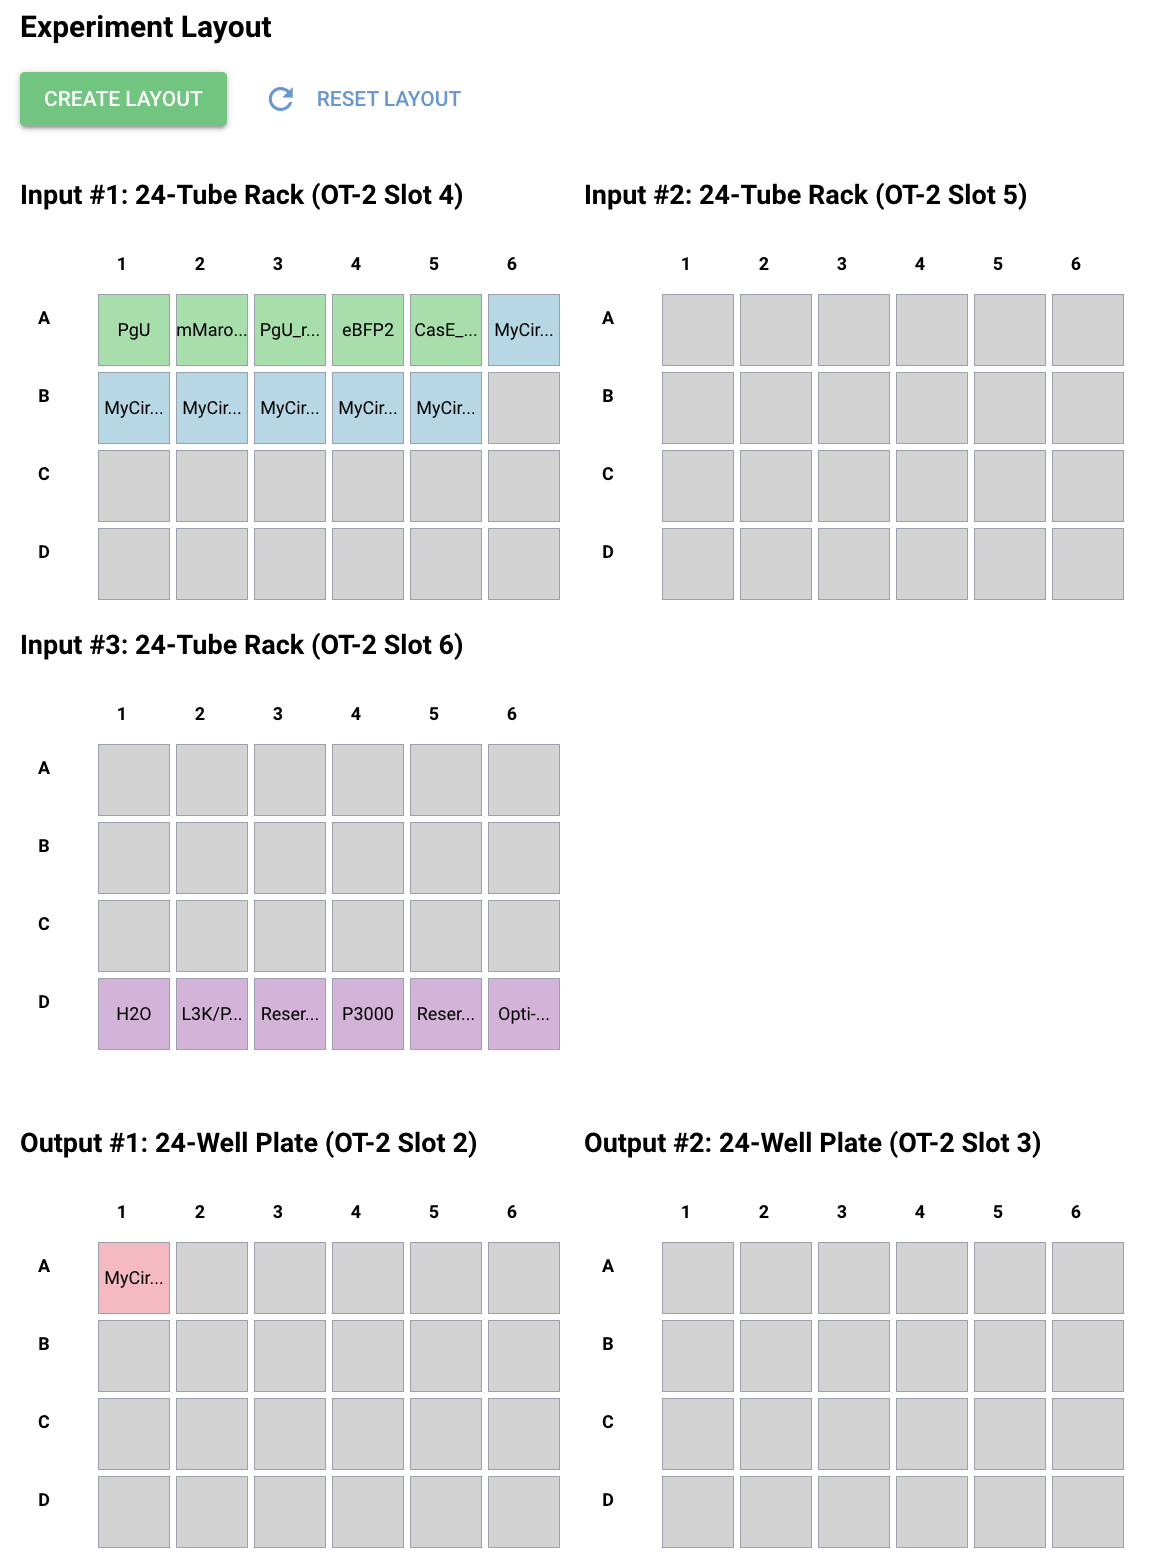
Protocol For this section, I had to first download Neuromorphic Wizard, which was a whole process but I managed. I just filled out the Genetic Circuit Design Template with a design of my choice: My group mates decided to do something pretty similar, so we went with the same overall ERN and ERN_rec_ERNs. These were the predictions and experimental set-up that Neuromorphic Wizard came up with.
DNA ladder solution (I was not able to get the exact details as the photo of the tube I took was blurry)
H2O
Machines I used included:
invitrogen E-Gel PowerSnap
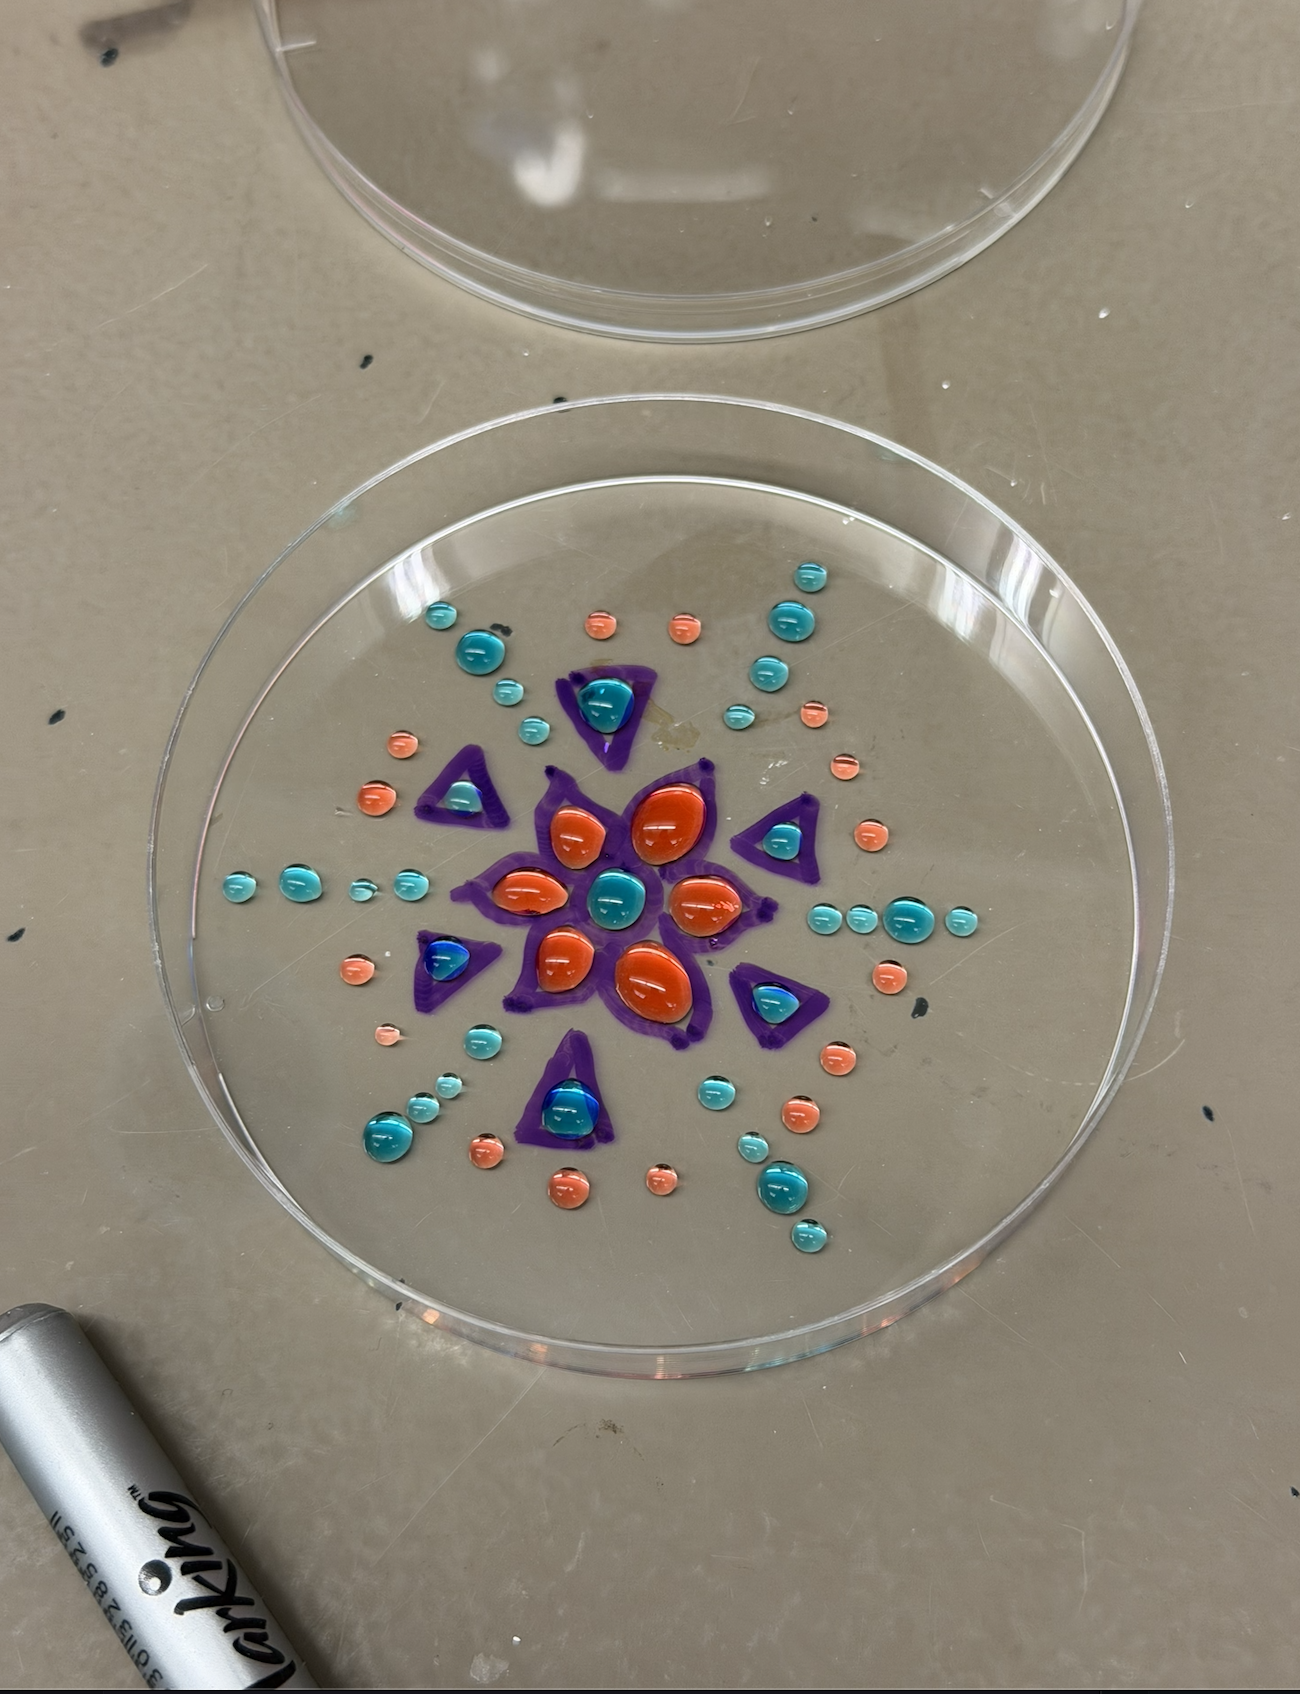
Pipette Art
In this part, I created artworks using food dye solutions in a petri dish. The methodology was as follows:
Grab a petri dish and draw a design (in my case, flowers with some geometric components).
Attach pipette tip to the pipette
Draw 150 uL of chosen solution into pipette
Pipette out droplets in pattern and shapes of choice
Dispose of tip when finished
Repeat steps 2-5 until satisfied
Admire artwork!
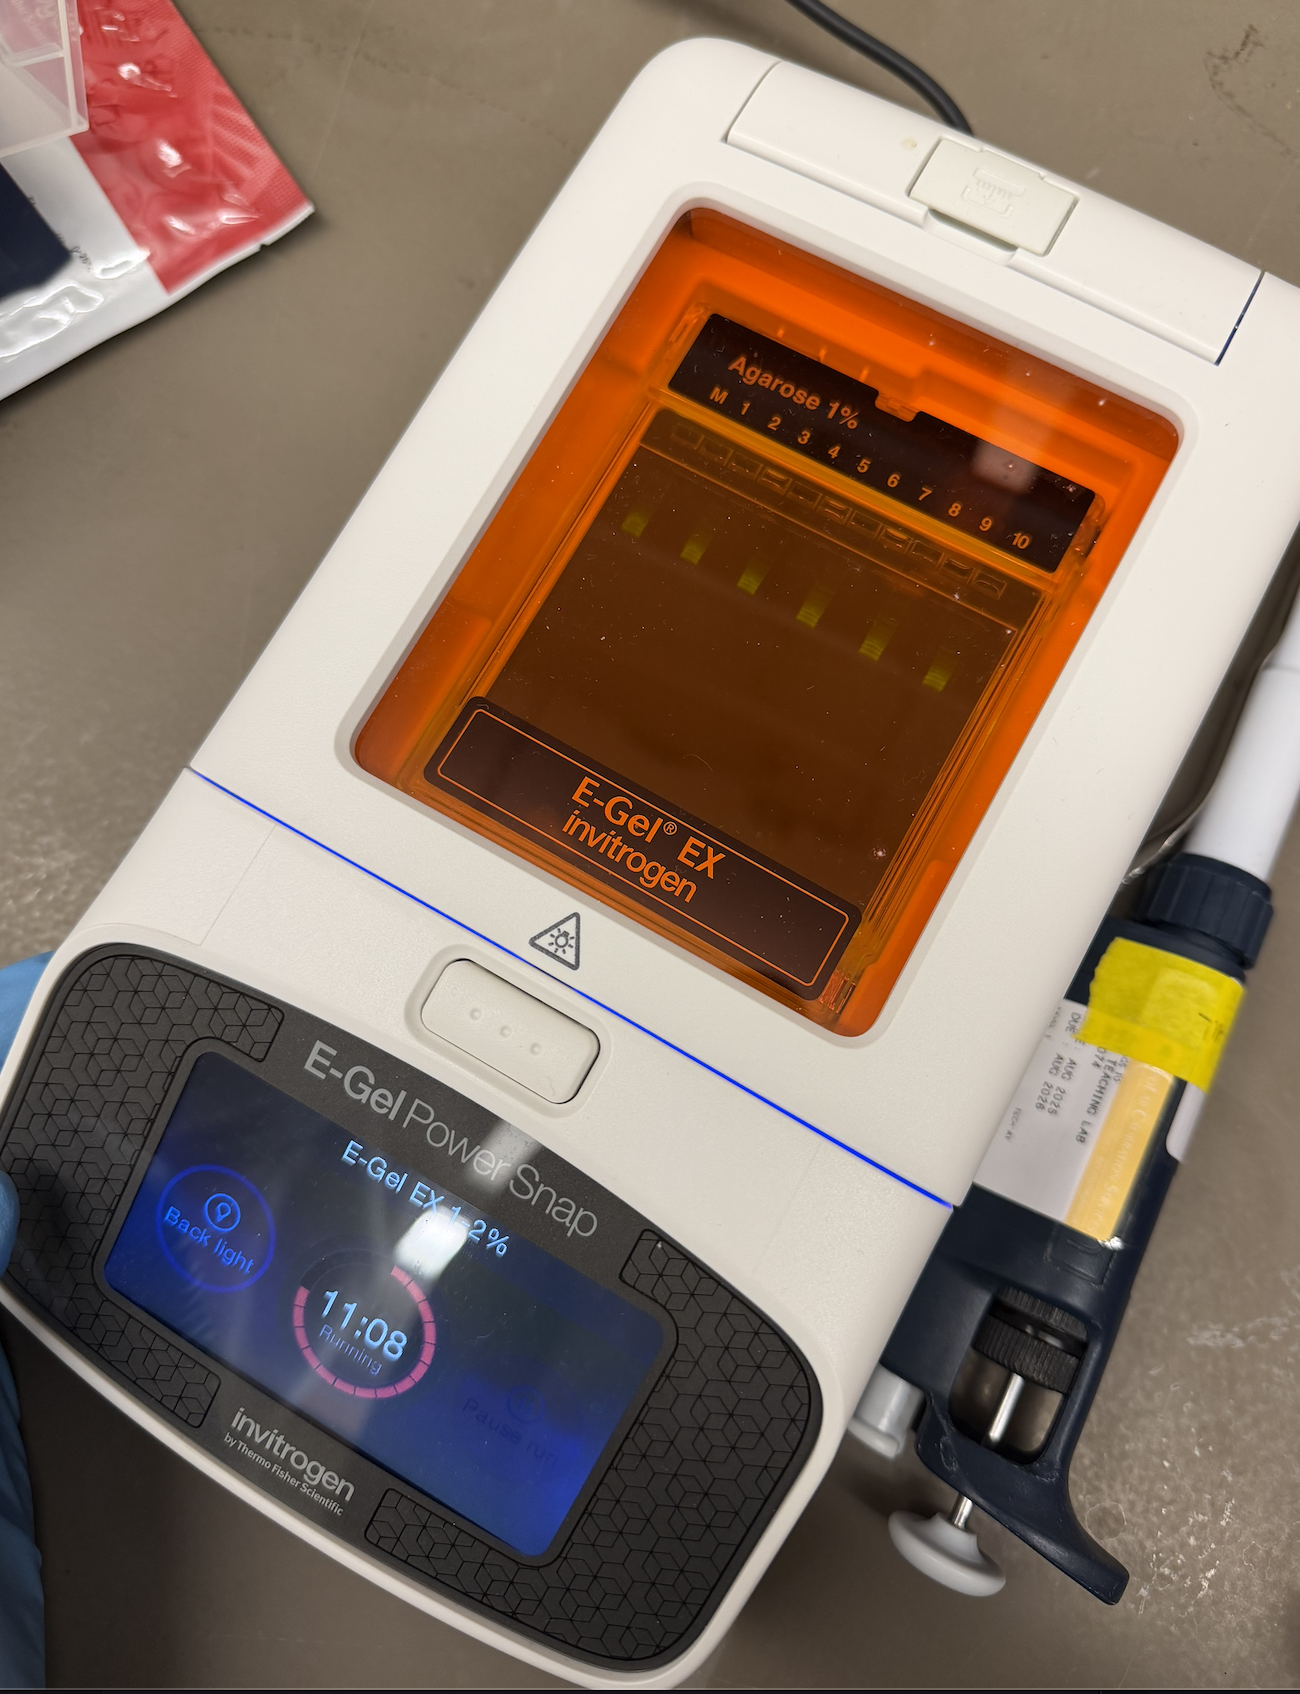
Gel Electrophoresis
In this part, I tried running an electrophoresis machine for the first time! My methodology was as follows:
Turn on invitrogen E-Gel PowerSnap
Remove invitrogen E-Gel EX: Agarose 1% from packet
Assemble package into machine
Attach pipette tip to the pipette
Open PCR tube of DNA ladder solution
Draw 15 uL of DNA ladder Solution
Pipette out complete volume into chosen wells
Dispose of pipette tip when finished and attach a new one
Draw 15 uL of H2O
Pipette out complete volume into remaining wells
Close lid of machine
Run for 15 minutes
Admire the process!
Pictures
Week 10 Lab: Mass Spectrometry
This laboratory module introduces Liquid Chromatography-Mass Spectrometry (LC-MS) as a premier tool for protein characterization, focusing on enhanced Green Fluorescent Protein (eGFP). The experiment follows a logical progression from “minimally perturbative” measurements to increasingly disruptive techniques, allowing students to determine three critical pieces of information: molecular weight, protein folding/structure, and primary amino acid sequence. By moving from intact protein analysis under both native and denaturing conditions to bottom-up peptide mapping, the lab demonstrates how a protein’s physical state directly influences its behavior in a mass spectrometer.Beyond standard eGFP analysis, the curriculum highlights the biochemical nuances of the protein, such as the autocatalytic self-cyclization of its fluorophore which involves a specific $20\text{ Da}$ mass loss. As a specialized bonus, the lab introduces Charge Detection Mass Spectrometry (CDMS) to analyze macromolecular structures that are too large for conventional MS. Students will use this technology to investigate the quaternary structure of Keyhole Limpet Hemocyanin (KLH), a massive complex that exists in multiple oligomeric states within the megadalton range.
Station 1:
The first stage involves a baseline analysis of the eGFP standard using LC-MS (Liquid Chromatography-Mass Spectrometry). During this process, the LC conditions convert the protein into its denatured form. The goal is to determine the protein’s overall molecular weight by measuring its mass-to-charge (m/z) ratio and charge (z) using the Waters Xevo G3 QTof system.
In this step, we didn’t really get to do much hands-on activity, or really get to enter things into the system. There was one step where someone in my group got to pipette a sample.
Station 2:
This was the second station for us, but technically the last stage. The final stage utilizes a “bottom-up” proteomics approach. The eGFP is enzymatically digested by trypsin, which cleaves the protein chain at specific Lysine and Arginine residues. The resulting peptides are fragmented in a collision cell using nitrogen gas. By measuring these fragments, the researchers can determine the precise amino acid sequence (primary structure) of the protein, a process known as peptide mapping.
Station 3:
Unfortunately, I had to leave by this time. In this step, chromatography is bypassed for direct infusion via a syringe pump to compare the protein’s physical states. Students compare “native” eGFP (folded and compact) with eGFP denatured by formic acid (unfolded and elongated). Because folded proteins have fewer solvent-accessible sites, they exhibit lower charge states, while unfolded proteins produce higher charge states, allowing the mass spectrometer to act as a tool for measuring protein folding and structural integrity.
Week 11: Cloud Lab
No real lab for this :D
Week 13 Lab: Golden Gate Assembly
I was in person! Impromptu so I don’t really have a lot of background information. We had like a Golden-Gate Assembly introduction
Week 2 Lab: DNA Gel Art
Overview
Materials:
The following items were used to prepare the agarose gel:
Microwavable media storage bottles
Agarose
TAE buffer
SYBR Safe DNA stain
Gel tray & comb
Eppendorf tubes
PCR Tube rack
Blue light transilluminator
Imaging device
Biological material I used included:
Lambda DNA
Nuclease-free water
Enzyme buffer
Restriction Enzymes: EcoRV, SacI, BamHI, KpnI
Machines I used included:
Voltage output source
Microwave
Buffer Preparation
In this part, we had to create the buffer. We wanted to achieve 400mL and calculations were done accordingly.
Pour 8 mL of [50] TAE Buffer into storage bottle
Pour 492 mL of water into storage bottle to dilute it.
Add dye
Gel Preparation
Add 0.75g of agarose powder and 75mL of the TAE buffer to a microwaveable bottle.
Heat the flask with the lid loosened in pulses of 15-20
Remove once the solution is bubbling and homogeneous
Once cooled, add 7.5 uL of SYBR Safe DNA stain to the solution
Pour the gel into the gel tray
Insert the comb into the gel tray
Allow gel to solidfy at room temperature
Restriction Digest
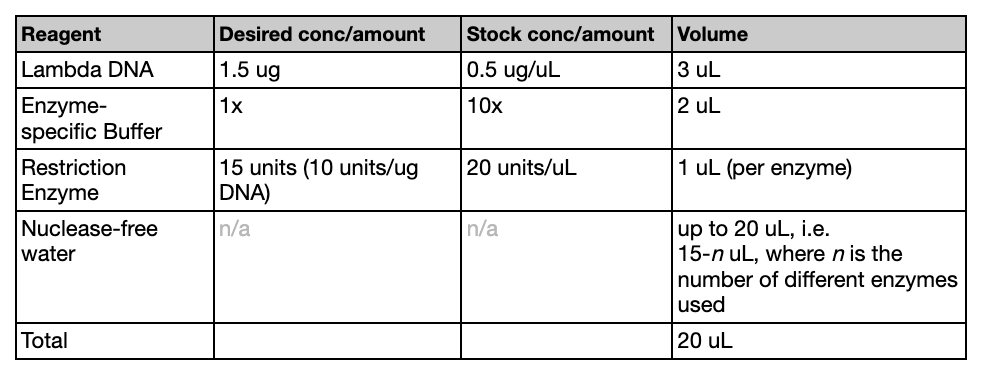
While the gel was solidifying, we created the digests. The following table (referenced from the Lab guide provided by HTGAA) was used to create the correct mixtures. We used EcoRV, SacI, BamHI, KpnI. The solution volume should add up to 20 uL total.
After the mixtures were created, the tubes were placed in an incubator for 30 minutes at 37ºC.
Gel Run
This part of the experiment should be done once the gel has set
Add loading dye into each of the Eppendorf tubes
Remove the comb carefully
Fill the casting wells with TAE so that it goes just barely over the gel
Load 20 uL of solution into each of the wells according to the pattern
Attach the red/black lead & make sure the red lead is placed opposite to the loading wells
Run the gel at 80-115V for around 45 minutes and check that everything looks to be correct.
Imaging Results
Once the electrophoresis is complete, remove the gel from the gel box
Place the gel onto the blu light transilluminator
Turn on the blue light transilluminator
Make sure the imaging device sees the gel clearly
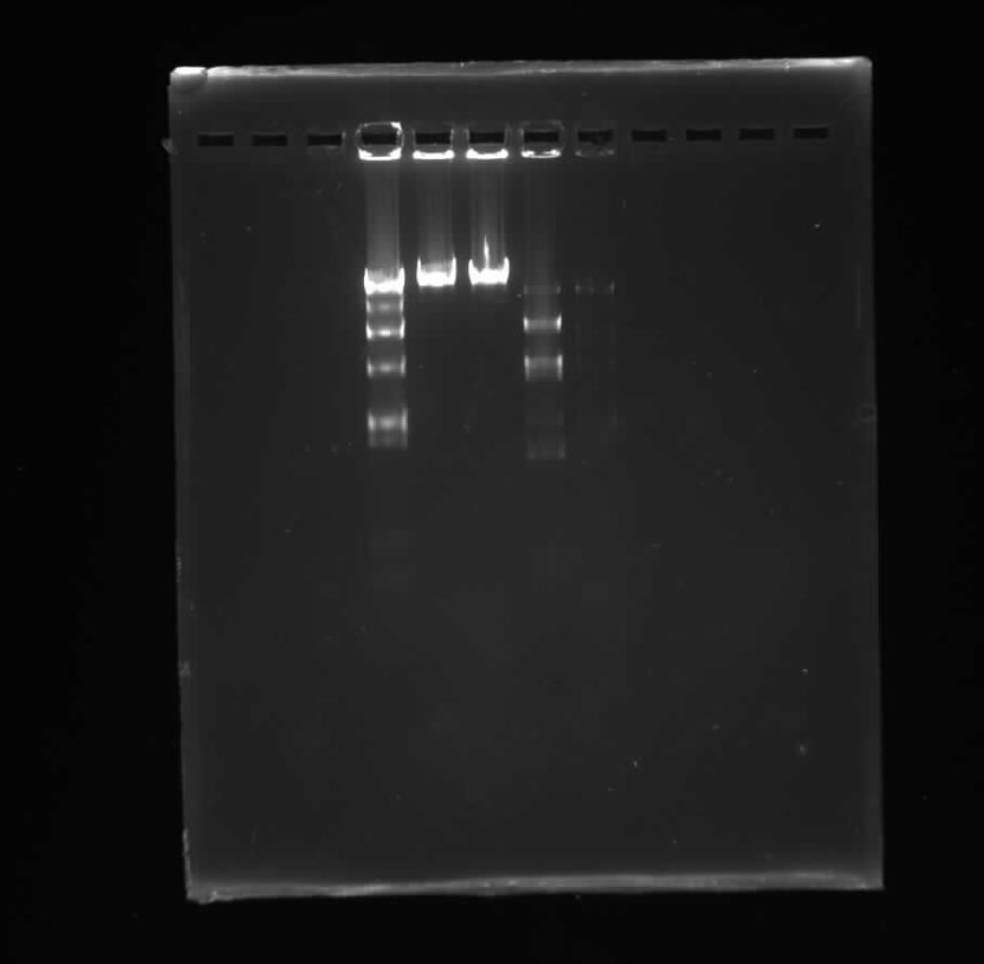
Final Results:
To be honest, I’m not really sure why our sample was messed up. It’s possible there was error at very important steps, like running the gel, incubating the mixtures or even formulating them correctly. It looks nothing like our proposed pattern.
The idea of having to write my own code to create this art sounded terrifying at first given that I probably barely passed 6.100A. Then I found out a lot of it was written in Google Colab and felt relieved, until I kept running into issues so I decided to give up and just use Ronan’s code from his website: https://opentrons-art.rcdonovan.com/
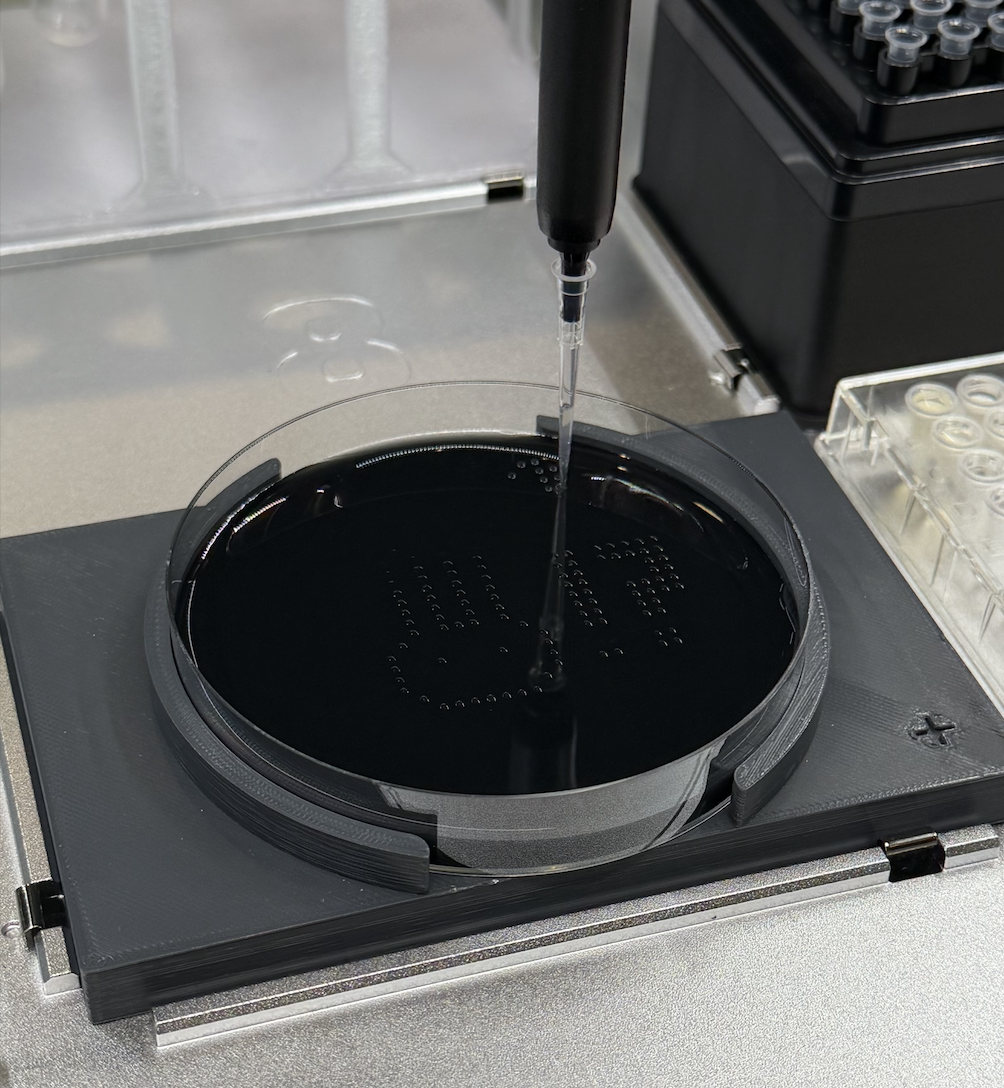
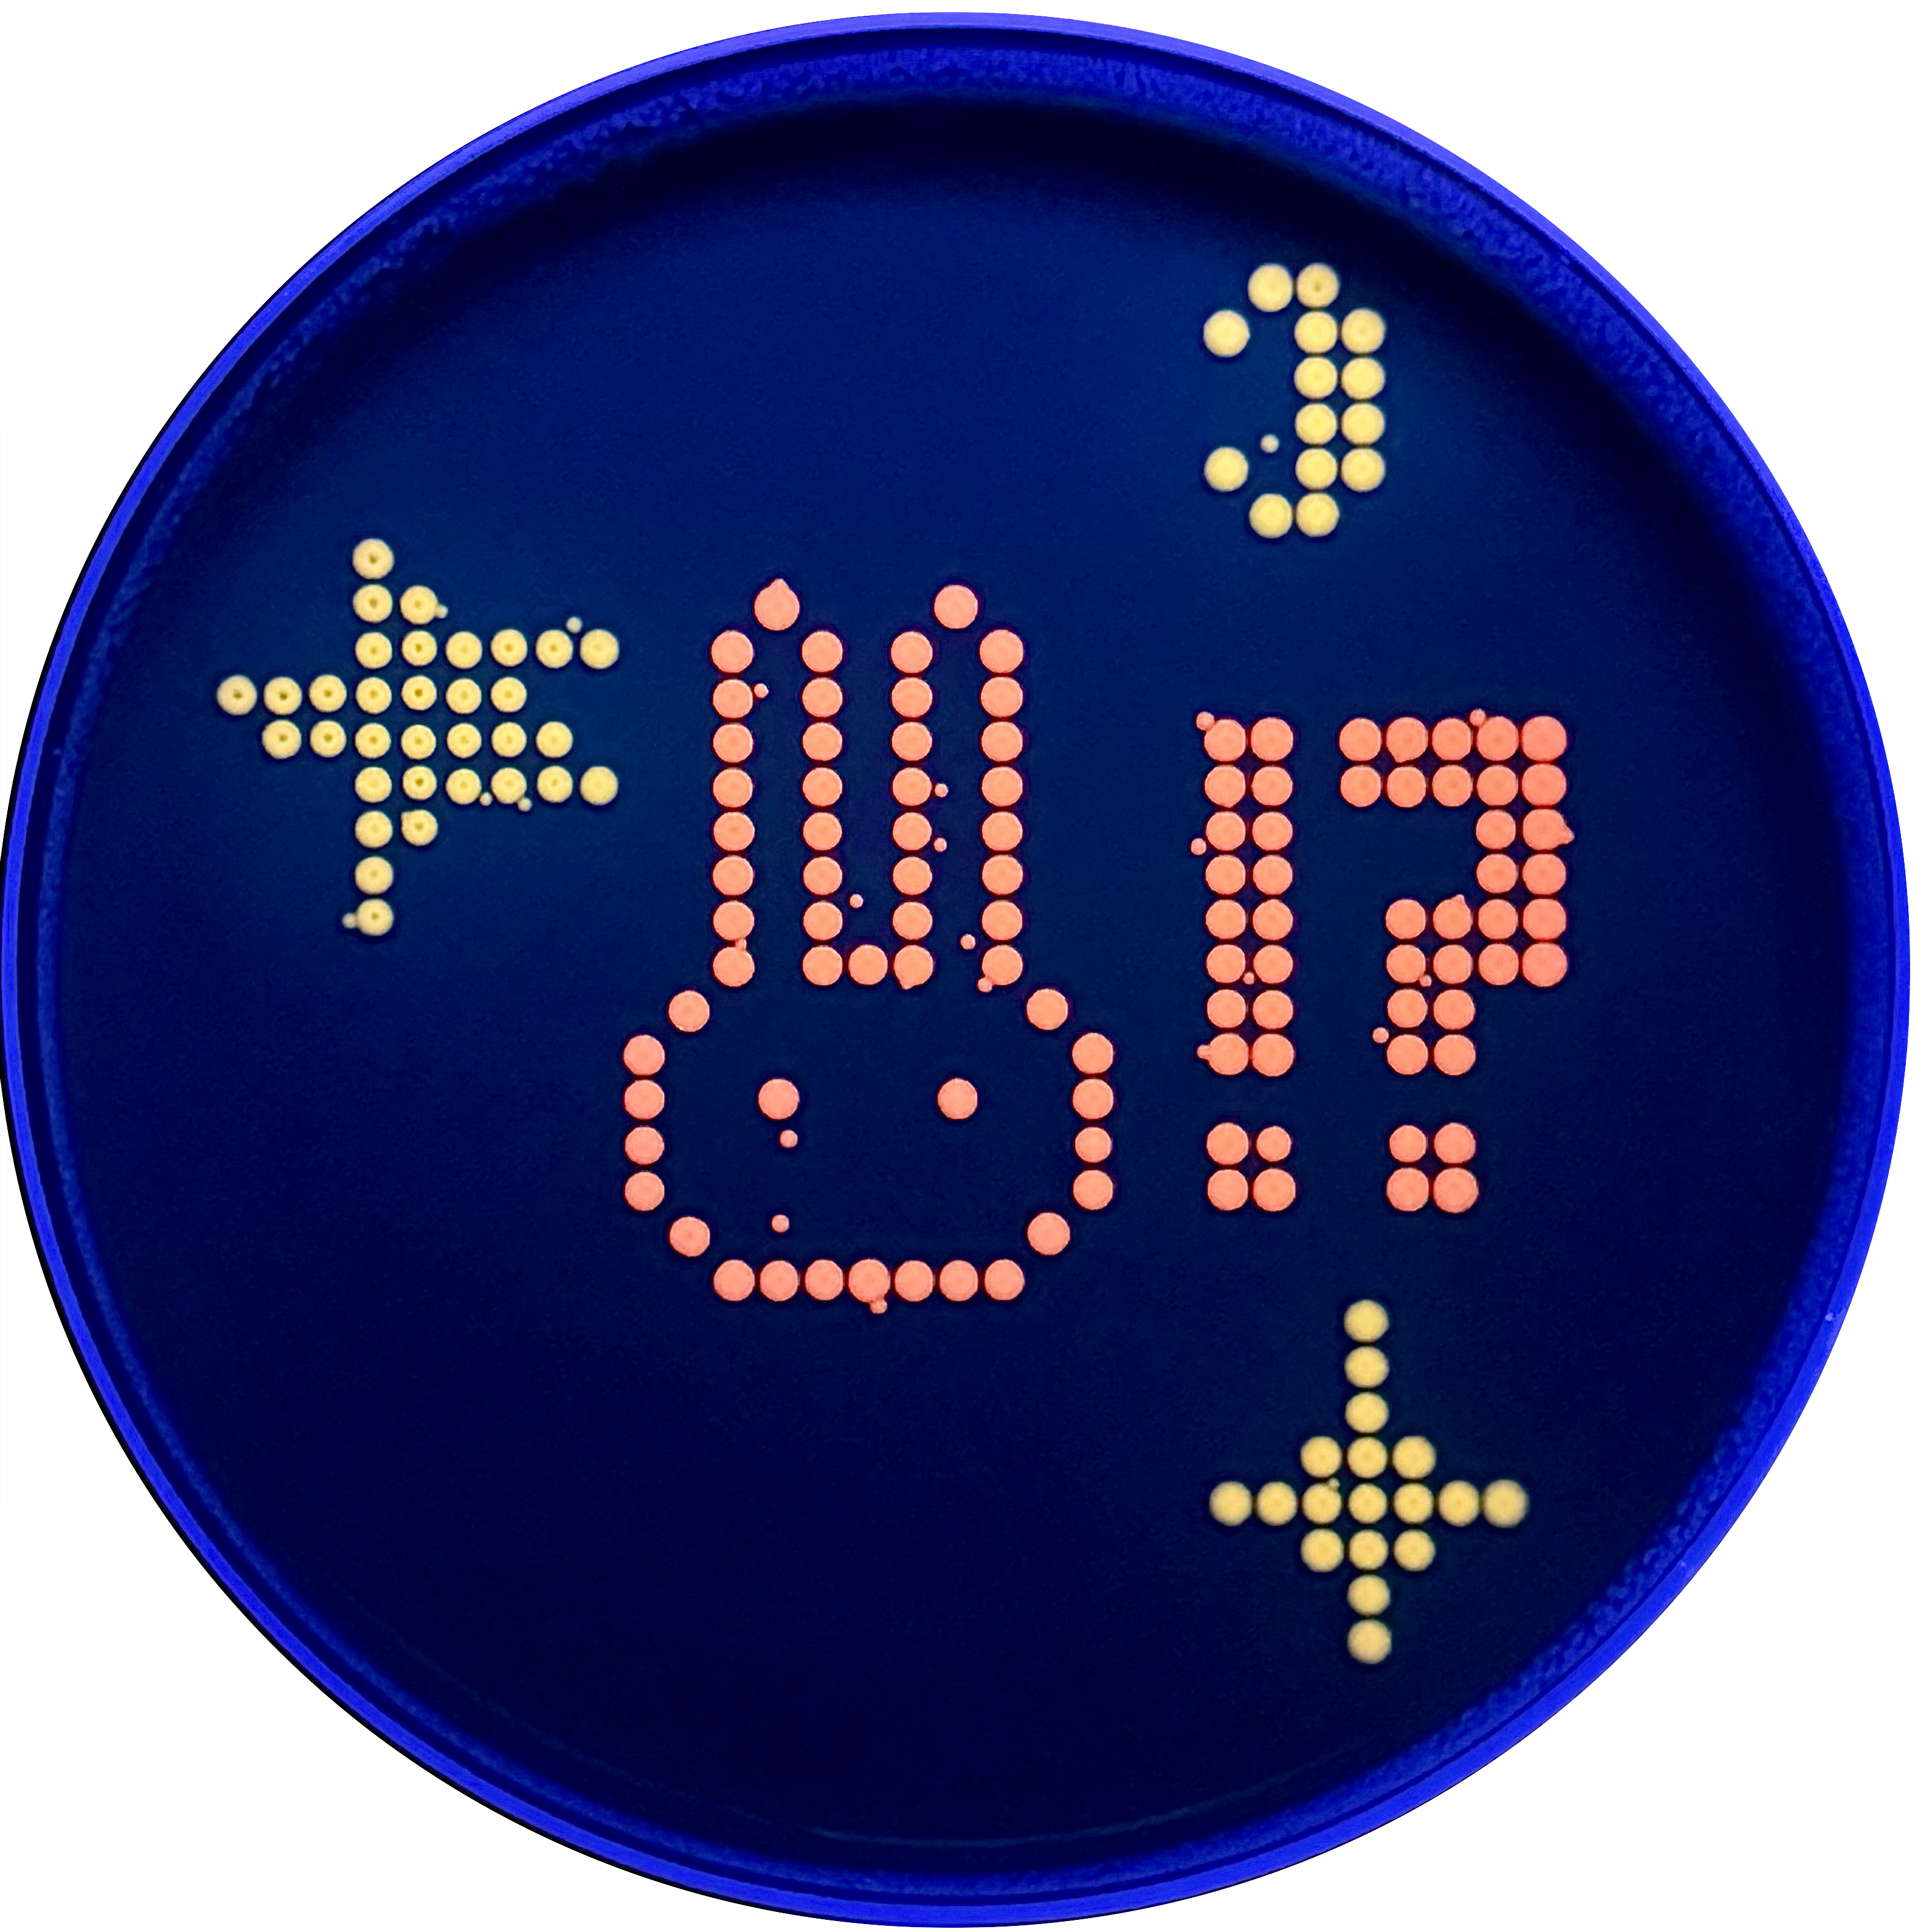
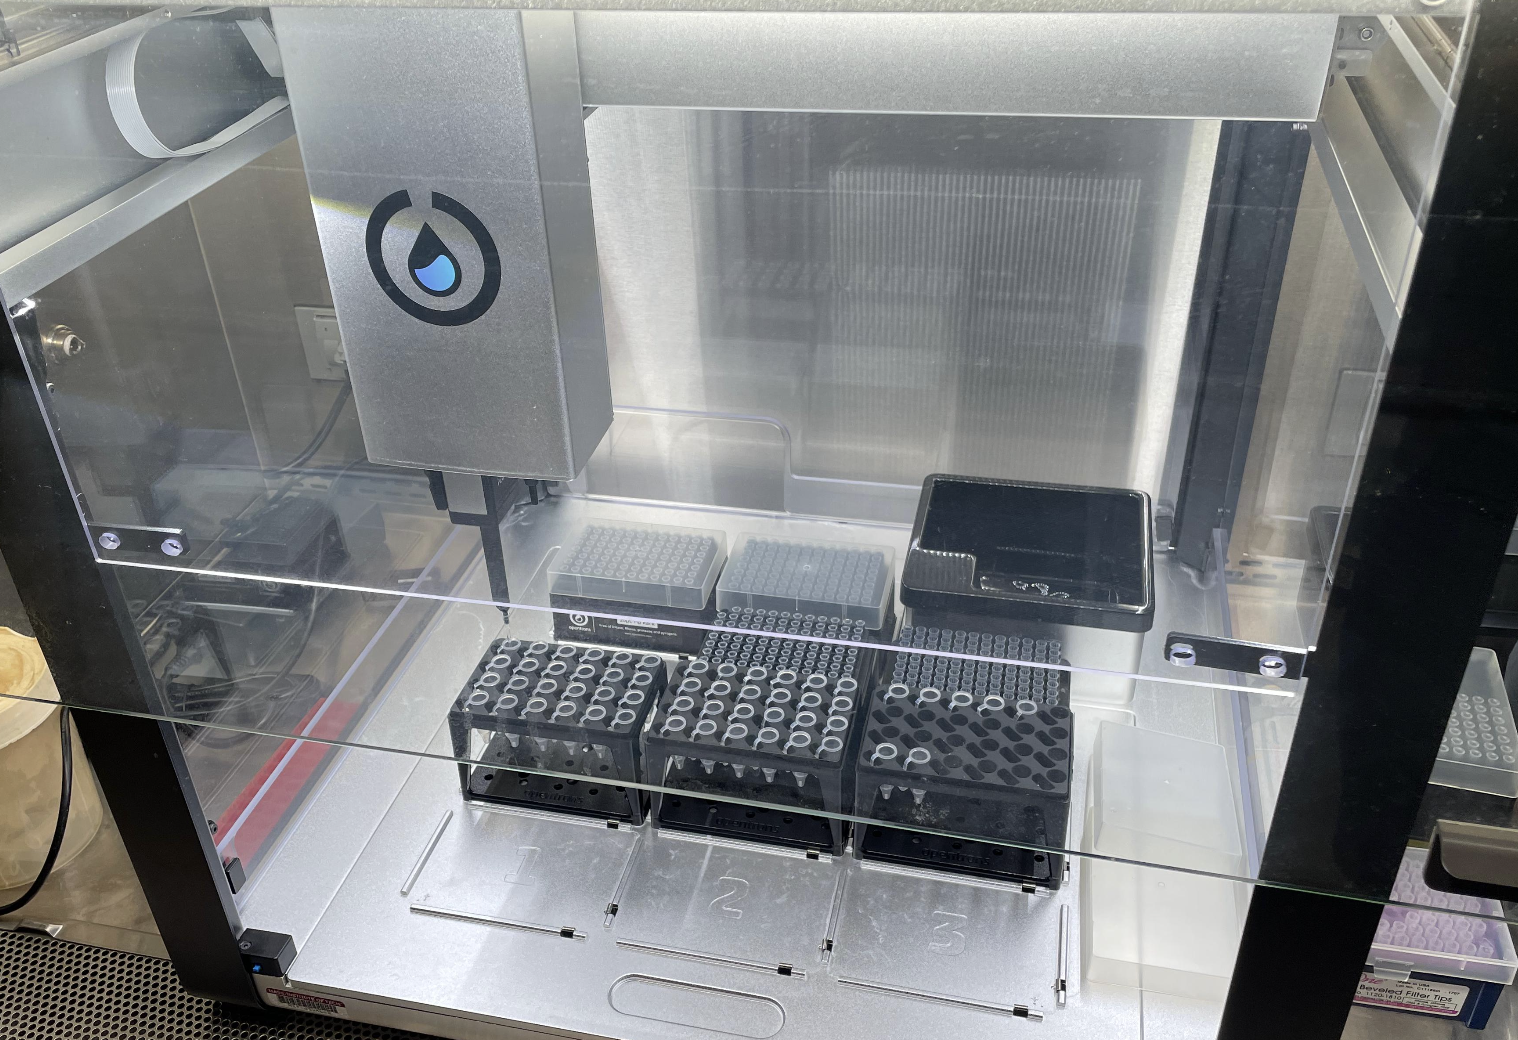
This was a pretty chill session. To be honest, I don’t know the details of how running the program works, but I was allowed to hit the start button! It was fascinating watching the robot do it’s thing. Because people came before me, if there was any troubleshooting that had to go on, it was done by the time I arrived.
Post Lab
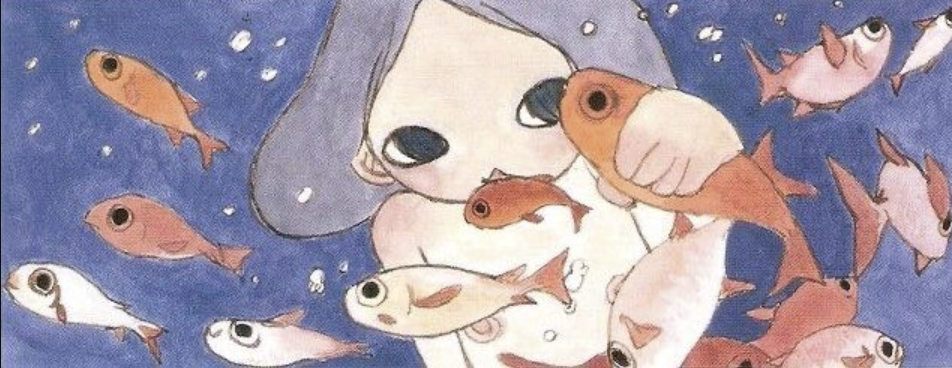
My design turned out super cute! I’m not super sure why there are tiny dots that appeared which don’t pertain to my design, perhaps this is contamination?
Post-Lab Reflection
I think I’m a materials major for a reason.
Code:
from opentrons import types

import string

metadata = {
    'protocolName': '{YOUR NAME} - Opentrons Art - HTGAA',
    'author': 'HTGAA',
    'source': 'HTGAA 2026',
    'apiLevel': '2.20'
}

Z_VALUE_AGAR = 2.0
POINT_SIZE = 0.75

mscarlet_i_points = [(-8.8,17.6), (0,17.6), (-11,15.4), (-6.6,15.4), (-2.2,15.4), (2.2,15.4), (-11,13.2), (-6.6,13.2), (-2.2,13.2), (2.2,13.2), (-11,11), (-6.6,11), (-2.2,11), (2.2,11), (13.2,11), (15.4,11), (19.8,11), (22,11), (24.2,11), (26.4,11), (28.6,11), (-11,8.8), (-6.6,8.8), (-2.2,8.8), (2.2,8.8), (13.2,8.8), (15.4,8.8), (19.8,8.8), (22,8.8), (24.2,8.8), (26.4,8.8), (28.6,8.8), (-11,6.6), (-6.6,6.6), (-2.2,6.6), (2.2,6.6), (13.2,6.6), (15.4,6.6), (26.4,6.6), (28.6,6.6), (-11,4.4), (-6.6,4.4), (-2.2,4.4), (2.2,4.4), (13.2,4.4), (15.4,4.4), (26.4,4.4), (28.6,4.4), (-11,2.2), (-6.6,2.2), (-2.2,2.2), (2.2,2.2), (13.2,2.2), (15.4,2.2), (22,2.2), (24.2,2.2), (26.4,2.2), (28.6,2.2), (-11,0), (-6.6,0), (-4.4,0), (-2.2,0), (2.2,0), (13.2,0), (15.4,0), (22,0), (24.2,0), (26.4,0), (28.6,0), (-13.2,-2.2), (4.4,-2.2), (13.2,-2.2), (15.4,-2.2), (22,-2.2), (24.2,-2.2), (-15.4,-4.4), (6.6,-4.4), (13.2,-4.4), (15.4,-4.4), (22,-4.4), (24.2,-4.4), (-15.4,-6.6), (-8.8,-6.6), (0,-6.6), (6.6,-6.6), (-15.4,-8.8), (6.6,-8.8), (13.2,-8.8), (15.4,-8.8), (22,-8.8), (24.2,-8.8), (-15.4,-11), (6.6,-11), (13.2,-11), (15.4,-11), (22,-11), (24.2,-11), (-13.2,-13.2), (4.4,-13.2), (-11,-15.4), (-8.8,-15.4), (-6.6,-15.4), (-4.4,-15.4), (-2.2,-15.4), (0,-15.4), (2.2,-15.4)]
mko2_points = [(15.4,33), (17.6,33), (13.2,30.8), (17.6,30.8), (19.8,30.8), (17.6,28.6), (19.8,28.6), (17.6,26.4), (19.8,26.4), (13.2,24.2), (17.6,24.2), (19.8,24.2), (15.4,22), (17.6,22), (-28.6,19.8), (-28.6,17.6), (-26.4,17.6), (-28.6,15.4), (-26.4,15.4), (-24.2,15.4), (-22,15.4), (-19.8,15.4), (-17.6,15.4), (-35.2,13.2), (-33,13.2), (-30.8,13.2), (-28.6,13.2), (-26.4,13.2), (-24.2,13.2), (-22,13.2), (-33,11), (-30.8,11), (-28.6,11), (-26.4,11), (-24.2,11), (-22,11), (-19.8,11), (-28.6,8.8), (-26.4,8.8), (-24.2,8.8), (-22,8.8), (-19.8,8.8), (-17.6,8.8), (-28.6,6.6), (-26.4,6.6), (-28.6,4.4), (-28.6,2.2), (19.8,-17.6), (19.8,-19.8), (19.8,-22), (17.6,-24.2), (19.8,-24.2), (22,-24.2), (13.2,-26.4), (15.4,-26.4), (17.6,-26.4), (19.8,-26.4), (22,-26.4), (24.2,-26.4), (26.4,-26.4), (17.6,-28.6), (19.8,-28.6), (22,-28.6), (19.8,-30.8), (19.8,-33)]

point_name_pairing = [("mscarlet_i", mscarlet_i_points),("mko2", mko2_points)]

# Robot deck setup constants
TIP_RACK_DECK_SLOT = 9
COLORS_DECK_SLOT = 6
AGAR_DECK_SLOT = 5
PIPETTE_STARTING_TIP_WELL = 'A1'

# Place the PCR tubes in this order
well_colors = {
    'A1': 'sfGFP',
    'A2': 'mRFP1',
    'A3': 'mKO2',
    'A4': 'Venus',
    'A5': 'mKate2_TF',
    'A6': 'Azurite',
    'A7': 'mCerulean3',
    'A8': 'mClover3',
    'A9': 'mJuniper',
    'A10': 'mTurquoise2',
    'A11': 'mBanana',
    'A12': 'mPlum',
    'B1': 'Electra2',
    'B2': 'mWasabi',
    'B3': 'mScarlet_I',
    'B4': 'mPapaya',
    'B5': 'eqFP578',
    'B6': 'tdTomato',
    'B7': 'DsRed',
    'B8': 'mKate2',
    'B9': 'EGFP',
    'B10': 'mRuby2',
    'B11': 'TagBFP',
    'B12': 'mChartreuse_TF',
    'C1': 'mLychee_TF',
    'C2': 'mTagBFP2',
    'C3': 'mEGFP',
    'C4': 'mNeonGreen',
    'C5': 'mAzamiGreen',
    'C6': 'mWatermelon',
    'C7': 'avGFP',
    'C8': 'mCitrine',
    'C9': 'mVenus',
    'C10': 'mCherry',
    'C11': 'mHoneydew',
    'C12': 'TagRFP',
    'D1': 'mTFP1',
    'D2': 'Ultramarine',
    'D3': 'ZsGreen1',
    'D4': 'mMiCy',
    'D5': 'mStayGold2',
    'D6': 'PA_GFP'
}

volume_used = {
    'mscarlet_i': 0,
    'mko2': 0
}

def update_volume_remaining(current_color, quantity_to_aspirate):
    rows = string.ascii_uppercase
    for well, color in list(well_colors.items()):
        if color == current_color:
            if (volume_used[current_color] + quantity_to_aspirate) > 250:
                # Move to next well horizontally by advancing row letter, keeping column number
                row = well[0]
                col = well[1:]

                # Find next row letter
                next_row = rows[rows.index(row) + 1]
                next_well = f"{next_row}{col}"

                del well_colors[well]
                well_colors[next_well] = current_color
                volume_used[current_color] = quantity_to_aspirate
            else:
                volume_used[current_color] += quantity_to_aspirate
            break

def run(protocol):
    # Load labware, modules and pipettes
    protocol.home()

    # Tips
    tips_20ul = protocol.load_labware('opentrons_96_tiprack_20ul', TIP_RACK_DECK_SLOT, 'Opentrons 20uL Tips')

    # Pipettes
    pipette_20ul = protocol.load_instrument("p20_single_gen2", "right", [tips_20ul])

    # PCR Plate
    temperature_plate = protocol.load_labware('opentrons_96_aluminumblock_generic_pcr_strip_200ul', 6)

    # Agar Plate
    agar_plate = protocol.load_labware('htgaa_agar_plate', AGAR_DECK_SLOT, 'Agar Plate')
    agar_plate.set_offset(x=0.00, y=0.00, z=Z_VALUE_AGAR)

    # Get the top-center of the plate, make sure the plate was calibrated before running this
    center_location = agar_plate['A1'].top()

    pipette_20ul.starting_tip = tips_20ul.well(PIPETTE_STARTING_TIP_WELL)

    # Helper function (dispensing)
    def dispense_and_jog(pipette, volume, location):
        assert(isinstance(volume, (int, float)))
        # Go above the location
        above_location = location.move(types.Point(z=location.point.z + 2))
        pipette.move_to(above_location)
        # Go downwards and dispense
        pipette.dispense(volume, location)
        # Go upwards to avoid smearing
        pipette.move_to(above_location)

    # Helper function (color location)
    def location_of_color(color_string):
        for well,color in well_colors.items():
            if color.lower() == color_string.lower():
                return temperature_plate[well]
        raise ValueError(f"No well found with color {color_string}")

    # Print pattern by iterating over lists
    for i, (current_color, point_list) in enumerate(point_name_pairing):
        # Skip the rest of the loop if the list is empty
        if not point_list:
            continue

        # Get the tip for this run, set the bacteria color, and the aspirate bacteria of choice
        pipette_20ul.pick_up_tip()
        max_aspirate = int(18 // POINT_SIZE) * POINT_SIZE
        quantity_to_aspirate = min(len(point_list)*POINT_SIZE, max_aspirate)
        update_volume_remaining(current_color, quantity_to_aspirate)
        pipette_20ul.aspirate(quantity_to_aspirate, location_of_color(current_color))

        # Iterate over the current points list and dispense them, refilling along the way
        for i in range(len(point_list)):
            x, y = point_list[i]
            adjusted_location = center_location.move(types.Point(x, y))

            dispense_and_jog(pipette_20ul, POINT_SIZE, adjusted_location)

            if pipette_20ul.current_volume == 0 and len(point_list[i+1:]) > 0:
                quantity_to_aspirate = min(len(point_list[i:])*POINT_SIZE, max_aspirate)
                update_volume_remaining(current_color, quantity_to_aspirate)
                pipette_20ul.aspirate(quantity_to_aspirate, location_of_color(current_color))

        # Drop tip between each color
        pipette_20ul.drop_tip()
Week 4 HW: Protein Design Part I
This lab is embedded into Part 3 of my Homework for Week 4
Week 6: Gibson Assembly
Day One
Materials:
The following items were used:
PCR tubes
Centrifuge tubes
P200 pipette with 200uL tips
P20 pipette with 20uL tips
Nuclease-free water
Sharpie
Tube holder
invitrogen E-Gel EX: Agarose 1%
Biological material I used included:
Backbone fragment purified
Color fragment(s) purified in Light Pink, Blue, Purple
Backbone Forward Primer
Backbone Reverse Primer
Color Reverse Primer
Template mUAV Plasmid
Phusion HF PCR Mix
DNA Binding Buffer
Machines I used included:
Centrifuge
invitrogen E-Gel PowerSnap
PCR Incubator
Part 1: PCR
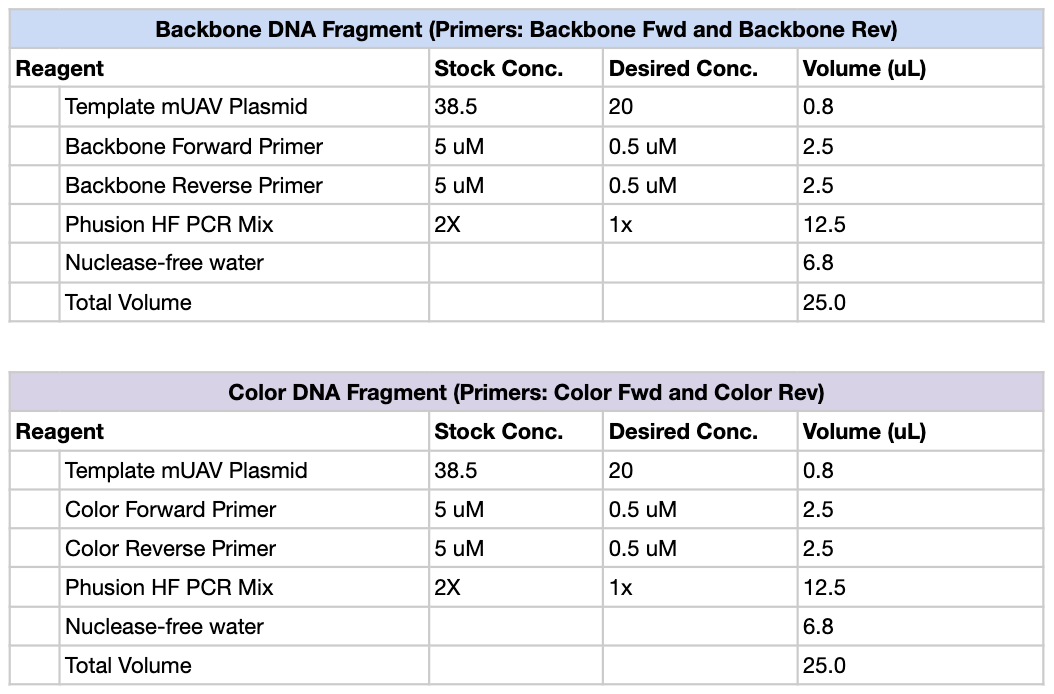
First, we created PCR mixtures according to the following table, using Light Pink, Purple and Blue as our color primers of choice. So total, there should be 4 PCR tubes: Backbone, Light Pink, Purple and Blue.
We then ran the PCR reaction with the following settings:
Both of these tables were pulled from the HTGAA lab handout.
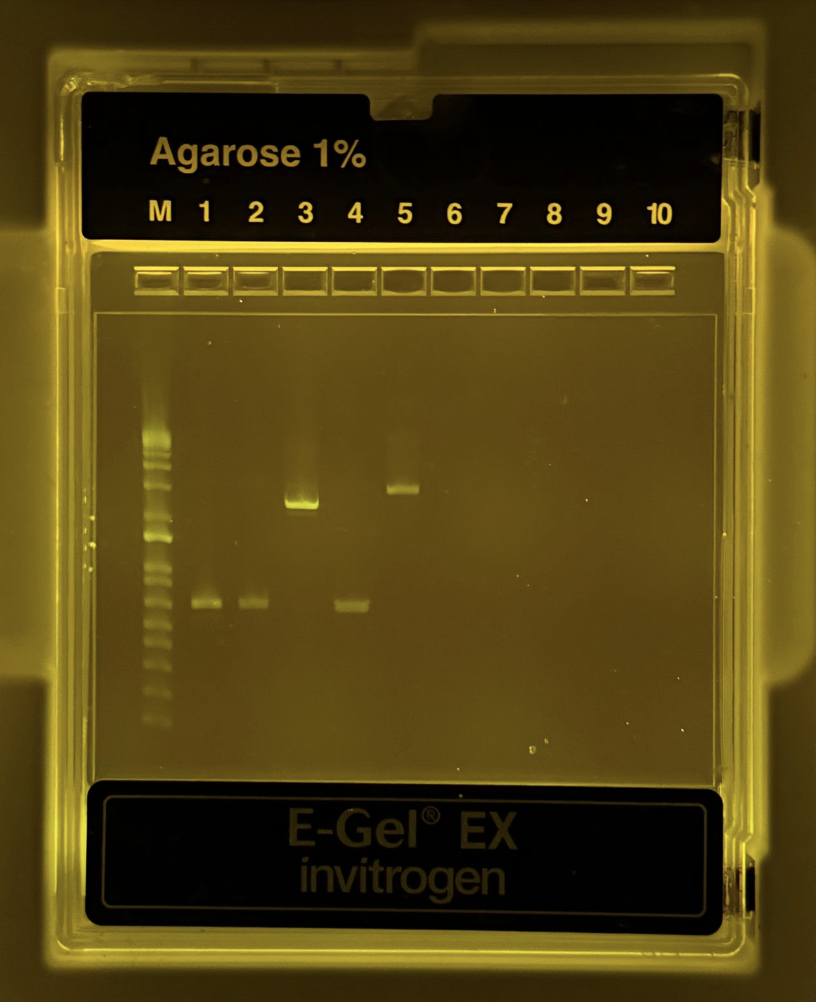
Part 2: Gel Diagnostic
After the PCR reaction was complete, we had to run a gel diagnostic to ensure this reaction was completed correctly. The protocol was as follows:
Take 2uL of each mixture and transferit into new PCR tubes (labeled).
Pipette 2uL of mUVA into new tube.
Add 20uL of water to each PCR tube.
Unpack gel electrophoresis cassette
Load into machine
Pipette DNA Ladder into first well
Pipette 20uL of mixture from each NEW PCR tube into the correct wells. In total, there were 6 full wells.
Use the automatic setting for 1%, and wait 10 minutes.
Thankfully, it was successful!
Part 3: DNA Purification and Quantification
Pipette 100uL of DNA Binding Buffer into a centrifuge tube
Add 20uL of PCR product
Mix briefly by vortexing
Transfer 120uL of the mixture into separate columns with a collection tube
Centrifuge for 1 minute
Discard the flowthrough
Add 200 uL of DNA wash buffer to the column
Centrifuge for 1 min
Repeat the last two steps
Transfer the column to new tube
Discard flow through
Add 6uL of nuclease free water to the column matrix
Allow it to sit for 2 min
Centrifuge for 1 min
Store and save
Day Two
Materials
Items Used:
P1000 pipette with 1000uL tips
P20 pipette with 10uL tips
PCR Tubes
Biological Materials Used:
Purified Fragments
Gibson Assembly Master Mix
Nuclease Free Water
LB-Agar plates with Chioramphenicol
SOC Growth Medium
DH5α competent cells
Machines Used:
Thermal Cycler
Shaking Incubator
Waterbath set to 42C
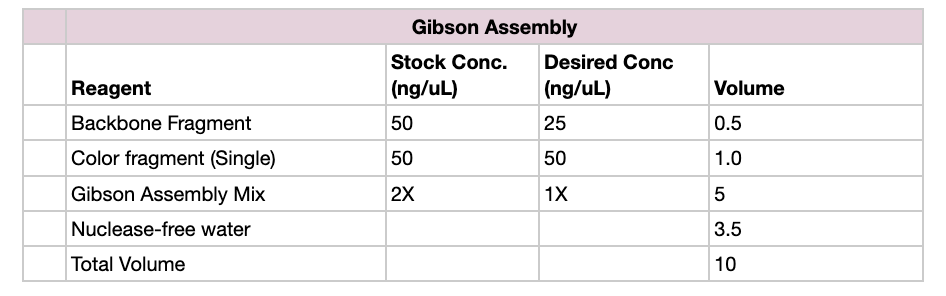
Part 1: Setting Up Gibson Assembly
Set up reaction in proportions according to the table below, for each color fragment
Incubate the reaction at 50 C for 30 minutes in a heat block
Add 100 uL of nuclease-free water to dilute sample
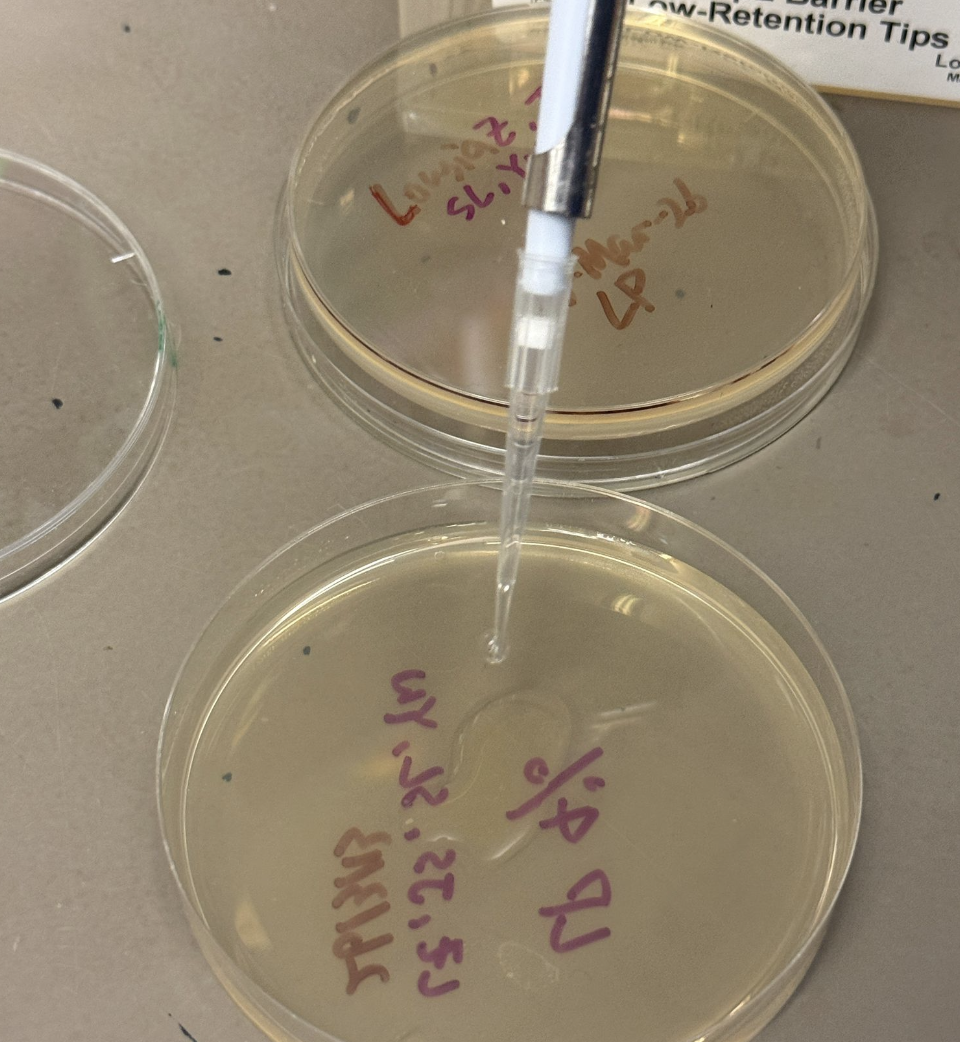
Part 2: Transformation
Transfer 20uL of competent cells to each tube
Transfe purified assembly products into each tube (8 total, 3 Light Pink, 3 Blue, 3 Purple)
Incubate on ice for 30 min
Shock the cells by keeping tubes at 42 C for 45 seconds, immediately after the ice bath
Add 100uL of SOC media to each tube
Allow growth in a shaking incubator for 1 hour
Transfer 100uL from each tube to appropriate plate and use plating beads / plastic spreader as needed
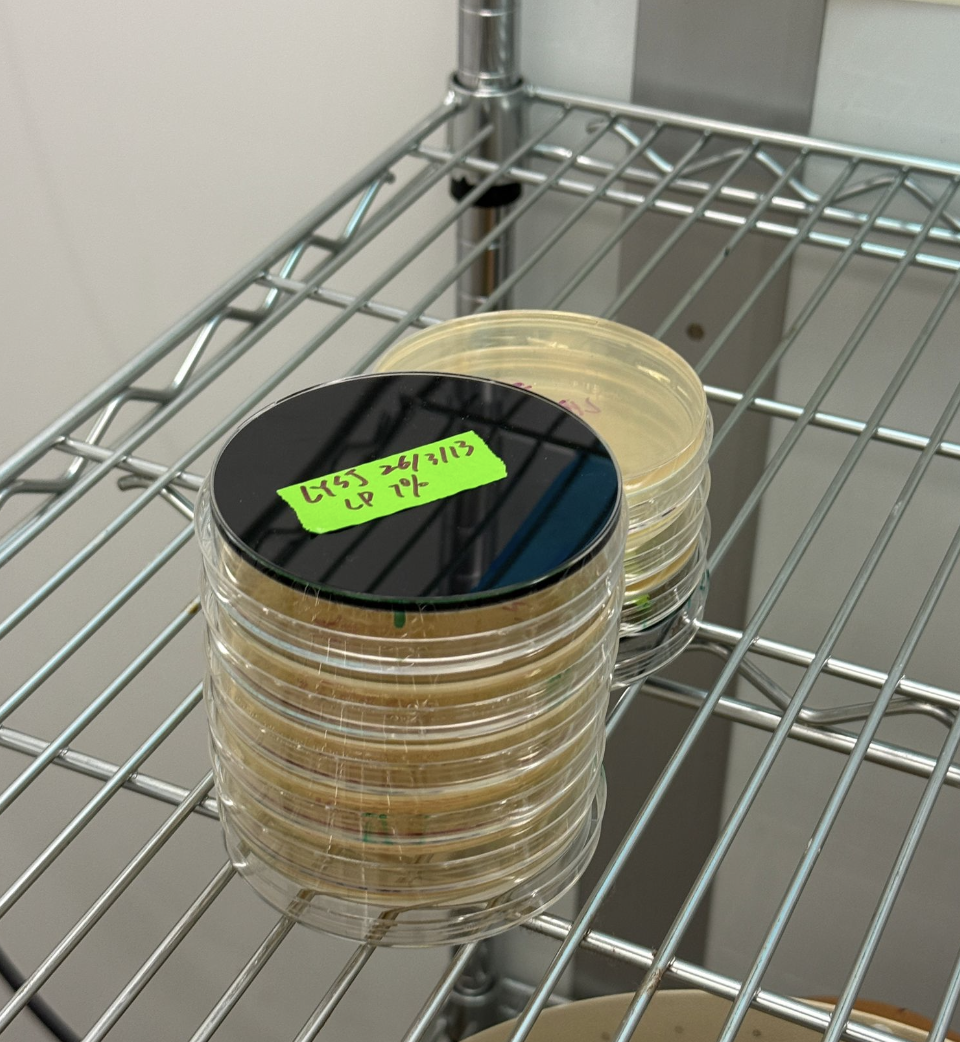
Incubate the plates at 37°C for 72 hours
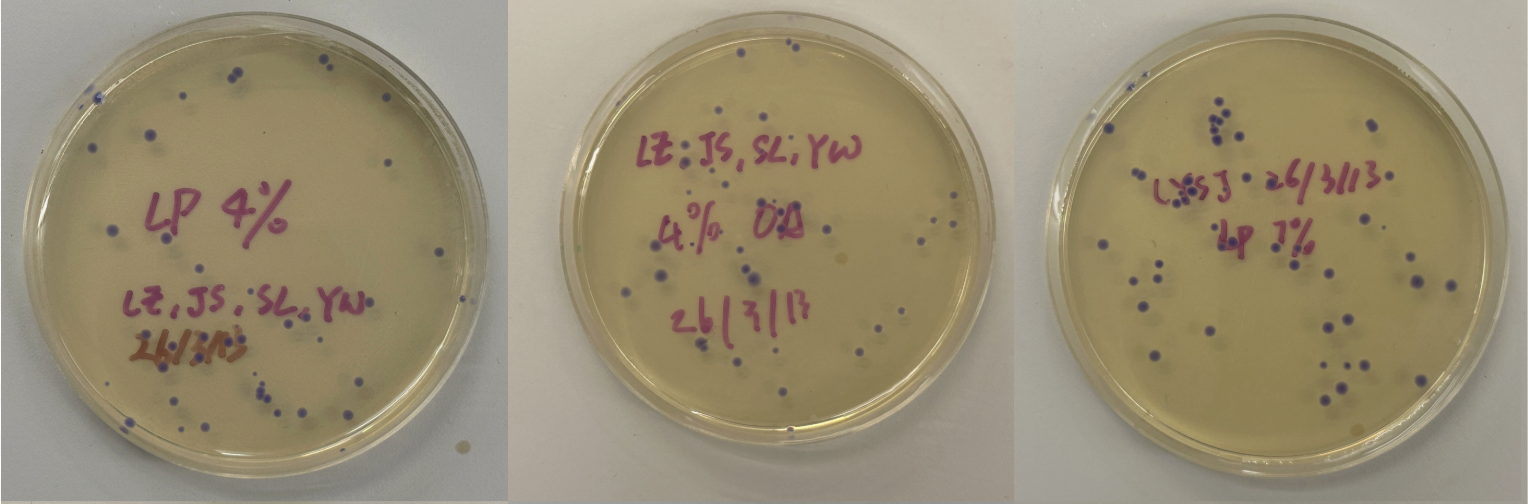
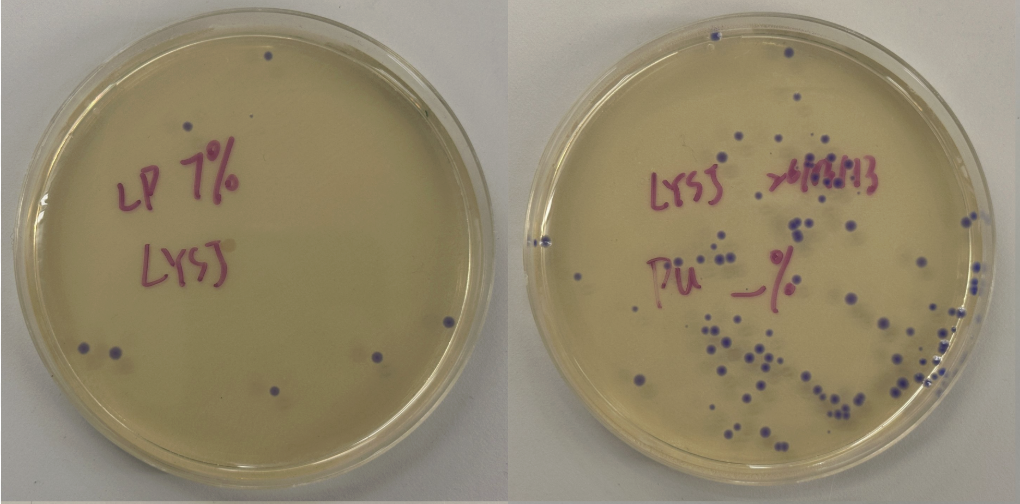
Part 3: Results
All colonies exhibited an indigo color that’s consistent with wildtype amilCP. The red circle is an interesting occurence of a colorless colony.
What may have happened is that there was not the correct molar ratio of insert to backbone, which may have occurred after purification. This meant that the backbone might have ended up in excess and annealed to each other rather than the insert. This explanation also explains why this would have been consistent across all the different volume groups. Had there been too much insert, there would have been mostly colorness colonies. These colonies survive selection and express a wildtype indigo color.
With regards to the transparent colony, it signals that the backbone reassembled without the color insert and does not have the amilCP CDS.
This colony is evidence that the Gibson Assembly process was occuring, just not as we intended.
Week 7: Neuromorphic Circuits
Protocol
For this section, I had to first download Neuromorphic Wizard, which was a whole process but I managed.
I just filled out the Genetic Circuit Design Template with a design of my choice:
My group mates decided to do something pretty similar, so we went with the same overall ERN and ERN_rec_ERNs.
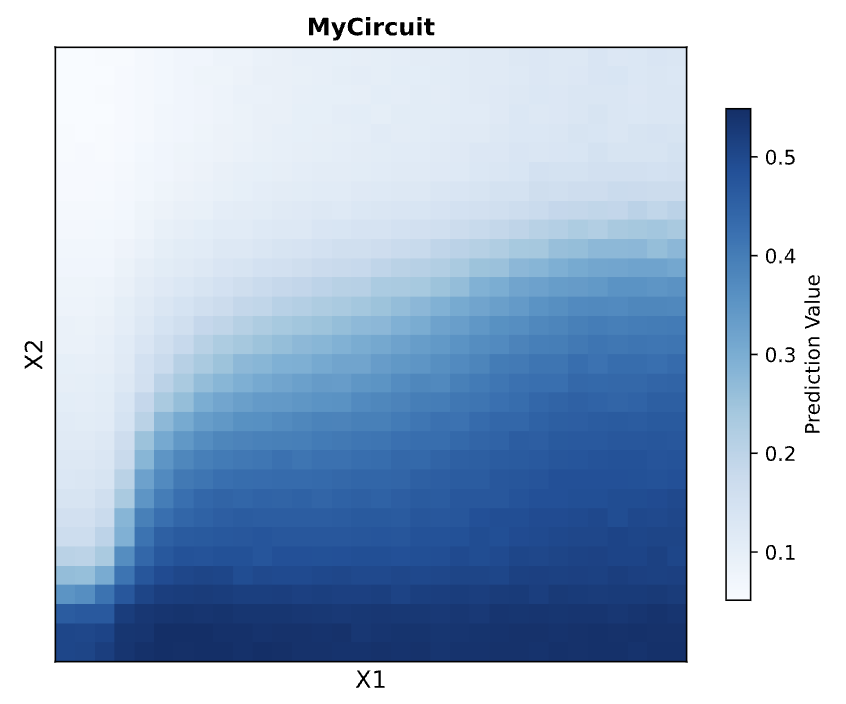
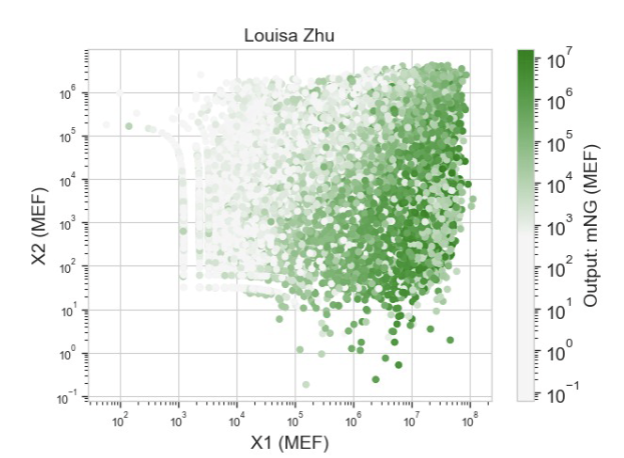
These were the predictions and experimental set-up that Neuromorphic Wizard came up with.
I will say overall this was one of the more conceptually difficult labs for me. I think overall, I could understand the general flow that X1 and X2 were some input, and the colors were to help track these ERNs and ERN_rec_ERNs, but I think it was difficult for me to intuitively choose a pattern and then fill in the template based on what I want my pattern to be. So instead, I worked the unconventional way as I felt I had a solid enough understanding and what I wanted to focus on was hte product.
In the future, it is something I would like to learn about, but I don’t know that I have the capacity to do so given my lack of computer science background.
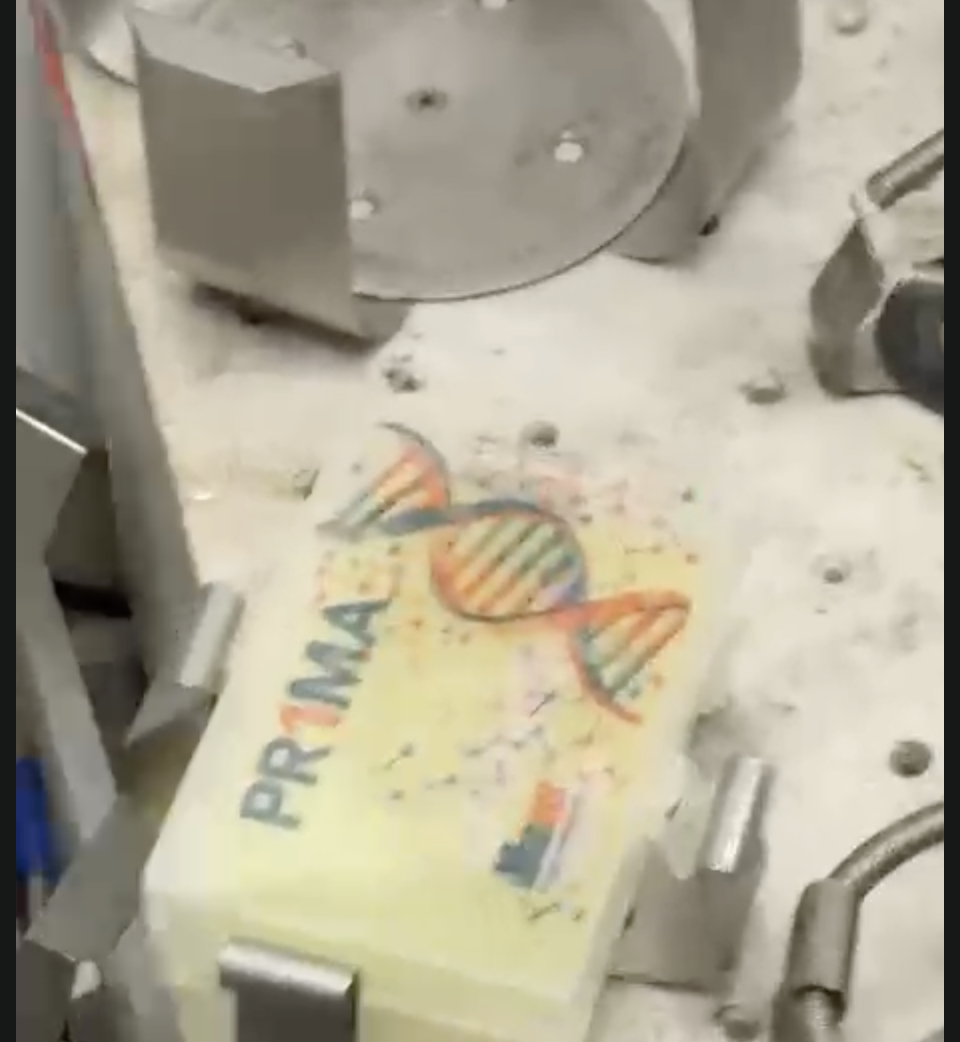
Running the Robot
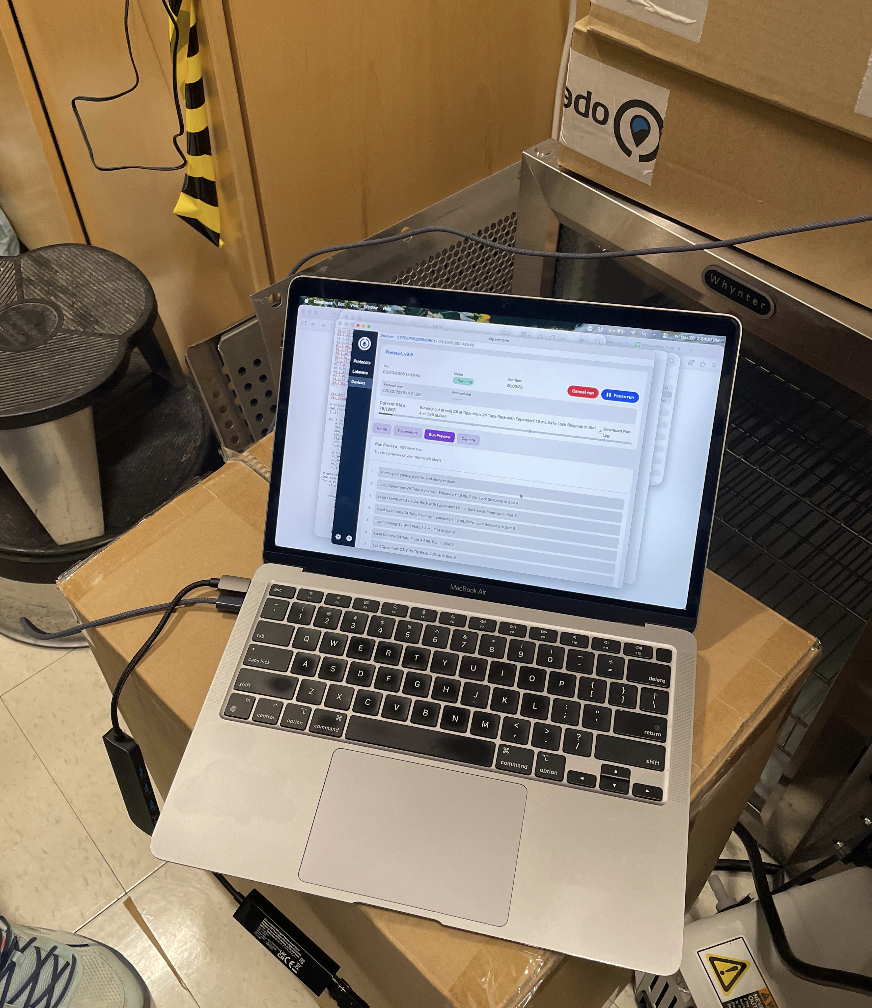
These are some photos from watching the robot run:
Running the Robot
I didn’t know we were supposed to do Low, Medium, High (?), or at least that part was not clear to me. Here is what came out of our experiment.