Week 6: Gibson Assembly
Day One
Materials:
The following items were used:
- PCR tubes
- Centrifuge tubes
- P200 pipette with 200uL tips
- P20 pipette with 20uL tips
- Nuclease-free water
- Sharpie
- Tube holder
- invitrogen E-Gel EX: Agarose 1%
Biological material I used included:
- Backbone fragment purified
- Color fragment(s) purified in Light Pink, Blue, Purple
- Backbone Forward Primer
- Backbone Reverse Primer
- Color Reverse Primer
- Template mUAV Plasmid
- Phusion HF PCR Mix
- DNA Binding Buffer
Machines I used included:
- Centrifuge
- invitrogen E-Gel PowerSnap
- PCR Incubator
Part 1: PCR
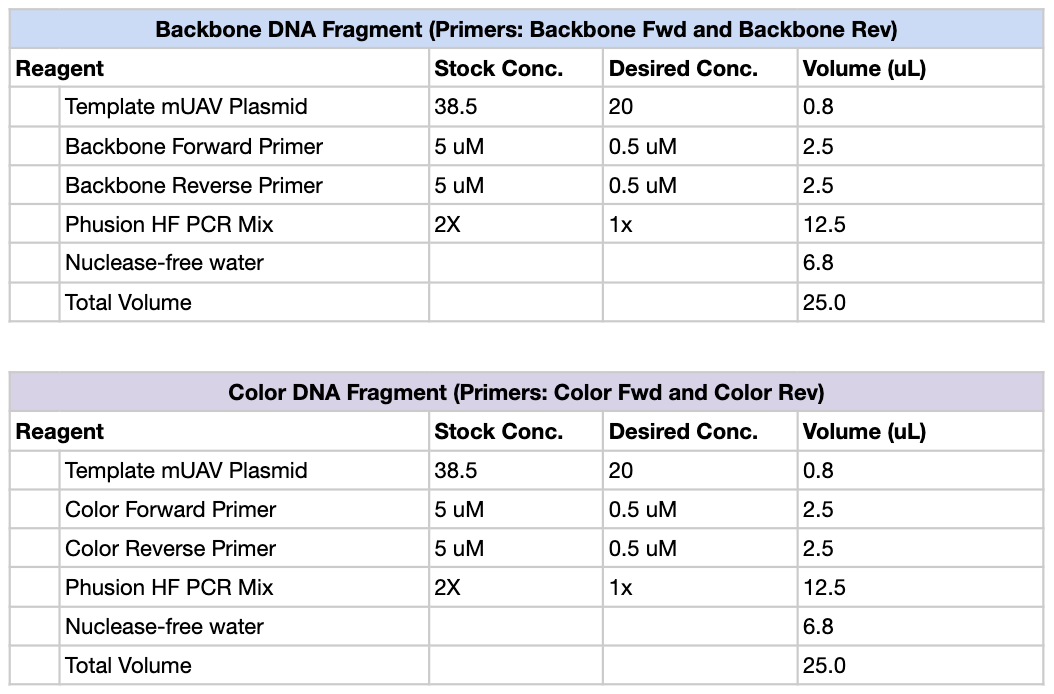
First, we created PCR mixtures according to the following table, using Light Pink, Purple and Blue as our color primers of choice. So total, there should be 4 PCR tubes: Backbone, Light Pink, Purple and Blue.
We then ran the PCR reaction with the following settings:

Both of these tables were pulled from the HTGAA lab handout.
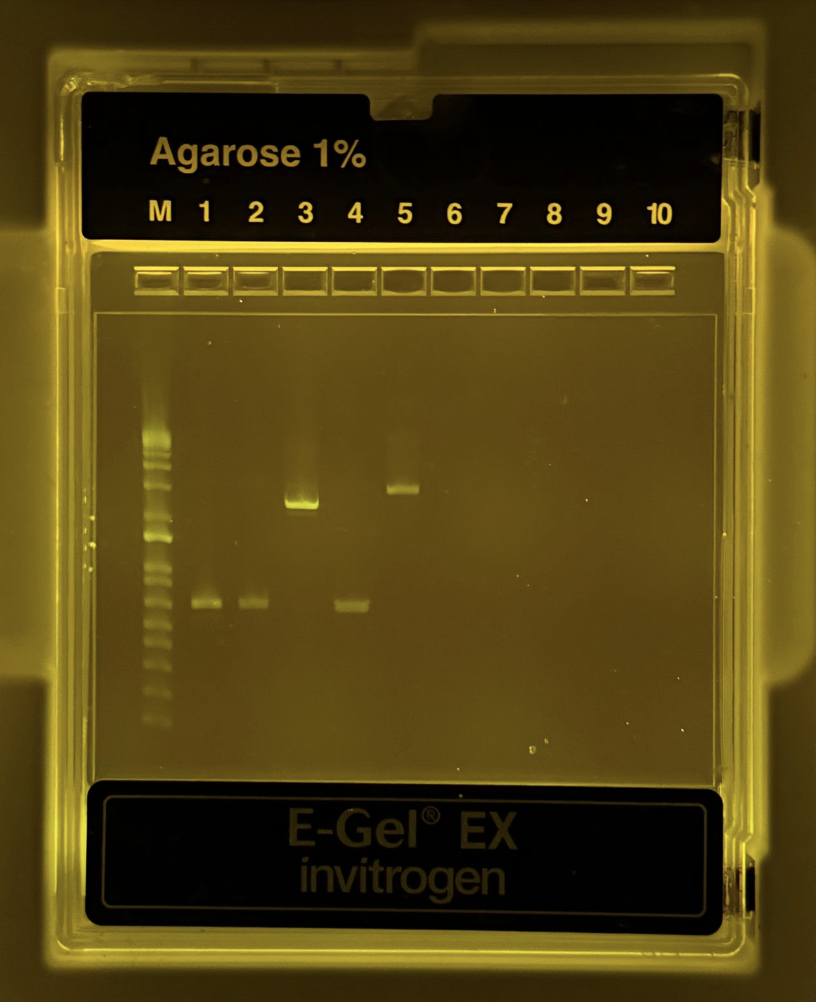
Part 2: Gel Diagnostic
After the PCR reaction was complete, we had to run a gel diagnostic to ensure this reaction was completed correctly. The protocol was as follows:
- Take 2uL of each mixture and transferit into new PCR tubes (labeled).
- Pipette 2uL of mUVA into new tube.
- Add 20uL of water to each PCR tube.
- Unpack gel electrophoresis cassette
- Load into machine
- Pipette DNA Ladder into first well
- Pipette 20uL of mixture from each NEW PCR tube into the correct wells. In total, there were 6 full wells.
- Use the automatic setting for 1%, and wait 10 minutes.
Thankfully, it was successful!
Part 3: DNA Purification and Quantification
- Pipette 100uL of DNA Binding Buffer into a centrifuge tube
- Add 20uL of PCR product
- Mix briefly by vortexing
- Transfer 120uL of the mixture into separate columns with a collection tube
- Centrifuge for 1 minute
- Discard the flowthrough
- Add 200 uL of DNA wash buffer to the column
- Centrifuge for 1 min
- Repeat the last two steps
- Transfer the column to new tube
- Discard flow through
- Add 6uL of nuclease free water to the column matrix
- Allow it to sit for 2 min
- Centrifuge for 1 min
- Store and save
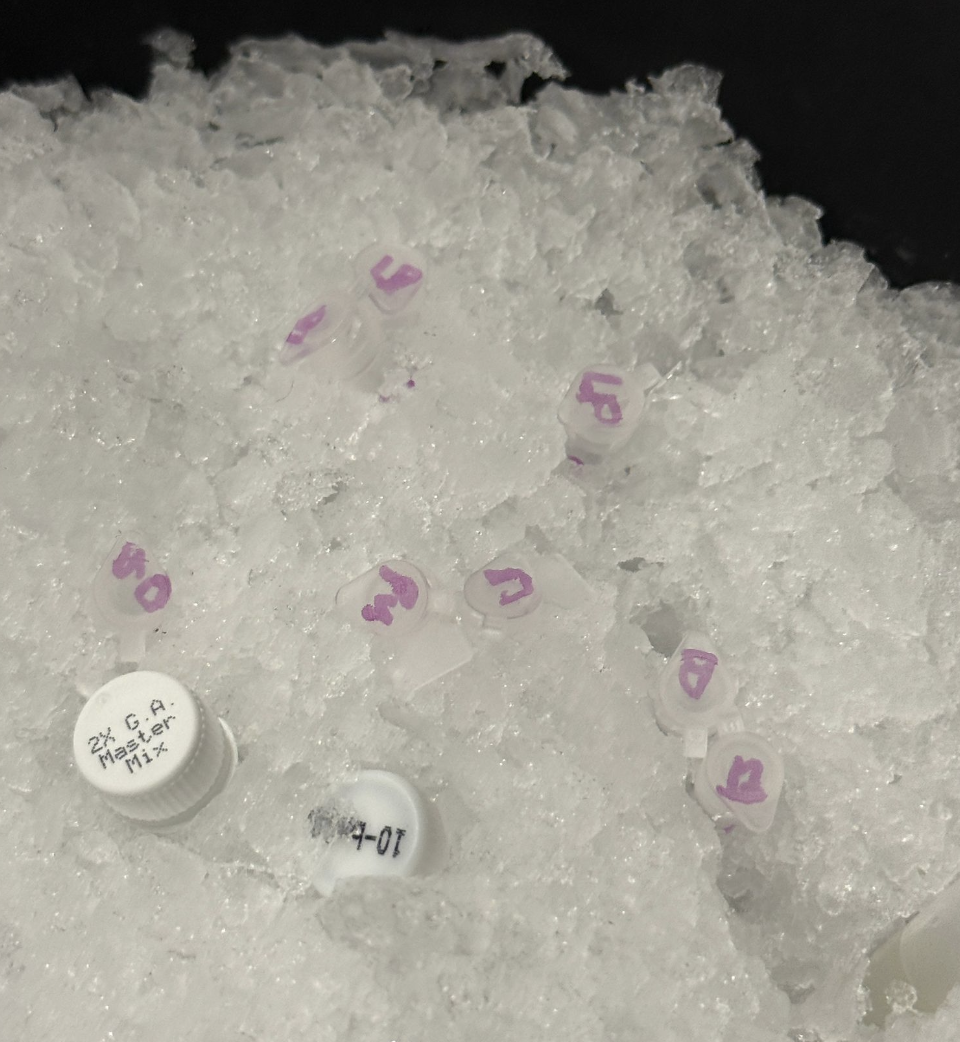
Day Two
Materials
Items Used:
- P1000 pipette with 1000uL tips
- P20 pipette with 10uL tips
- PCR Tubes
Biological Materials Used:
- Purified Fragments
- Gibson Assembly Master Mix
- Nuclease Free Water
- LB-Agar plates with Chioramphenicol
- SOC Growth Medium
- DH5α competent cells
Machines Used:
- Thermal Cycler
- Shaking Incubator
- Waterbath set to 42C
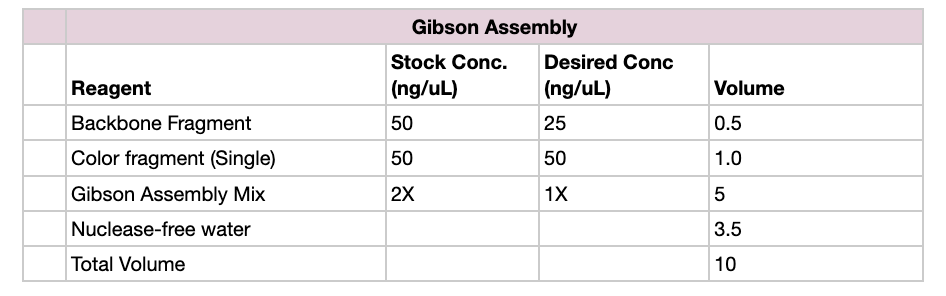
Part 1: Setting Up Gibson Assembly
- Set up reaction in proportions according to the table below, for each color fragment
- Incubate the reaction at 50 C for 30 minutes in a heat block
- Add 100 uL of nuclease-free water to dilute sample
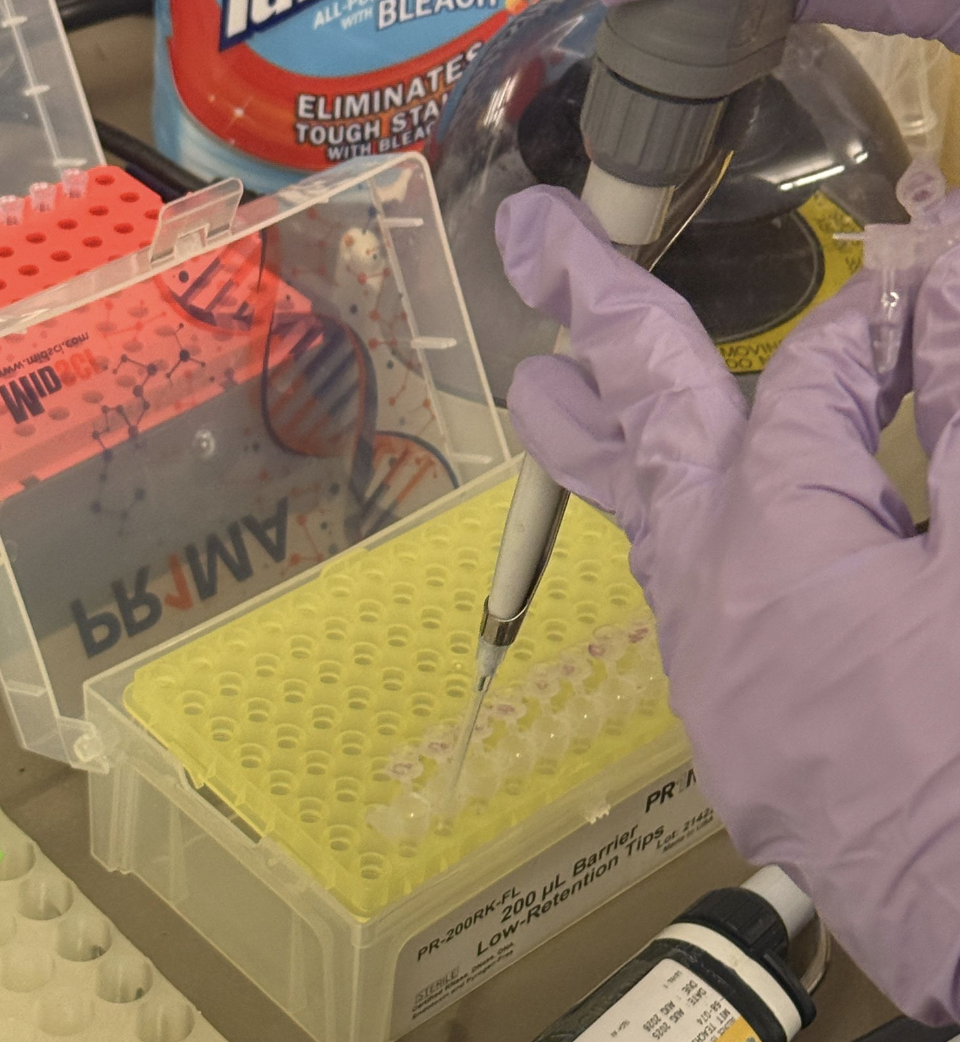
Part 2: Transformation
- Transfer 20uL of competent cells to each tube
- Transfe purified assembly products into each tube (8 total, 3 Light Pink, 3 Blue, 3 Purple)
- Incubate on ice for 30 min
- Shock the cells by keeping tubes at 42 C for 45 seconds, immediately after the ice bath
- Add 100uL of SOC media to each tube
- Allow growth in a shaking incubator for 1 hour
- Transfer 100uL from each tube to appropriate plate and use plating beads / plastic spreader as needed
- Incubate the plates at 37°C for 72 hours
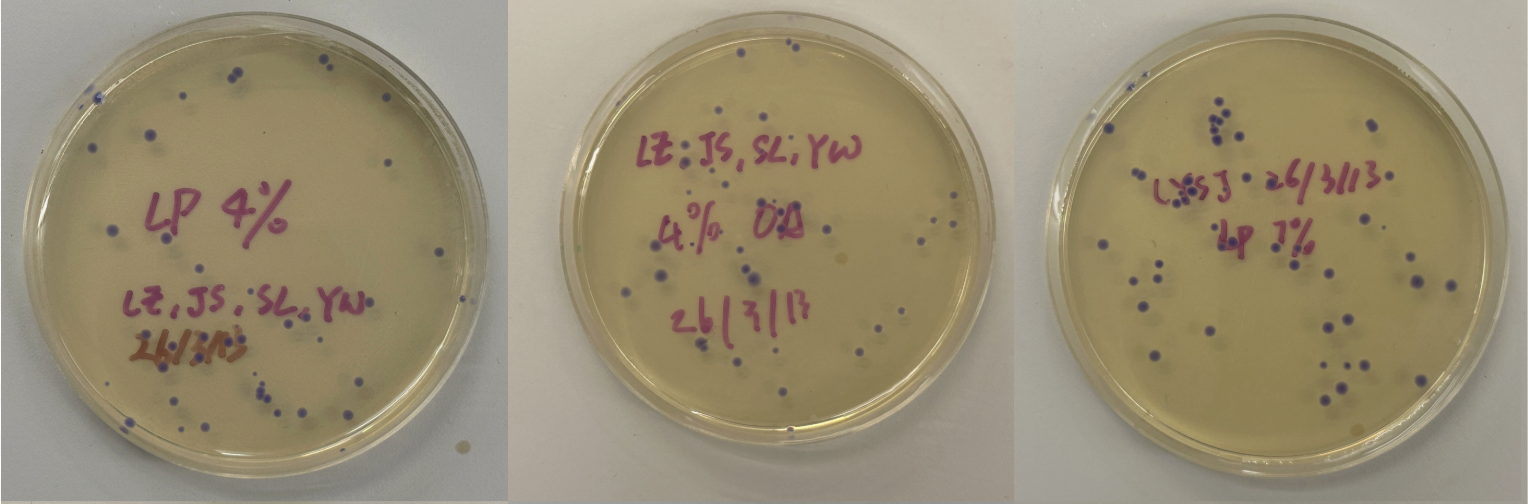
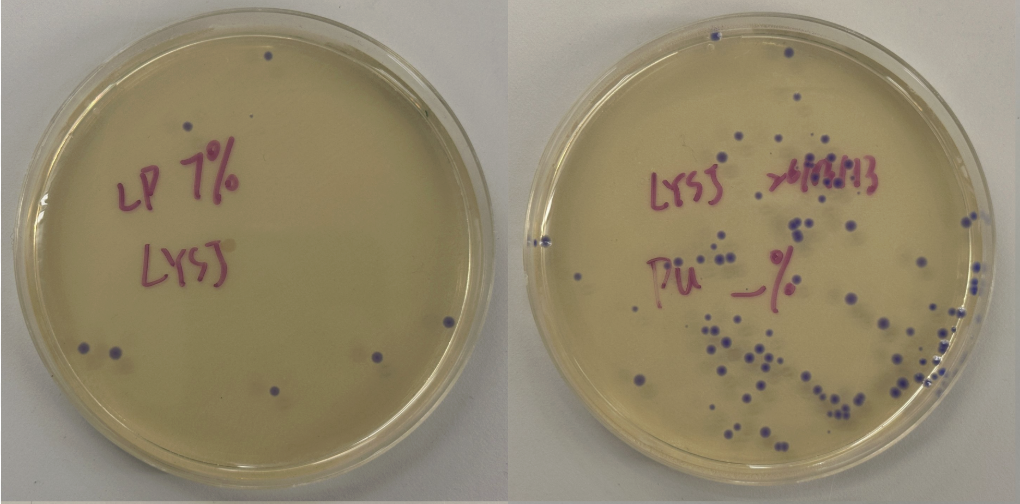
Part 3: Results
All colonies exhibited an indigo color that’s consistent with wildtype amilCP. The red circle is an interesting occurence of a colorless colony.
What may have happened is that there was not the correct molar ratio of insert to backbone, which may have occurred after purification. This meant that the backbone might have ended up in excess and annealed to each other rather than the insert. This explanation also explains why this would have been consistent across all the different volume groups. Had there been too much insert, there would have been mostly colorness colonies. These colonies survive selection and express a wildtype indigo color.
With regards to the transparent colony, it signals that the backbone reassembled without the color insert and does not have the amilCP CDS.
This colony is evidence that the Gibson Assembly process was occuring, just not as we intended.