Week 6 HW: Genetic Circuits Part i

𓃠 Week 6 Homework 𓃠
Assignment: DNA Assembly
1. What are some components in the Phusion High-Fidelity PCR Master Mix and what is their purpose?
Phusion High-Fidelity PCR Master Mix is basically a pre-optimized solution containing every chemical component needed for DNA amplification except for the DNA template and the primers.
It mainly consistes of:
- Phusion High-Fidelity DNA Polymerase: This is the main enzyme that synthesizes the new DNA strand
- Deoxynucleotide Triphosphates (dNTPs): These are the nucleotide building blocks that the DNA Polymerase use to synthesize the new DNA strand
- Magnesium Chloride (MgCl2): This is an essential cofactor for the DNA polymerase, helps it with stabilizing the negatively charged alpha-phosphate of the dNTPs, reducing electrostatic repulsion and allowing primers to anneal more effectively to the template
- Reaction Buffers: These maintain a stable chemical environment for the DNA Polymerase, it includes:
- High Fidelty Buffer: The default buffer optimized to provide the highest possible sequence accuracy.
- GC Buffer: This buffer is has special additives additives to help denature high GC content templates
- pH Buffer: This buffer includes buffering agents that keep the reaction at a specific pH (8.8–9.3) to prevent DNA damage and maintain enzyme activity.
2. What are some factors that determine primer annealing temperature during PCR?
The main two factors are the GC content of the primer, the more Gs and Cs, the higher the temperature, also the Primer Length, the longer the primer the more hydrogen bonds holding the strand and the higher the chance there will be GC regions too, one more factor is salt concentrations, High salt concentrations neutralize the negatively charged DNA backbone, stabilizing the bonds in the process and raising the melting temperature.
3. There are two methods from this class that create linear fragments of DNA: PCR, and restriction enzyme digests. Compare and contrast these two methods, both in terms of protocol as well as when one may be preferable to use over the other.
They both do generate linear DNA, but the processs is different:
- PCR generates the linear fragment through building DNA from scratch, you can pick the starting area you want through primer design, the end product usually has a blunt end and you end up with a huge amount of your target area since PCR also has exponential amplification
- Restriction Enzyme Digests however generates the fragment through cutting existing DNA, you usually cant pick the starting area since each restriction enzyme has a specific area where it can make a cut, and depending on the used enzyme, you might end up with sticky or blunt ends, and you usually end up with just the amoung of your target fragment that depends on the starting amount.
4. How can you ensure that the DNA sequences that you have digested and PCR-ed will be appropriate for Gibson cloning?
For Gibson Assembly the main thing you need to focus on is having overlapping sequences (20-40 bp) on both ends of your target DNA with whatever backbone it is going to be inserted in, so that the Gibson mix can chew back these overlaps and anneal them and start stitching them together.
5. How does the plasmid DNA enter the E. coli cells during transformation?
There is two ways:
- Chemical Transformation (Heat Shock): This is the most common method and is done using Calcium Chloride where the rapid heat change causes thermal imbalance across the membrane, causing pores to open in the bacterial cell wall so that the plasmid can enter.
- Electroporation: This method uses a quick pulse of electricity and is more efficient for large plasmid, the idea is similar, High voltage electric pulses are sent and it disrupts the cell membrane causing pores so the plasmid can enter.
6. Describe another assembly method in detail (such as Golden Gate Assembly)
I will talk in depth about Gibson Assembly
So Gibson Assembly is a molecular cloning method that allows seamless joining of multiple DNA fragments in a one pot reaction without requiring restriction enzymes or leaving behind scar sites, and it all mainly depends on having overlapping ends (20-40 bp) with the fragment next to it, and these overlapping ends can be designed using PCR primers.
Here is how the One Pot reaction happens:
- The Gibson Master Mix is added and the temperature is set to around 50 degrees
- T5 Exonuclease chews back the DNA from the 5’ ends exposing the overlaps we designed, this now makes them stick together and anneal
- Phusion DNA Polymerase then fills those gaps using the overlapping strand as a template
- Taq DNA Ligase it seals the gaps and nicks between the sugar-phosphate backbone to create a single continous strand of DNA
Gibson Assembly is very good in that it is Fast, Seamless and can assemble up to 15-20 fragments at once and doesnt care about internal restriction sites, however the overlapping primers is expensive, and the reaction can fail if the overlaps create stable hairpins or secondary structures
Benchling Workflow
I will do a simple experiment where i stitch a GFP Protein to a plasmid.
First we need to retreive the GFP DNA sequence from ENA.
This is the Link ot the Fasta file and Here is the DNA sequence:
TACACACGAATAAAAGATAACAAAGATGAGTAAAGGAGAAGAACTTTTCACTGGAGTTGTCCCAATTCTTGTTGAATTAGATGGTGATGTTAATGGGCACAAATTTTCTGTCAGTGGAGAGGGTGAAGGTGATGCAACATACGGAAAACTTACCCTTAAATTTATTTGCACTACTGGAAAACTACCTGTTCCATGGCCAACACTTGTCACTACTTTCTCTTATGGTGTTCAATGCTTTTCAAGATACCCAGATCATATGAAACAGCATGACTTTTTCAAGAGTGCCATGCCCGAAGGTTATGTACAGGAAAGAACTATATTTTTCAAAGATGACGGGAACTACAAGACACGTGCTGAAGTCAAGTTTGAAGGTGATACCCTTGTTAATAGAATCGAGTTAAAAGGTATTGATTTTAAAGAAGATGGAAACATTCTTGGACACAAATTGGAATACAACTATAACTCACACAATGTATACATCATGGCAGACAAACAAAAGAATGGAATCAAAGTTAACTTCAAAATTAGACACAACATTGAAGATGGAAGCGTTCAACTAGCAGACCATTATCAACAAAATACTCCAATTGGCGATGGCCCTGTCCTTTTACCAGACAACCATTACCTGTCCACACAATCTGCCCTTTCGAAAGATCCCAACGAAAAGAGAGACCACATGGTCCTTCTTGAGTTTGTAACAGCTGCTGGGATTACACATGGCATGGATGAACTATACAAATAAATGTCCAGACTTCCAATTGACACTAAAGTGTCCGAACAATTACTAAAATCTCAGGGTTCCTGGTTAAATTCAGGCTGAGATATTATTTATATATTTATAGATTCATTAAAATTGTATGAATAATTTATTGATGTTATTGATAGAGGTTATTTTCTTATTAAACAGGCTACTTGGAGTGTATTCTTAATTCTATATTAATTACAATTTGATTTGACTTGCTCAAA
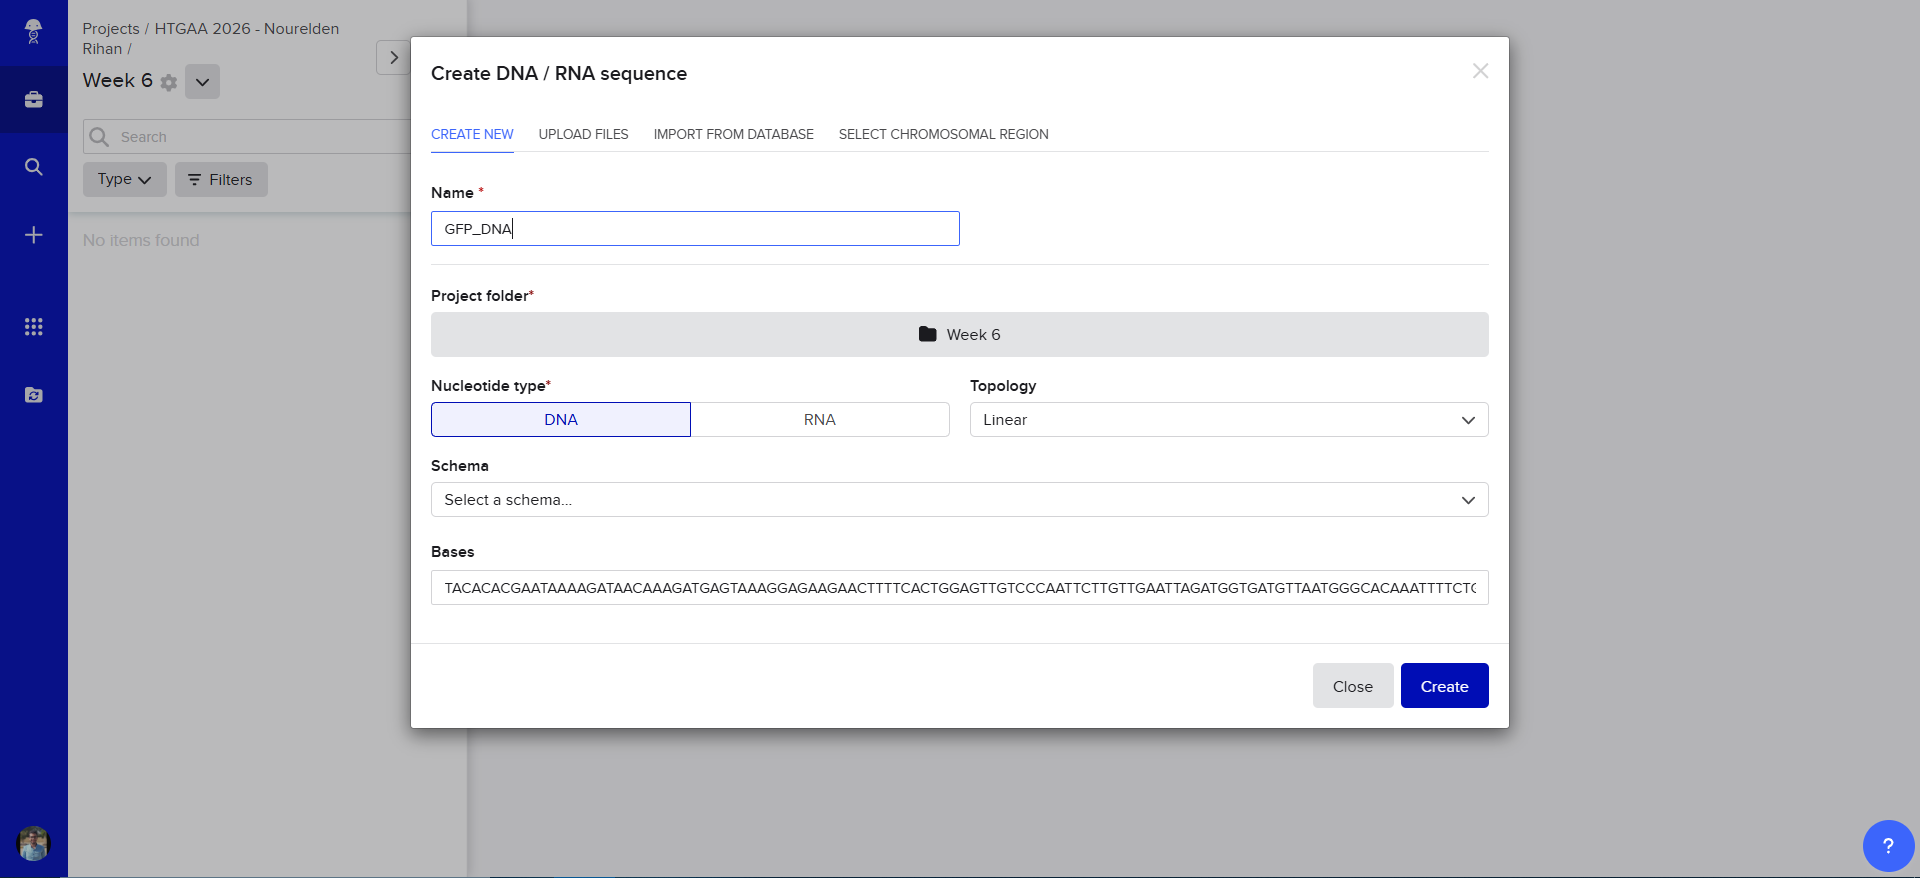
Now Let’s Create the DNA Entry for GFP on Benchling
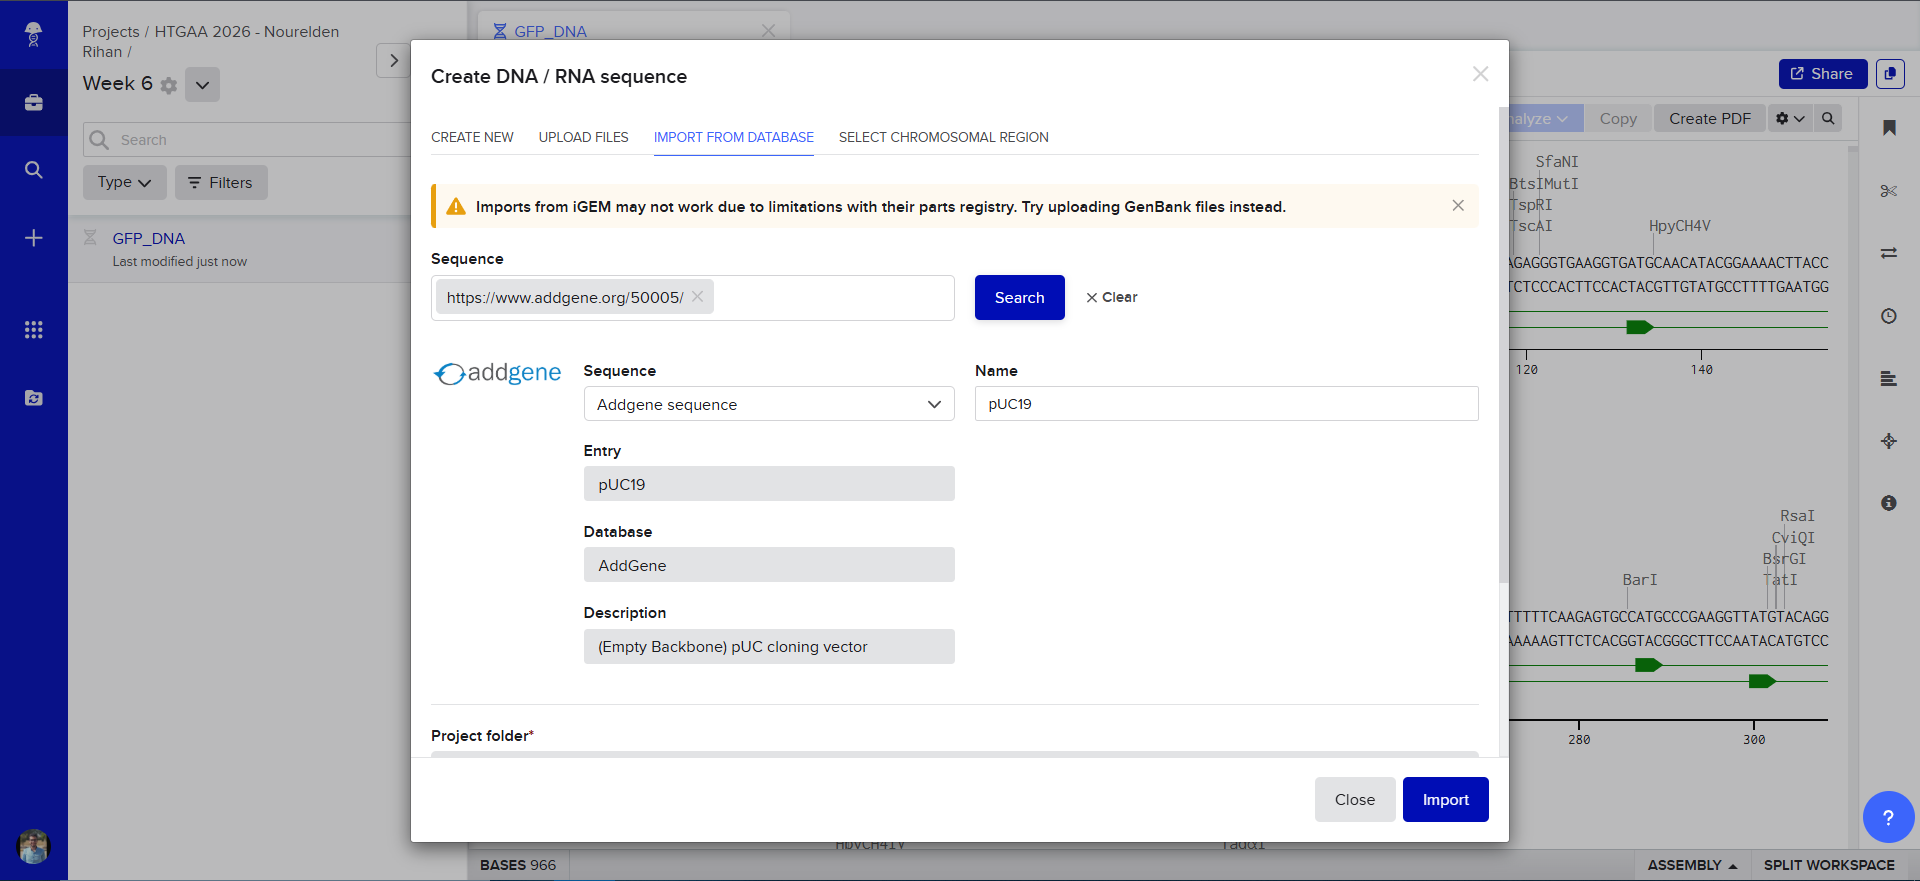
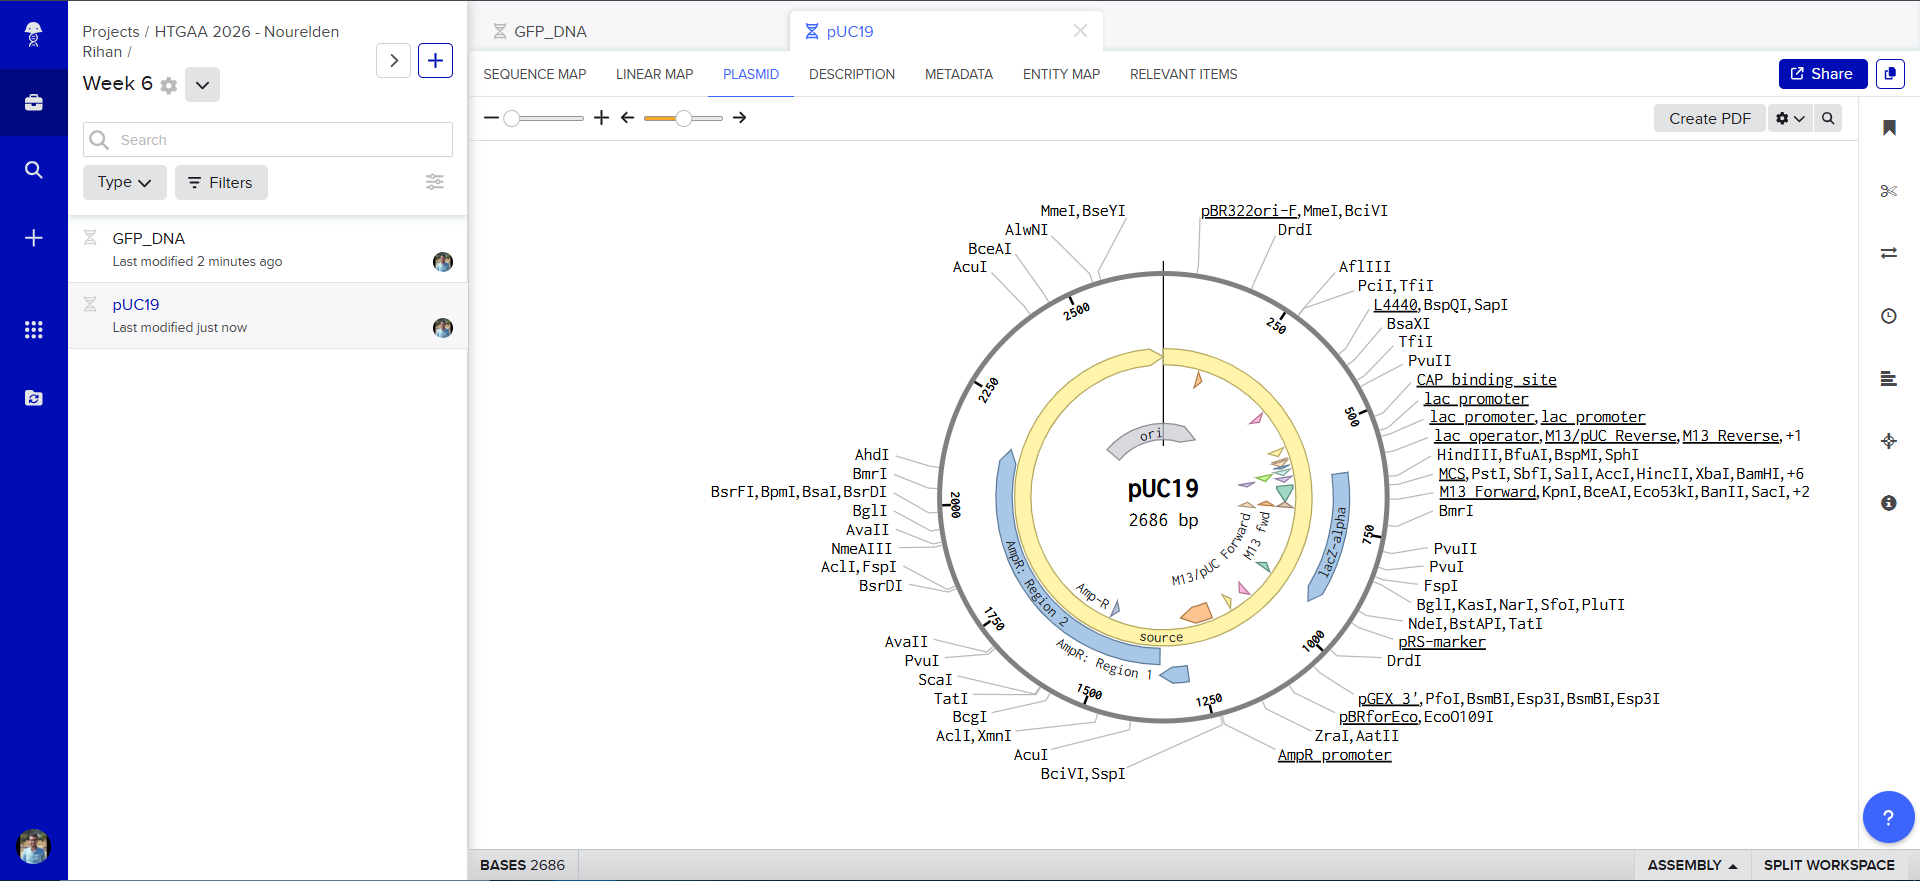
Now we need to find a proper plasmid to use, Gemini suggested i use pUC19 so i looked it up on Addgene

It is a High Copy cloning vector, 2686 bp backbone, with Ampicillin resistance for selection
using the Addgene Link https://www.addgene.org/50005/ for pUC19 i imported it into Benchling
The Plasmid Looked cool with its annotations and was easily readible
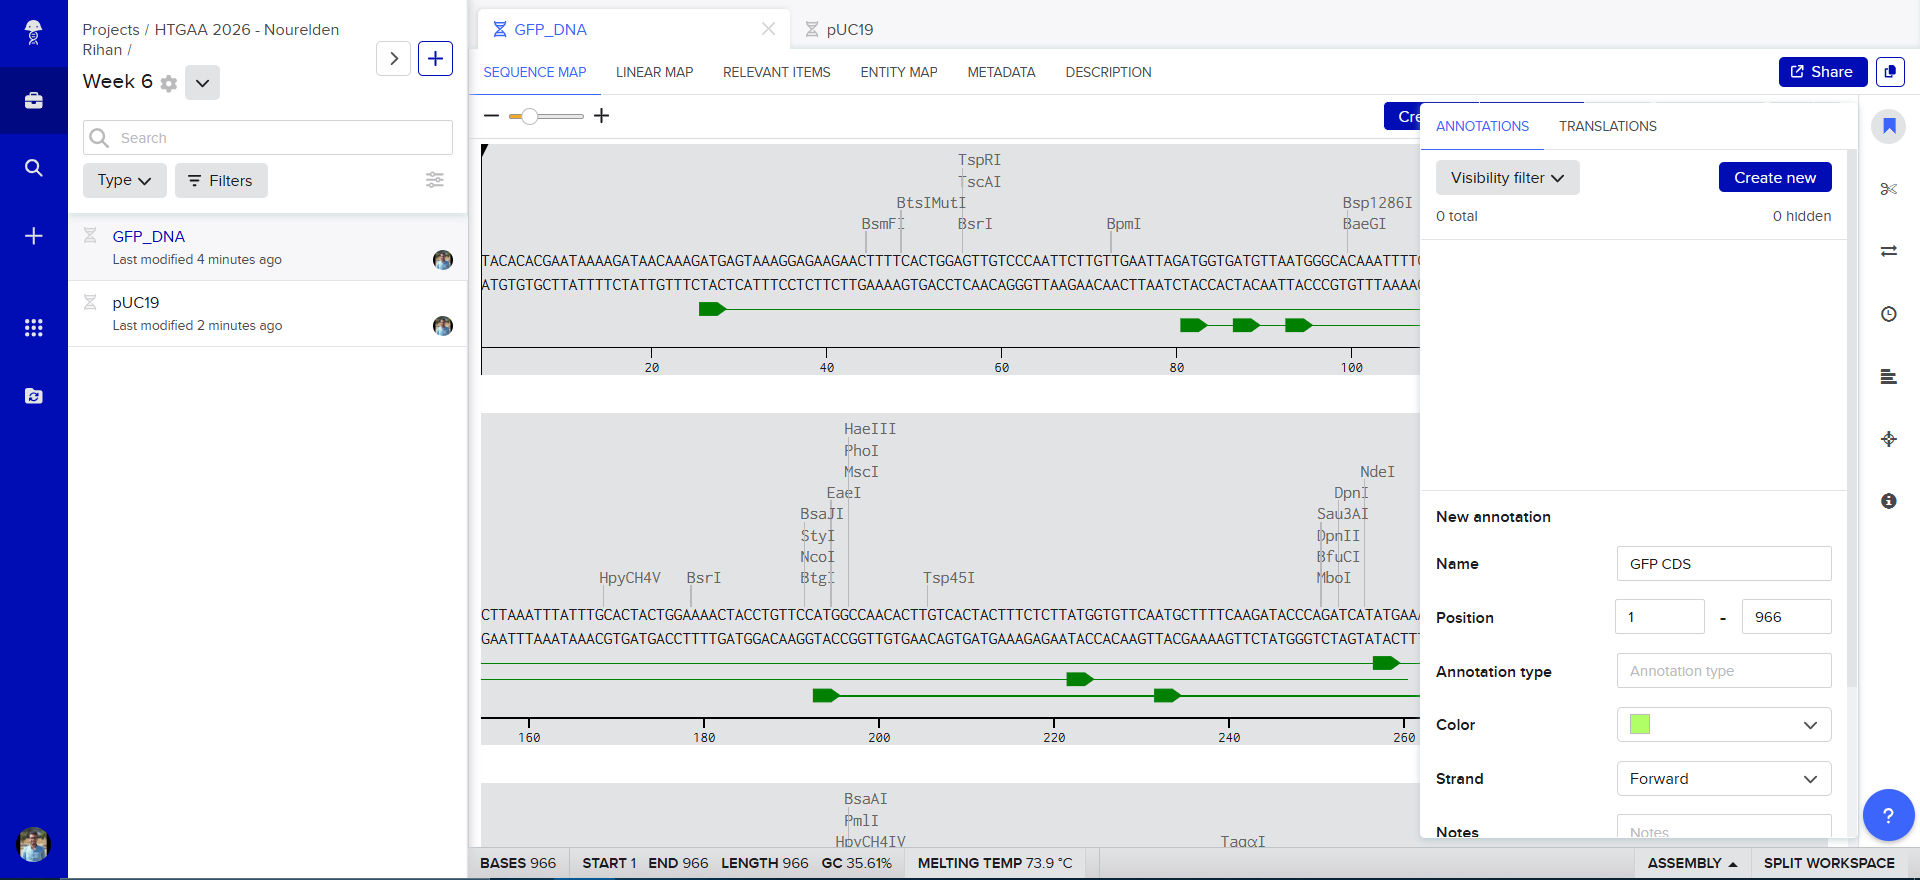
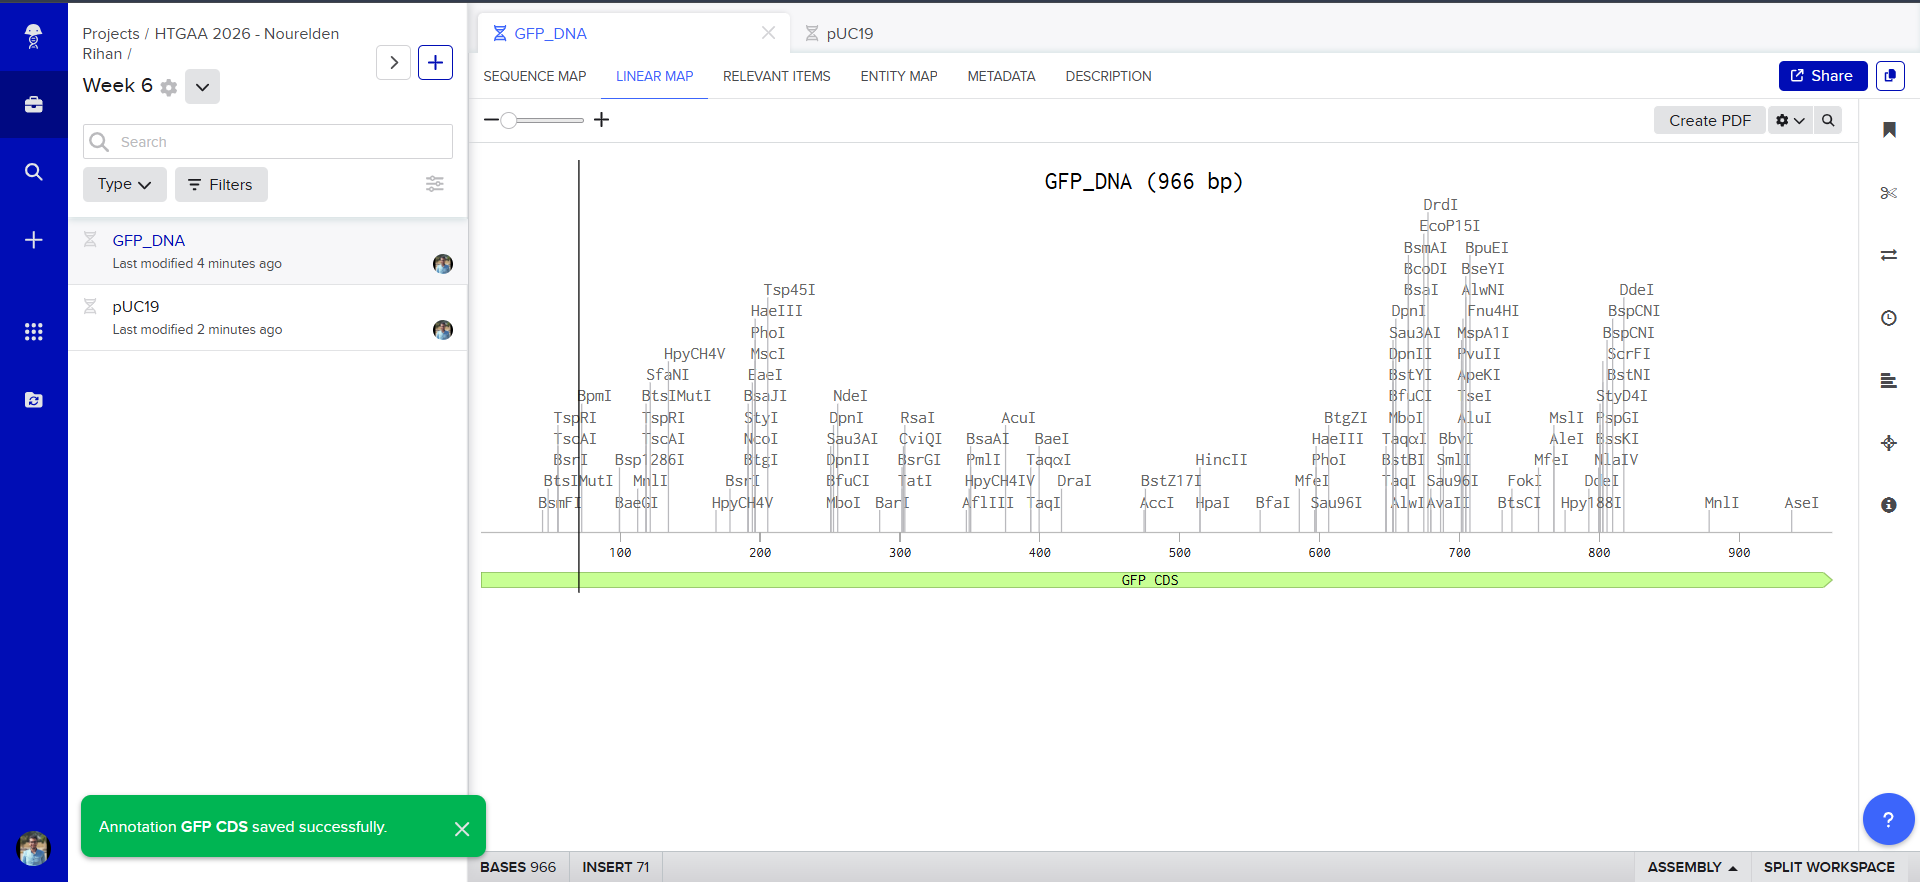
so i decided to go in and annotate my GFP too, and since it was just the GFP coding sequence, the process was striaghforward, i just selected it all and named the annotation GFP CDS.
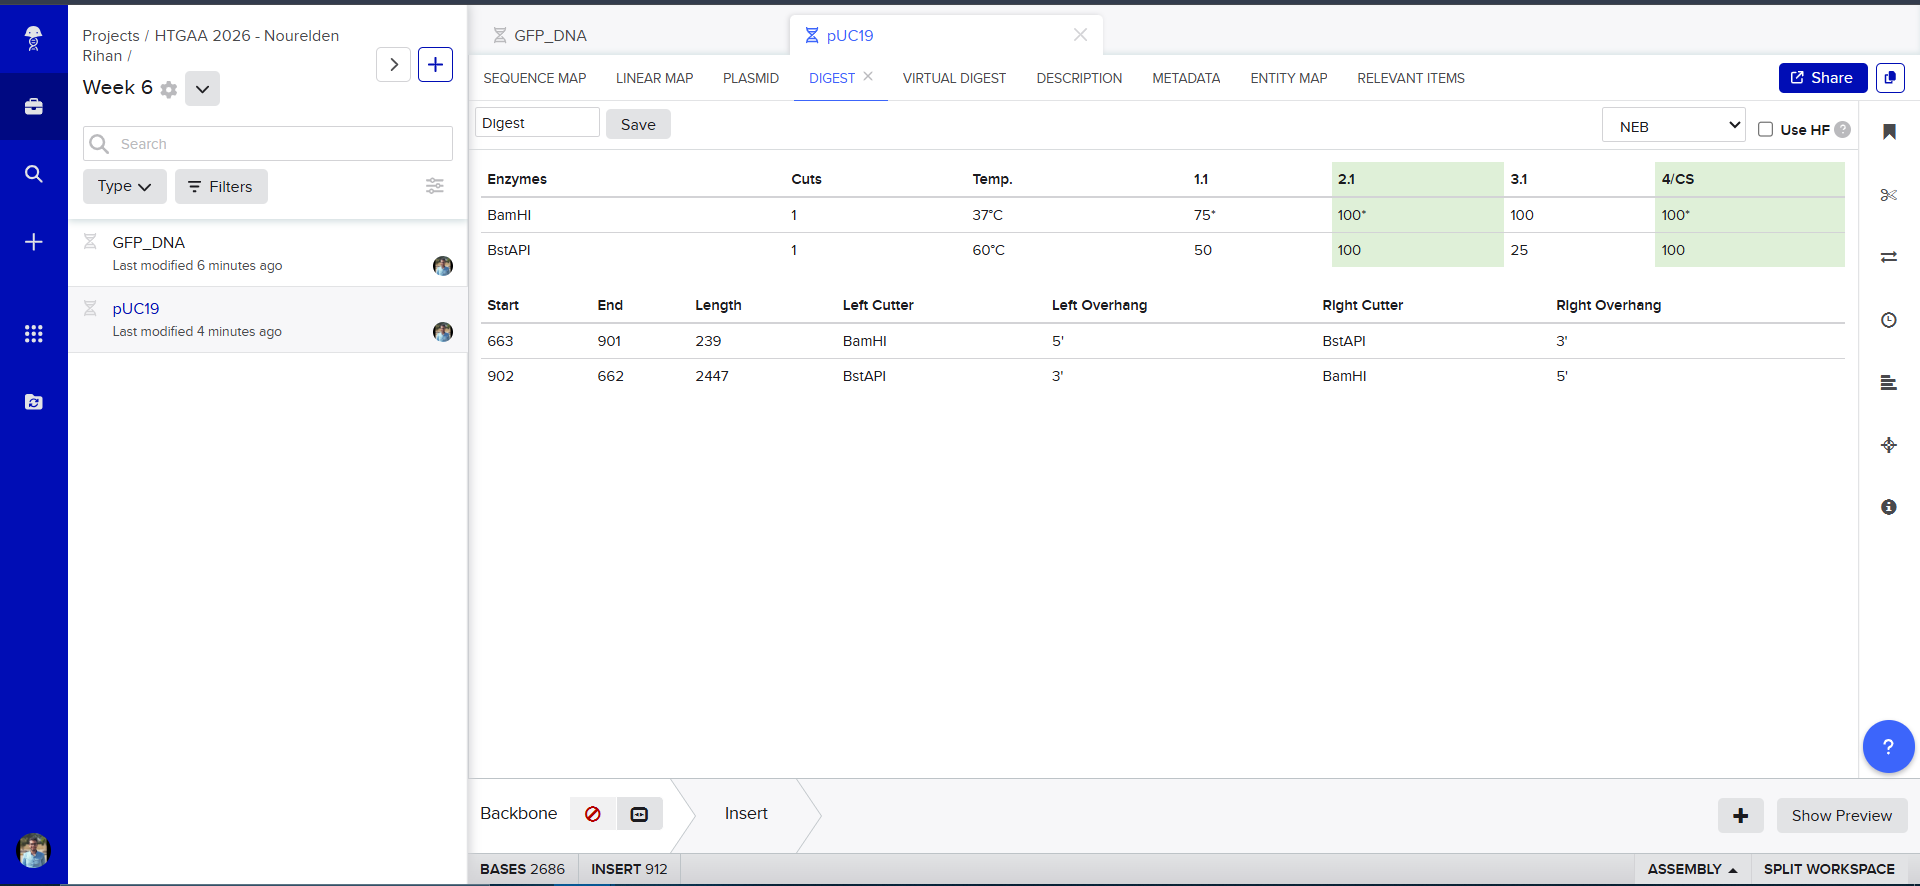
Now we need to cut and Linearize our vector to do Gibson Assembly, so i chose these two restricion enzymes, they are BamHI and BstAPI, why? because these only cut once and inside the Multiple Cloning Site (MCS)
And this is the result of the digest, we have two parts, the discarded small part (239 bp) and our linearized backbone (2447 bp)
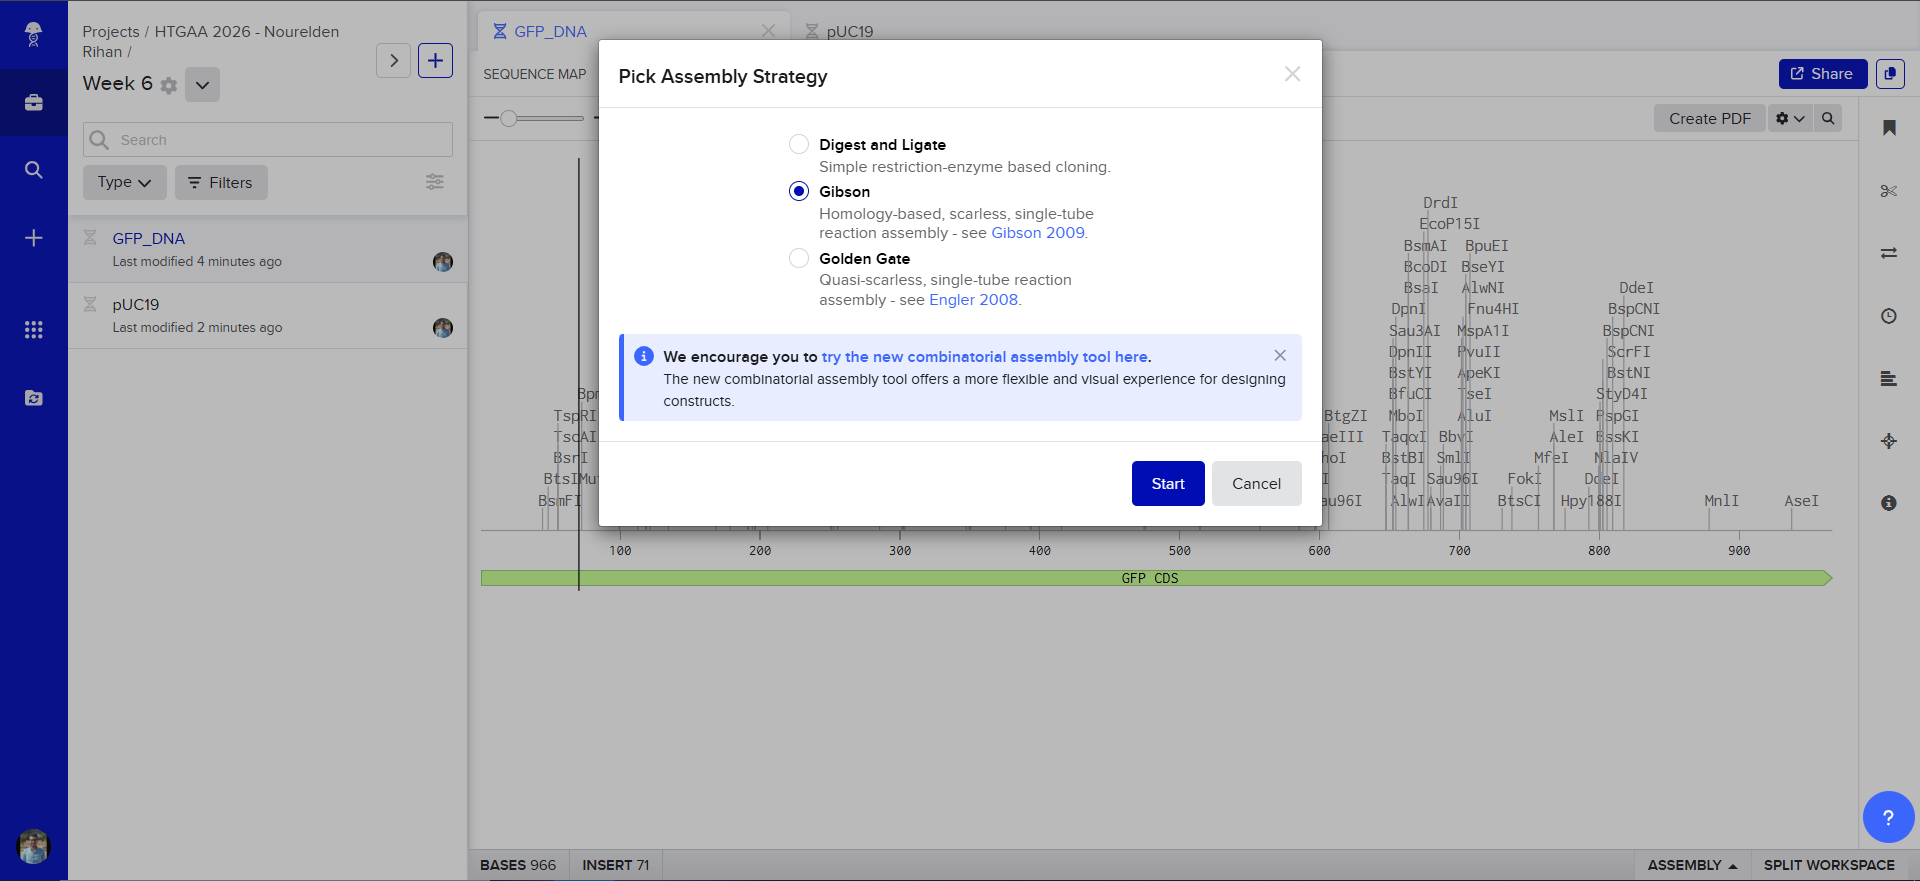
And Now we do Gibson Assembly, first through the assembly wizard
then we select our linearized backbone as the “Backbone”
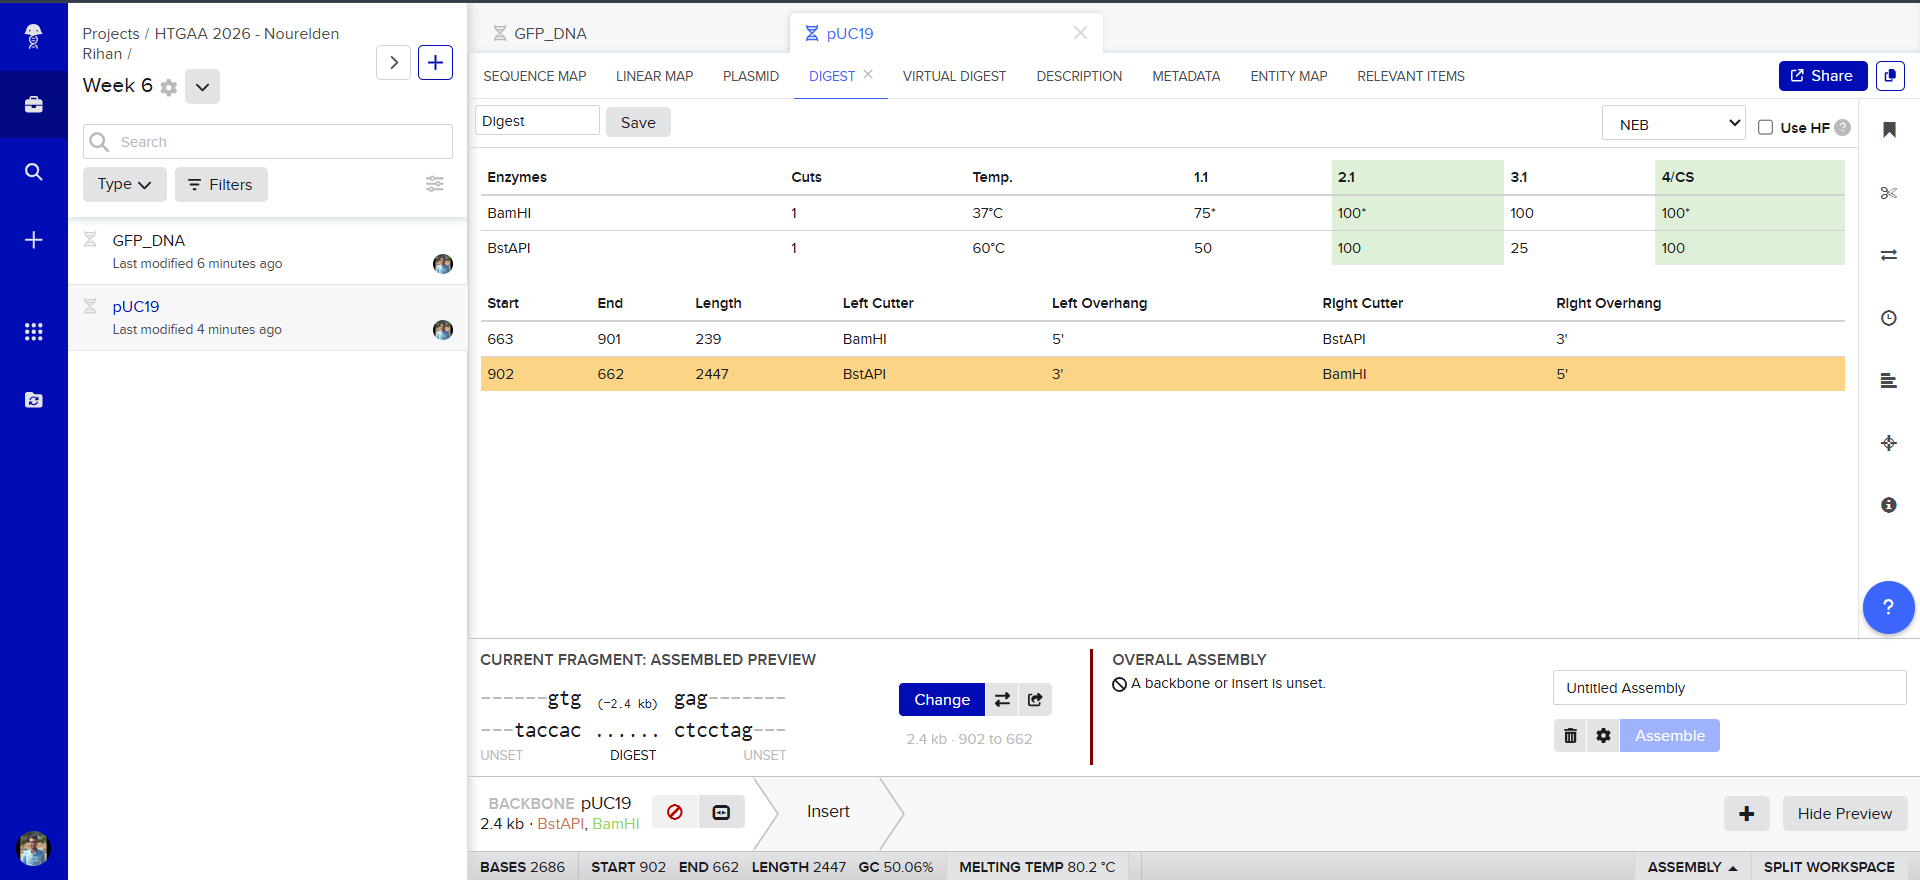
then we select all of our GFP as the “insert”

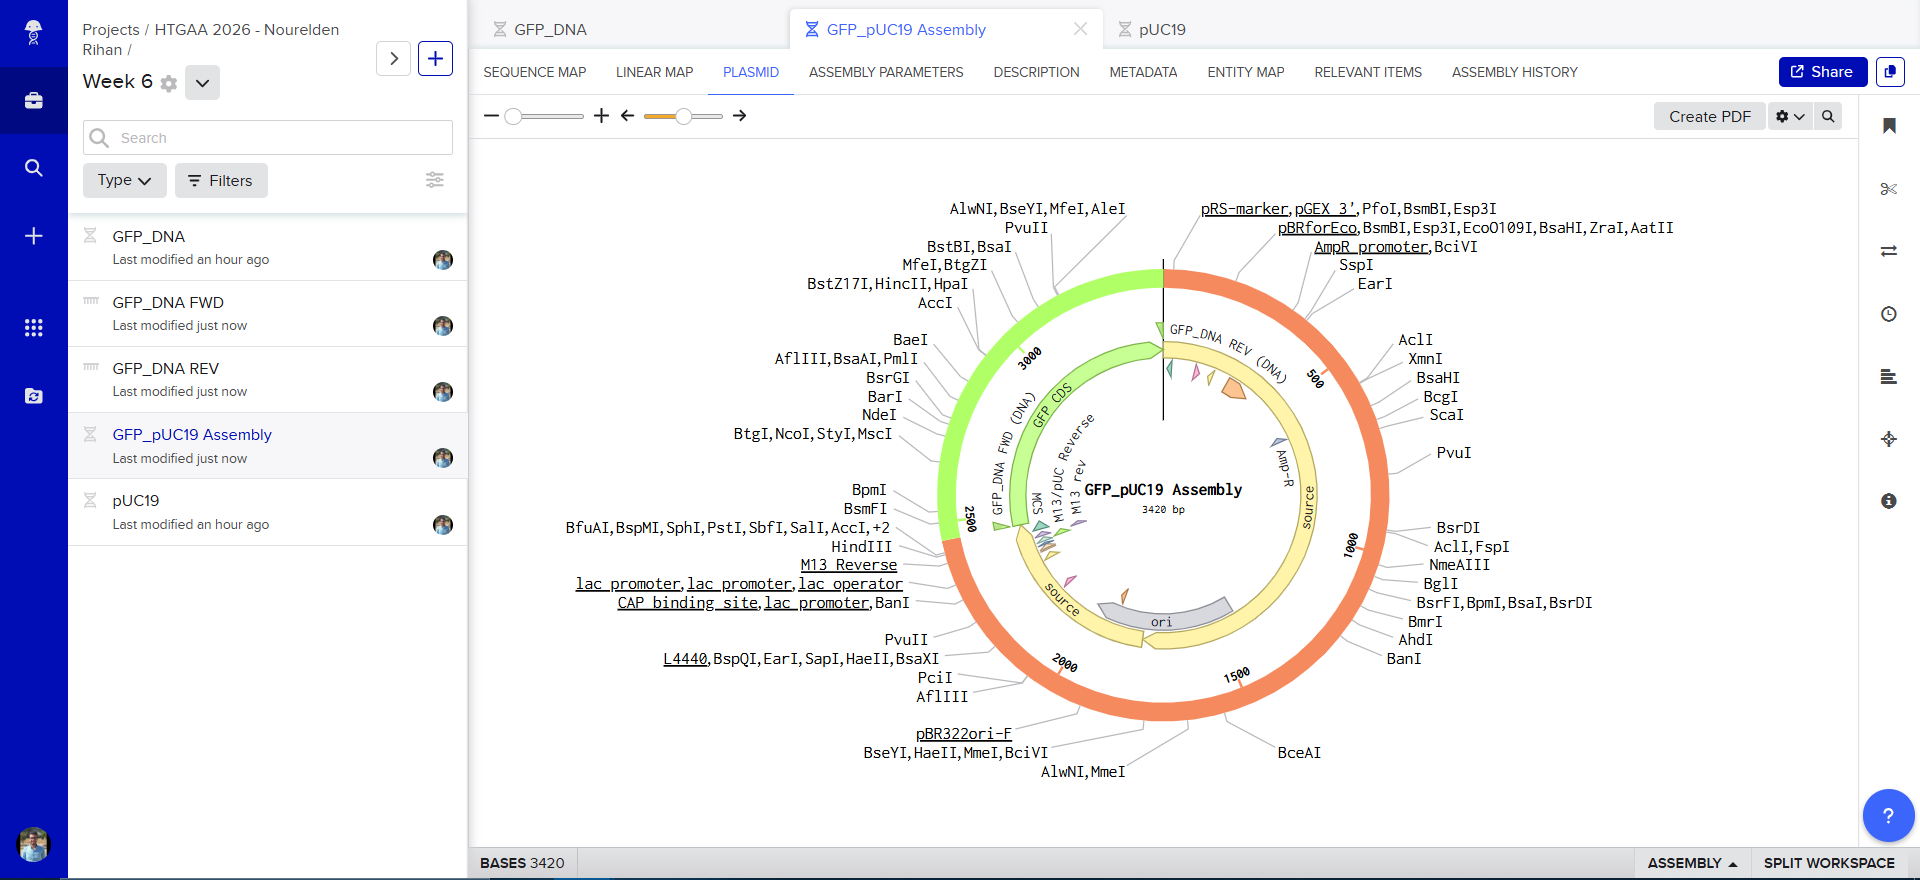
and tadaaaa! here is our final construct
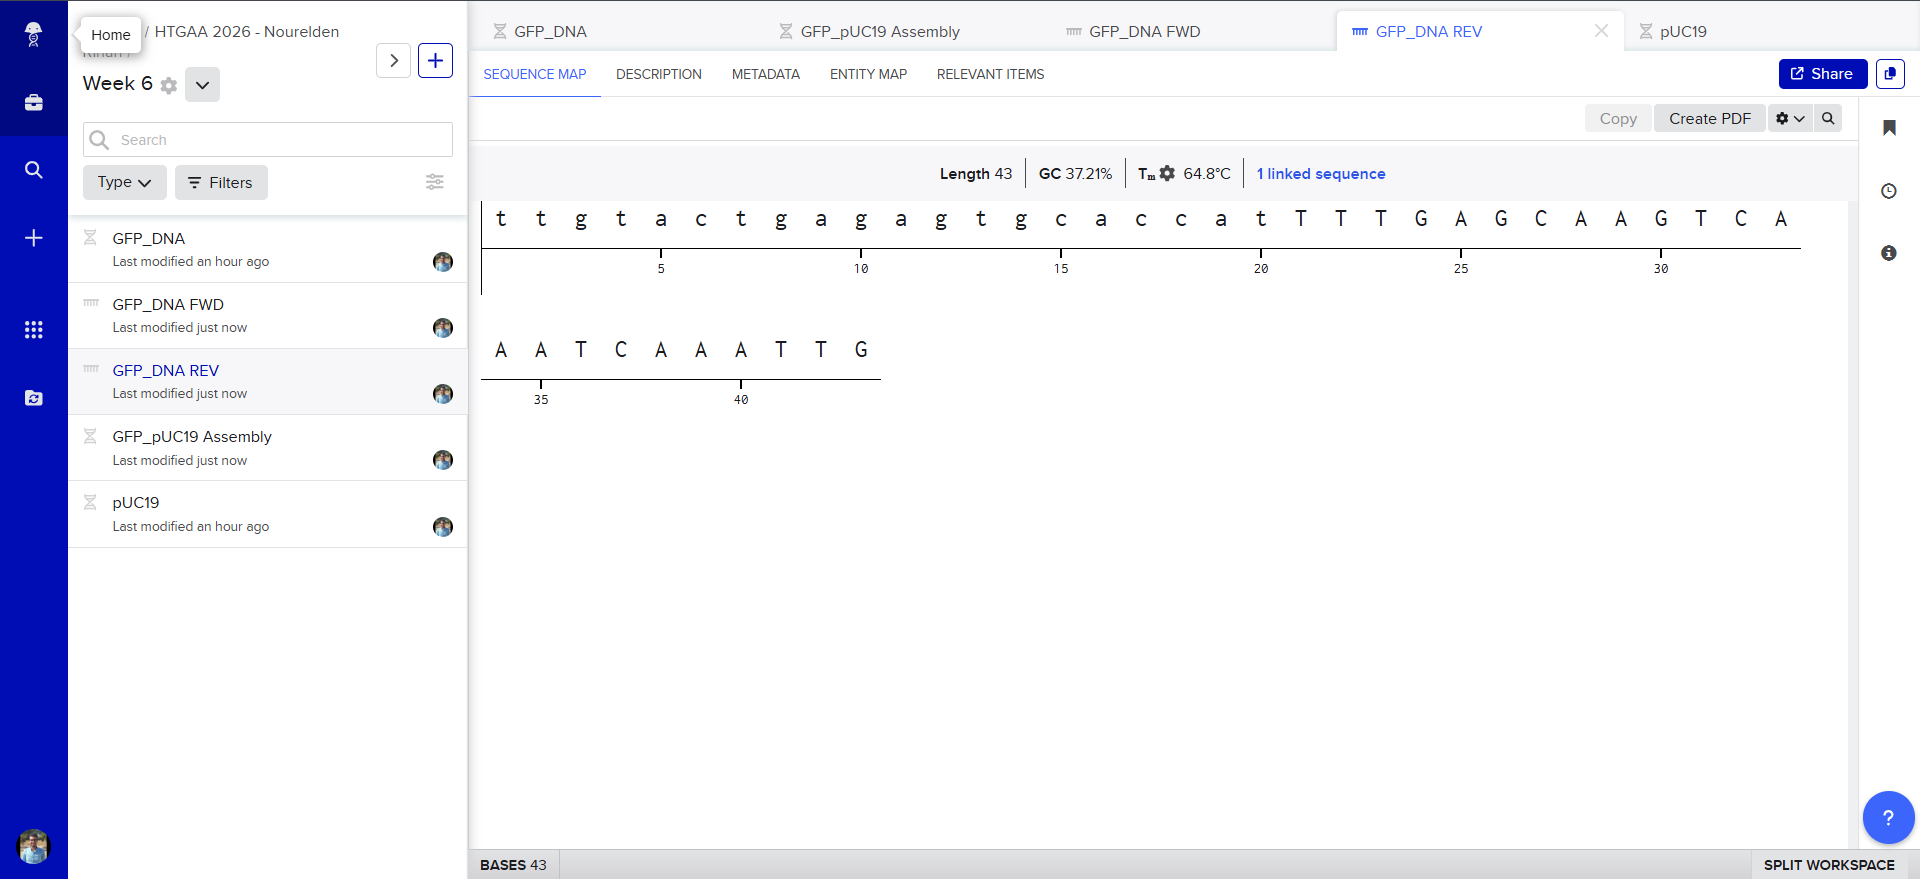
Also Benchling has generated the Forward and Reverse PCR Primers needed for the Reaction, here is the forward primer
caggtcgactctagaggatcTACACACGAATAAAAGATAACAAAG
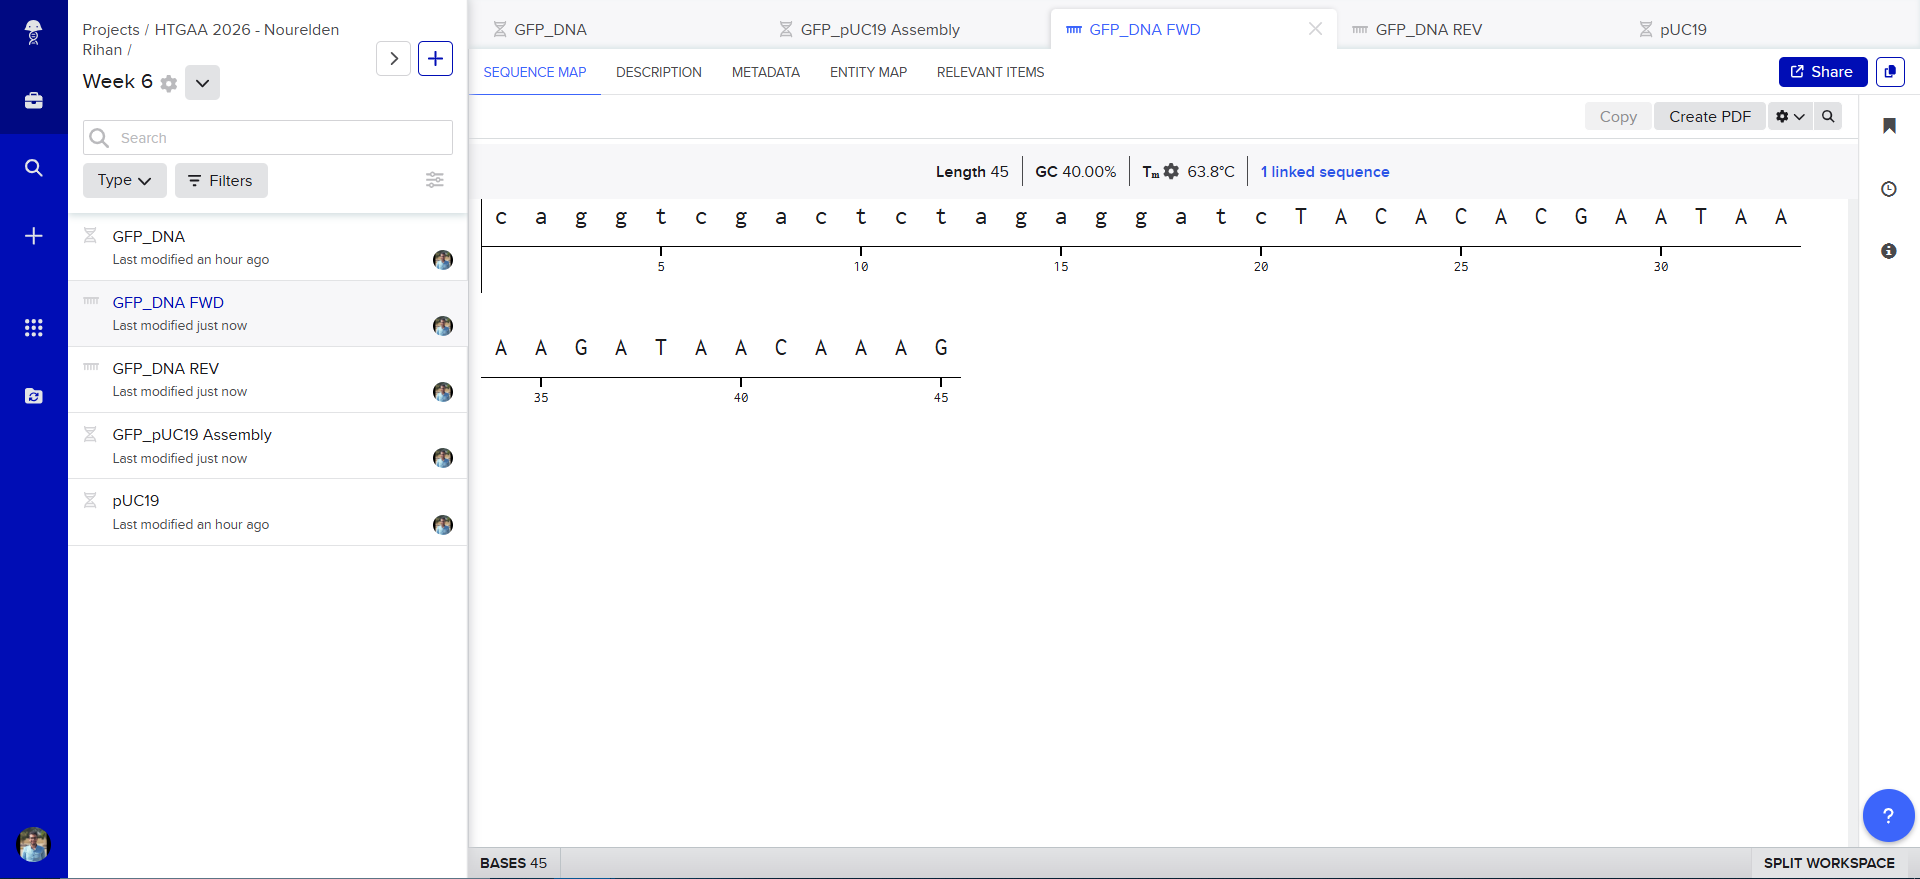
and here is the reverse primer
ttgtactgagagtgcaccatTTTGAGCAAGTCAAATCAAATTG
Assignment: Asimov Kernel
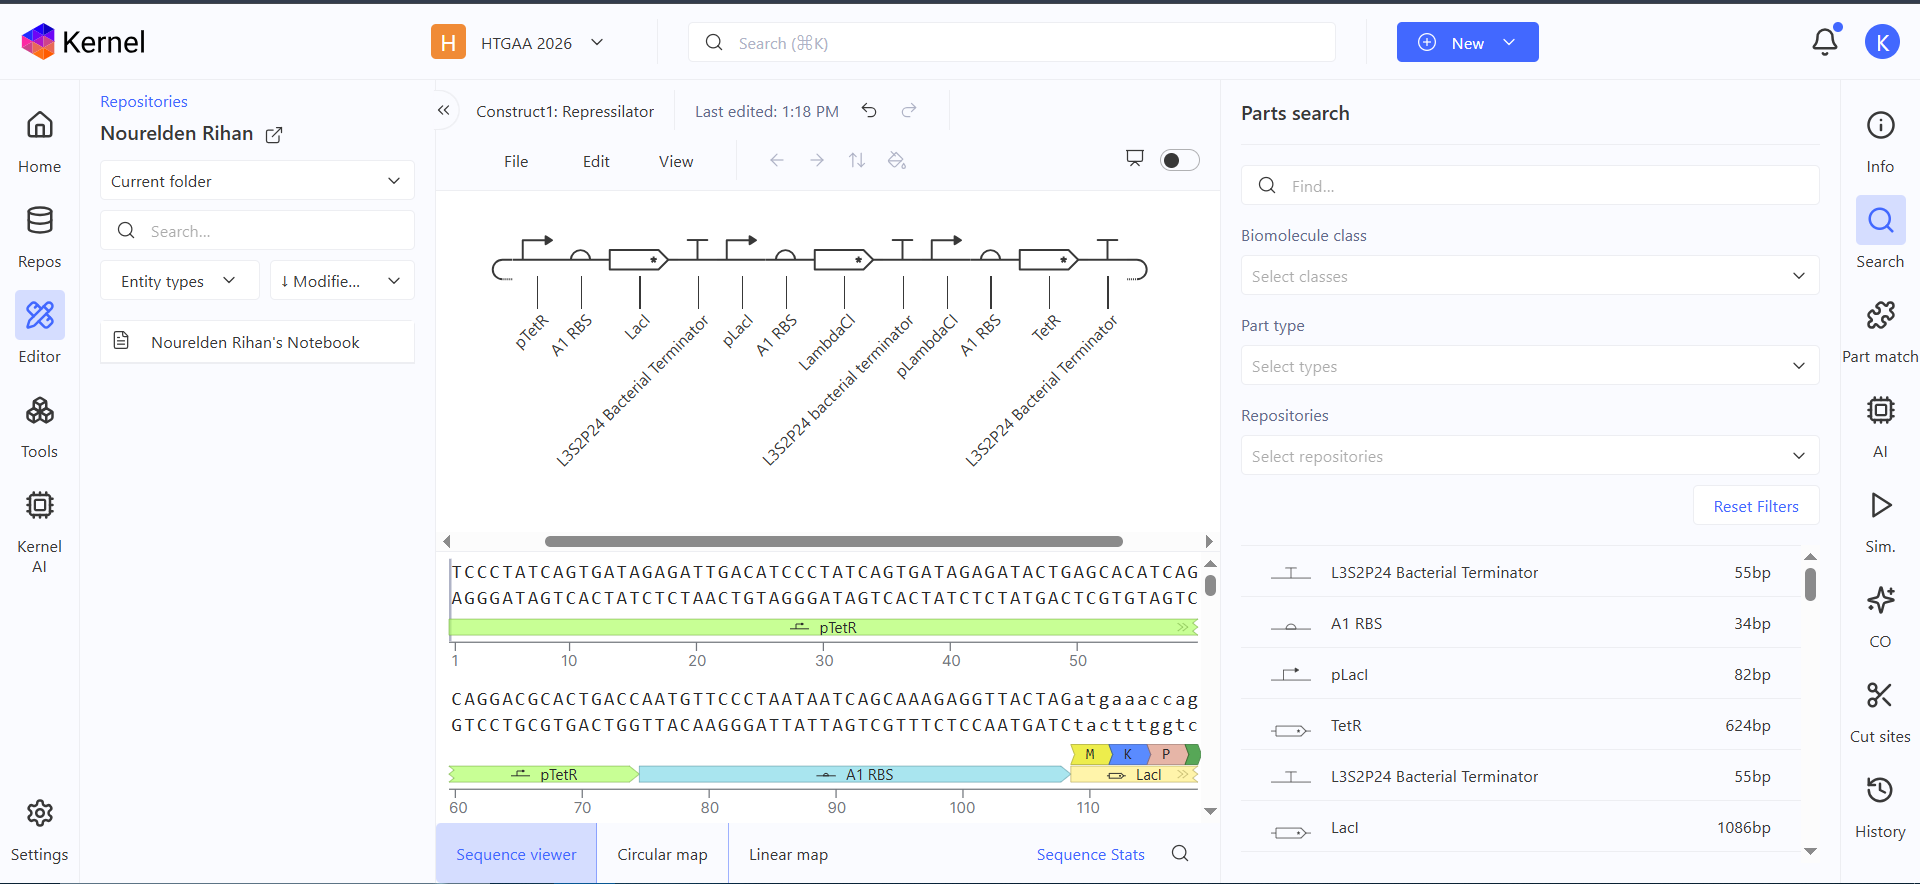
Here is the represilator workflow, i tried to follow the same model that Traci did in the Lecture
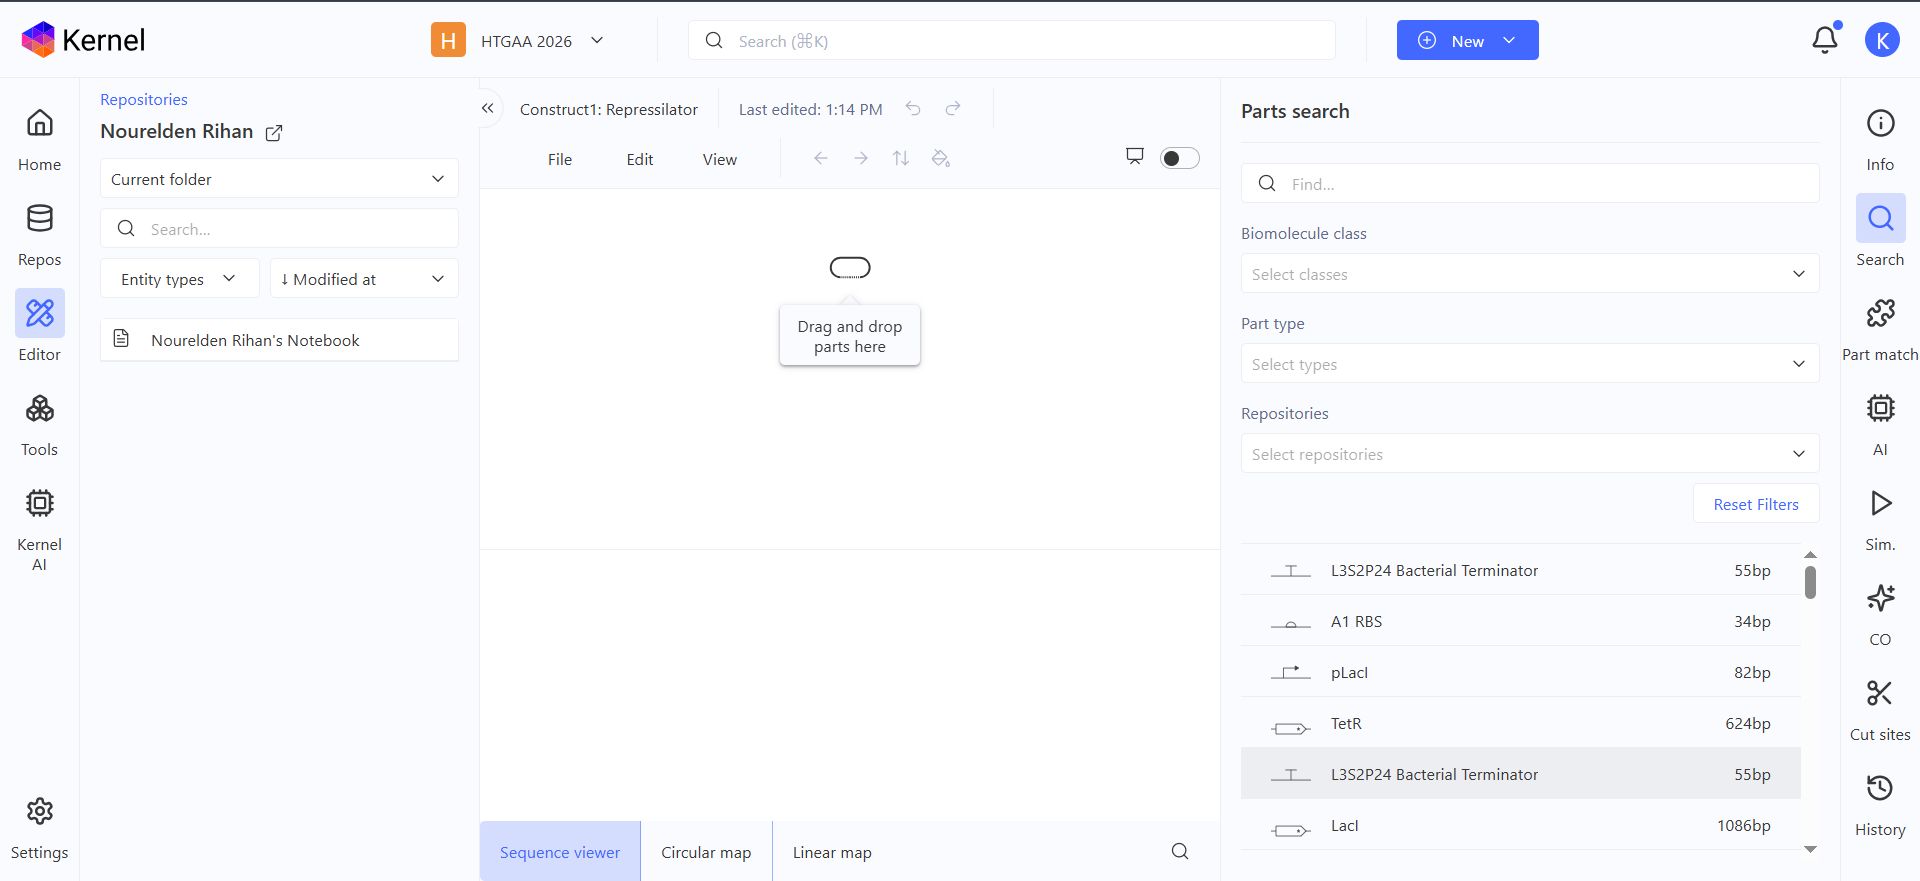
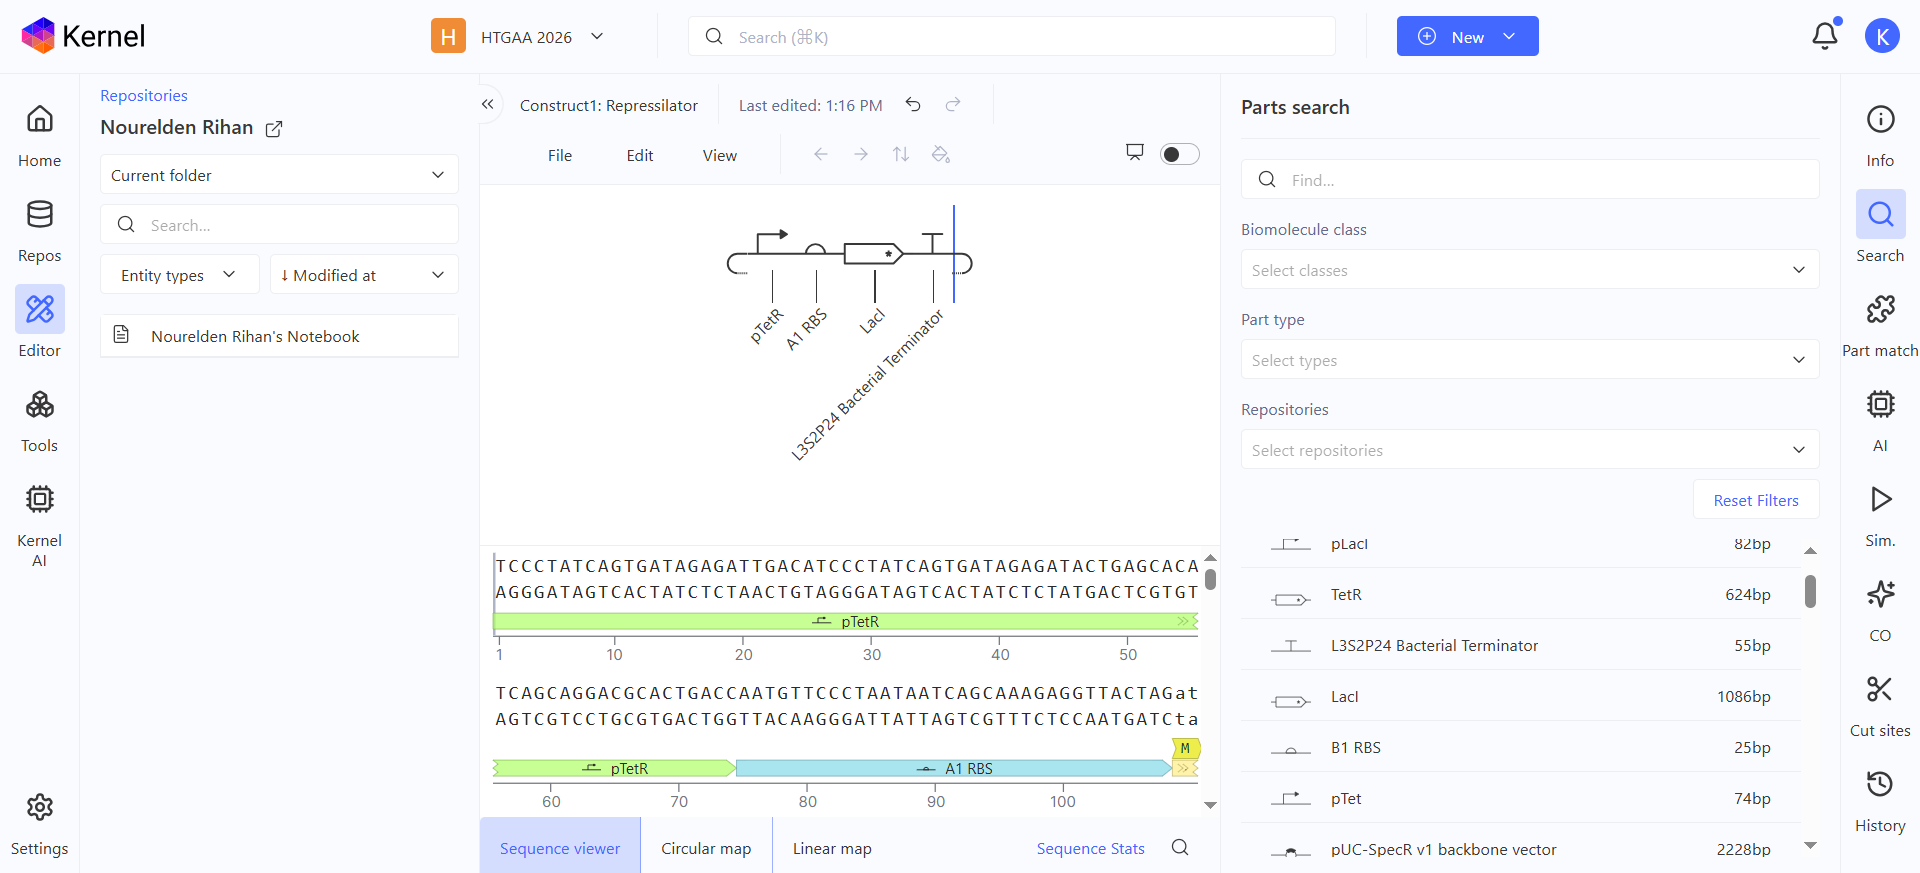

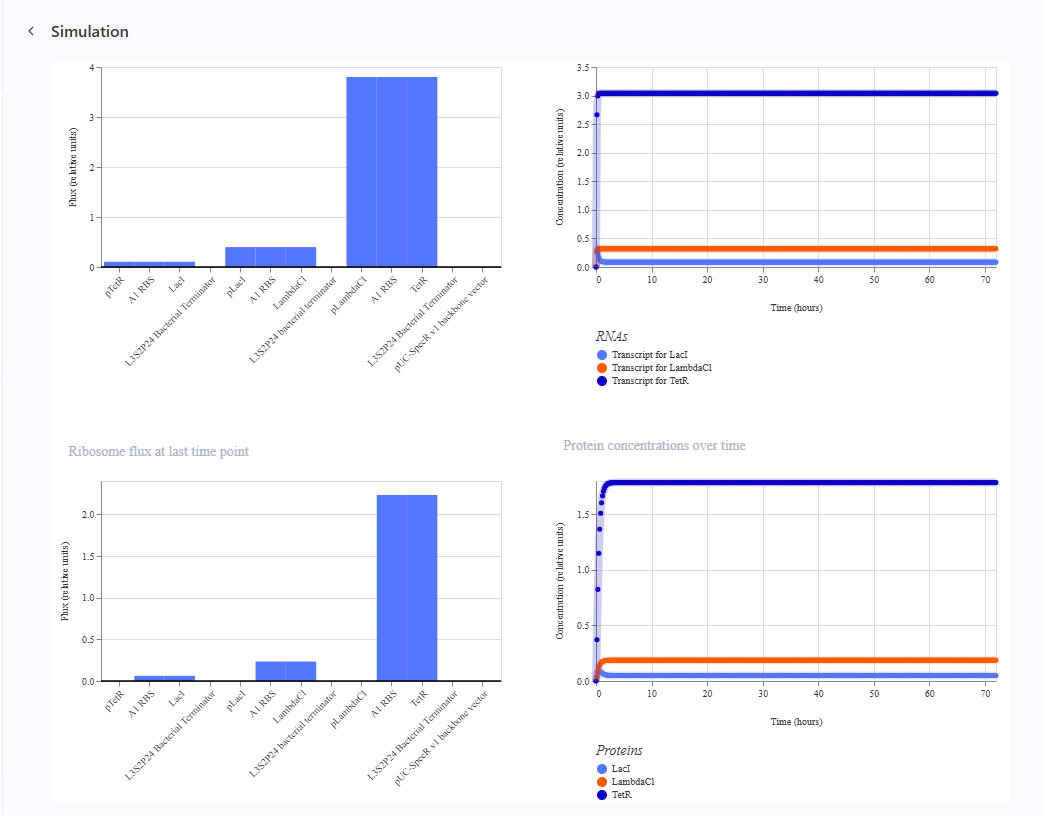
This was the simulation i got which is totally different than the Bacterial Demos one :(
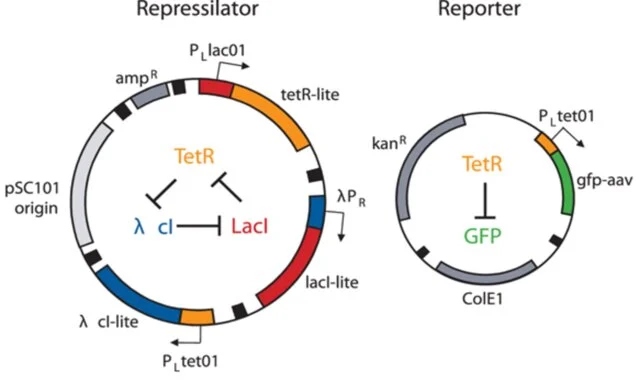
I thought i did it wrong so i looked up this represilator visual
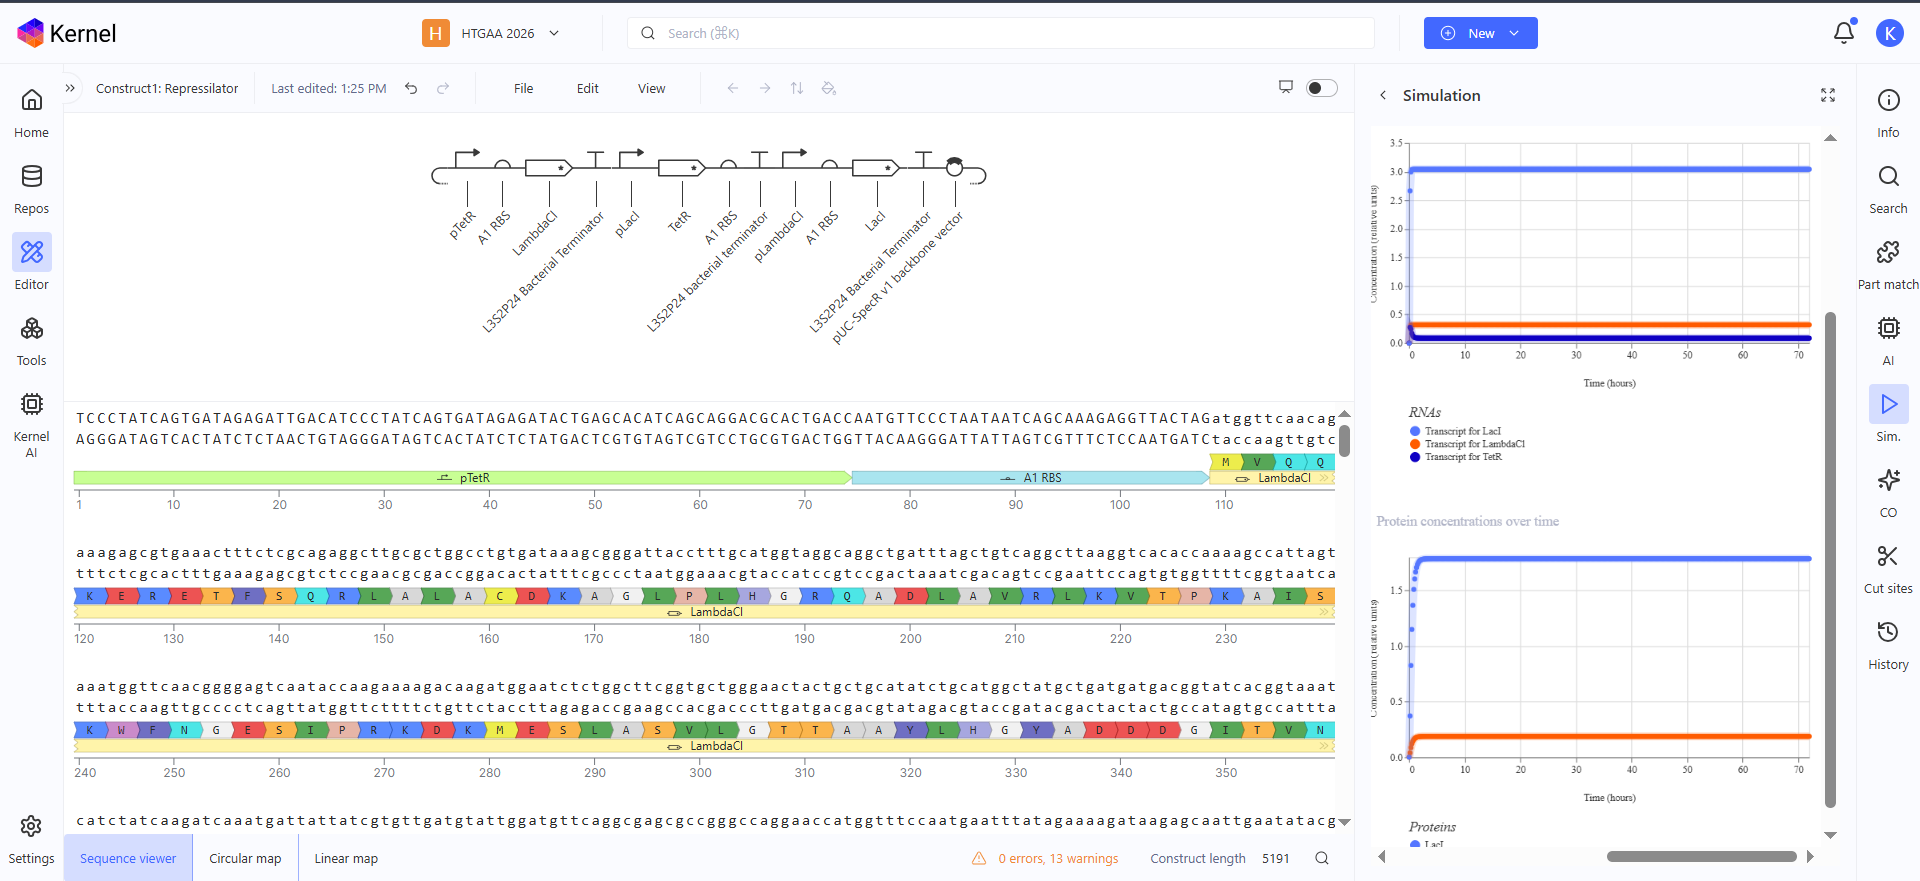
i tried switching up my components to match it but as shown here, the graph is still the same :(
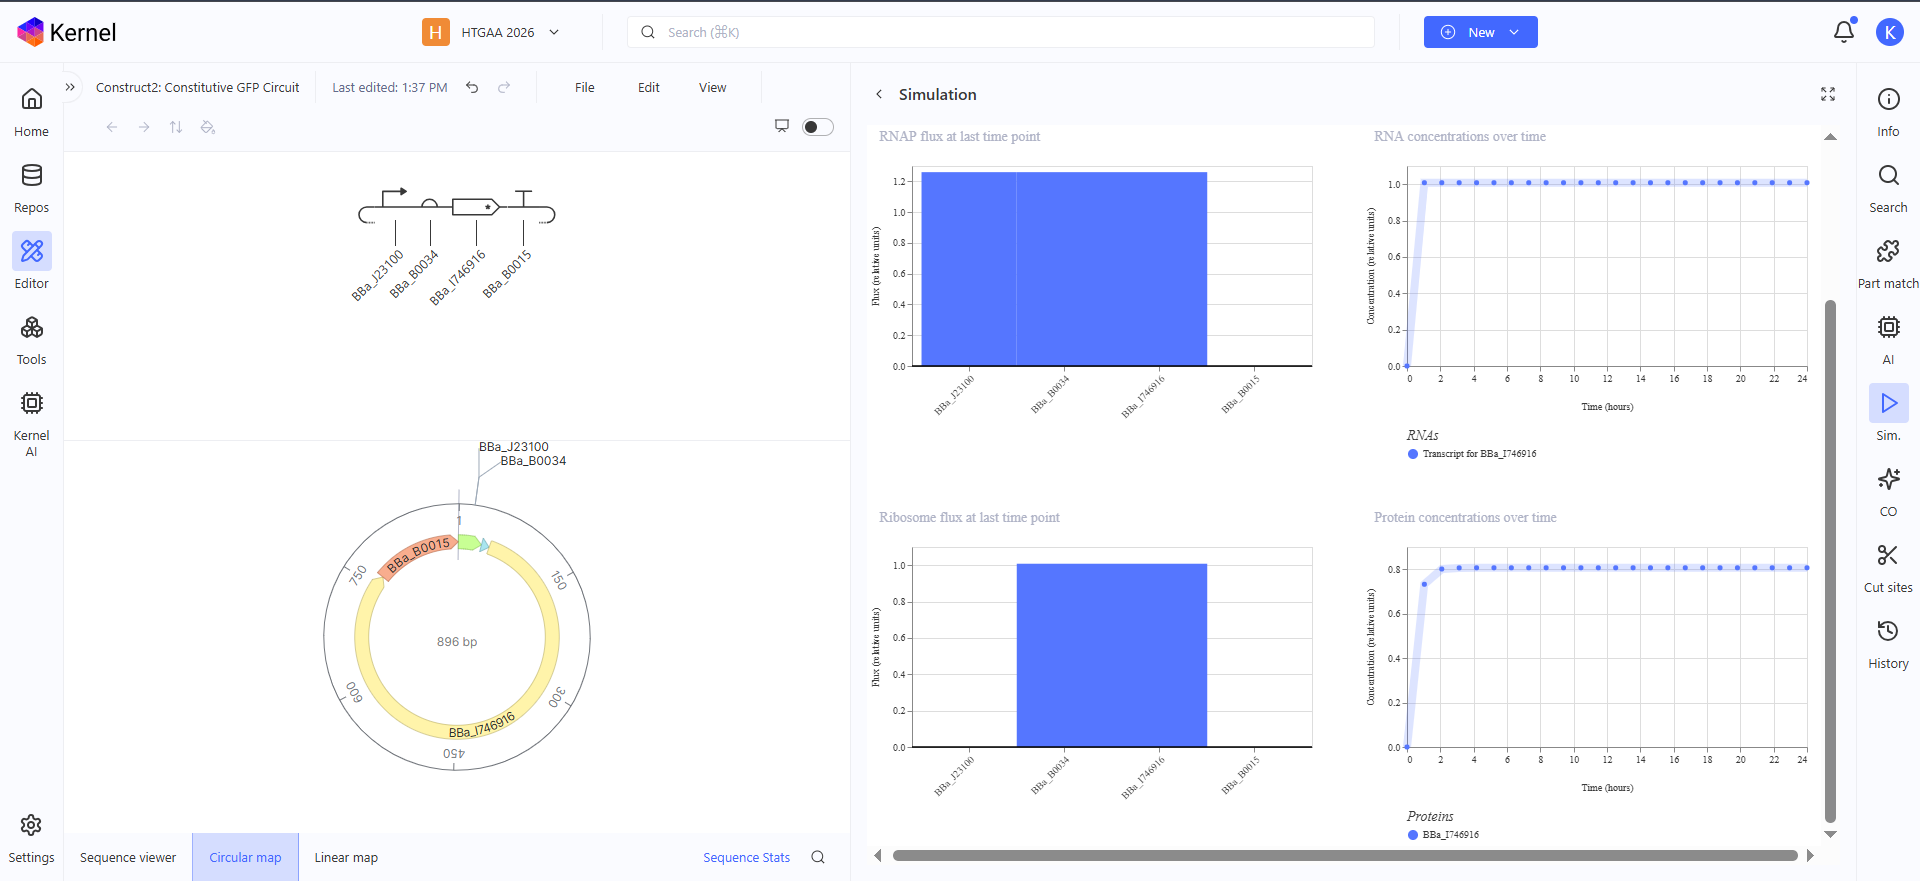
Construct 1: Constitutive GFP Circuit
This is a very simple GFP producing genetic circuit with a constitutive promoter for continous production
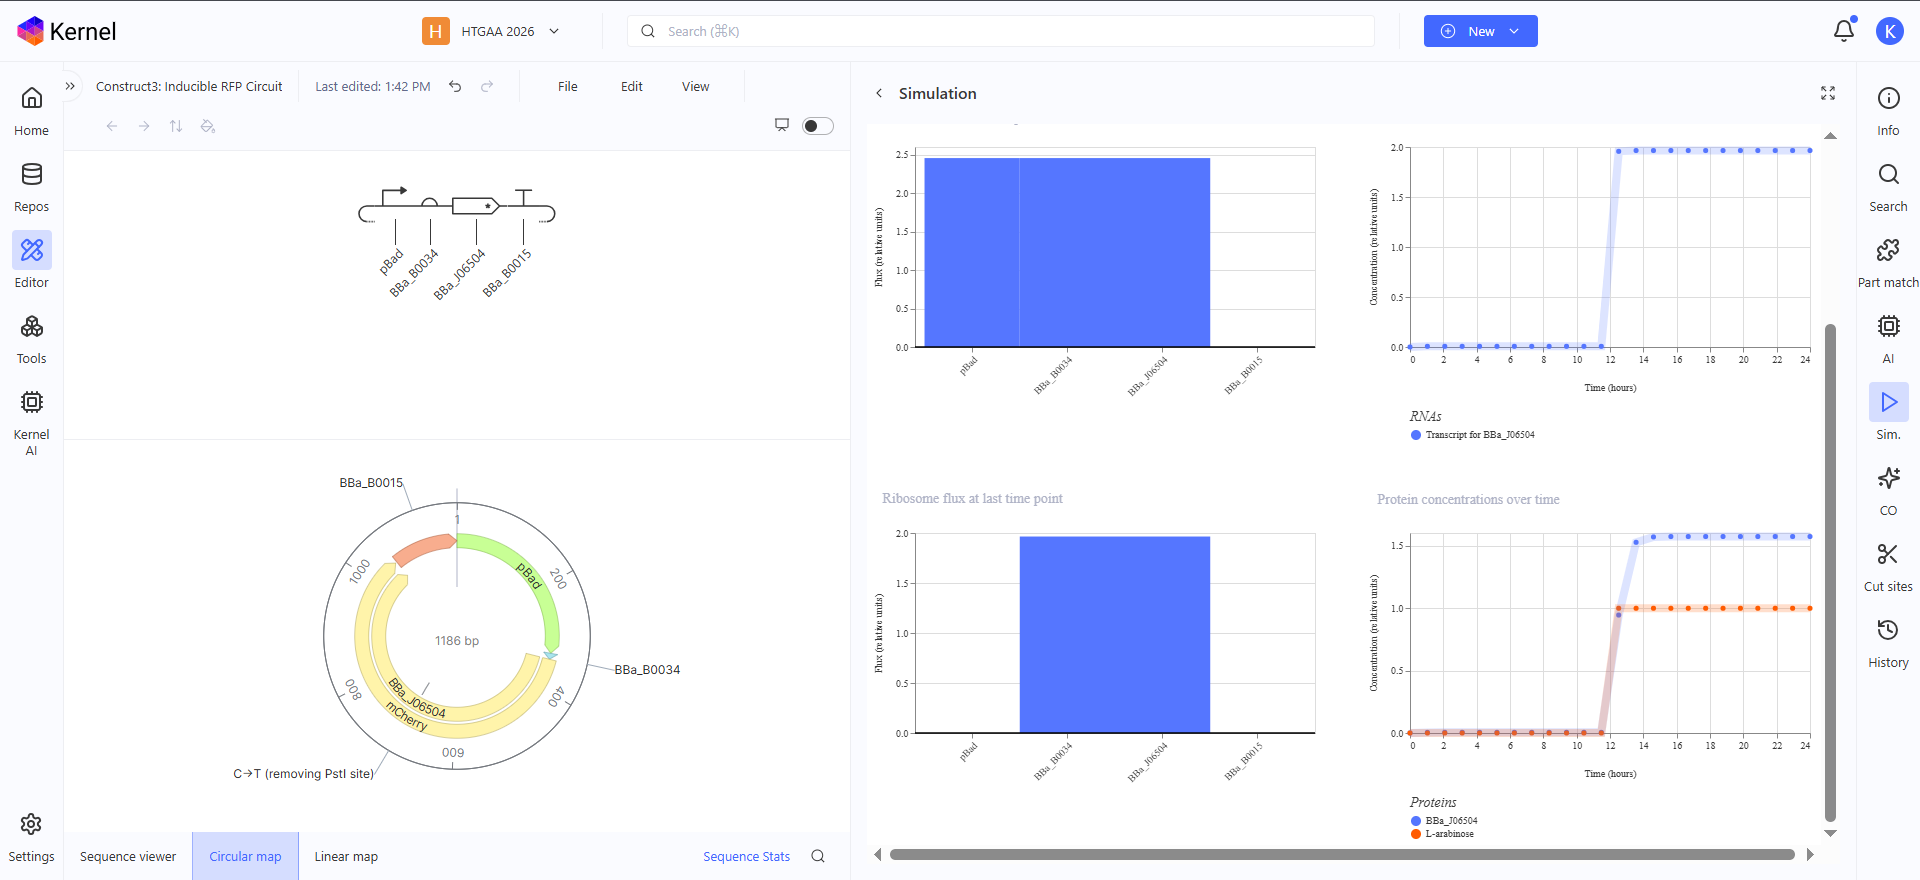
Construct 2: Inducible RFP Circuit
This is an Arabinose controlled RFP producing genetic circuit, in the simulation graph here, i added L-Arabinose at hour 12 so show the increasing production of RFP starting from this point

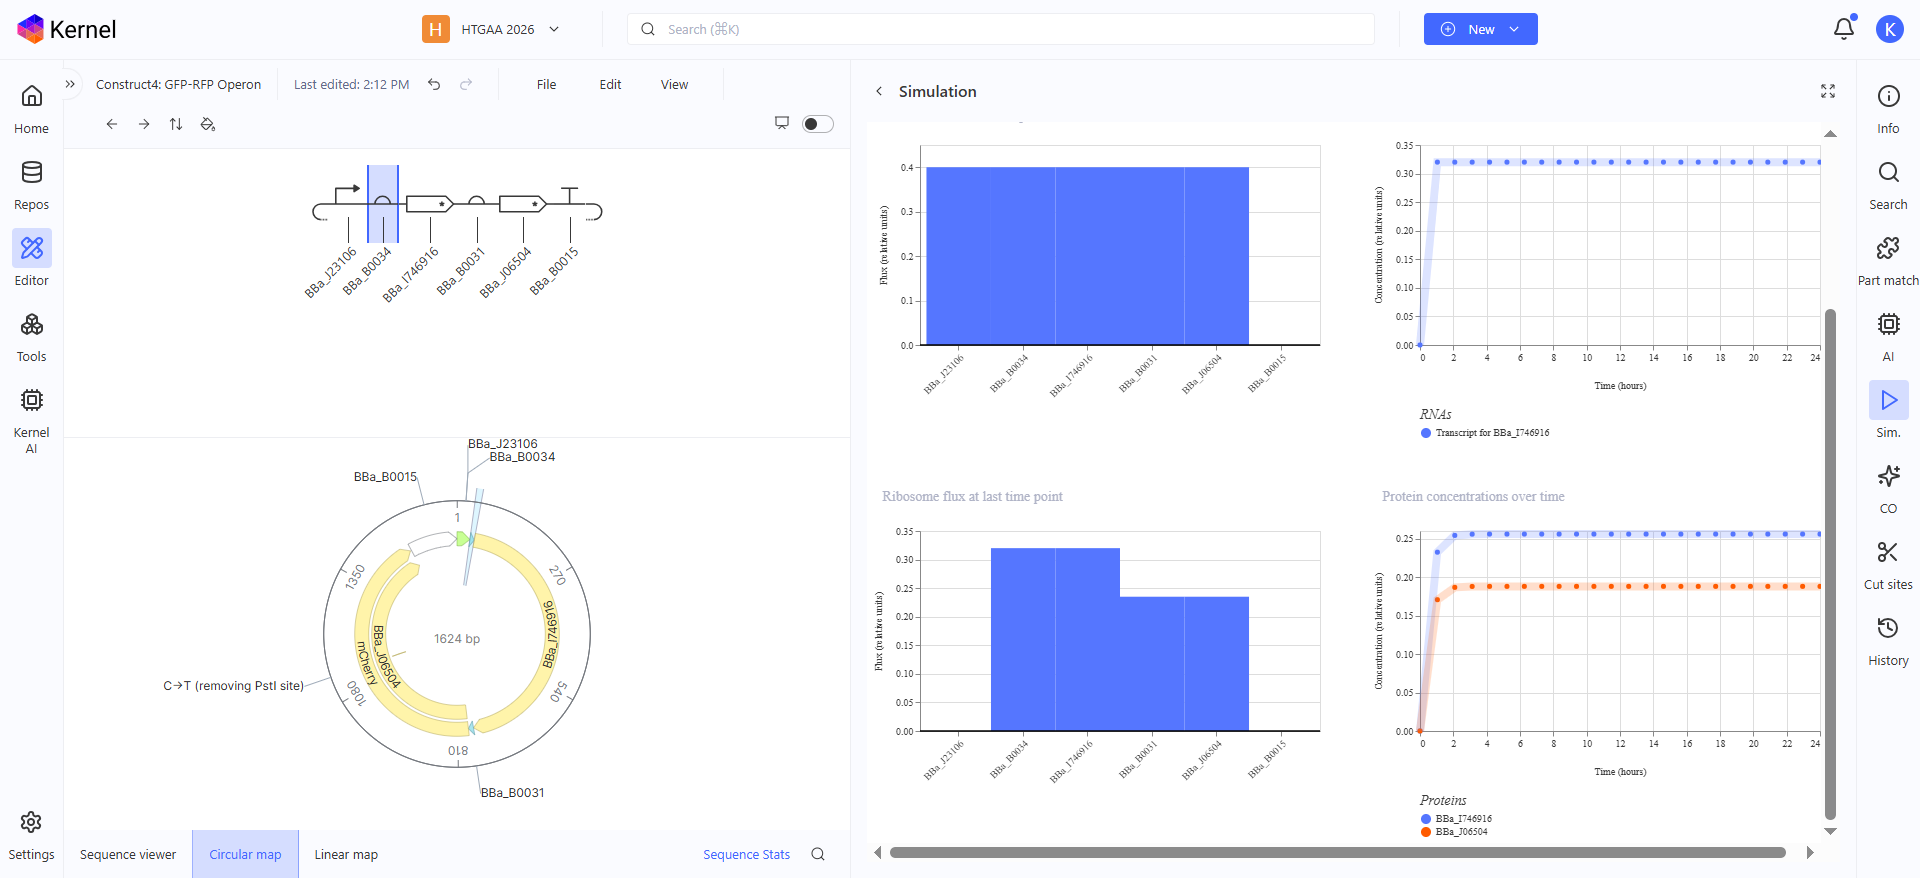
Construct 3: GFP-RFP Operon
This genetic circuit is an Operon of both GFP and RFP, using a single promotor and a single terminator and in between are both the GFP CDS and its RBS and the RFP CDS with its RBS, to make the simulation graph clearer in the production concentrations, i gave the RFP a weaker RBS than the GFP one so now in the graph you can see the protein concentration of RFP is a bit less than GFP