Week 6 HW: Genetic Circuits Part I: Assembly Technologies
🧪 Part A: DNA Assembly
1. Components of Phusion High-Fidelity PCR Master Mix and Their Purpose
The Phusion High-Fidelity PCR Master Mix is optimized for accurate DNA amplification and typically contains:
- Phusion DNA Polymerase
- A high-fidelity DNA polymerase enzyme.
- Synthesizes new DNA strands during PCR. Has proofreading activity (3’ → 5’ exonuclease) which corrects mismatched bases, reducing mutation rates.
- dNTPs (Deoxynucleotide Triphosphates)
- Building blocks of DNA: dATP, dTTP, dCTP, dGTP
- Polymerase incorporates these nucleotides into the growing DNA strand.
- Reaction Buffer (HF Buffer)
- Contains several important chemicals: Mg²⁺ ions
- Required cofactor for DNA polymerase activity.
- Salt and pH stabilizers
- Maintain optimal conditions for enzyme activity.
- Stabilizers
- Help preserve enzyme structure during thermal cycling.
- Optional additives
- May include compounds improving amplification of GC-rich sequences.
To provide a ready-to-use mixture that supports accurate, efficient DNA amplification during PCR.
2. Factors That Determine Primer Annealing Temperature
The annealing temperature (Ta) during PCR determines how well primers bind to the DNA template. Key factors include:
- Primer Melting Temperature (Tm)
- The most important factor. Annealing temperature is usually 2–5°C below the lowest primer Tm.
- GC Content
- GC pairs have 3 hydrogen bonds (stronger).
- Higher GC content increases primer stability and raises Tm.
- Primer Length
- Longer primers bind more strongly.
- Typical length: 18–22 bp.
- Salt Concentration
- Higher salt stabilizes DNA duplexes and increases Tm.
- Secondary Structures
- Hairpins or primer dimers can reduce effective binding.
- Template complexity
- Highly repetitive DNA may require different annealing conditions
3. PCR vs Restriction Enzyme Digests for Creating Linear DNA
| Feature | PCR | Restriction Digest |
|---|---|---|
| Mechanism | DNA amplification using primers and polymerase | DNA cutting using sequence-specific enzymes |
| Protocol | Thermal cycling (denature → anneal → extend) | Incubation with restriction enzyme at constant temperature |
| DNA Required | Very small template amounts | Requires sufficient plasmid DNA |
| Flexibility | Can introduce mutations or new sequences | Limited to enzyme recognition sites |
| Speed | ~1–2 hours | ~30–60 minutes digestion |
| Precision | Depends on primer design | Cuts exactly at recognition sequence |
When PCR is preferable
- Introducing mutations
- Creating new overlaps
- Amplifying small fragments
When restriction digest is preferable
- Cloning using existing restriction sites
- Cutting large plasmids
- Avoiding PCR errors
4. Ensuring DNA Fragments Are Compatible for Gibson Assembly
To ensure successful Gibson cloning, fragments must have:
- Overlapping sequences
- Typically 20–40 bp identical overlap between fragments.
- Correct orientation
- Fragments must be designed so overlaps match the correct 5’ → 3’ direction.
- Clean DNA fragments
- Remove template plasmid using DpnI digestion.
- Purify PCR products using DNA cleanup columns.
- Correct fragment sizes
- Verify using agarose gel electrophoresis.
- Accurate concentration
- Measure with Nanodrop or Qubit to achieve correct molar ratios.
5. How Plasmid DNA Enters E. coli During Transformation
Step-by-step mechanism
- Competent cells
- E. coli cells are chemically treated (CaCl₂).
- This neutralizes negative charges on DNA and membrane.
- DNA incubation on ice
- DNA binds loosely to the cell membrane.
- Heat shock (42°C)
- Creates temporary pores in the membrane.
- DNA entry
- Plasmid DNA diffuses into the cytoplasm.
- Recovery
- Cells recover in SOC media and begin expressing antibiotic resistance genes.
- Selection
- Cells with plasmids survive on antibiotic plates.
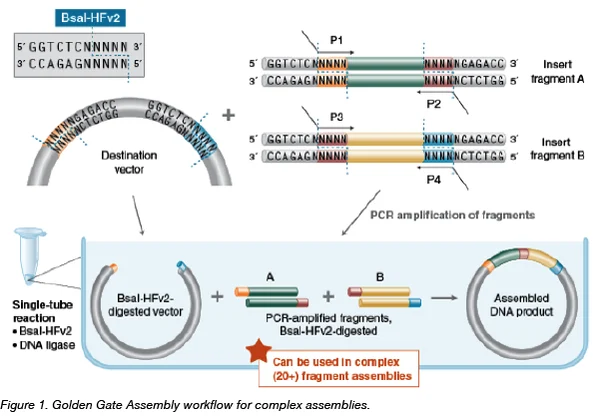
6. Another DNA Assembly Method: Golden Gate Assembly
Golden Gate Assembly is a molecular cloning technique that allows the simultaneous assembly of multiple DNA fragments in a single reaction. It uses Type IIS restriction enzymes (such as BsaI or BsmBI) that cut DNA outside their recognition sequence, generating custom overhangs. These overhangs are designed so fragments assemble in a specific order. During the reaction, the enzyme repeatedly digests DNA fragments and ligase re-joins them, gradually producing the desired construct. Because the restriction sites are removed after assembly, the final plasmid is scarless, meaning no extra sequences remain. Golden Gate is highly efficient and commonly used in synthetic biology, metabolic engineering, and modular cloning systems like MoClo. It is especially useful when assembling many DNA fragments simultaneously.
7. Modeling Golden Gate Assembly Using Benchling
Attempt 1
Initally I decided to directly build a complicated genetic circuit design for my final project idea (lunglite) using golden gate assembly method but failed:
Steps involved:
- I created a benchling project-

- Created folders in same project-
- Plasmid Backbone
- Gene Modules
- Golden Gate Fragments
- Assembly Simulation
- Final Constructs
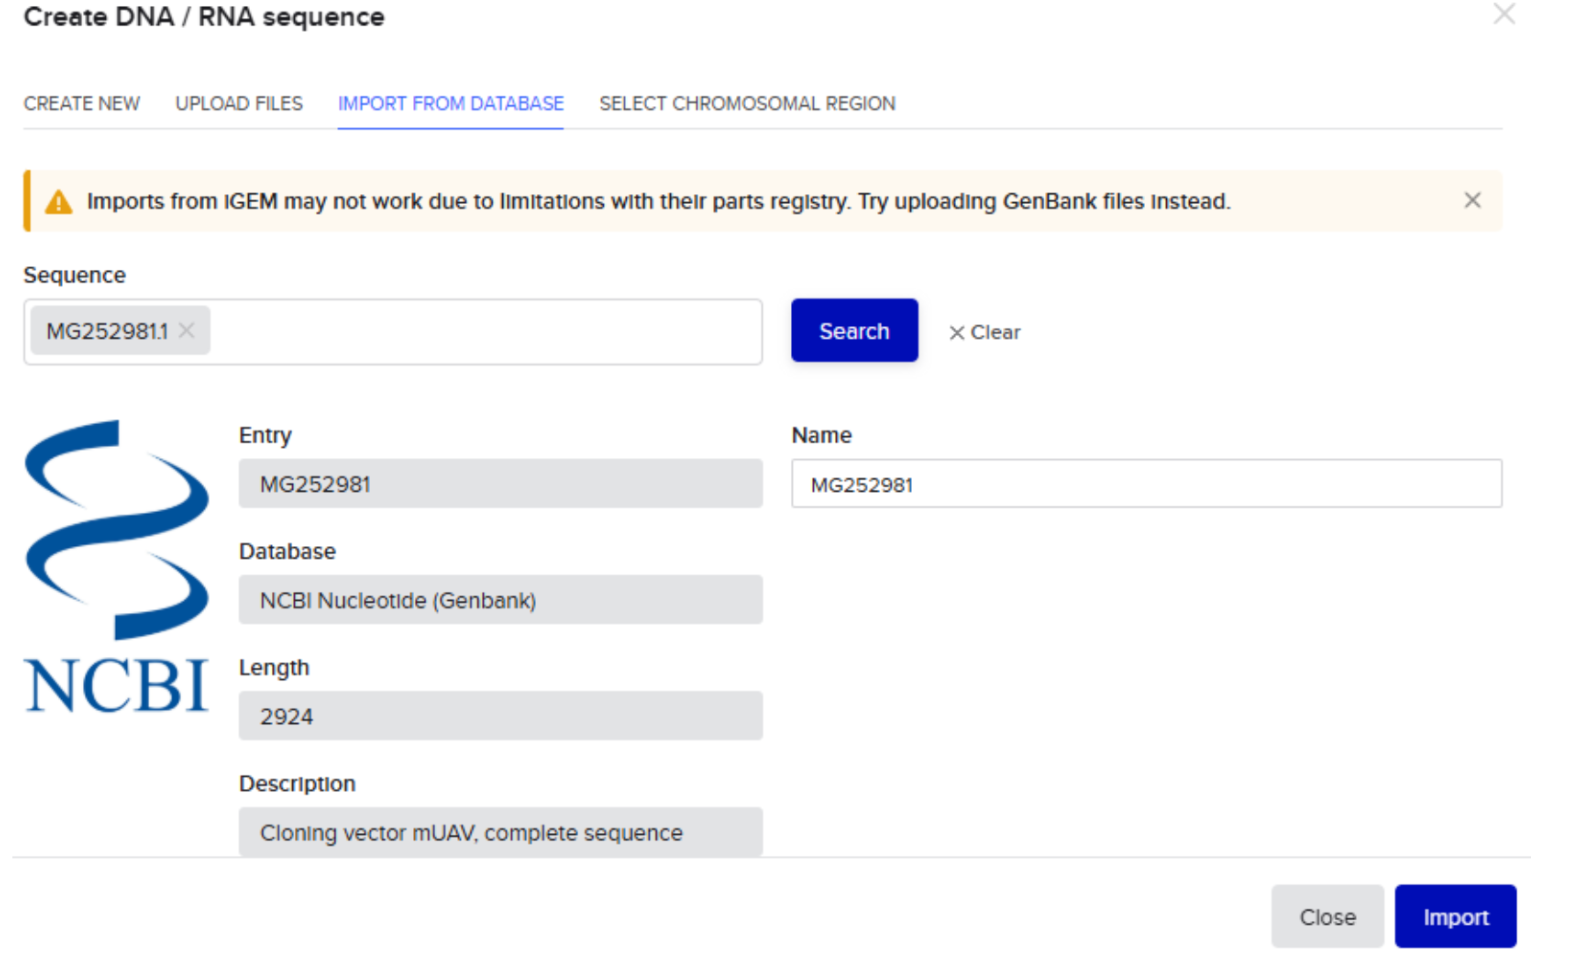
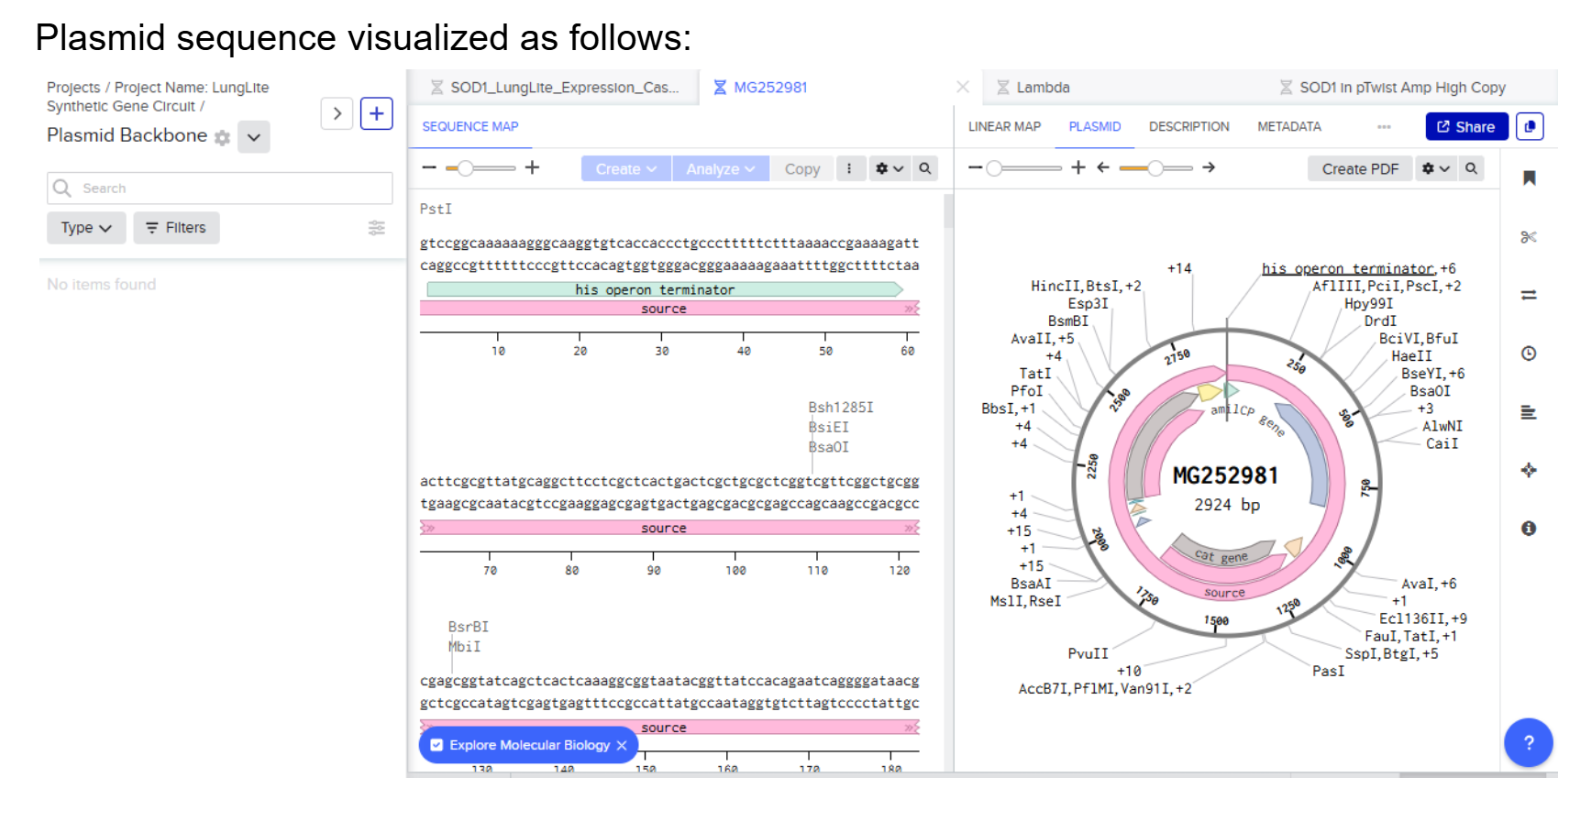
- Imported plasmid sequence to the folder “Plasmid Backbone”-
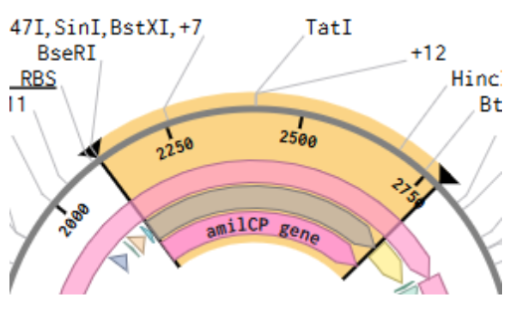
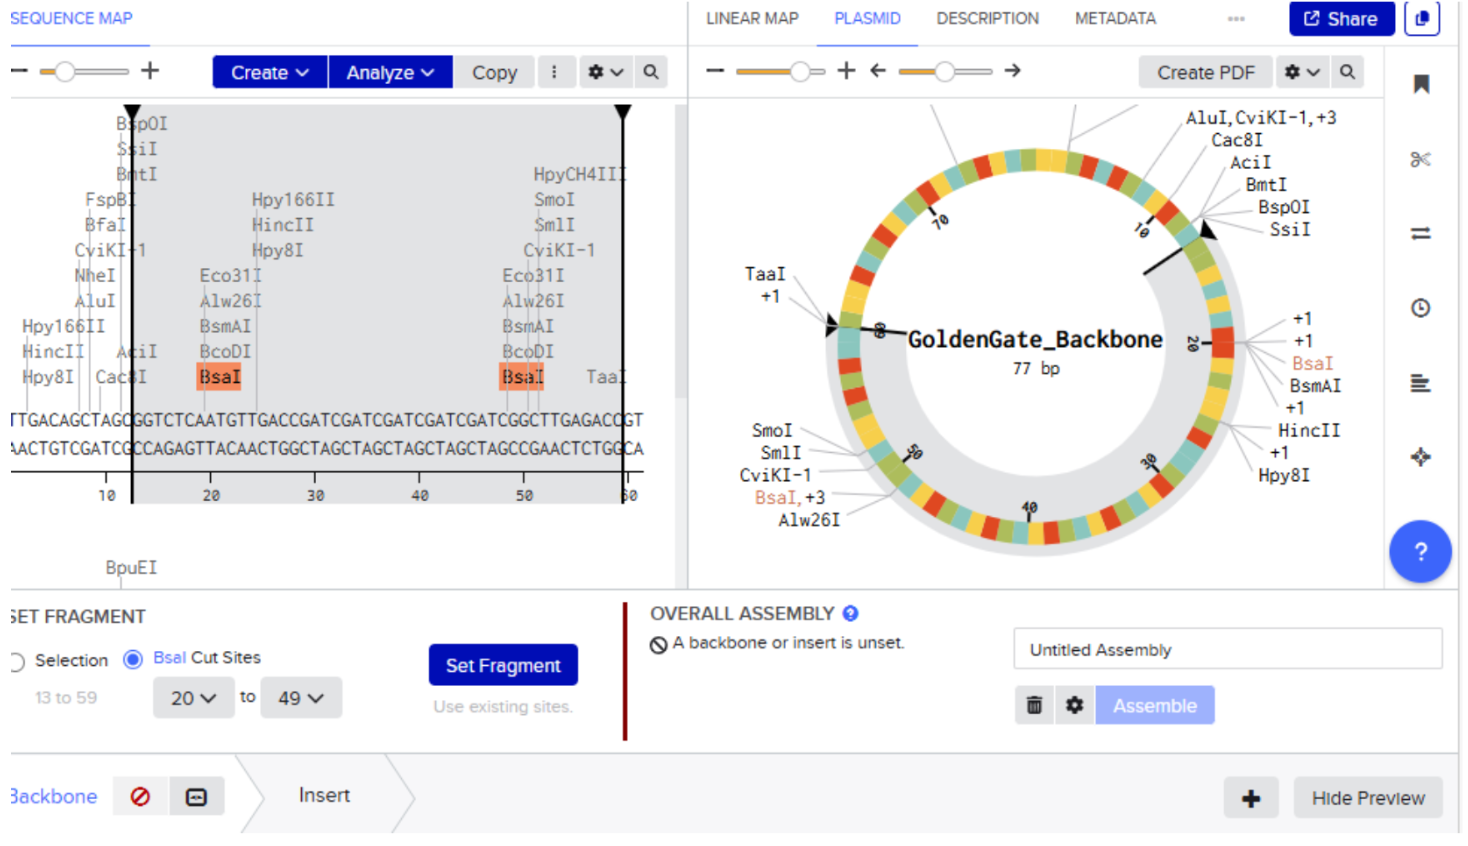
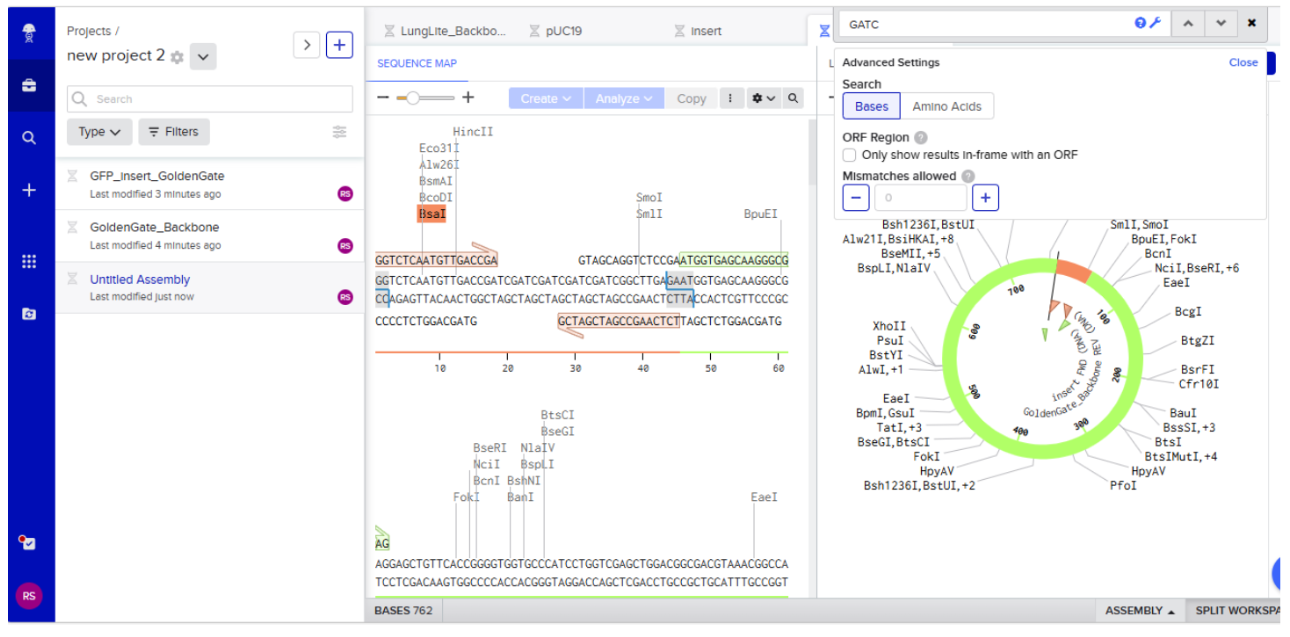
- Plasmid sequence visualized as follows:
- Highlight TGTCAG as Chromophore Site In amilCP gene:
I directly searched for the sequence:
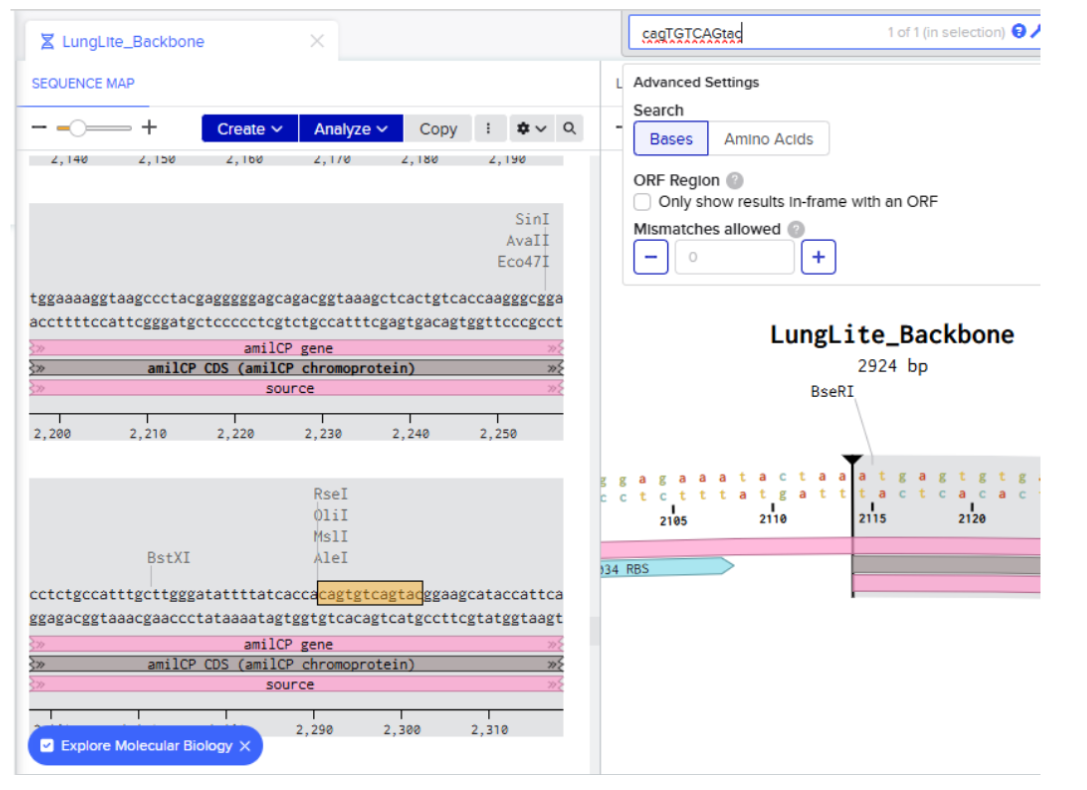
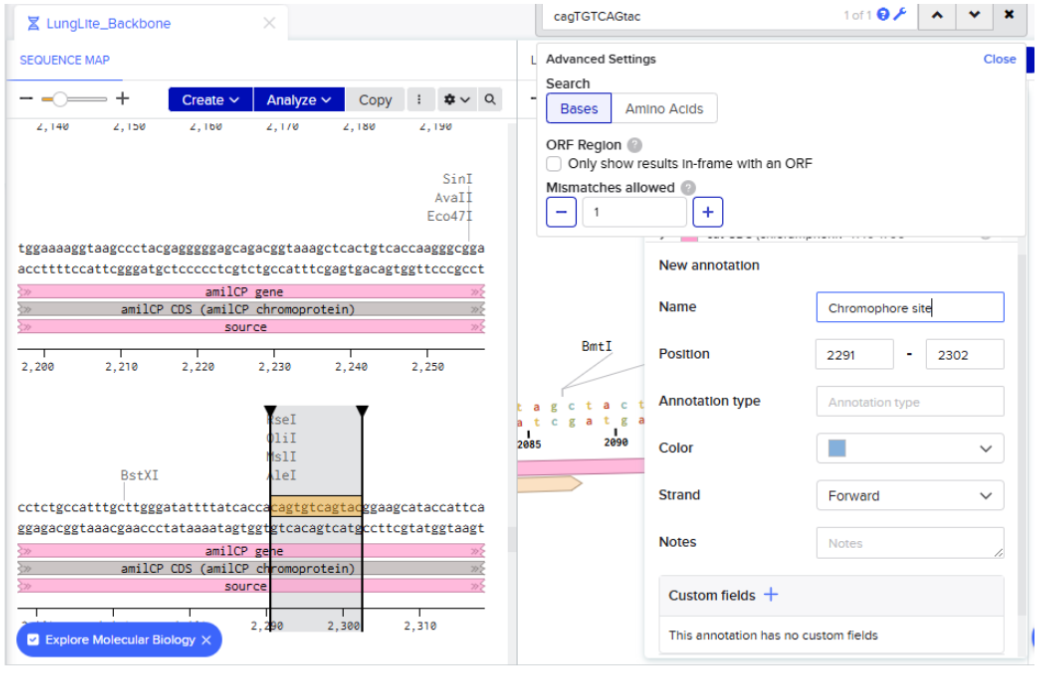
- Creating annotation of the identified sequence:
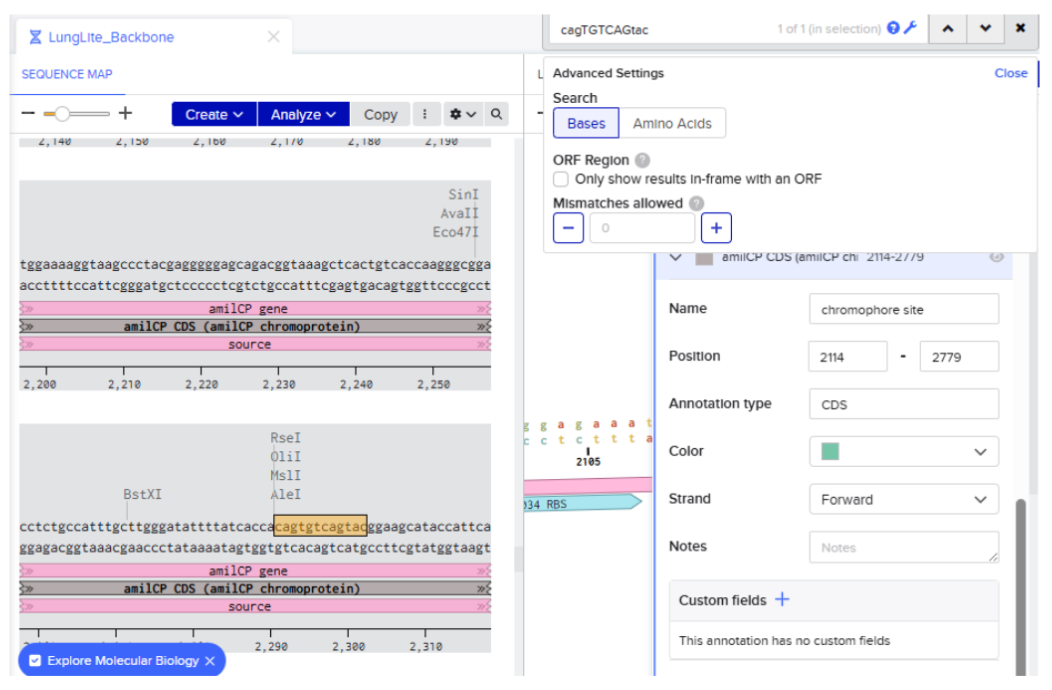
Didn’t highlight the region properly had to do the step again:
- Selected golden gate assembly
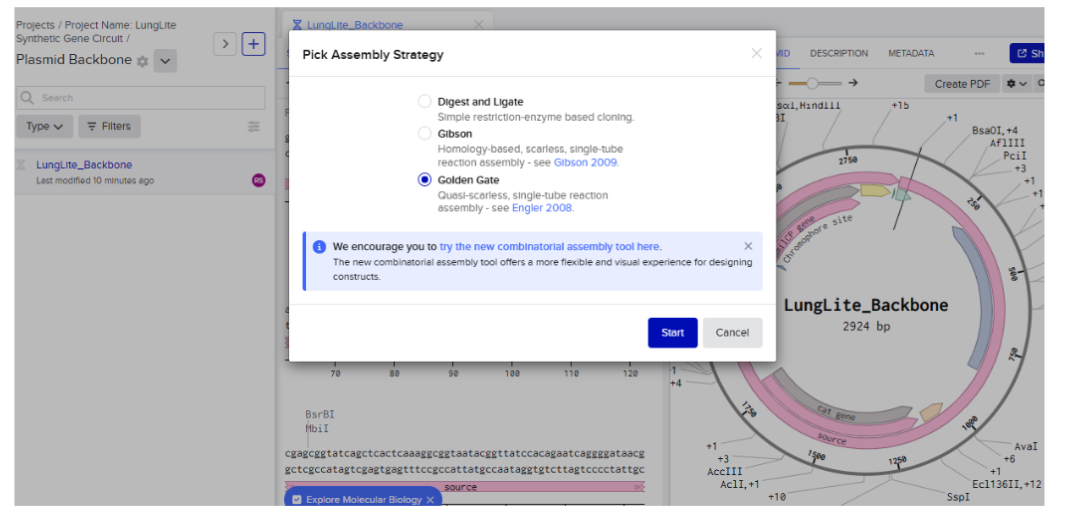
Attempt 2
After several failed attempts, the following steps attached show a successful implementation for Golden Gate Assembly modeling:
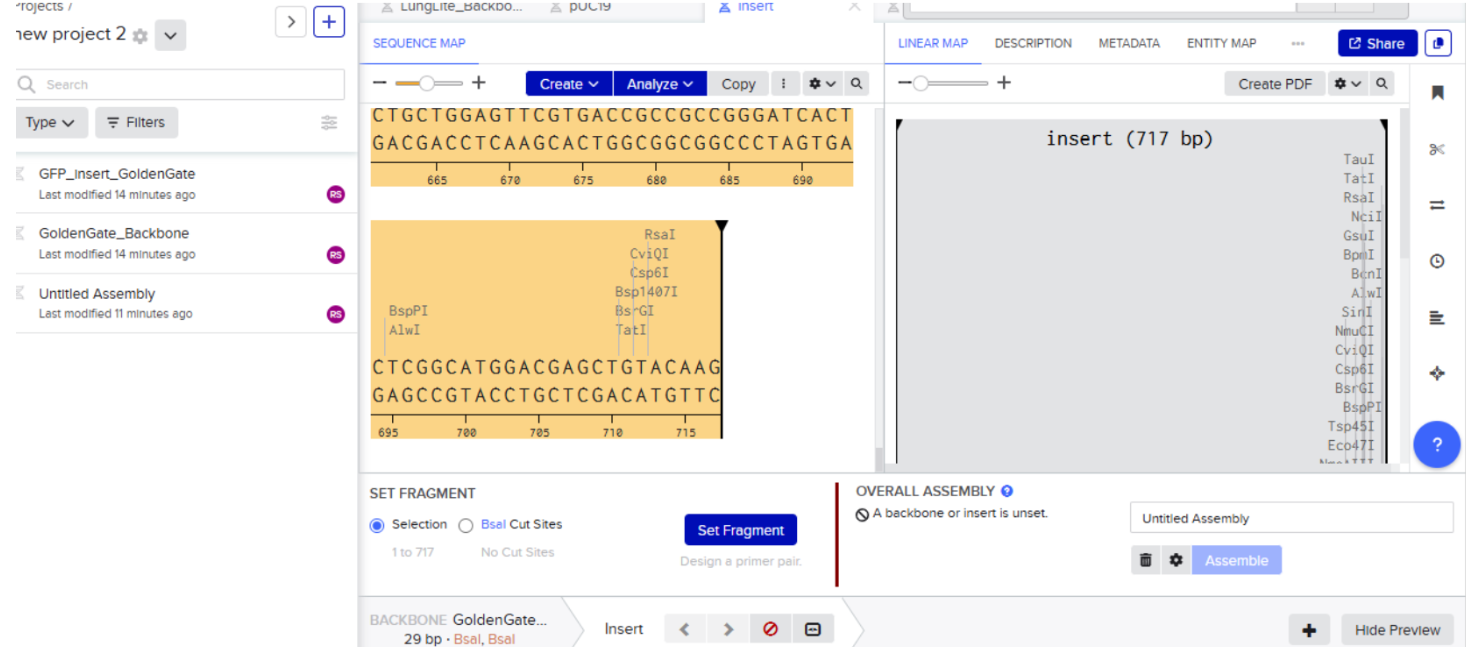
- Backbone DNA Sequence: pUC19
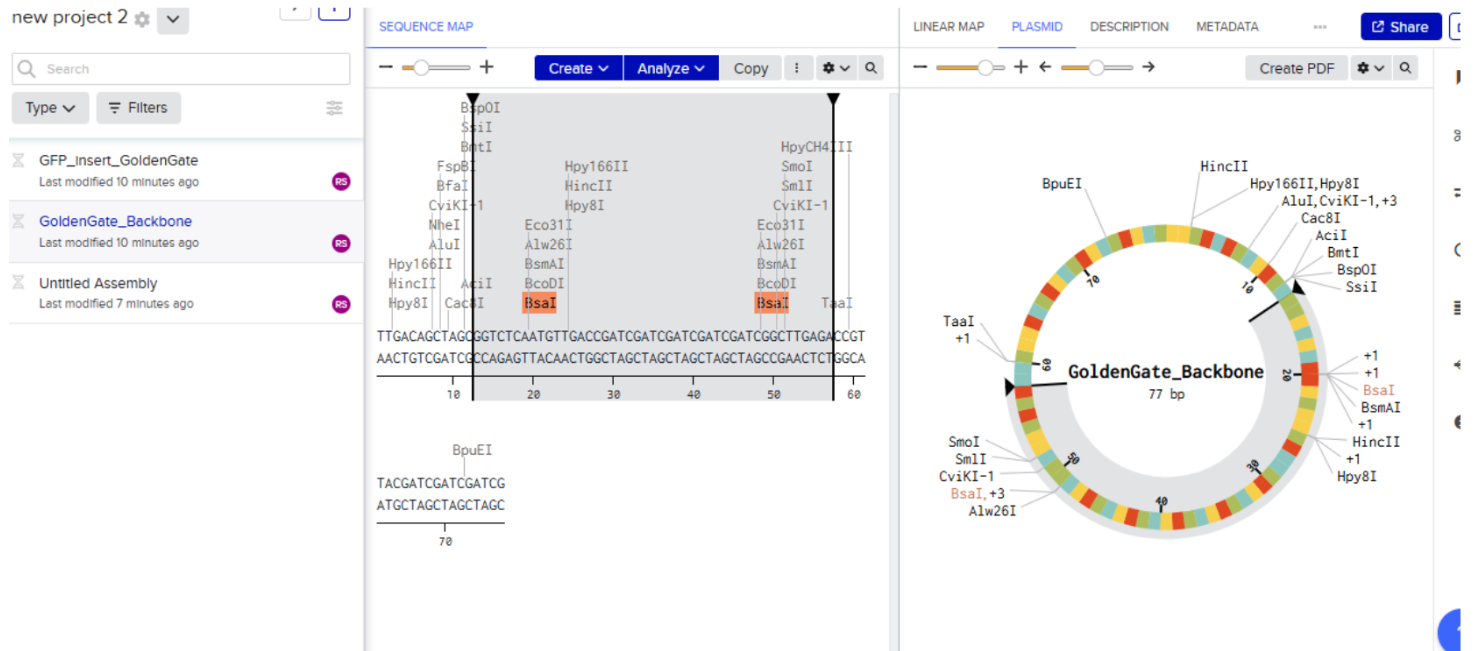
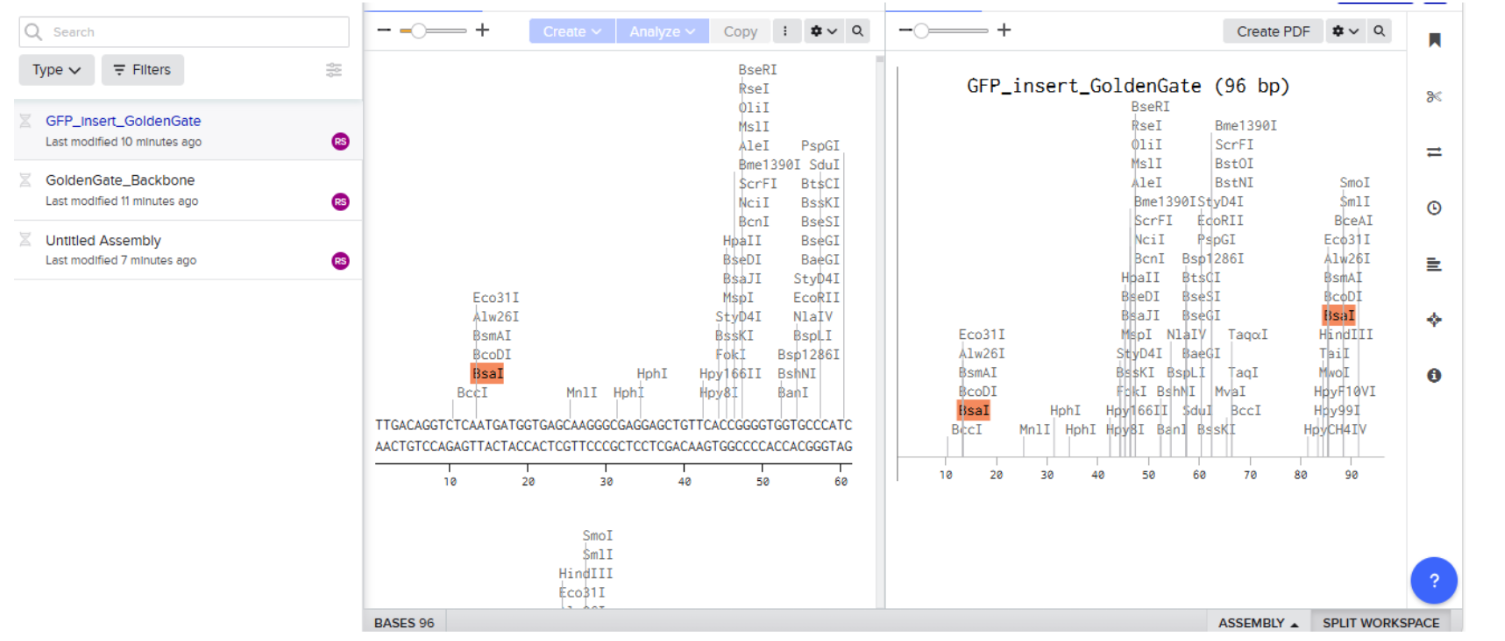
- Insert sequence (GFP Protein):
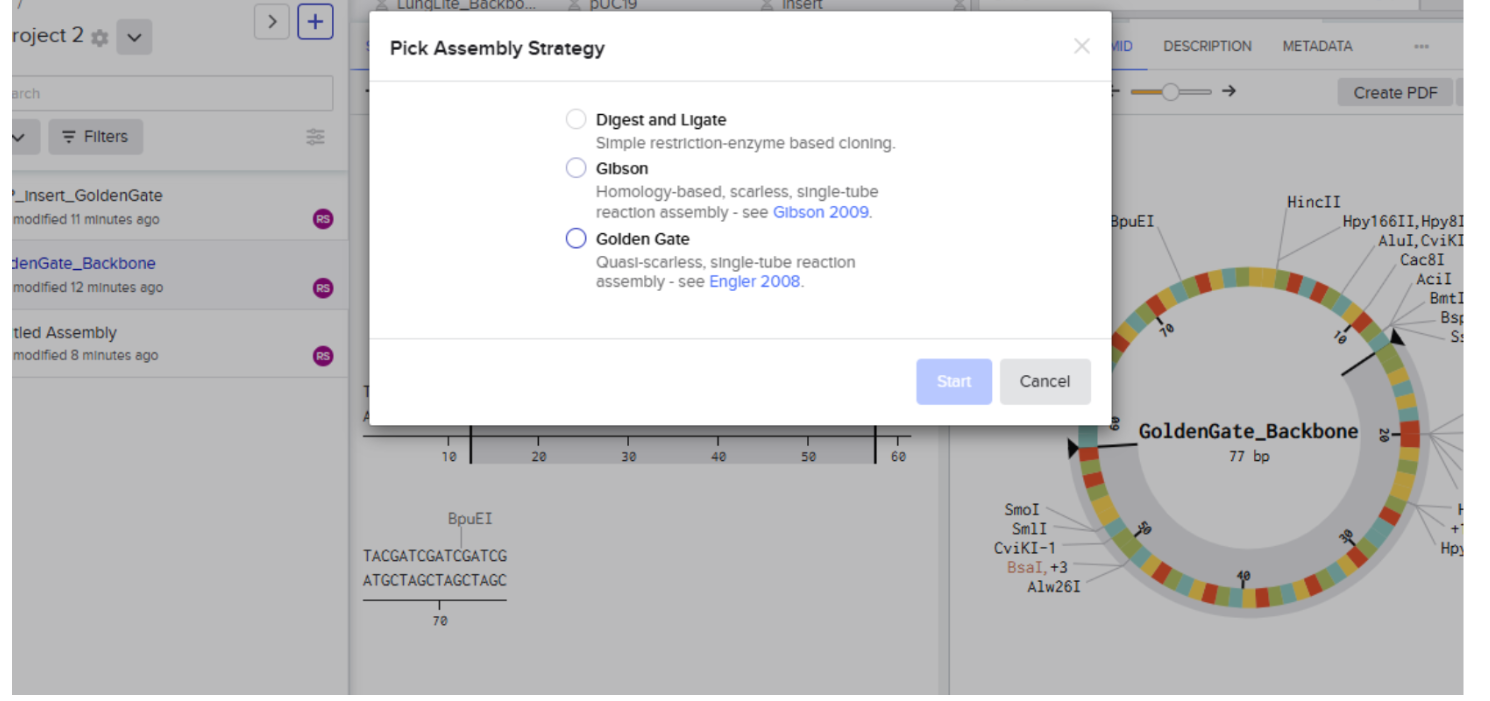
- Open the plasmid sequence and click on assembly then click on assembly wizard

- Select Golden Gate Assembly Method:
- After clicking on start then click on “backbone option”:
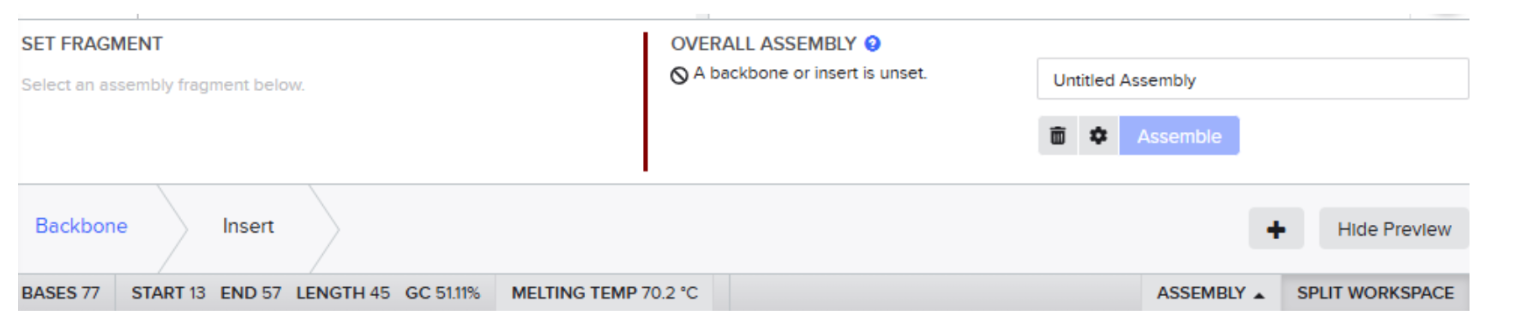
- Highlight the sequence between BsaI restriction sites and then select set fragment
- Repeat the same process of insert fragment
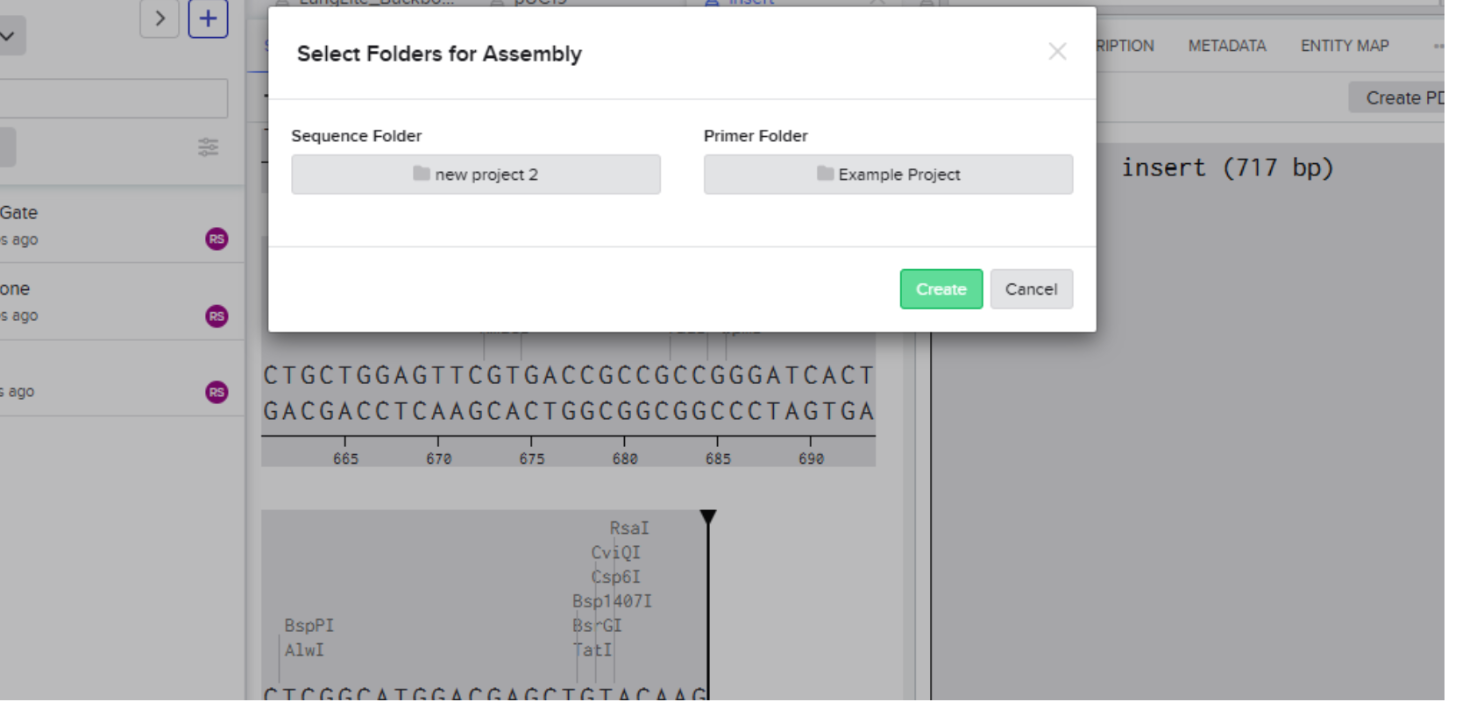
- Then click on create and voila its done
Assembly results:
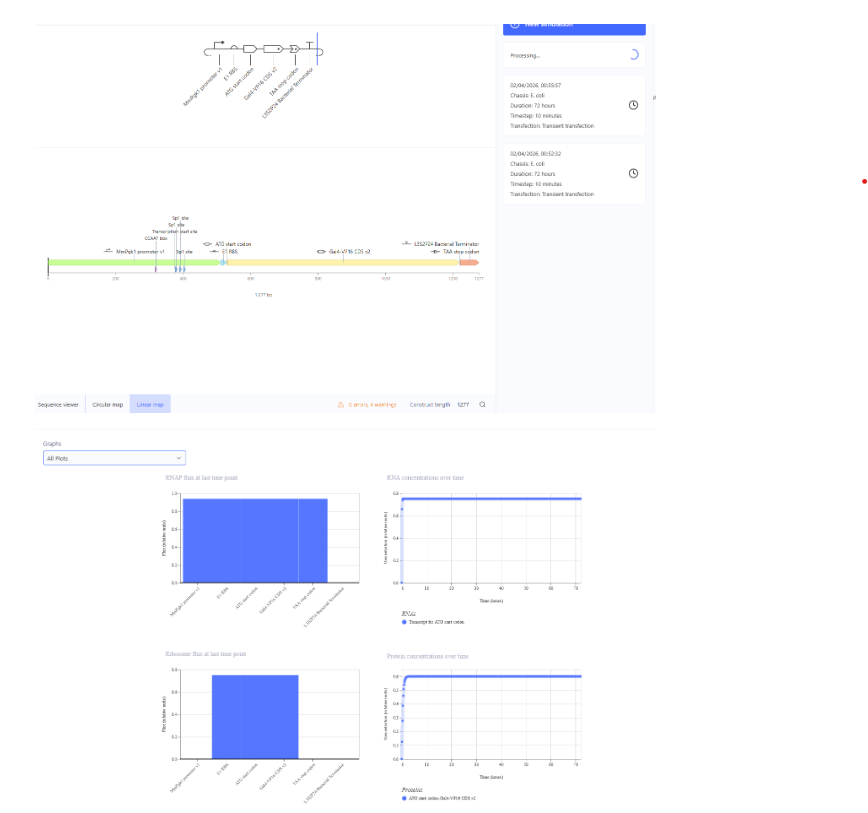
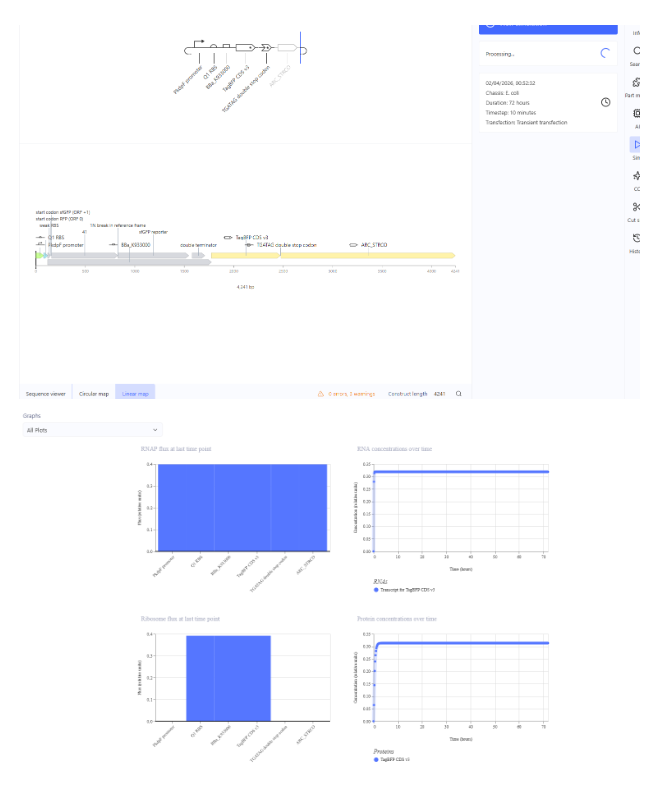
Assignment: Asimov Kernel
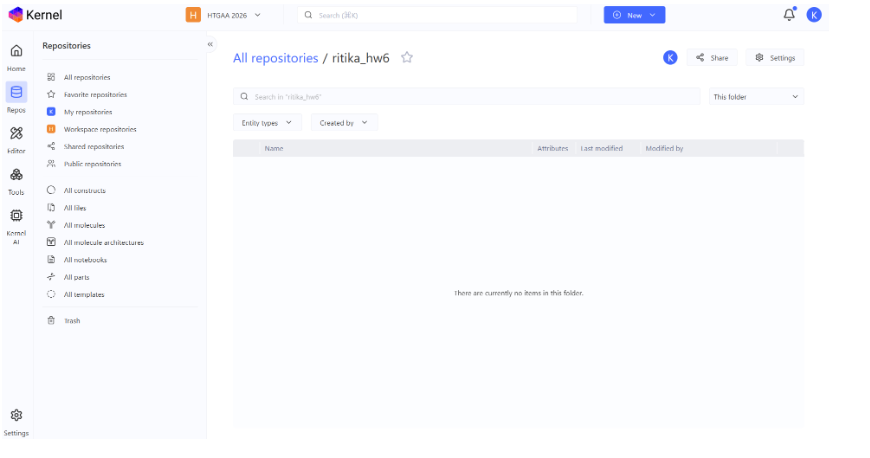
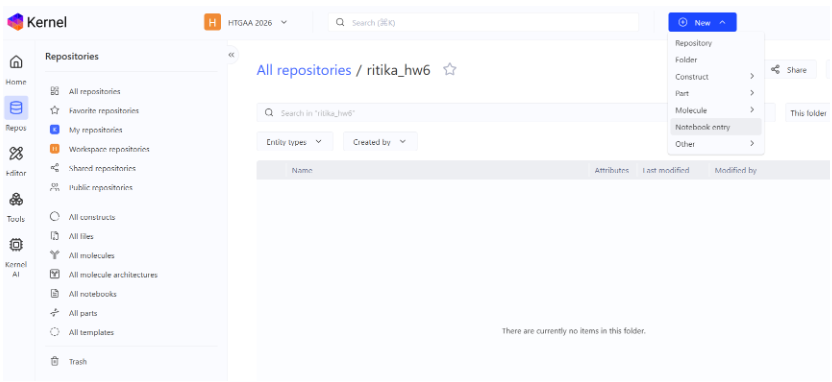
- Created repository for the work:
- Creating a notebook entry:
- Construct 1:
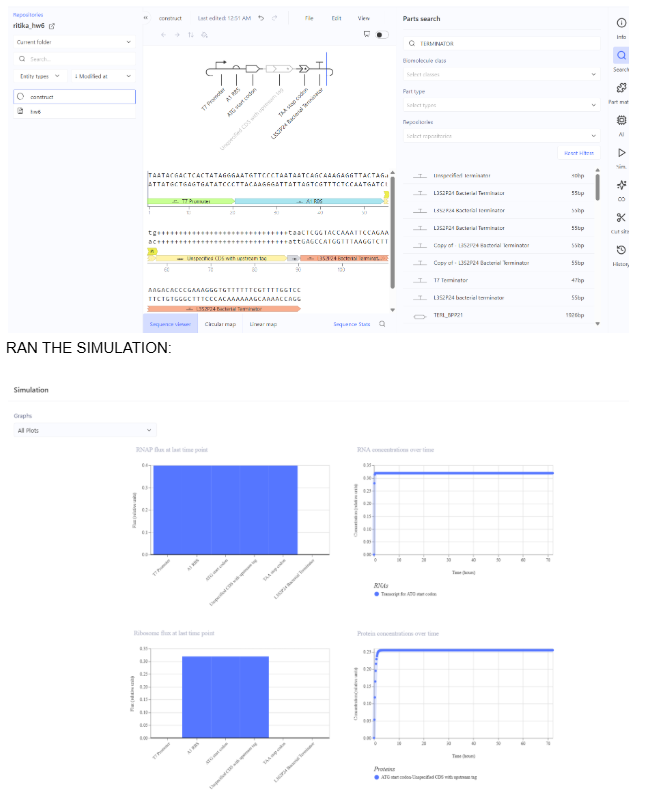
- Construct 2:
- Construct 3: