Deep learning guided optimization of PETase Introduction In this project, we will explore the application of deep learning techniques to optimize the performance of PETase, an enzyme that can degrade polyethylene terephthalate (PET), a common plastic. The goal is to enhance the thermal stability and catalytic efficiency of PETase through computational methods.
Subsections of Projects
Individual Final Project
Deep learning guided optimization of PETase
Introduction
In this project, we will explore the application of deep learning techniques to optimize the performance of PETase, an enzyme that can degrade polyethylene terephthalate (PET), a common plastic. The goal is to enhance the thermal stability and catalytic efficiency of PETase through computational methods.
Aims
Aim 1: Develop a deep learning model to predict the stability of PETase variants
In this aim, we will create a deep learning model that can predict the thermal stability of different PETase variants. We will use a dataset of known PETase variants and their corresponding stability data to train the model. The model will be designed to take into account various features of the enzyme, such as amino acid sequence and structural properties.
Aim 2: Synthesize the wild-type PETase and selected variants
In this aim, we will synthesize the wild-type PETase and a selection of variants that are predicted to have improved stability based on the deep learning model. We will use recombinant DNA technology to express and purify these enzymes for further testing.
Aim 3: Evaluate the catalytic efficiency of the synthesized PETase variants
In this aim, we will assess the catalytic efficiency of the synthesized PETase variants. We will perform enzymatic assays to measure the rate of PET degradation by each variant under various conditions. This will allow us to determine if the predicted improvements in stability also translate to enhanced catalytic performance.
Aim 4 (Visionary Aim): Close the loop between computational predictions and experimental validation via laboratory automation
In this visionary aim, we will implement a closed-loop system that integrates computational predictions with experimental validation. We will use laboratory automation to rapidly test the predicted PETase variants and feed the results back into the deep learning model for further refinement. This iterative process will enable us to continuously improve the model’s predictive accuracy and optimize the performance of PETase variants in a more efficient manner.
Deep learning model to predict the stability of PETase variants
Zero-shot Prediction of Mutational Effects with ProteinMPNN
ProteinMPNN is a pre-trained graph neural network that generates protein sequences for given protein backbone structures. It learns the conditional probability of protein sequence autoregressively conditioned on the backbone structure:
The difference in likelihood, $\log p(s_k = \text{M} | \mathbf{s}{\backslash k}, \mathbf{X}) - \log p(s_k = \text{W} | \mathbf{s}{\backslash k}, \mathbf{X})$, is used to estimate the mutational effect of substituting the amino acid W on position $k$ to amino acid M.
We benchmarked the original pre-trained ProteinMPNN on the SKEMPI dataset. The likelihood difference only shows weak correlation with experimental $\Delta \Delta G$, which elucidates the gap between the structural compatibility information learned by ProteinMPNN and the experimental catalytic performance.
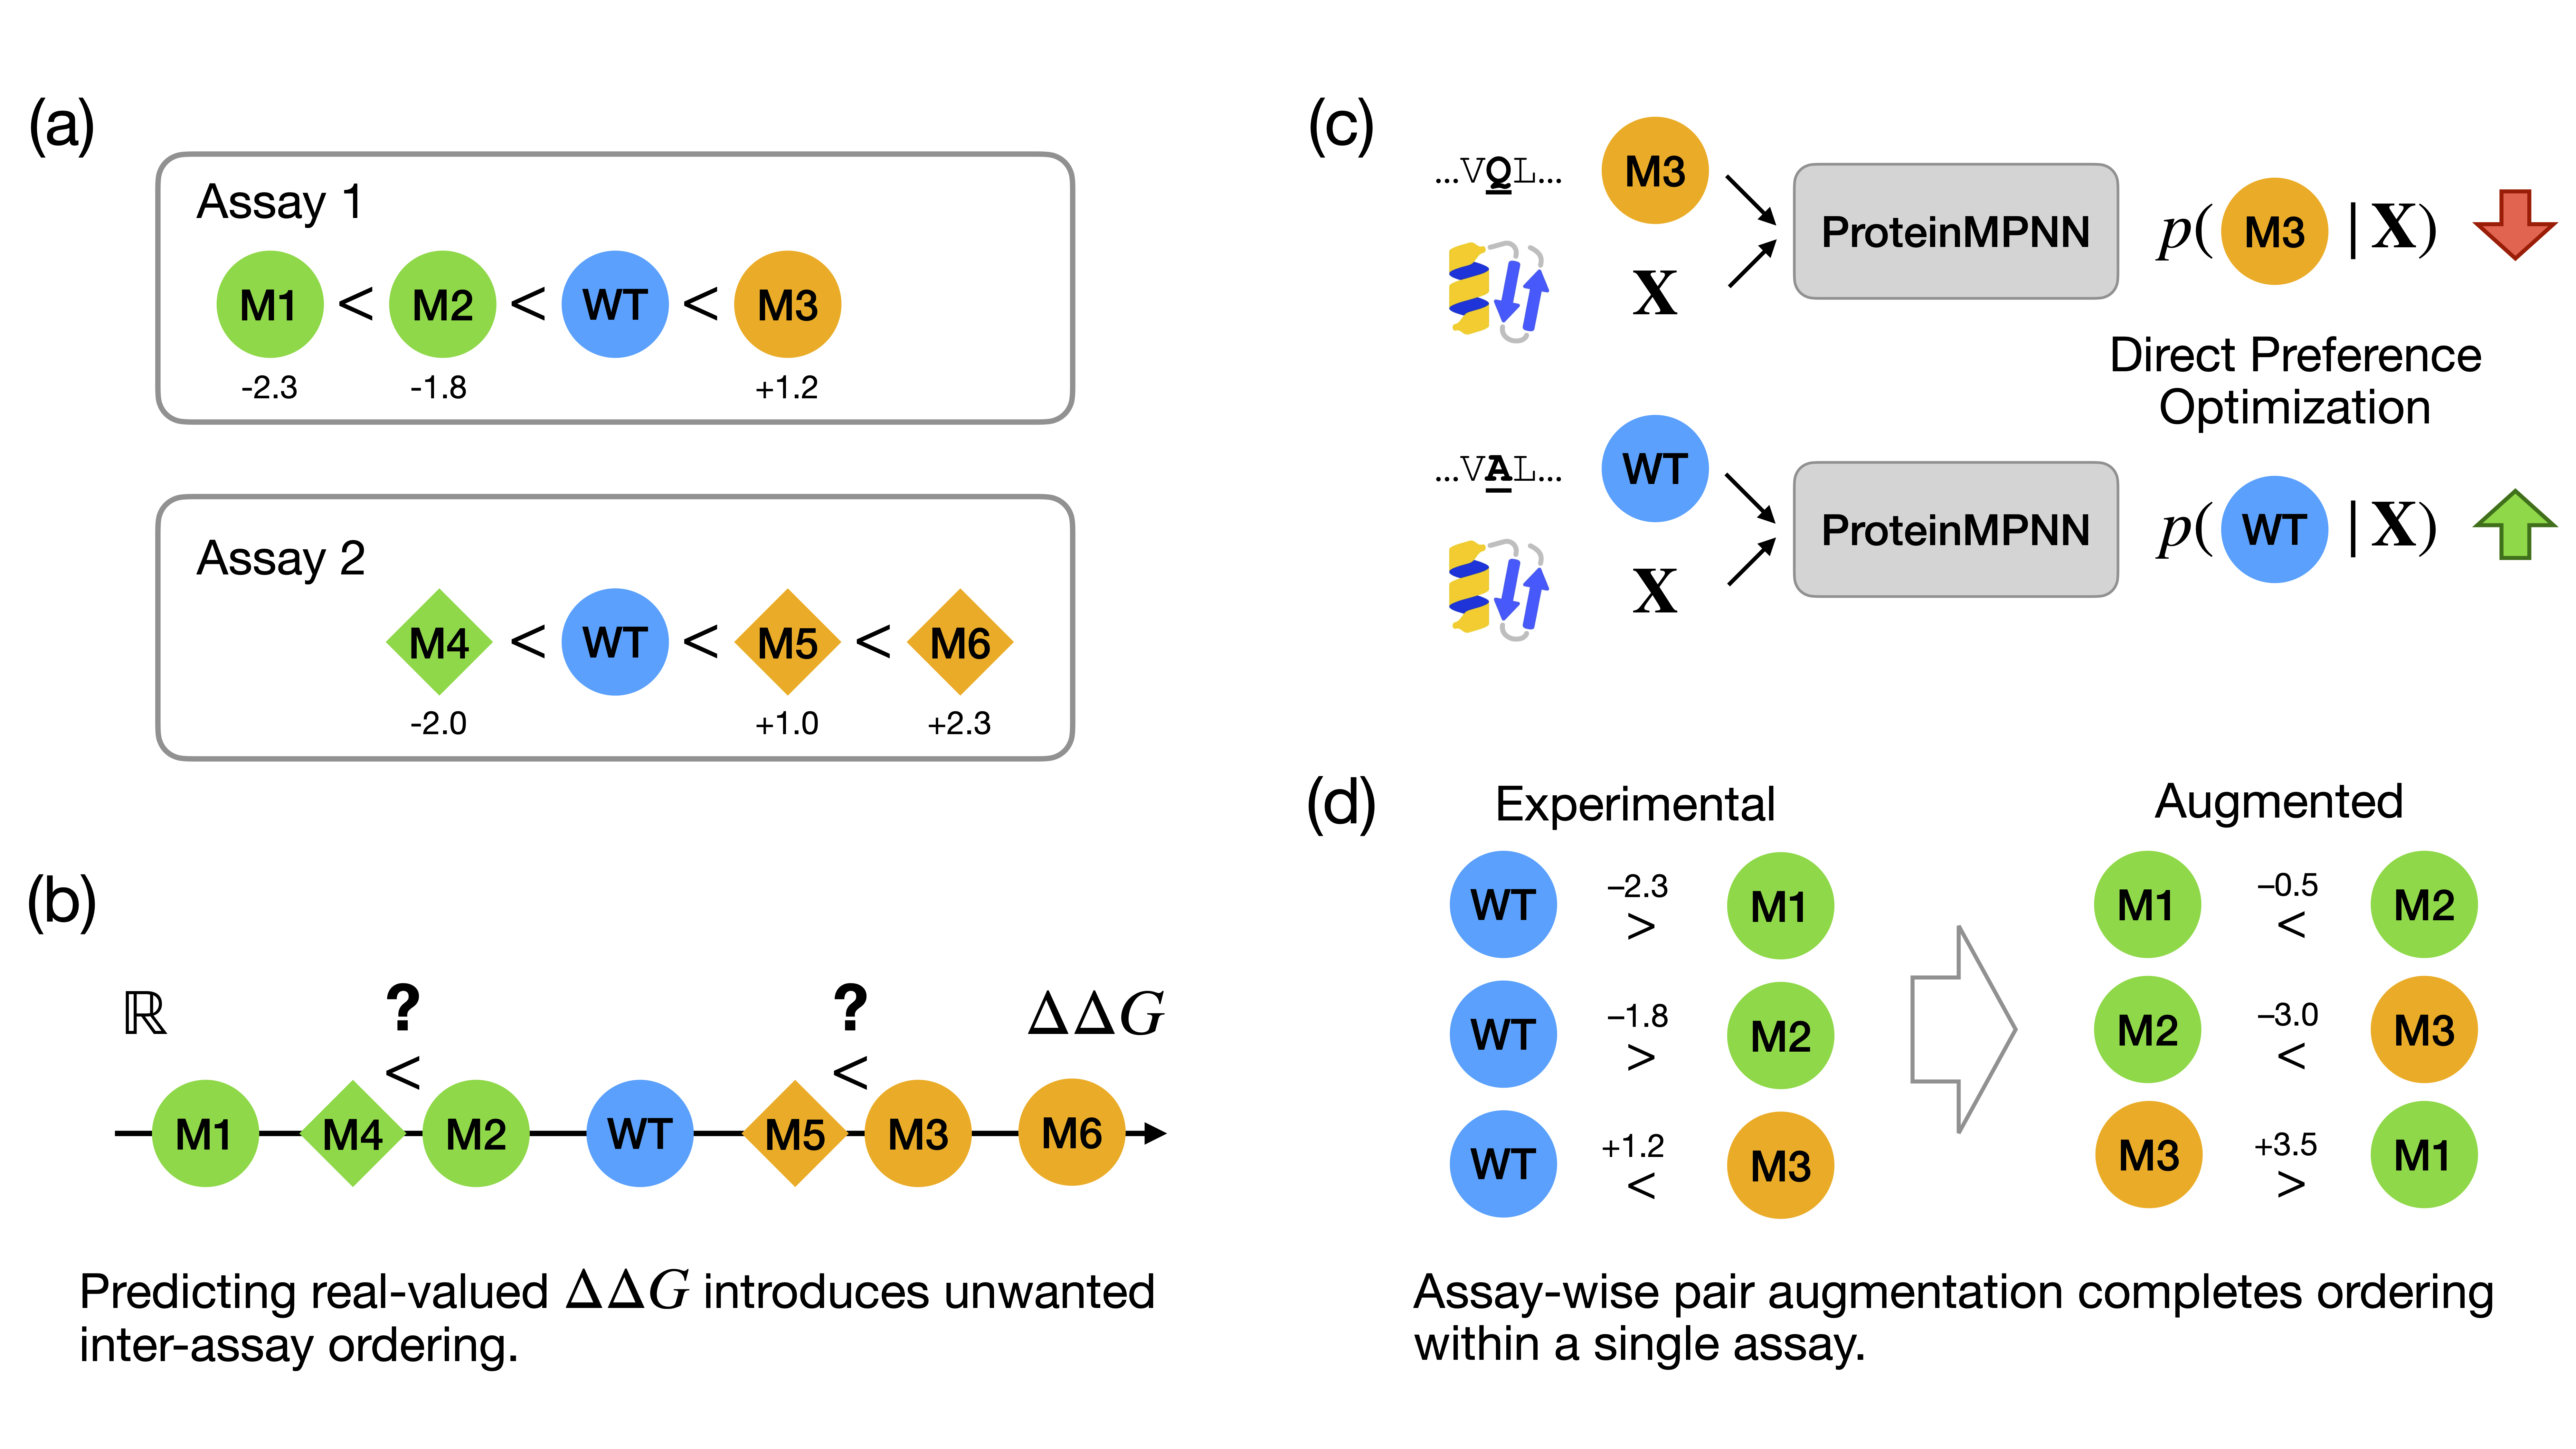
Assaywise Alignment with Experimental Data
The visionary aim of this project is to close the loop between computational predictions and experimental validation via laboratory automation. To achieve this, we implement an assaywise alignment strategy that integrates the deep learning model’s predictions with experimental data from enzymatic assays.
We repurposed the Direct Preference Optimization (DPO) method to align ProteinMPNN with experimental experimental values.
Each mutation entry is treated as an ordered pair of preference:
When $\Delta \Delta G > 0$, the wild-type amino acid is preferred over the mutant.
When $\Delta \Delta G < 0$, the mutant amino acid is preferred over the wild-type.
Intuitively, the DPO loss function increases the likelihood of the favorable amino acid type and penalizes the unfavorable one:
A limitation of preference optimization using only individual mutations from the dataset is that the model learns if a mutation is favorable or not, but it does not learn to compare different mutations directly. To address this, we augmented the training data by combining pairs of mutations.
Suppose there are two mutations at the same position in the dataset:
A30D: $\Delta\Delta G = -1.0$
A30K: $\Delta\Delta G = +2.0$
We can combine these by inverting the first mutation into D30A ($\Delta\Delta G = +1.0$) and then merging it with the second to create D30K ($\Delta\Delta G = 3.0$).
While data augmentation introduces necessary ordering between mutations, we cannot merge every possible pair. Doing so might introduce artificial ordering between mutations from different experimental settings. Therefore, we use an assay-wise approach:
(1) Two mutations are only merged if they belong to the same assay;
(2) “same assay” is defined by sharing the same protein structure, the same publication source, and the same experimental method.
By restricting the scope of merging, we guarantee that relative ordering is introduced only within the same assay and not across inconsistent experimental conditions.
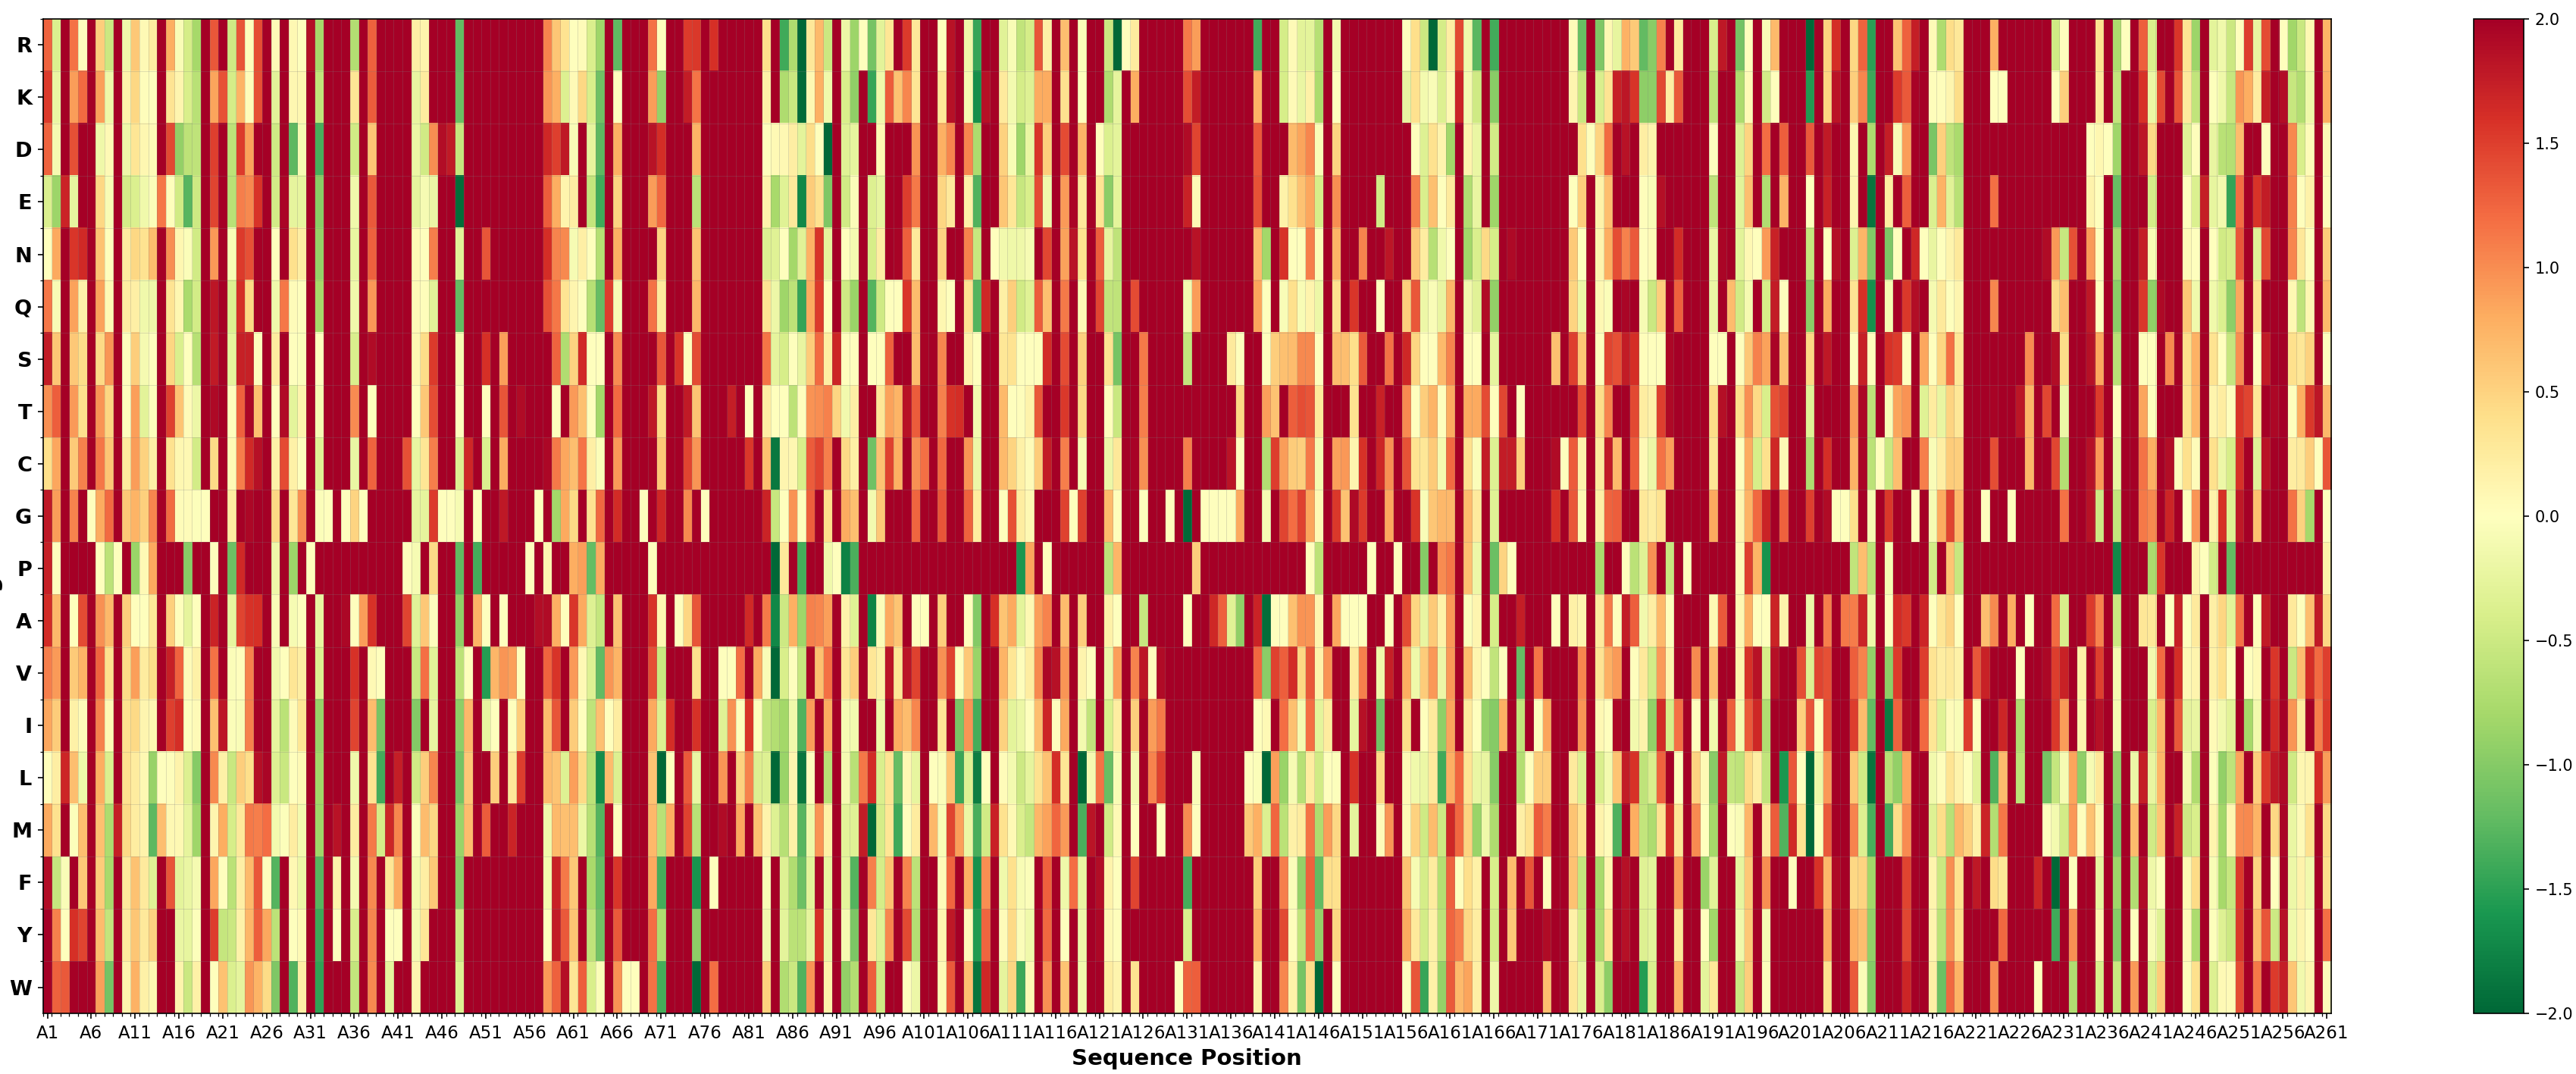
Zero-shot Prediction of PETase Mutational Effects with ProteinMPNN
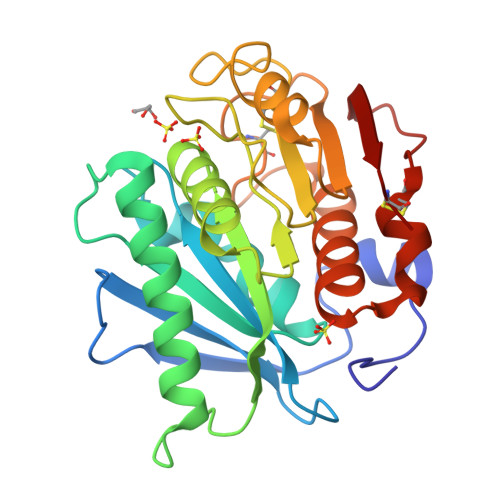
There are multiple structures of PETase available in the Protein Data Bank (PDB). We used the structure with PDB ID 5XFY for ProteinMPNN inference. We scored all 19 possible amino acid substitutions on each position of the PETase sequence and ranked them by the likelihood difference compared to the wild-type amino acid.
According to the predictions, top 10 mutations are:
The vector used for cloning is pET-28a(+), which contains a T7 promoter.
Cell-free protein synthesis
I used the Ginkgo CFPS protocol for cell-free protein synthesis of PETase. The reaction mixture contains the following components:
6 uL of E. coli lysate
10 uL of Economy Reagent Mix
4 uL of DNA template (at least 10 nM)
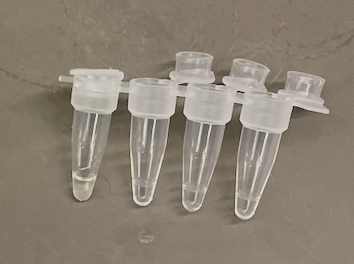
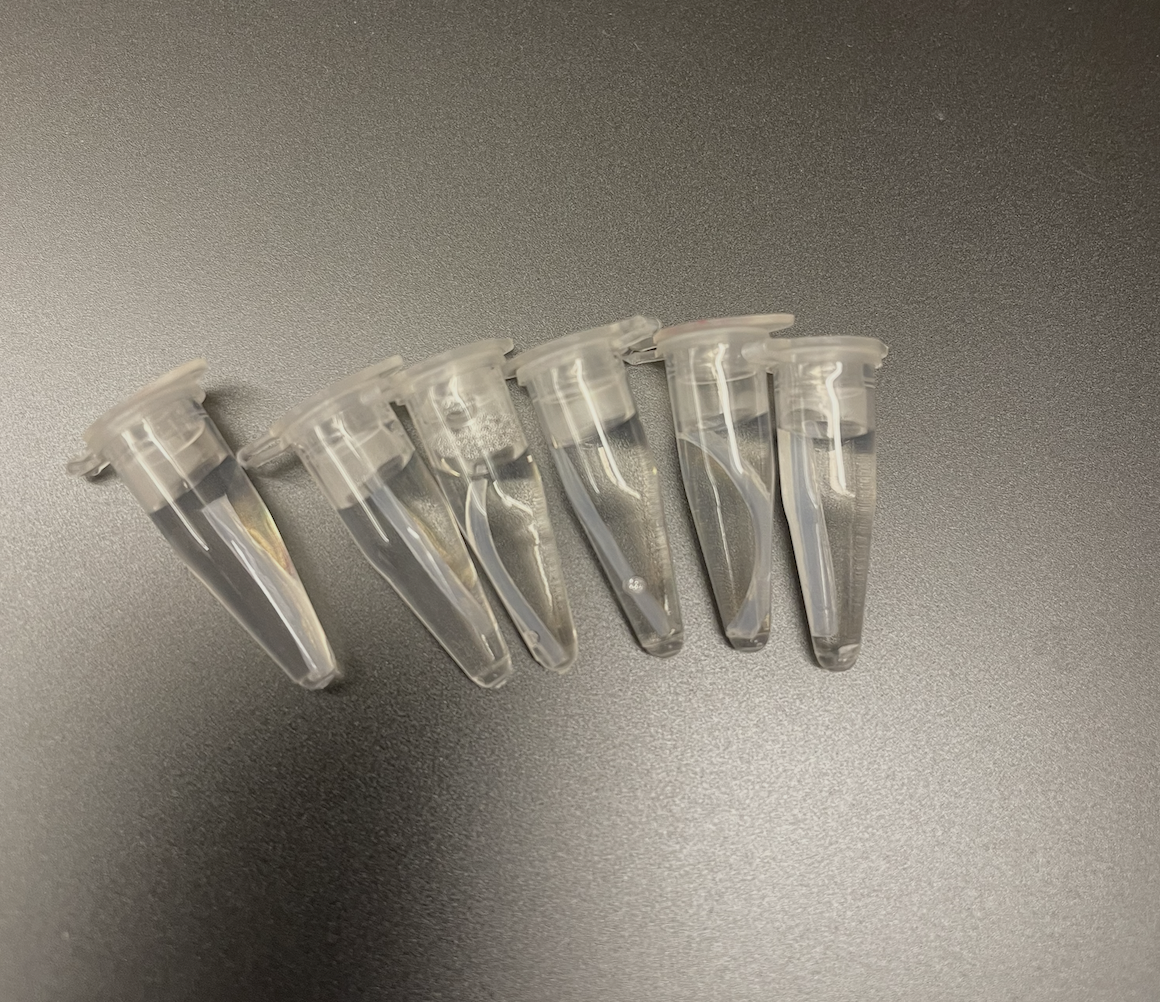
Below is the photo of the pipetting process for creating the CFPS reaction mixture:
The reaction was mixed and centrifuged to remove bubbles. Then, it was incubated at 30°C for 24 hours.
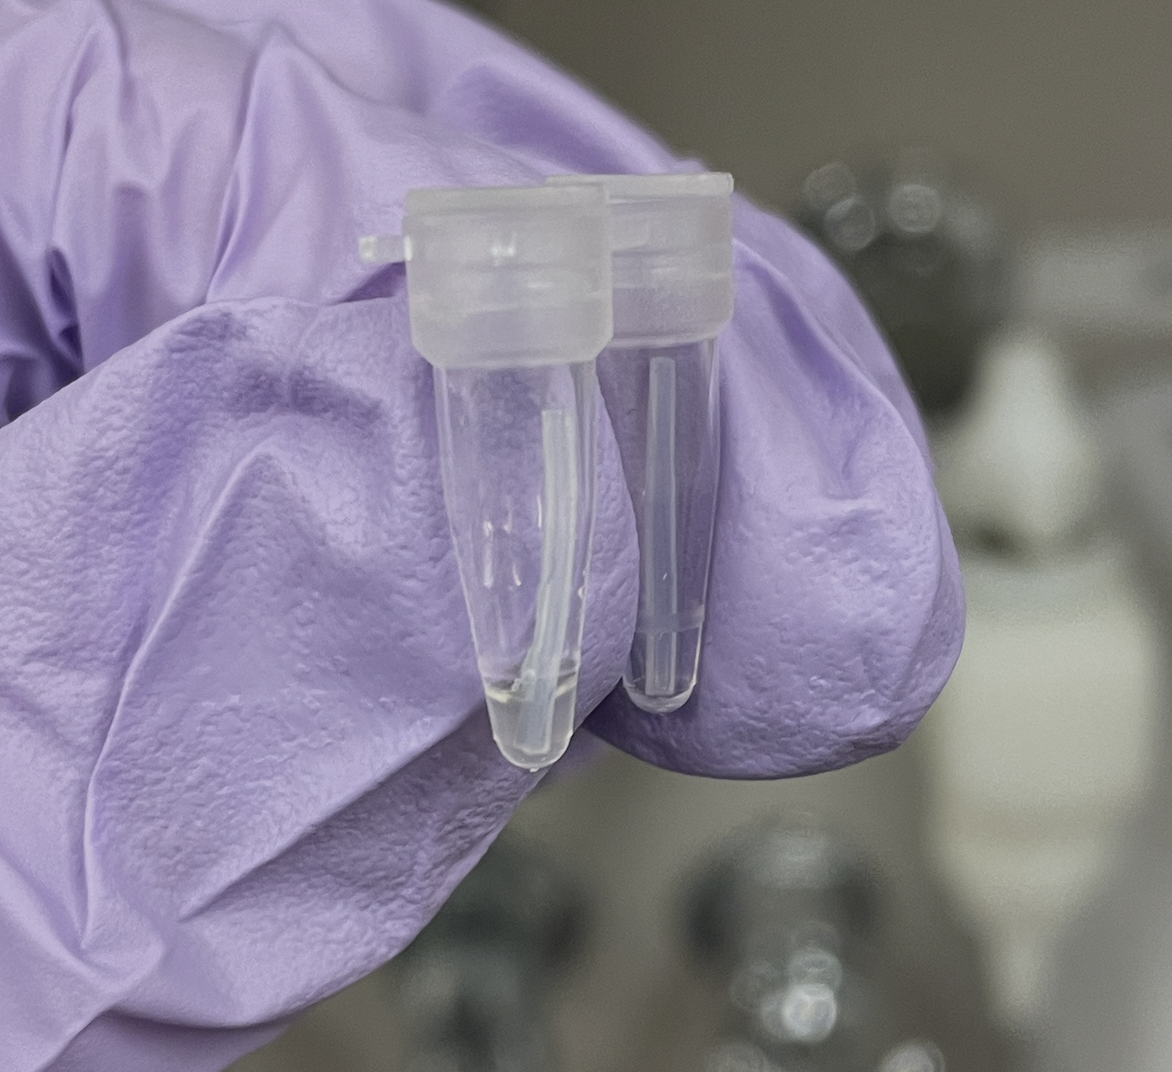
Below is the incubated CFPS reaction mixture (in the leftmost PCR tube) after 24 hours:
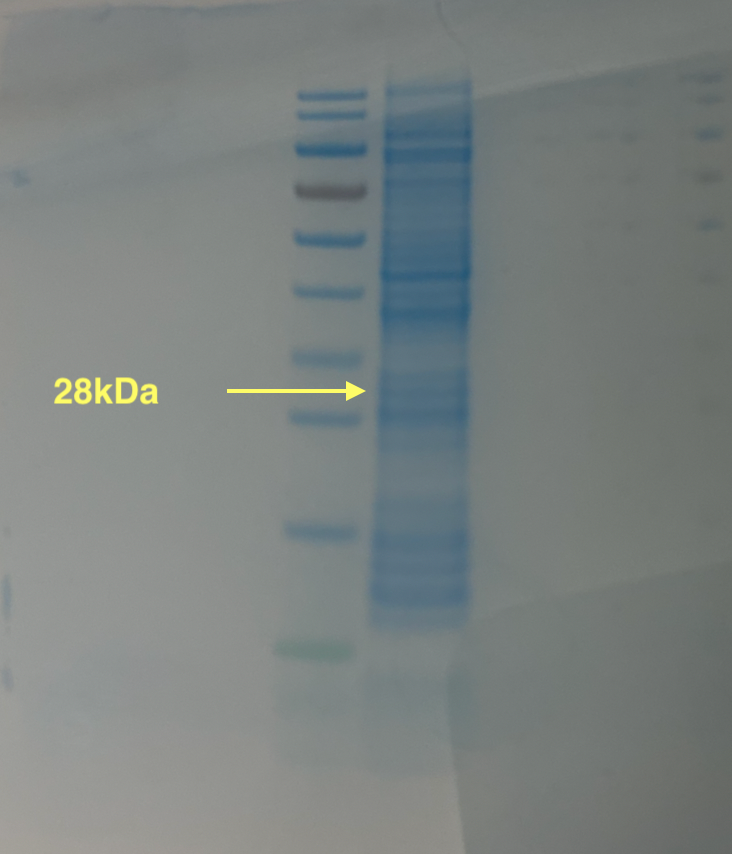
SDS-PAGE analysis
To verify the expression of PETase, we performed SDS-PAGE analysis on the CFPS reaction mixture. The expected molecular weight of PETase is approximately 28 kDa.
Below is the protocol followed for SDS-PAGE analysis:
1. Sample Preparation (1:20 Final Concentration)
We will perform a two-step dilution to ensure the protein is concentrated enough to see clearly.
Final Concentration: 1:20 CFPS in 1X Sample Buffer.
2. Denaturation
Heat the samples at 95°C for 10 minutes.
Note: Even without DTT, heating is required to allow the SDS (in the LDS buffer) to coat the proteins and give them a uniform negative charge.
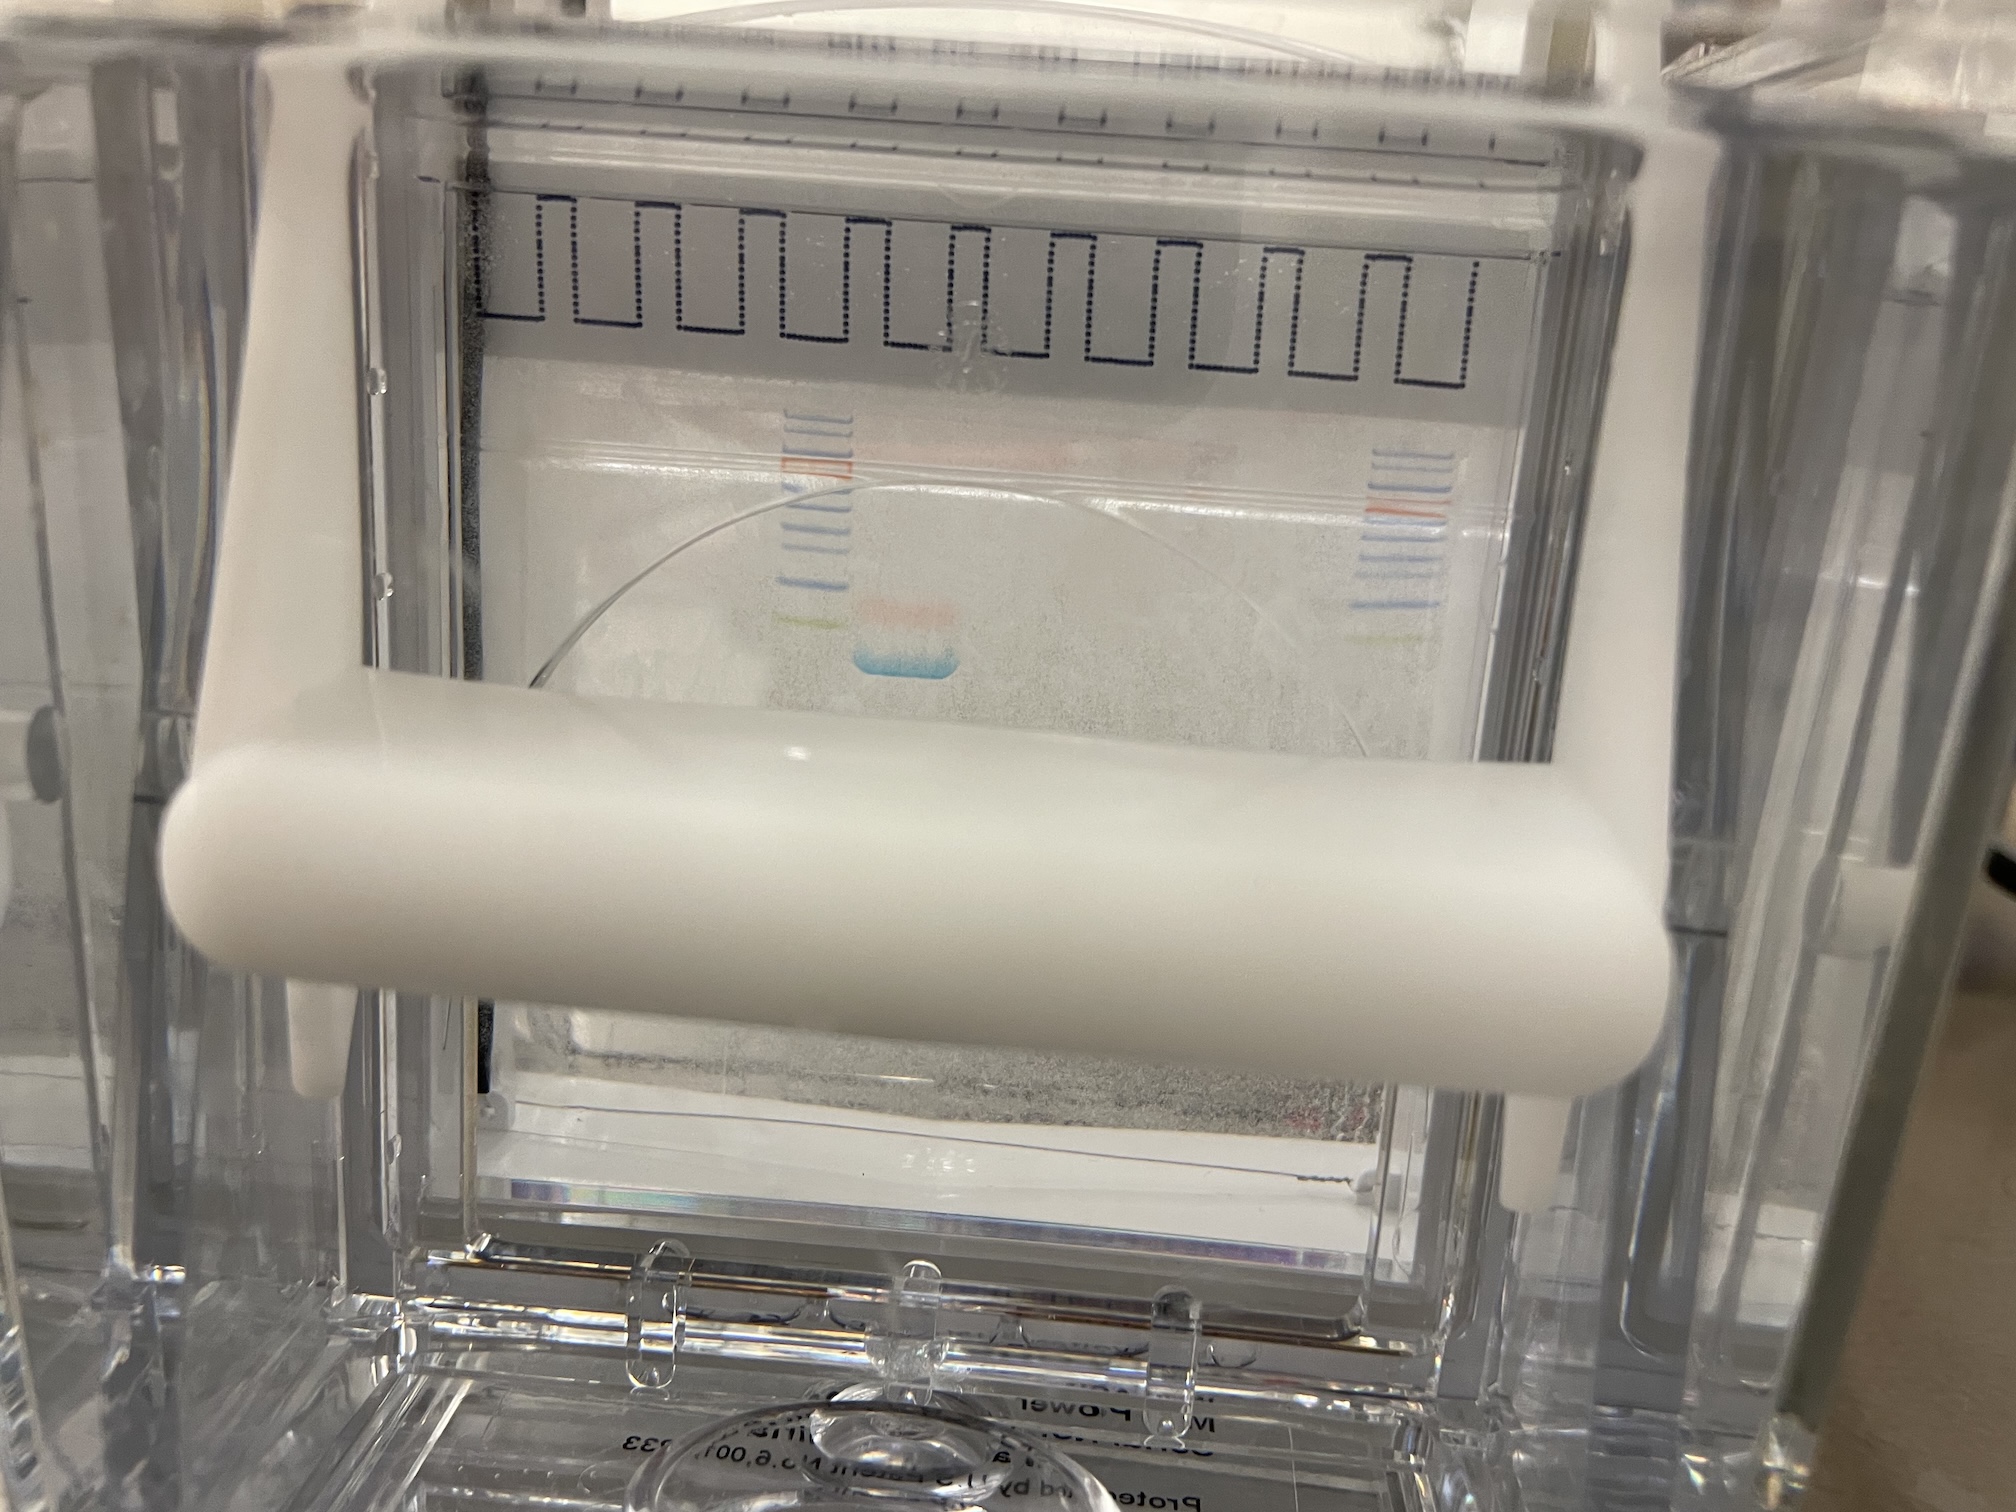
3. Gel Tank & Buffer Setup
Buffer: Dilute your 20X Bolt MES SDS Running Buffer stock to 1X with deionized water (e.g., 25 mL stock + 475 mL water).
Assembly: Remove the comb and the tape from the bottom of the Bolt Bis-Tris Plus 4–12% gel. Place it in the Mini Gel Tank.
Fill: Fill the inner chamber (between the gels) and the outer chamber with the 1X MES buffer.
4. Loading and Running
Load Ladder: Add 3 µL of PageRuler prestained ladder.
Load Samples: Load 15 µL of your 1:20 prepared sample per lane.
Tip: Using 15 µL instead of 10 µL will deliver even more protein to the lane to help with the “faint band” issue.
Run Settings:
Run at 180 V (constant).
Stop when the dye front is near the bottom.
5. Staining and Imaging
Stain: Use Coomassie Brilliant Blue stain to visualize the protein bands.
Destain: Destain the gel to reduce background and enhance band visibility in water for 12 hours.
Mini-prep to create even more DNA template for CFPS
We only have ~500 ng of DNA template from the initial synthesis, which is not enough for multiple rounds of CFPS. To create more DNA template, we first cloned the synthesized DNA into the pET-28a(+) vector and transformed it into E. coli for amplification. After growing the transformed bacteria, we used a mini-prep kit to extract the plasmid DNA.
Transformation and culturing
Below is the protocol followed for the culturing process, adopted from the protocol of Week 6 Gibson Assembly lab:
Thaw competent cells on ice in their containers (meaning: take a tube of cells out of the -80C freezer and put it directly to ice, and wait until it becomes liquid). Thaw for exactly 10 minutes
Take microcentrifuge tubes (one for each Gibson Assembly reaction). Label them.
Transfer 20uL of competent cells to the tube.
Transfer 4uL of your purified & diluted Gibson Assembly product into each tube. Keep the tubes on ice.
Incubate on ice for 30 min.
Take your ice bucket to the heat bath. Set-up a timer. With your hands holding both tubes, submerge the tubes in the 42°C heat bath (or thermal cycler) such that half of the tube is submerged. Keep the tubes at 42°C for exactly 45 seconds, then transfer the tubes back to ice for 5 minutes.
Add 200uL-500uL of SOC media to each of the tubes, and grow in a (shaking) incubator for 60 minutes.
While you’re waiting, label your agar plates.
For the first plates, transfer 100uL from each tube to its appropriate plate and use plating beads or a plastic spreader. Dispose of the beads into a clear container to be recycled (never put them back in the jar!).
Incubate the plates at 37°C for 72 24 hours. Make sure you place the plates with the agar upside down to avoid condensation issues.
For all of the extra liquid you have that contains bacteria - transfer to the liquid waste disposal tube. Add bleach to kill all bacteria (this is how we dispose of anything that has live bacteria in it).
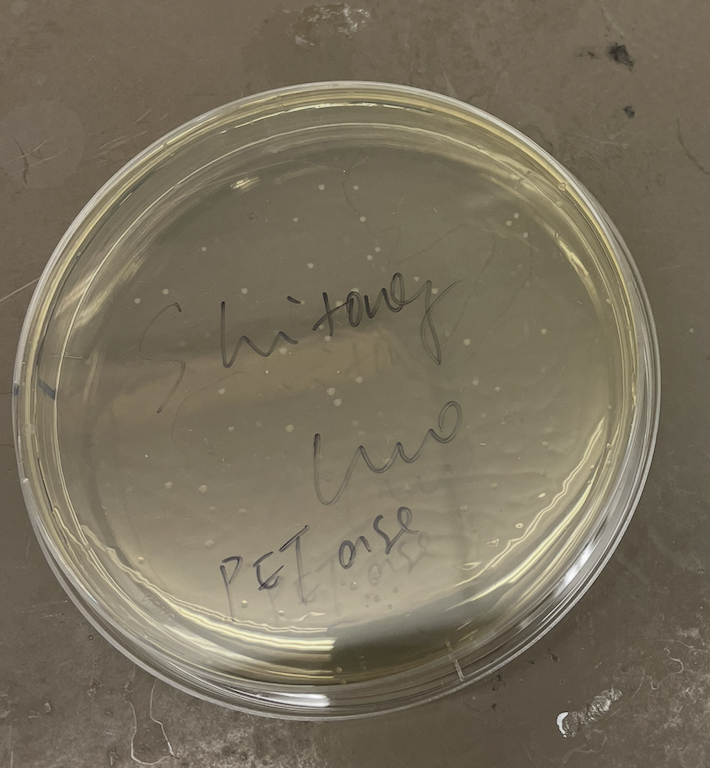
The next day, I saw colonies on the agar plates, which indicates successful transformation. I picked 3 colonies and grew them in liquid culture for mini-prep.
The liquid culture was heated at 30°C for 12 hours to allow the bacteria to grow.
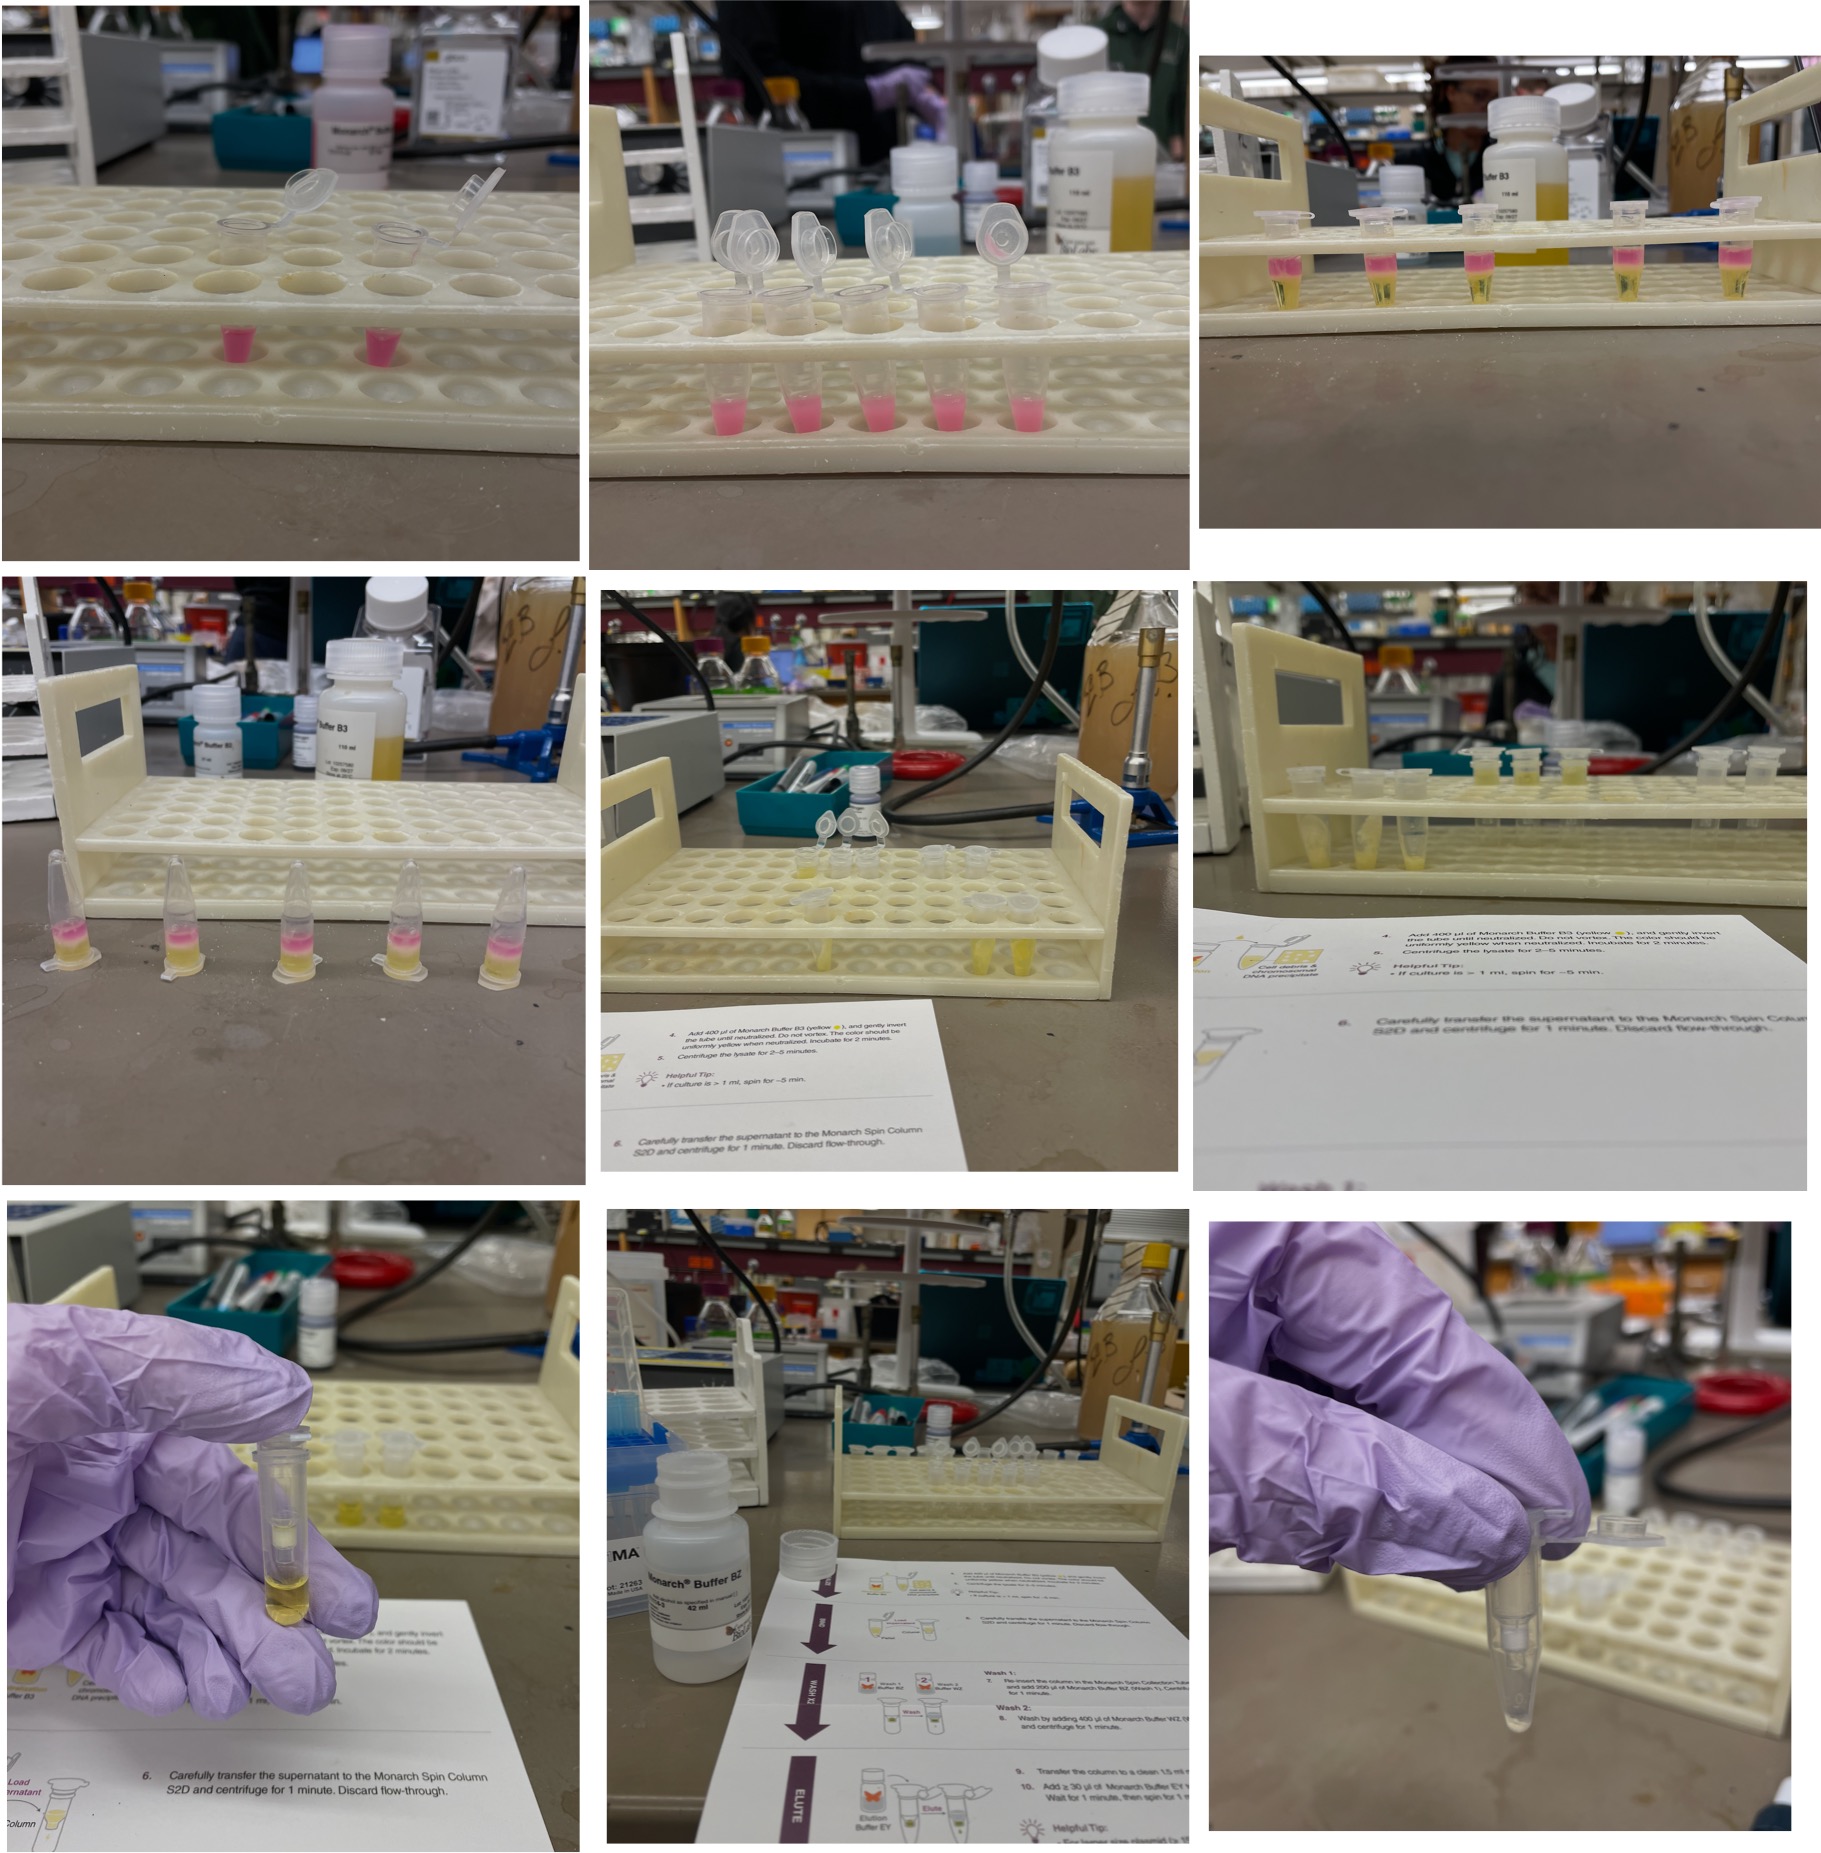
Mini-prep
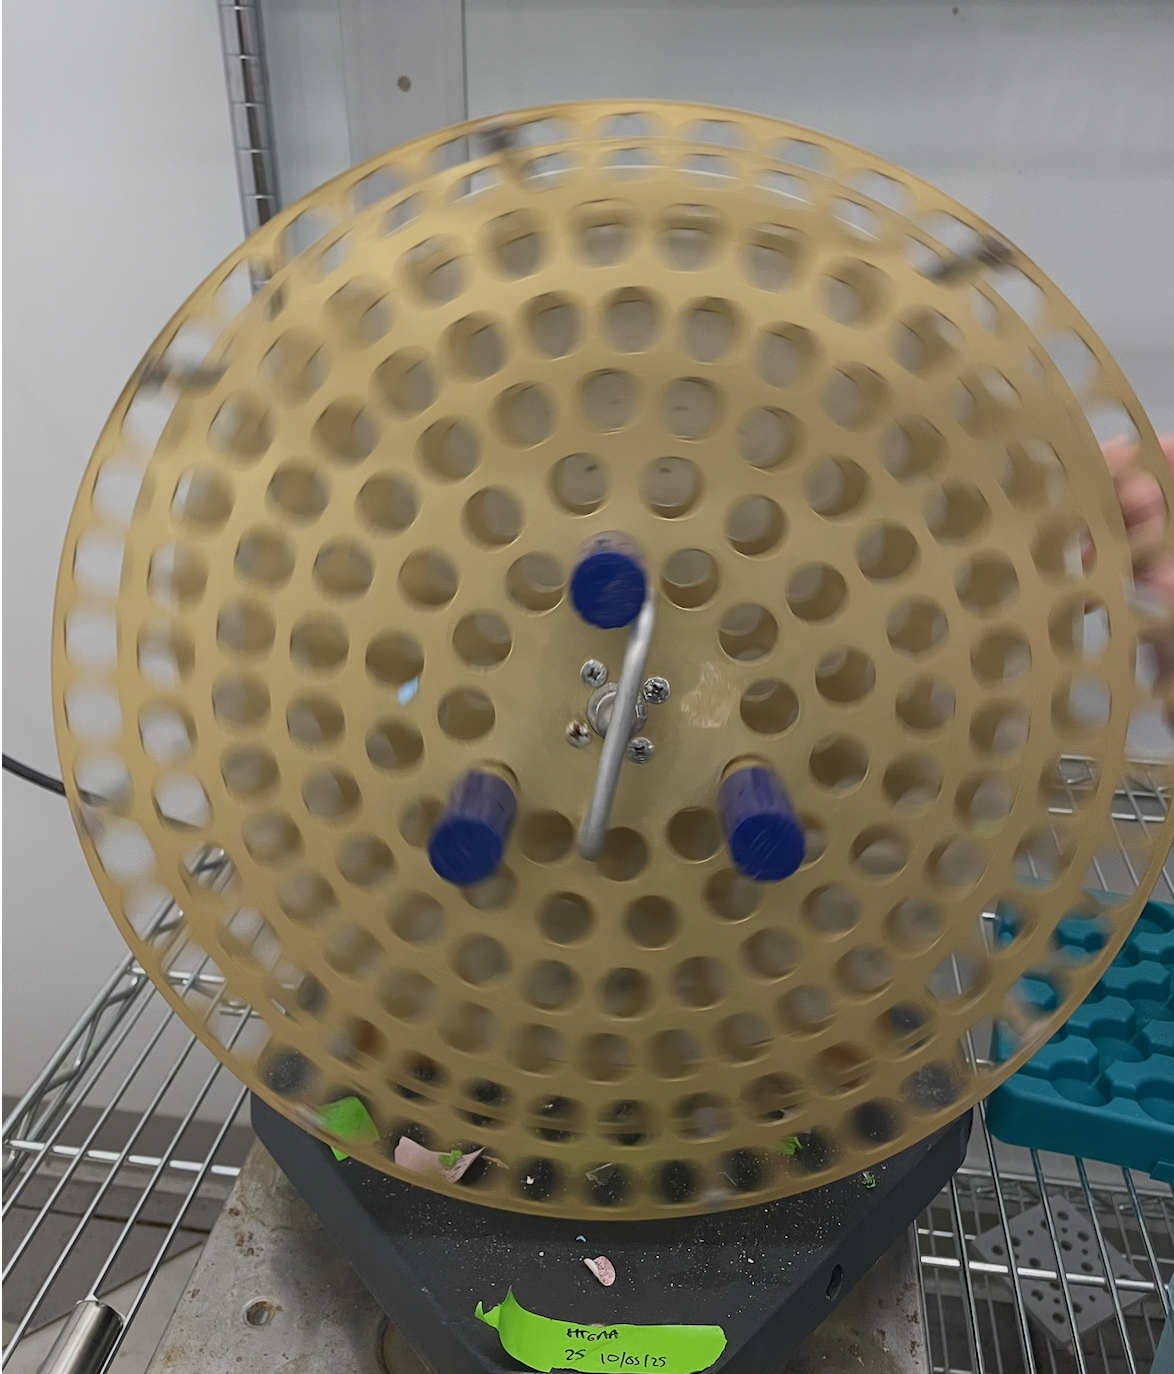
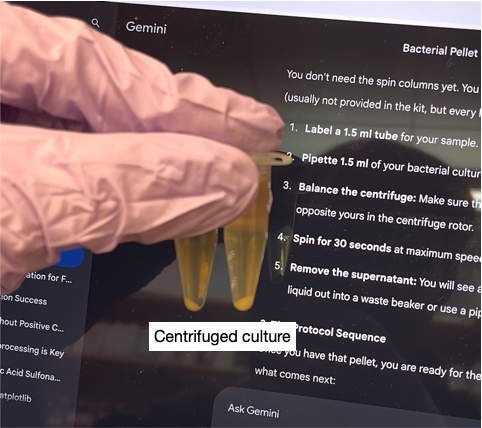
First, I transferred the liquid culture to centrifuge tubes (1.5mL each) and centrifuged them to pellet the bacteria. Then, I removed the supernatant.
After that, I followed the mini-prep kit protocol to extract the plasmid DNA from the bacterial pellets.
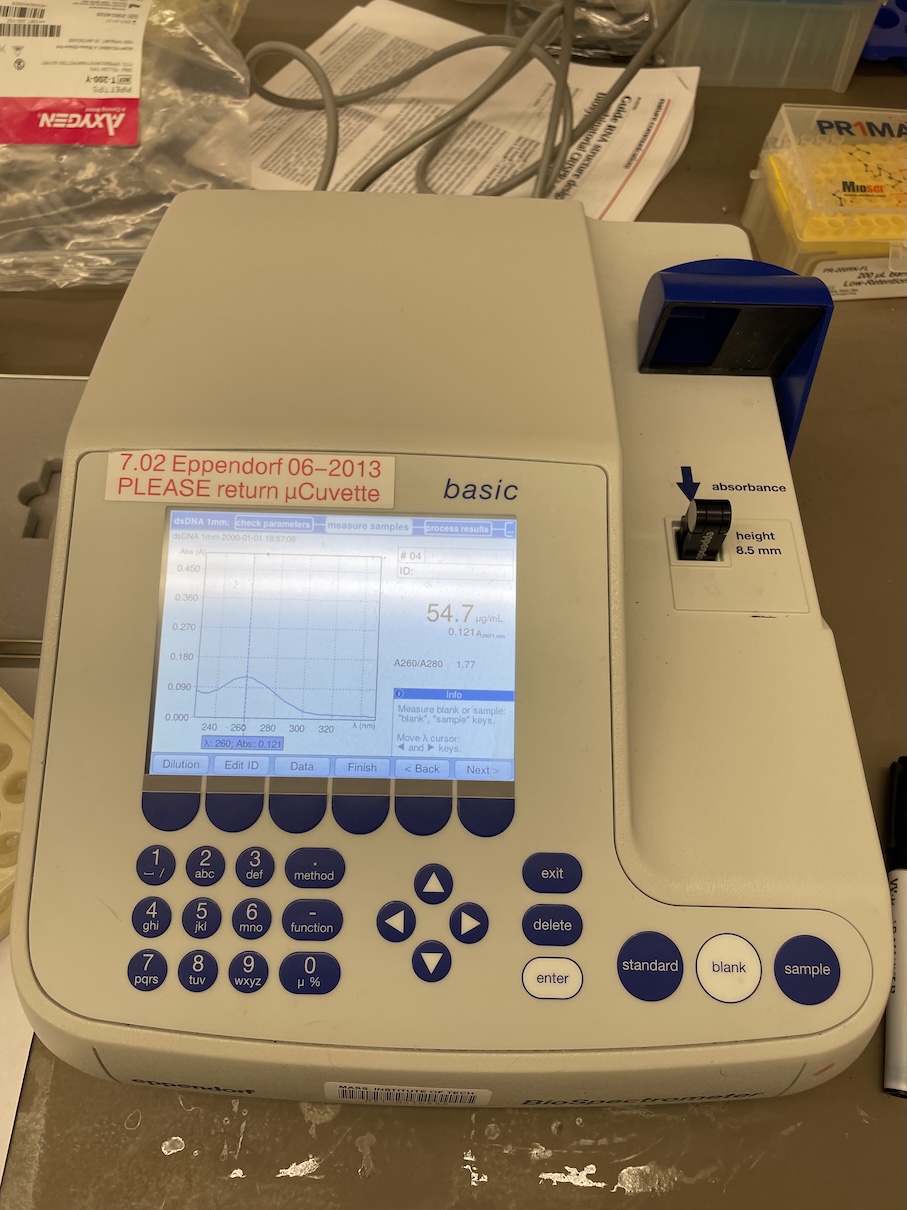
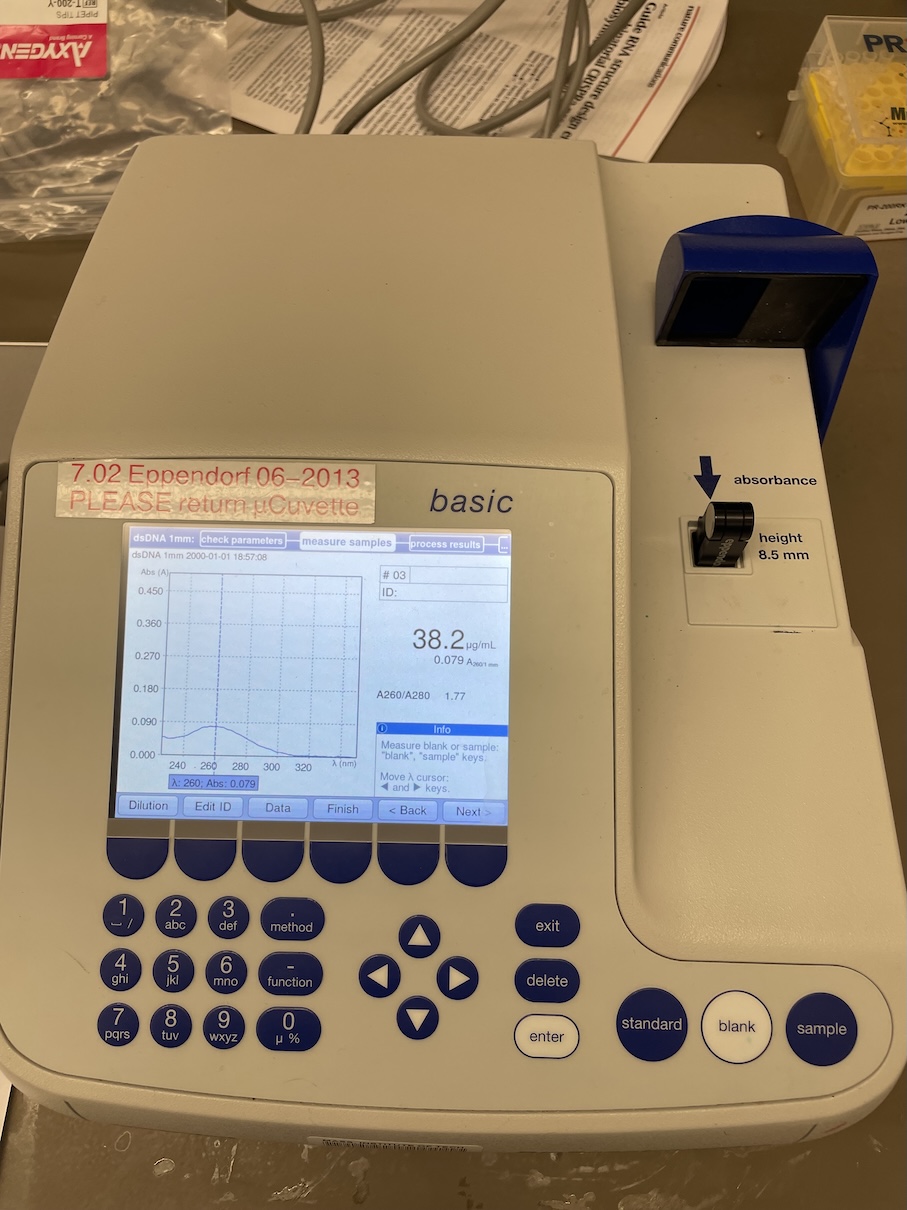
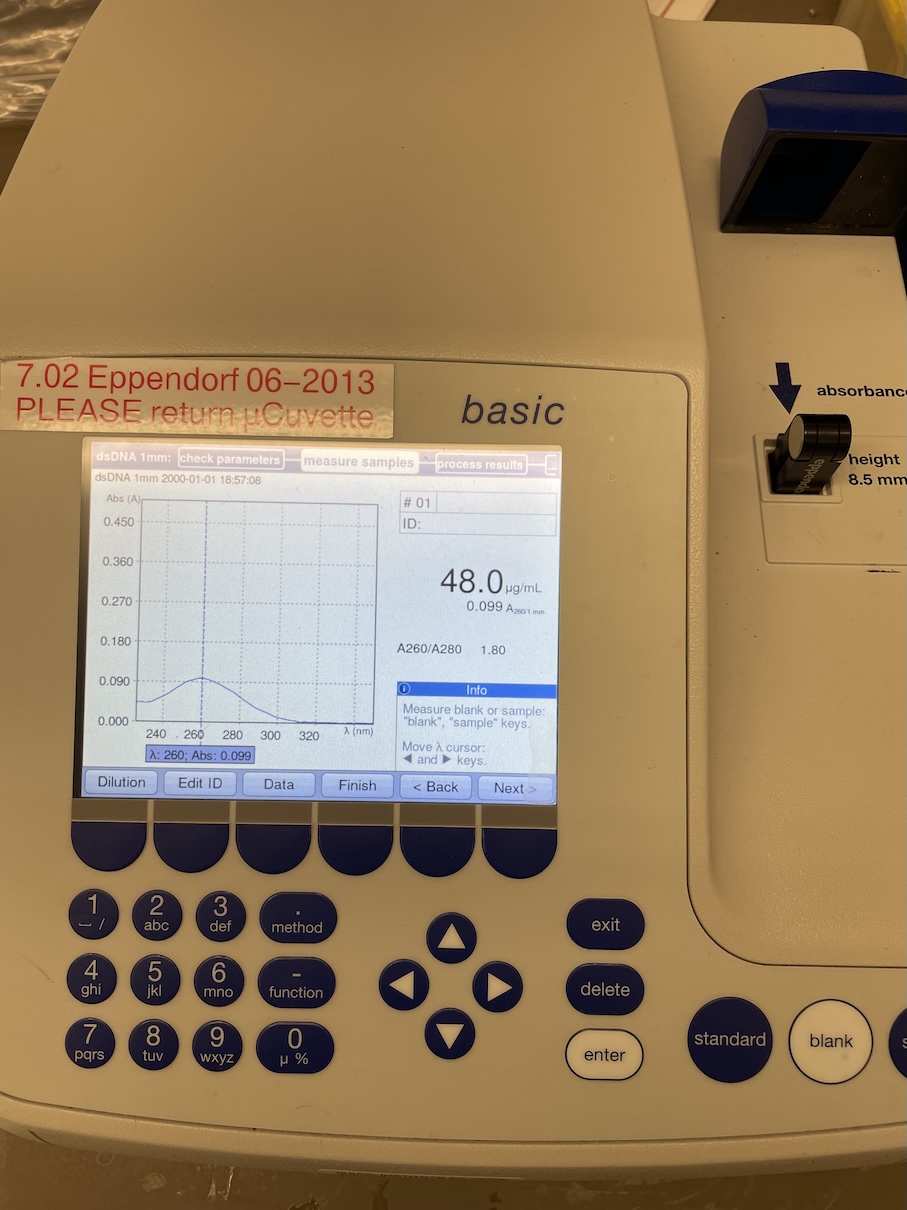
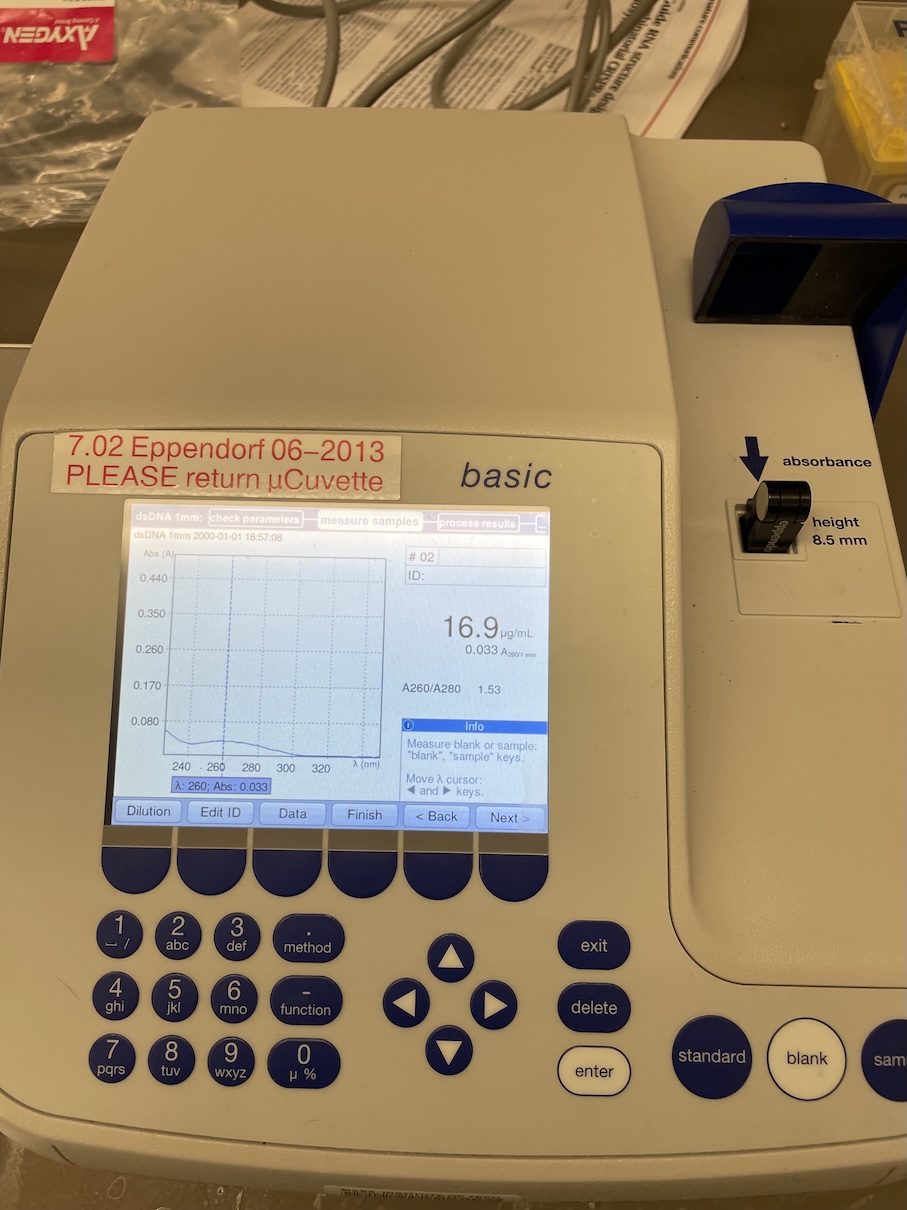
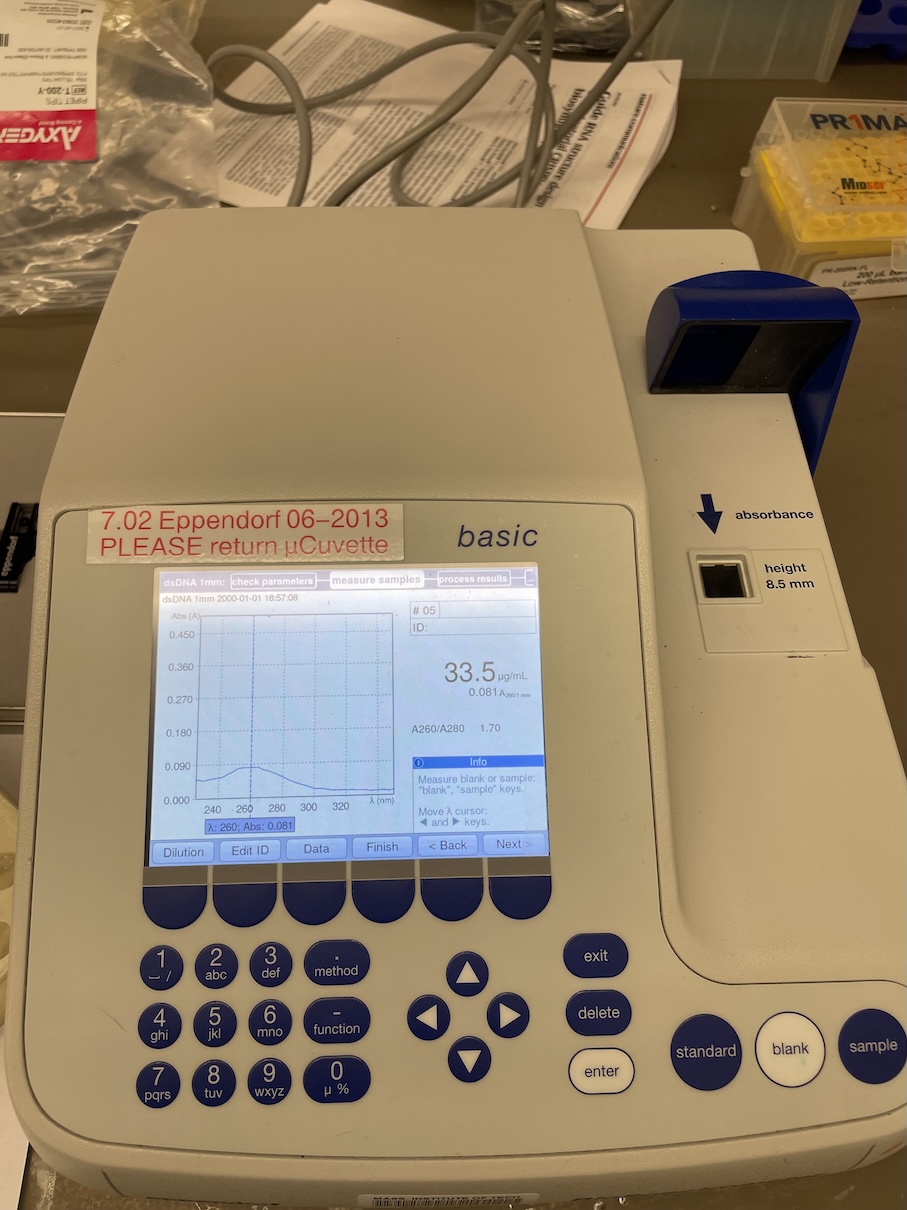
The final eluted DNA was quantified using a spectrophotometer, and I obtained a concentration of approximately 30~50 ng/µL, which is sufficient for more CFPS.
1
2
3
4
5
Evaluate the capability of PET degradation
To evaluate the catalytic capability of the synthesized PETase, I bought a PET film from Amazon. The PET film was cut into small pieces, and was preprocessed by heating at 95°C for 30 minutes to increase its surface area and make it more accessible to enzymatic degradation.
PET film bought from Amazon
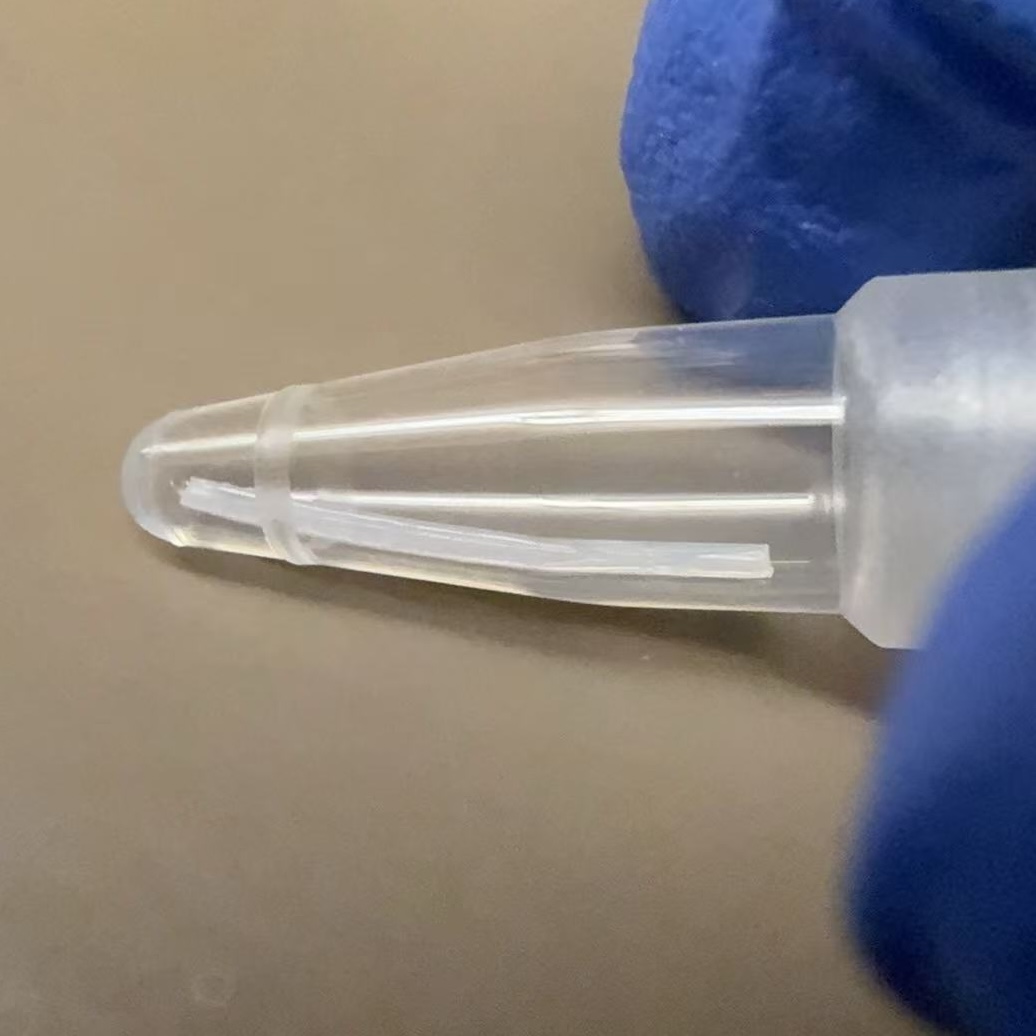
PET film cut into small pieces and heated at 95°C for 30 minutes
Small PET pieces soaked in the PETase solution
I soaked the preprocessed PET pieces in the CFPS reaction mixture containing the synthesized PETase for 48 hours at 30°C.