HTGAA - Week 3: Lab Automatisation
My Homework
WEEK 3 - CODING AND AUTOMATISATION
This week we get hands-on (or at least code-on) with pipetting robots.
Lecture (Tues, Feb 17)
NO LECTURE THIS WEEK!
Recitation (Wed, Feb 18)
Lab automation: autonomous lab intro
(▶️Recording | 💻Slides)
Ronan Donovan, Alex Tran, Ana Arkhipenkova, Kourosh Afshinjoo
Instructions
1. Assignment: Python Script for Opentrons Artwork
Assignees for the following sections
| MIT/Harvard students | Required |
| Committed Listeners | Required |
Your task this week is to Create a Python file to run on an Opentrons liquid handling robot.
- Review this week’s recitation and this week’s lab for details on the Opentrons and programming it.
- Generate an artistic design using the GUI at opentrons-art.rcdonovan.com.
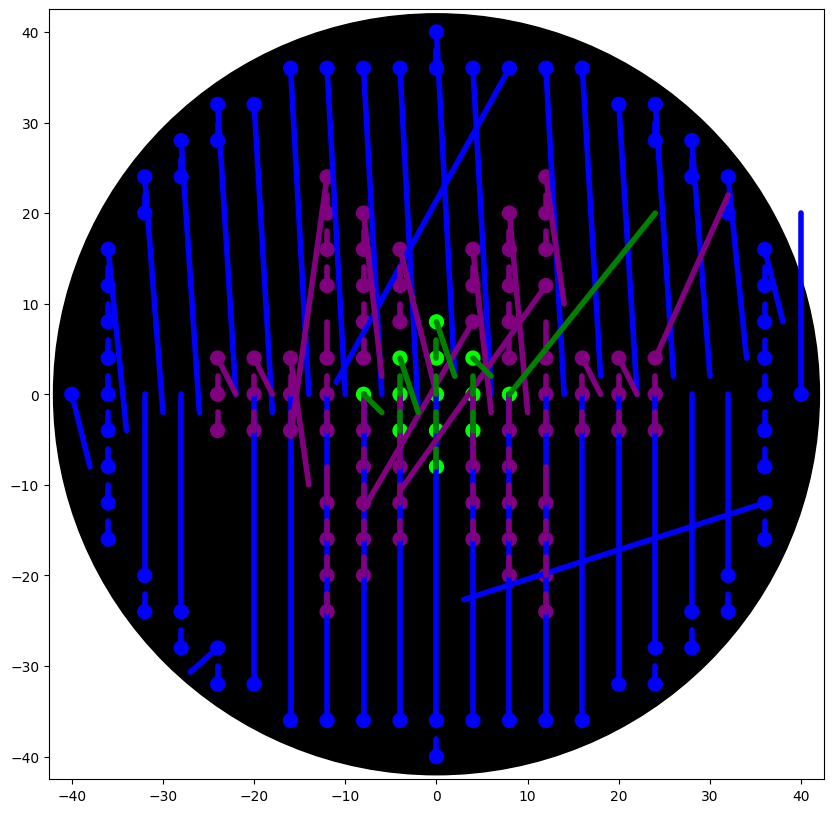
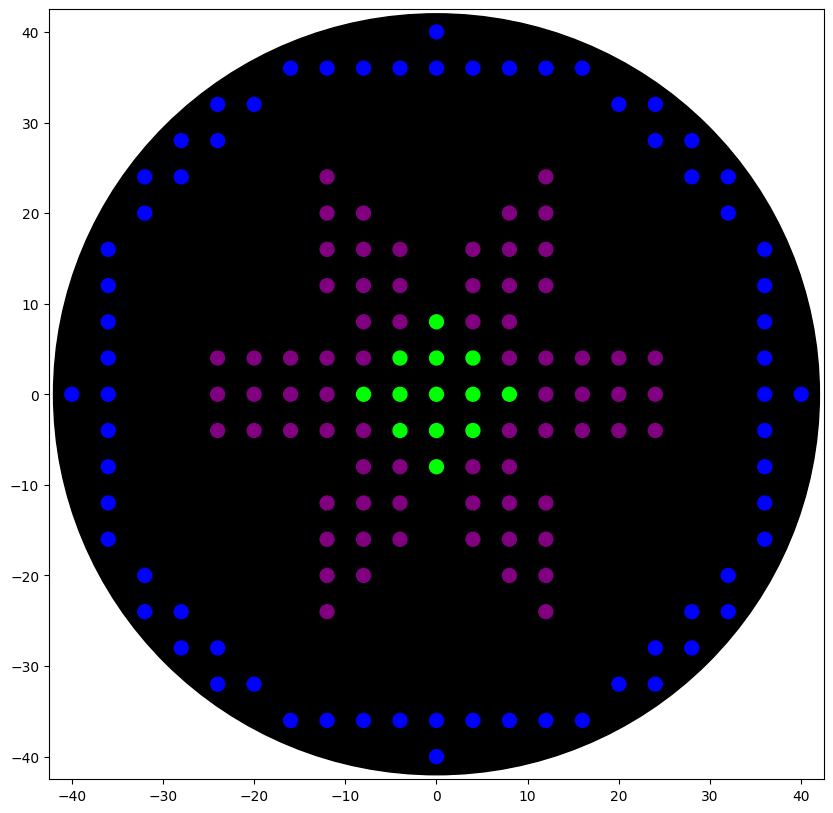
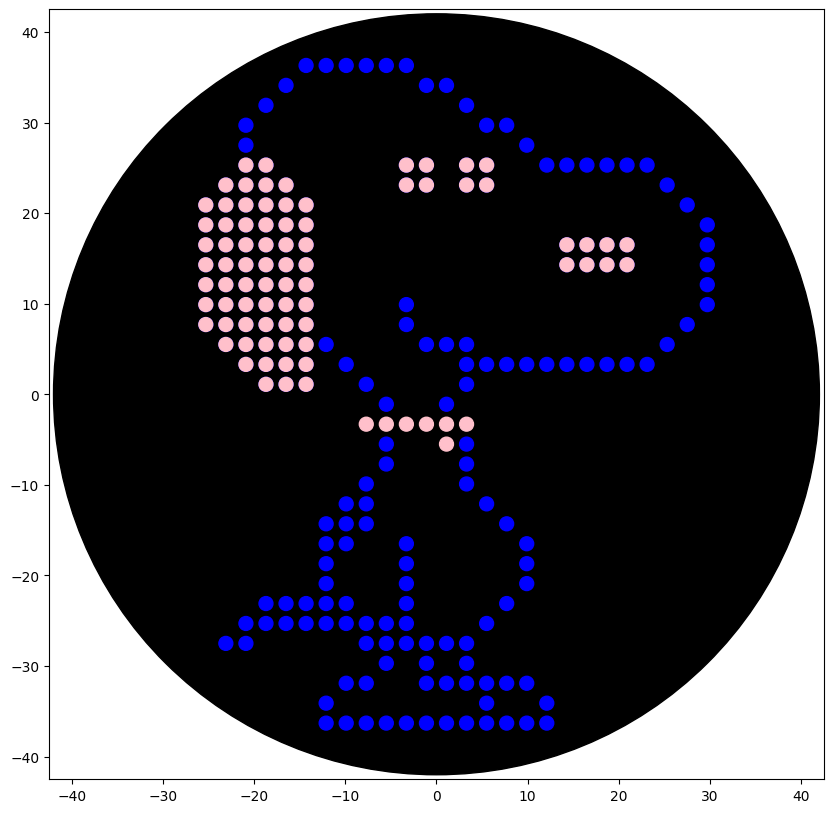
The original idea was to create a piece based on gothic arquitecture featuring a stained glass rose window
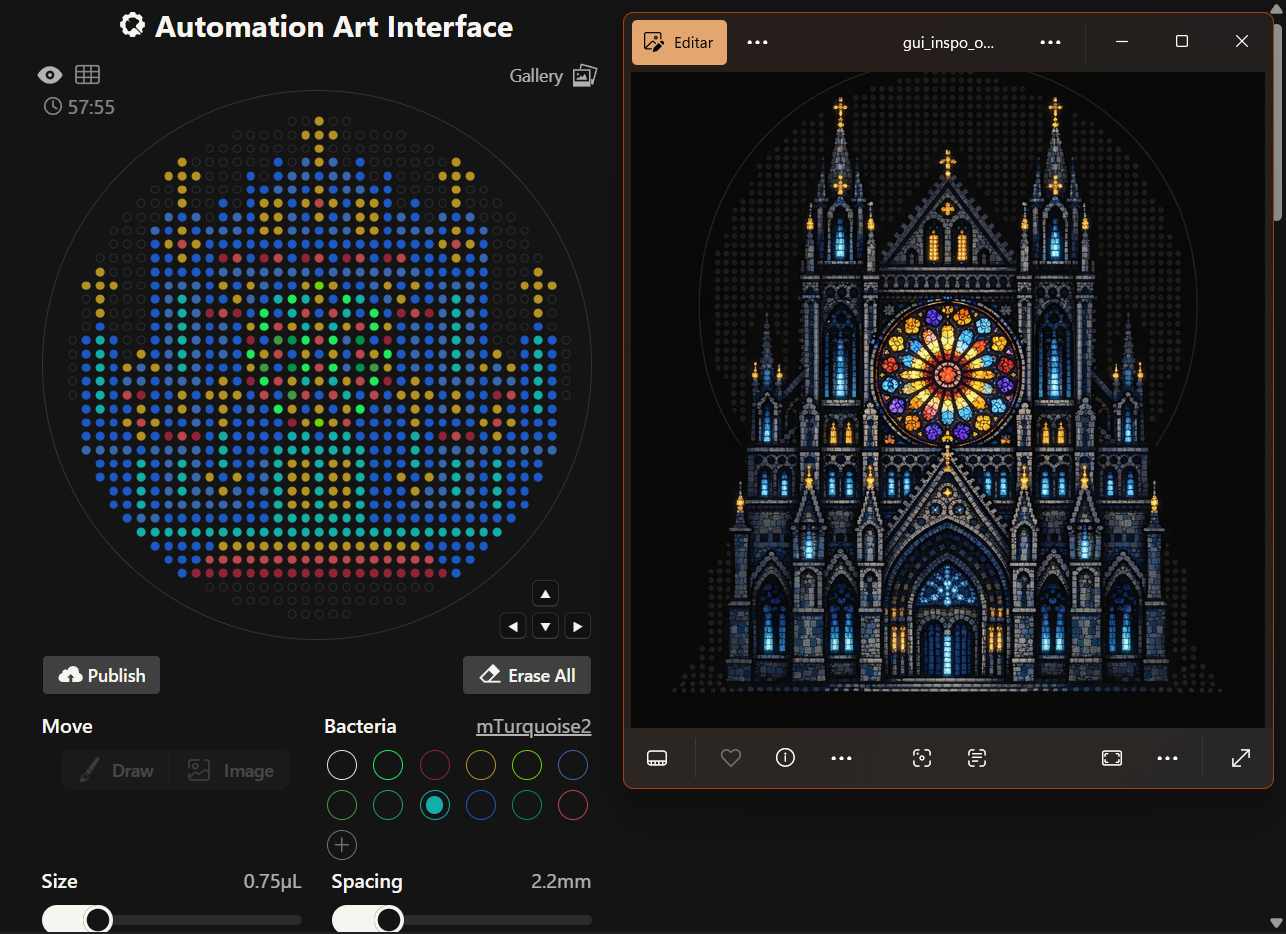
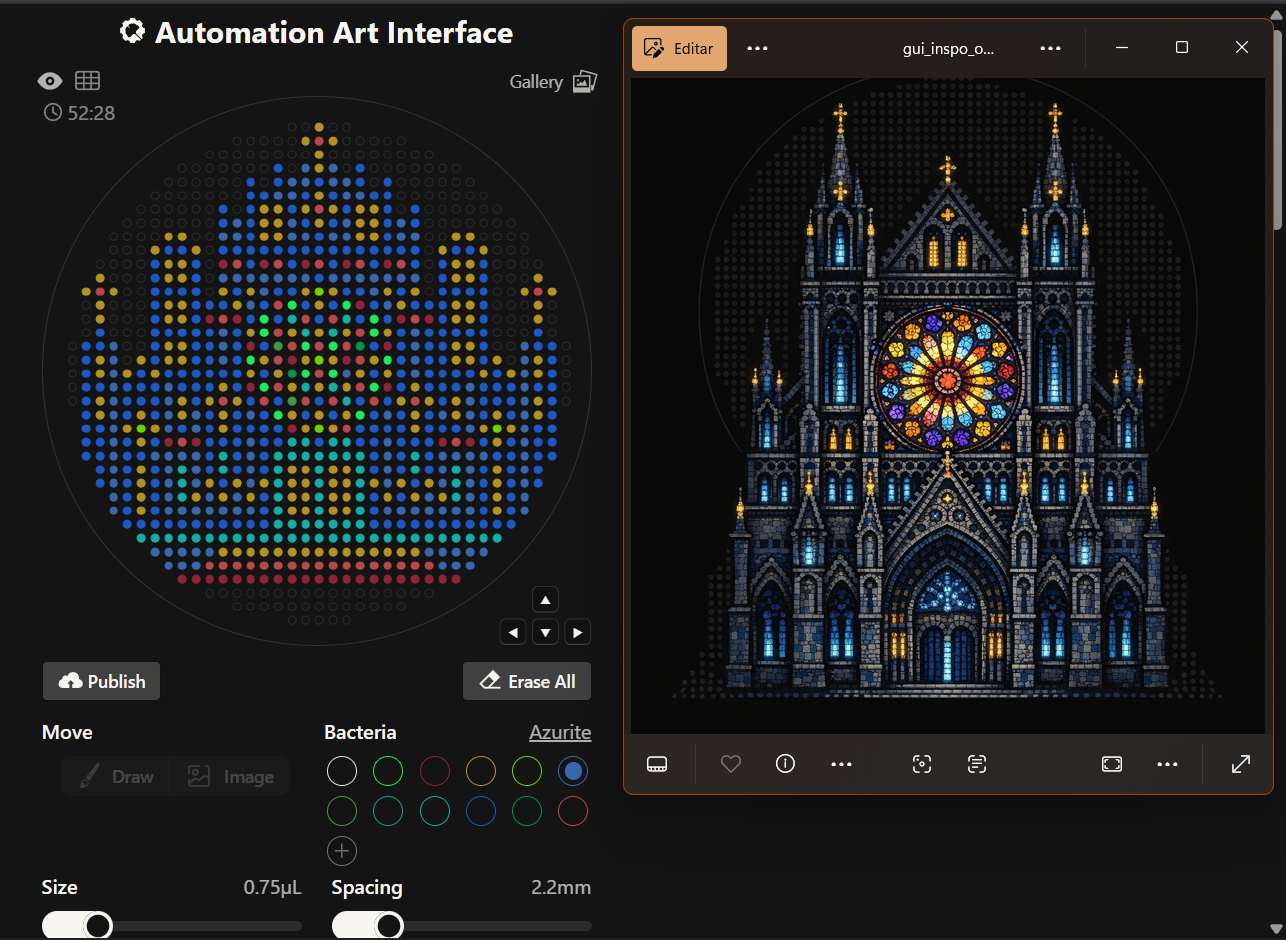
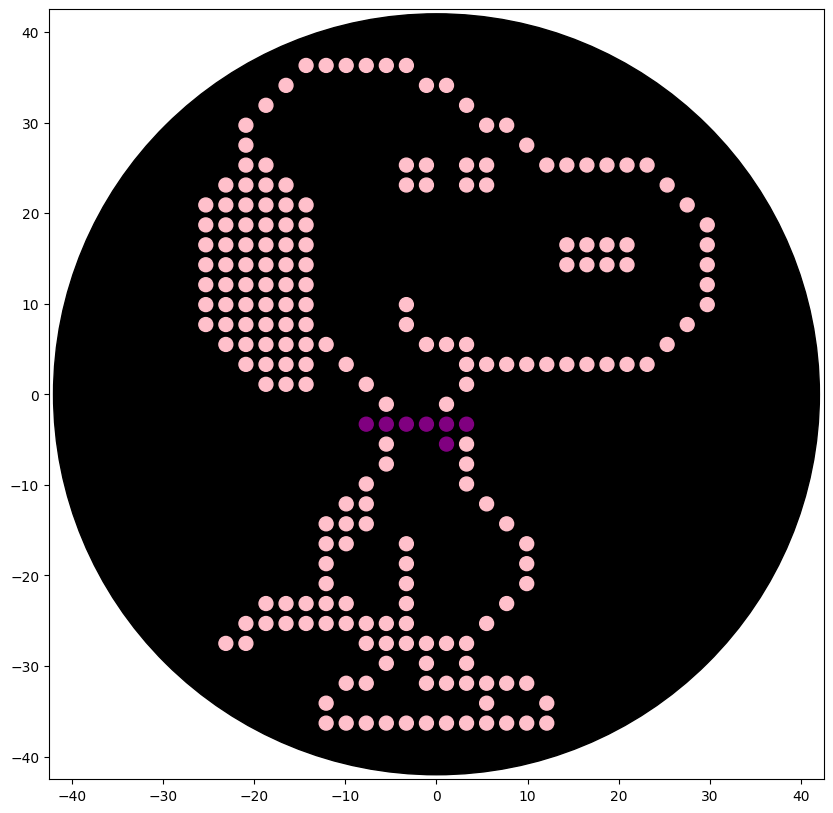
However, the results where closer to a Mario Bros castle and I didn’t quite like it, so instead, I made a second attempt with two different options; one for my gothic rose window greed and another one more simple with a Snoopy design, thinking more on the time recuired for it to be created on the Opentron machine.
The first idea vs the final idea
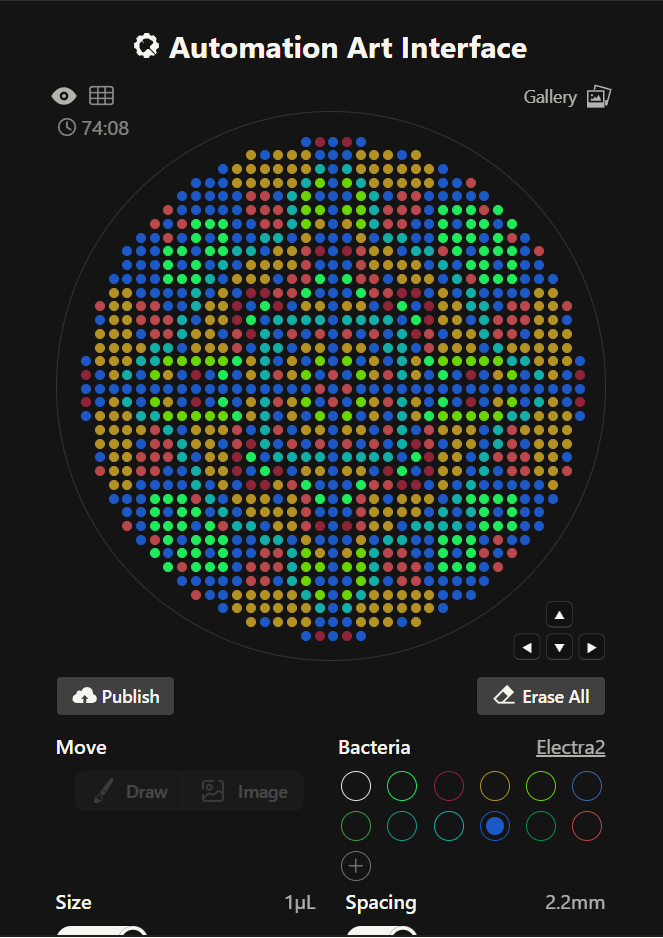
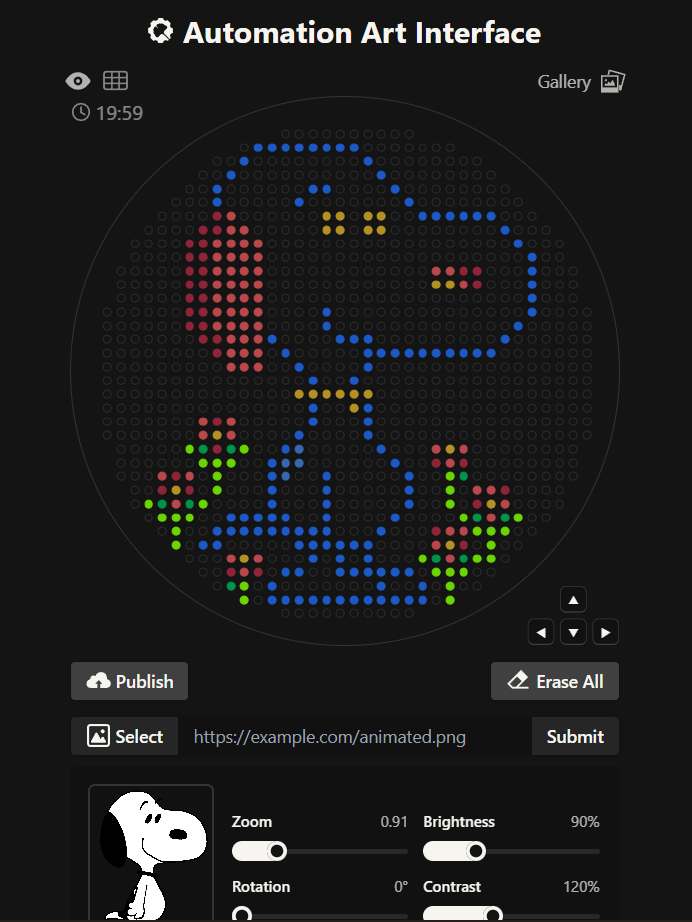
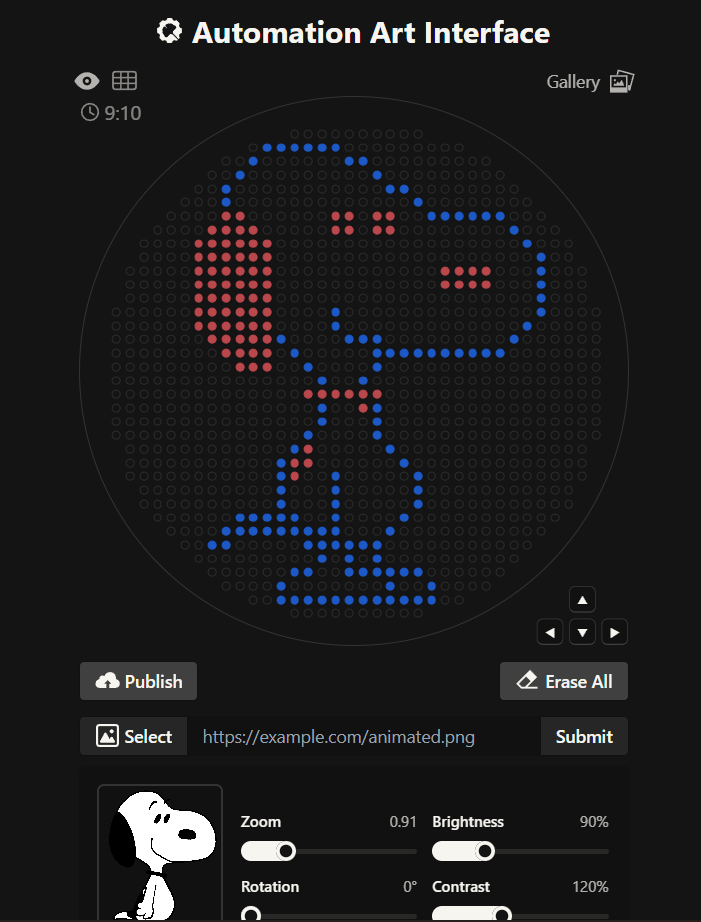
The link for the final published design on te GUI site is this: Click here
- Using the coordinates from the GUI, follow the instructions in the HTGAA26 Opentrons Colab to write your own Python script which draws your design using the Opentrons.
- You may use AI assistance for this coding — Google Gemini is integrated into Colab (see the stylized star bottom center); it will do a good job writing functional Python, while you probably need to take charge of the art concept.
- If you’re a proficient programmer and you’d rather code something mathematical or algorithmic instead of using your GUI coordinates, you may do that instead.
For the Python code in Google Colab:
I did try to make the Python file aside from the Ronan’s site Python download and I encounter a few issues while coding.
HTGAA Opentrons Setup Code Analysis
1. Environment Setup
Explanation:
- Google Colab comes with a newer numpy version that is incompatible with Opentrons.
- To avoid restarting the runtime repeatedly, we create a venv-like environment where Opentrons and its compatible dependencies are installed.
- This ensures the rest of the protocol works without conflicts.
plt.rcParams["figure.figsize"] = (10,10) sets the default figure size for visualizations of the Petri dish and droplets.
2. Petri Dish Constants
`PETRI_INNER_DIAMETER = 84 MAX_DRAW_RADIUS = PETRI_INNER_DIAMETER/2 - 2`
Explanation:
- Defines the Petri dish size (in mm) to simulate a real 90 mm plate.
MAX_DRAW_RADIUSleaves a 2 mm margin to prevent dispensing outside the plate due to tip size or miscalibration.- When scaling coordinates (like SCALE = 0.7), all points fit within ±36.3 mm, safely under the 40 mm limit.
3. Helper Classes and Functions
nullLocation
nullLocation = types.Location(types.Point(x=250, y=250, z=250), None)
- Placeholder for pipette location before dispensing anything.
same2DLocation(loc1, loc2): Compares x and y only, ignores z, to detect whether two points are essentially the same on the Petri dish.
mock_print(str): A silent print function used instead of standard print(), to avoid cluttering output logs during simulation.
4. Pipette Simulation Class (PipetteSim)
This is the heart of the setup, emulating an Opentrons pipette for aspirating, dispensing, and tracking droplets.
Key components:
self.droplets_x, self.droplets_y, self.droplets_size, self.droplets_color
- Tracks droplet positions, sizes, and colors for visualization.
self.smears
- Originally draws lines connecting sequential dispenses to simulate smearing/dragging of droplets.
Important: SMEAR Handling
- Commented out to remove unwanted lines in the visualization.
- Concept: Each time the pipette moves after dispensing, the simulator connects the last droplet to the new location with a line.
- We replaced it with
plt.scatter()for droplets only, avoiding the “demonic laser beams of death” - ChatGPT, 2026.
5. Scaling and Coordinates
- Coordinates for droplets (like electra2_points fron de GUI site) originally go up to ±36.3 mm.
- With
SCALE = 0.7, all points safely fit inside theMAX_DRAW_RADIUS = 40 mm.
This prevents runtime errors like:
ValueError: Dispensing outside "safe" area: Point (-25.3, 36.3) is more than 40.0mm away
Math used: simple multiplication for scaling each (x, y) coordinate
scaled_x = original_x * SCALE
scaled_y = original_y * SCALE
Mathematical calculations for coordinate scaling
We scale each coordinate $(x, y)$ to fit inside the safe dispensing area using a scale factor:
$$ x_{\text{scaled}} = x_{\text{original}} \cdot SCALE $$ $$ y_{\text{scaled}} = y_{\text{original}} \cdot SCALE $$Example:
- Original point:
- Scale factor:
Radius Check
The simulator only allows dispensing inside the safe radius:
$$ R_{\text{max}} = \frac{\text{PETRI INNER DIAMETER}}{2} - 2 = 40 \text{ mm} $$ A point $(x_{\text{scaled}}, y_{\text{scaled}})$ is valid if: $$ \sqrt{x_{\text{scaled}}^2 + y_{\text{scaled}}^2} \leq R_{\text{max}} $$Example:
$$ \sqrt{(-25.41)^2 + (17.71)^2} = \sqrt{645.7 + 313.7} = \sqrt{959.4} \approx 30.98 \text{ mm} < 40 \text{ mm} $$Safe to dispense.
Droplet Size Mapping
Droplet volume $V$ in μL is mapped to a visual size $S$ for plotting:
$$ S = V \cdot K $$ Where $K = 100$ in our code.Example:
$$ V = 1 \mu L \implies S = 1 \cdot 100 = 100 \text{ (scatter marker size)} $$Summary Formula for Visualization
For each original coordinate $(x, y)$ and droplet volume $V$: $$ \begin{cases} x_{\text{scaled}} = x \cdot SCALE \\ y_{\text{scaled}} = y \cdot SCALE \\ S = V \cdot 100 \\ \text{Check: } \sqrt{x_{\text{scaled}}^2 + y_{\text{scaled}}^2} \leq 40 \end{cases} $$Example Table
| Original $(x,y)$ | Scaled $(x,y)$ | Volume $(\mu L)$ | Size $S$ |
|---|---|---|---|
| (-36.3, 25.3) | (-25.41, 17.71) | 1 | 100 |
| (29.7, -16.5) | (20.79, -11.55) | 2 | 200 |
| (-12.1, -36.3) | (-8.47, -25.41) | 0.5 | 50 |
AI really helped making this calculations neatly and fast to implement organically on the Python code.
6. Pipette Operations
Dispense
- Maps volume → size of droplet visually (unprincipled scaling, but works for display).
- Updates
self.totalDispensedto track volumes per color.
Aspirate
- Checks for tip presence, maximum volume, and cross-contamination.
- Updates
self.totalAspirated.
Pick Up & Drop Tip
- Ensures the pipette is always aware of whether it holds a tip, preventing accidental dispensing or aspirating without one.
7. Petri Dish Mapping (petriLocOfWell)
- Converts well IDs (A1-H12) into (x, y) coordinates on the Petri dish.
ord('D')andy-6 centerthe mapping around the dish.- Ensures droplets are placed accurately relative to the plate center.
Visual Representation of the Petri Dish and Safe Dispensing Area
We define:
- Petri dish radius:
- Safe dispensing radius: $R_\text{max} = 40\text{ mm}$
- Sample points scaled by $SCALE = 0.7$
Legend:
- Black circle: Petri dish outer edge
- Red dashed circle: Maximum safe dispensing radius
- Colored dots: Scaled droplet coordinates
- Axes: $x$ and $y$ in mm
How it works:
- The
\drawcommands make the dish and safe area. - The
\filldrawcommands place your points after scaling withSCALE = 0.7. - You can add more points by duplicating
\filldraw[...] (x_scaled, y_scaled) ....
8. Visualization (visualize())
- Draws the Petri dish with
plt.Circle. - Displays droplets with
plt.scatter.
Smears are commented out to prevent unwanted lines:
- X and Y limits are set slightly beyond the dish to avoid clipping.
9. Color & Well Handling
Additionally, we discovered that in the simulator:
- Blue corresponds to
A2, withA1you get pink,B1is purple, whileC1is green andD1is yellow. - Columns beyond D may not exist in some mock labware.
- This required careful mapping of colors to well IDs.
- We also used the color mapping to differentiate bio-inks visually.
10. Optional Future Feature
- A PNG → Opentrons coordinates converter could automate mapping any pixel art (Snoopy, logos, text) into pipette instructions (this part really makes your life easier!).
- Could be useful for quickly generating complex designs. However, we still have to scale the coordinates.
Summary of ChatGPT - AI Contributions
- Analyzed and adapted the Opentrons mock environment to work in Colab with new numpy versions.
- Applied scaling (SCALE = 0.7) to prevent
MAX_DRAW_RADIUS errors. - Commented out smears to clean the visualization (
plt.scatter() only). - Helped map real coordinates and colors into Opentrons wells for the simulator.
- Explained the logic behind dispense, aspirate, tip handling, and visualization.
- Suggested a PNG → coordinates converter for rapid design automation.
Now, for the code used
The colors instructed by Lifefabs Institute, London - Node are blue, pink and purple so two versions where made
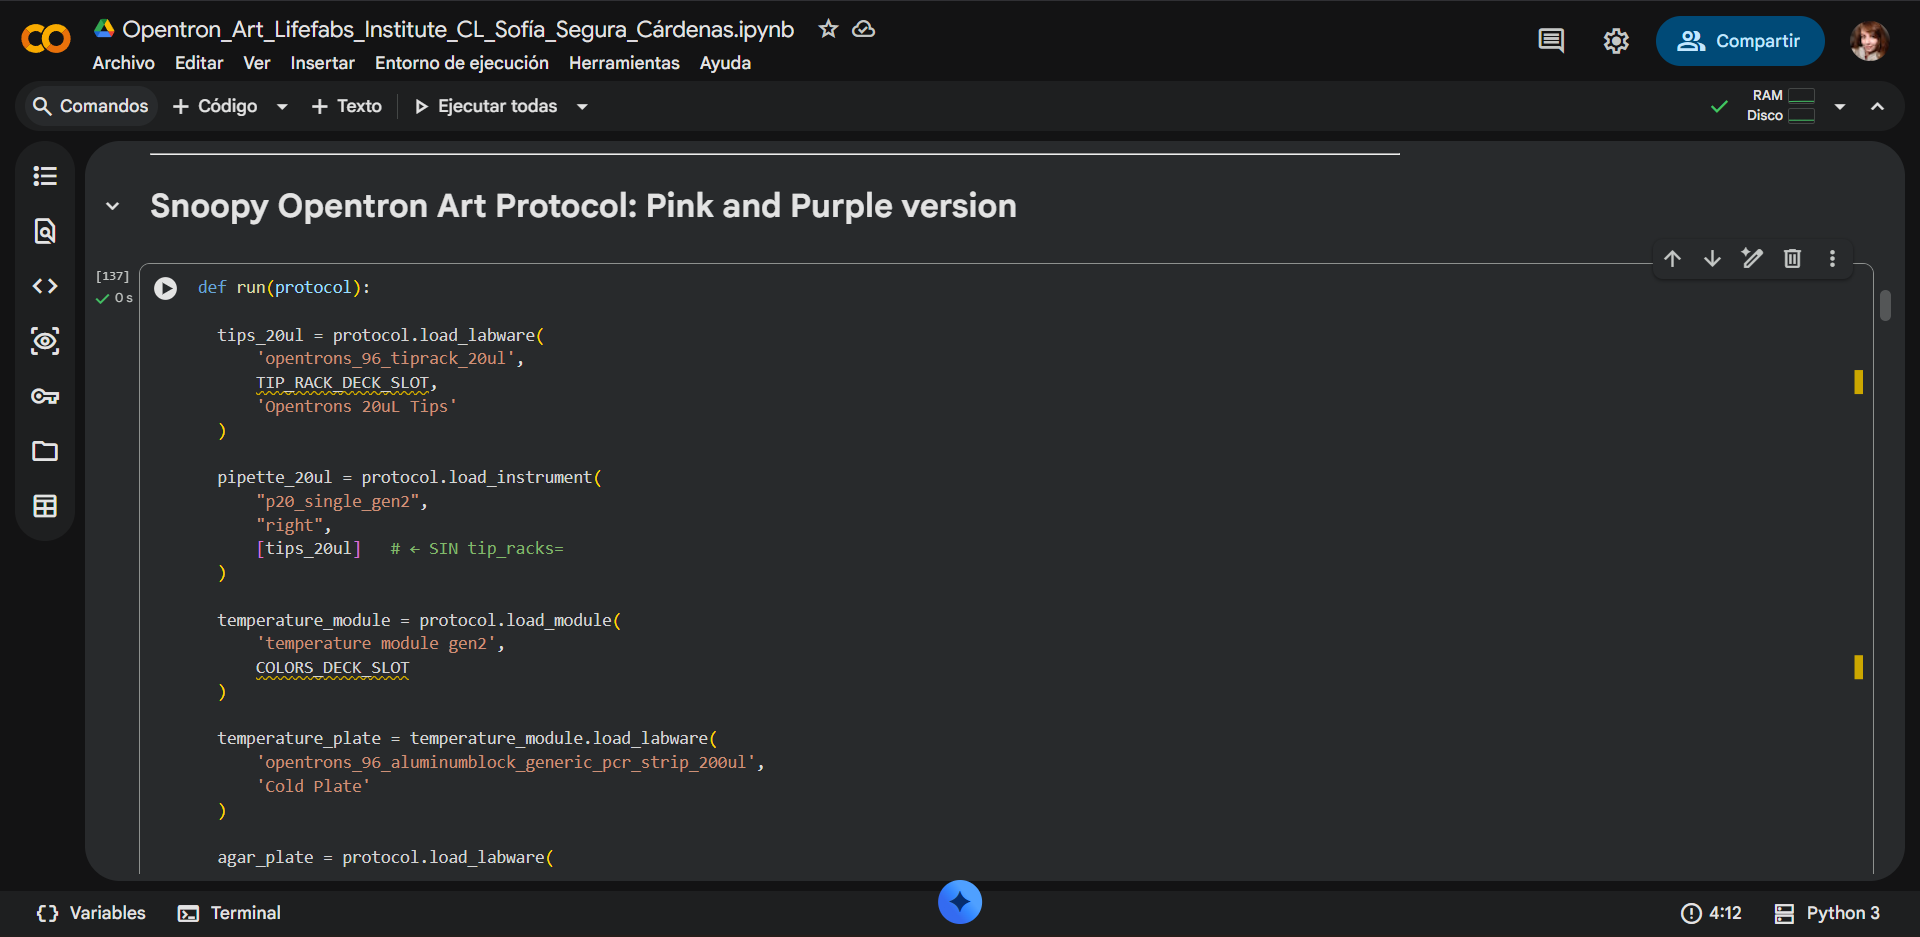
Link to the Google Colab Opentrons Python notebook: Click here
The final take
4. If the Python component is proving too problematic even with AI and human assistance, download the full Python script from the GUI website and submit that:
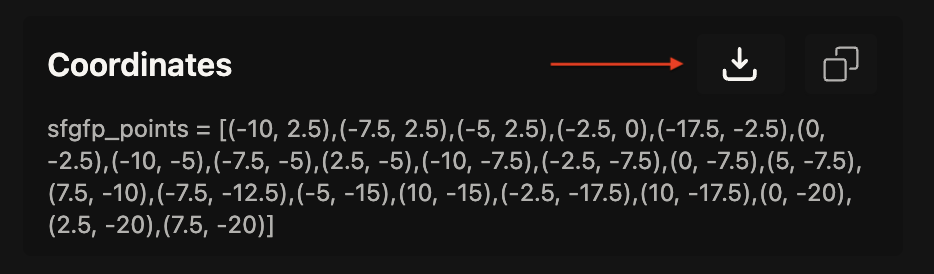
Use the download icon pointed to by the red arrow in this diagram.
This are the Python files with the final design downloaded directly from the GUI site:
5. If you use AI to help complete this homework or lab, document how you used AI and which models made contributions.
Did you use AI in to help write your code? If so, what was your experience & which AI tool did you find most helpful?
Did I use AI? For sure! I used AI to help write and optimize my code. I primarily used ChatGPT, which was extremely helpful in reviewing my code, explaining tricky parts, and suggesting optimizations. I also tried Google Colab’s Gemini, but I found its responses less useful and not satisfactory for my needs, even when providing it with access to the code. ChatGPT really guided me step by step, helping me understand how to structure the Opentrons protocol correctly and troubleshoot potential issues, which made the process much smoother and more reliable.
That said, even with ChatGPT’s guidance, we encountered several issues that we were not able to fully resolve, so while it significantly helped improve and clarify the code, it didn’t solve every problem.
- Sign up for a robot time slot if you are at MIT/Harvard/Wellesley or at a Node offering Opentrons automation. The Python script you created will be run on the robot to produce your work of art!
- At MIT/Harvard? Lab times are on Thursday Feb.19 between 10AM and 6PM.
- At other Nodes? Please coordinate with your Node.
- Submit your Python file via this form.
2. Post-Lab Questions
Assignees for the following sections
| MIT/Harvard students | Required |
| Committed Listeners | Required |
One of the great parts about having an automated robot is being able to precisely mix, deposit, and run reactions without much intervention, and design and deploy experiments remotely.
1. Find and describe a published paper that utilizes the Opentrons or an automation tool to achieve novel biological applications.
The paper chosen was:
PlasmoTron: an open-source platform for automated culture of malaria parasites.
Sanderson, T. & Rayner, J. C. (2018). PlasmoTron: an open-source platform for automated culture of malaria parasites. Bioarxiv. https://doi.org/10.1101/241596
About this article:
(View Full Screen)
Also, some other papers that are very interesting about this topic:
1. Semi-automated Production of Cell-free Biosensors.
Brown, D. M., Phillips, D. A., Garcia, D. C., et al. (2024). Semi-automated Production of Cell-free Biosensors. bioRxiv. https://doi.org/10.1101/2024.10.13.618078
2. Perspective on Utilizing Foundation Models for Laboratory Automation in Materials Research.
Hatakeyama-Sato, K., Nishida, T., Kitamura, K., et al. (2025). Perspective on Utilizing Foundation Models for Laboratory Automation in Materials Research. Arxiv. arXiv:2506.12312 [cs.RO]. https://doi.org/10.48550/arXiv.2506.12312
3. BOTany Methods: Accessible Automation for Plant Synthetic Biology.
Qiande, M., Lin, A., Larson, L., et al. (2026). BOTany Methods: Accessible Automation for Plant Synthetic Biology. Plant Physiology. https://doi.org/10.1093/plphys/kiag066
- Write a description about what you intend to do with automation tools for your final project. You may include example pseudocode, Python scripts, 3D printed holders, a plan for how to use Ginkgo Nebula, and more. You may reference this week’s recitation slide deck for lab automation details.
Example 1: You are creating a custom fabric, and want to deposit art onto specific parts that need to be intertwined in odd ways. You can design a 3D printed holder to attach this fabric to it, and be able to deposit bio art on top. Check out the Opentrons 3D Printing Directory.
Example 2: You are using the cloud laboratory to screen an array of biosensor constructs that you design, synthesize, and express using cell-free protein synthesis.
- Echo transfer biosensor constructs and any required cofactors into specified wells.
- Bravo stamp in CPFS reagent master mix into all wells of a 96-well / 384-well plate.
- Multiflo dispense the CFPS lysate to all wells to start protein expression.
- PlateLoc seal the plate.
- Inheco incubate the plate at 37°C while the biosensor proteins are synthesized.
- XPeel remove the seal.
- PHERAstar measure fluorescence to compare biosensor responses.
I decided to hold on on this section just for the moment since i might change my project this week!
3. Final Project Ideas
Assignees for the following sections
| MIT/Harvard students | Required |
| Committed Listeners | Required |
As explained in this week’s recitation, add 1-3 slides in your Node’s section of this slide deck with 3 ideas you have for an Individual Final Project. Be sure to put your name, city, and country on your slide!
The submitted project ideas are as follows:
Project N° 1: Dual-Signal Biosensor for Functional Radiation Dosimetry
Project N° 2: Living Sound-to-Color Interface Using Optogenetic Bacteria
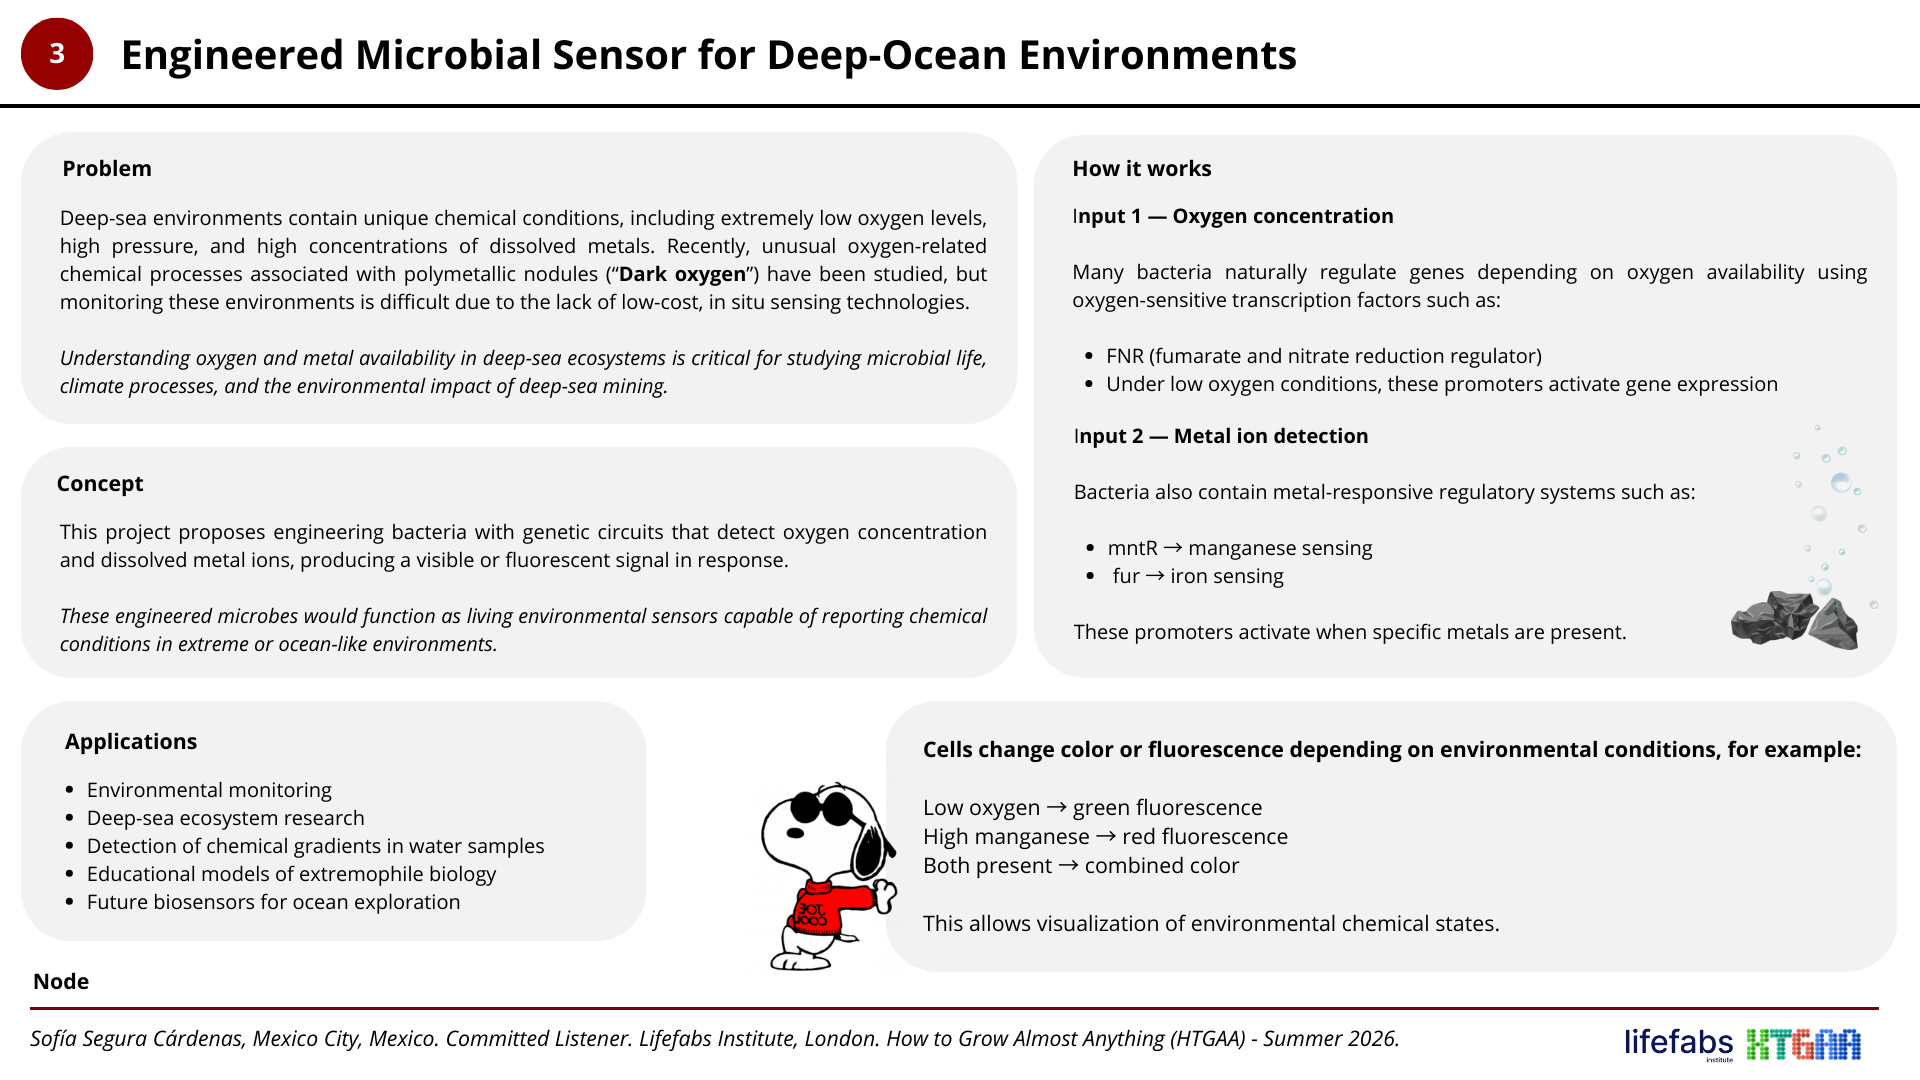
Project N° 3: Engineered Microbial Sensor for Deep-Ocean Environments
Resources
- Opentrons API Documentation: https://docs.opentrons.com/python-api/
- Opentrons Artwork GUI Website: http://opentrons-art.rcdonovan.com/
- Opentrons Artwork Colab: HTGAA26 Opentrons Colab
- Automation Equipment: HTGAA 2026 Recitation: Lab Automation, Opentrons Art, Intro to Cloud Laboratories
- OpenAI. (2026). ChatGPT (GPT-5.2) [Large language model]. https://chat.openai.com/