Week 2 Lab: DNA Gel Art
Gel Art - Restriction Digests and Gel Electrophoresis Wet Lab
Note: I will not be able to make most wet labs due to EMT school causing scheduling conflicts but was able to attend this first in-person node lab and will participate in-person when possible.
Protocol Part 1a: Preparing a 1% agarose electrophoresis gel
*Chemicals:
-Agarose powder
-1x TBE buffer
-SmartGlow Safe Green Pre Stain (https://www.labproservices.com/buy-smartglow-safe-green-pre-stain-1-0ml-ea-1-e4500-ps-ea.html?gad_source=1&gad_campaignid=20923765122&gbraid=0AAAAAqHTWoNkTzYIzDQi_alxD1vIk_2bP&gclid=CjwKCAiAncvMBhBEEiwA9GU_fvIAPFHPYWljiQUeFtU-1_CGZxCC4XhO-unP2Wn_t-_yl_bK6QYBLBoCFlwQAvD_BwE)
*Equipment
-Pipette Set
-Gel tray
-9 or 13-well comb
-Microwave
-Precision scale
*Consumables
-Pipette tips
-250 mL beaker
-Graduated cylinder (100mL)
TBE Buffer Preparation The TBE buffer provided in our lab was already diluted to the proper 1X working solution.
Gel Preparation To prepare an agarose gel for electrophoresis: Added 0.4 g of agarose powder (exact weight came out to 0.3999g) and 40mL of 1x TBE buffer to a microwavable beaker (1% w/v) Placed the flask in a microwave, heated in short pulses of 15–20 seconds, swirling gently between pulses, until the agarose was completely dissolved, watching to prevent any boil-overs. Allowed the solution to cool until the beaker was warm but comfortable to touch. Once cooled, added 2μL of SmartGlow DNA pre-stain to the solution and mixed gently. Slowly poured the agarose into the tray to avoid forming bubbles, placed the comb into the gel tray to create wells. 9 or 13 well-combs were available; I selected the 13-well comb and adapted my design to this. Allowed the gel to solidify for about 30 minutes at room temperature. Once set, carefully removed the comb, and the gel was ready for use.
Protocol Part 1b: Restriction Digest
*Chemicals
-1X Lambda DNA
-The following enzymes: EcoRI-HF, BamHI-HF, Xhol, KpnI-HF, SacI-HF, SalI-HF (see calculated quantities below)
-Nuclease-free water
*Equipment and Consumables
-Thermocycler
-PCR tube rack
I planned out an adjusted design from what I had in-silico due to the availability of 13 lanes:

Based upon this plan, I made 5 reaction tubes as follows calculated based upon the number of lanes I planned on using the reaction for:
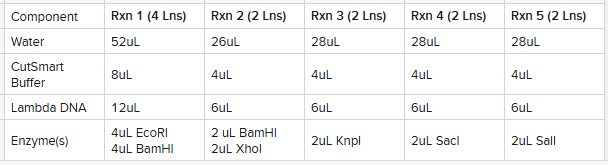
I then placed the rxn tubes in the thermocycler set to 37ºC and incubated for 30 minutes (while the agarose gel solidified).
Protocol Part 2: Gel Run
*Chemicals
-6x loading dye
-1X TBE
-SmartGlow Safe Green Pre Stain
*Equipment
-Gel Box
-Power supply (ours did not require the addition of leads, everything was built into the gel box with just a power supply connected to an outlet, voltage already adjusted to what was required)
Gel Run Comb was removed once the gel was set. Gel box was filled with approximately 30-40mL 1x TBE (enough to ensure gel was covered entirely). 0.72uL of pre-stain was added to the 1X TBE. For each rxn (per lane), I mixed 7uL of my digest from the rxn tube with 2uL of 6X loading dye on a sheet of parafilm prior to loading into wells, following the schema described above for all lanes. Made sure the top was place on the gel box the correct way (negative to negative, positive to positive, gel positioned with loaded lanes at the negative end). Ran the gel at 80V - 115V for around 45 minutes (originally checked after 30 minutes, let run about another 15 to allow for further separation of bands). Checked that there were bubbles in the buffer and that lanes were moving after about 10 minutes.
Protocol Part 3: Imaging Your Results
*Equipment
-Blue light transilluminator (for our lab, this was actually built into the gel electrophoresis chamber/gel box)
-Phone camera
*Consumables and Safety
-Gloves
To view my results, I simply turned on the blue light built into our gel boxes, removing the need to transfer the gel to a separate transilluminator. Put a light-blocking device around the gel box to block out ambient room light and allow for better photos to be taken. Took a picture using my phone’s camera through an imaging hole on the top of the light-blocking device. Disposed of the gel in the solid waste bin (burn box).
Final Results
Here is a picture of the final results:
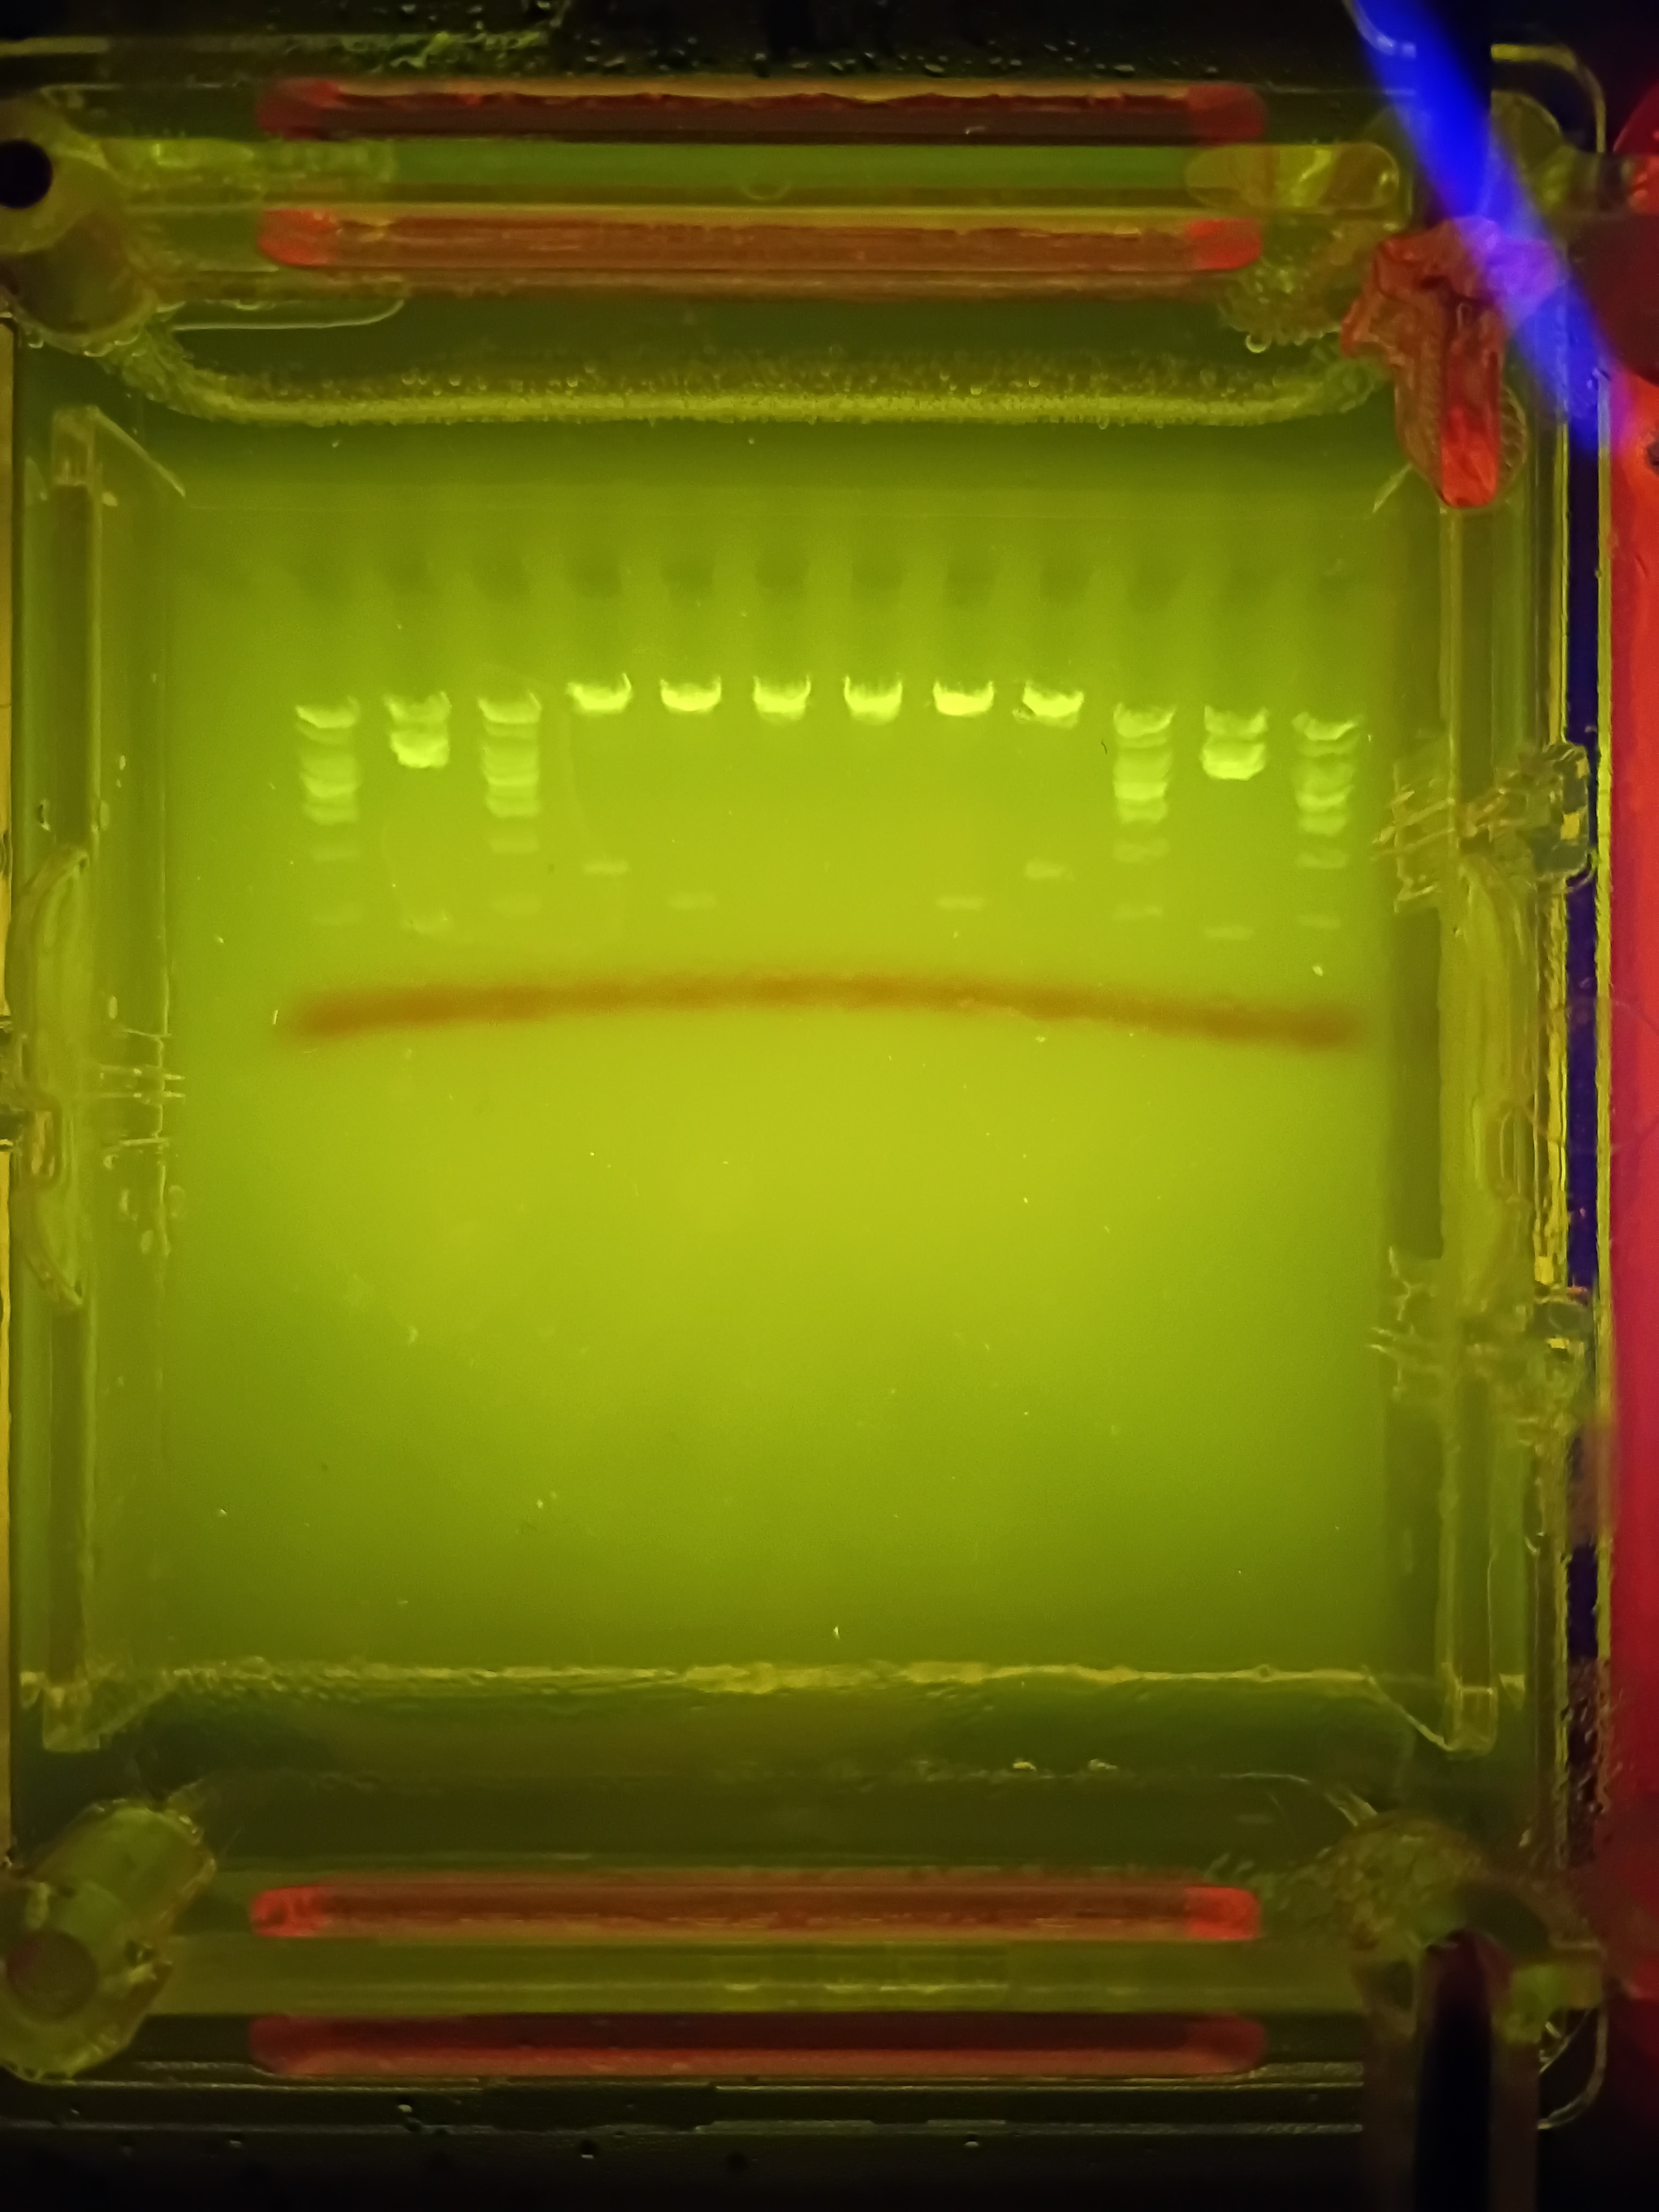
I forgot to account for the fact that some of the single bands created were rather small sections base-pair wise and thus would not be very visible. I also was hoping for better separation from my deisgn from the uncut sections at the top, making my smiley face a bit hard to make out (especially since the bottom of the smile is not actually visible). Someone commented that they think the design looked like a neat bridge, so if anyone asks…it was definitely a bridge I was trying to make here!