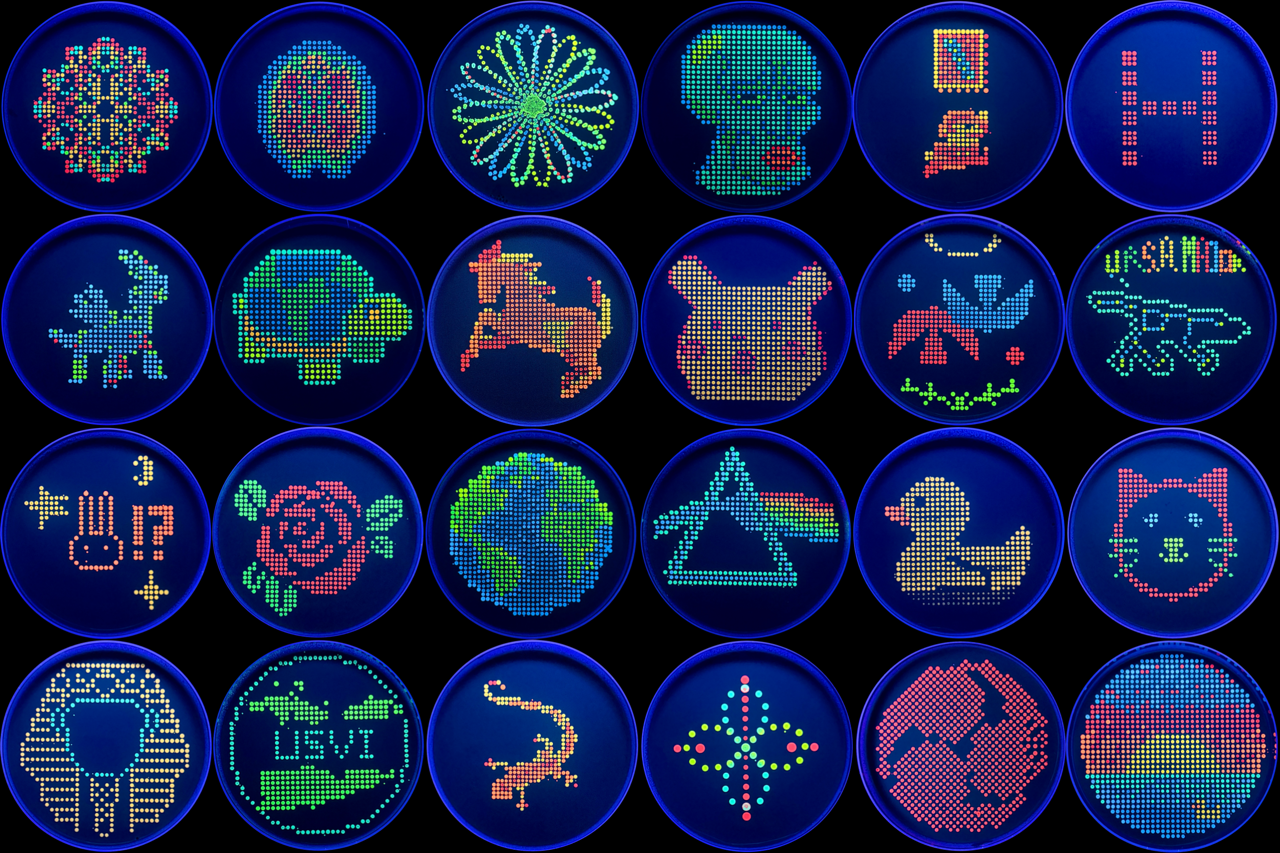
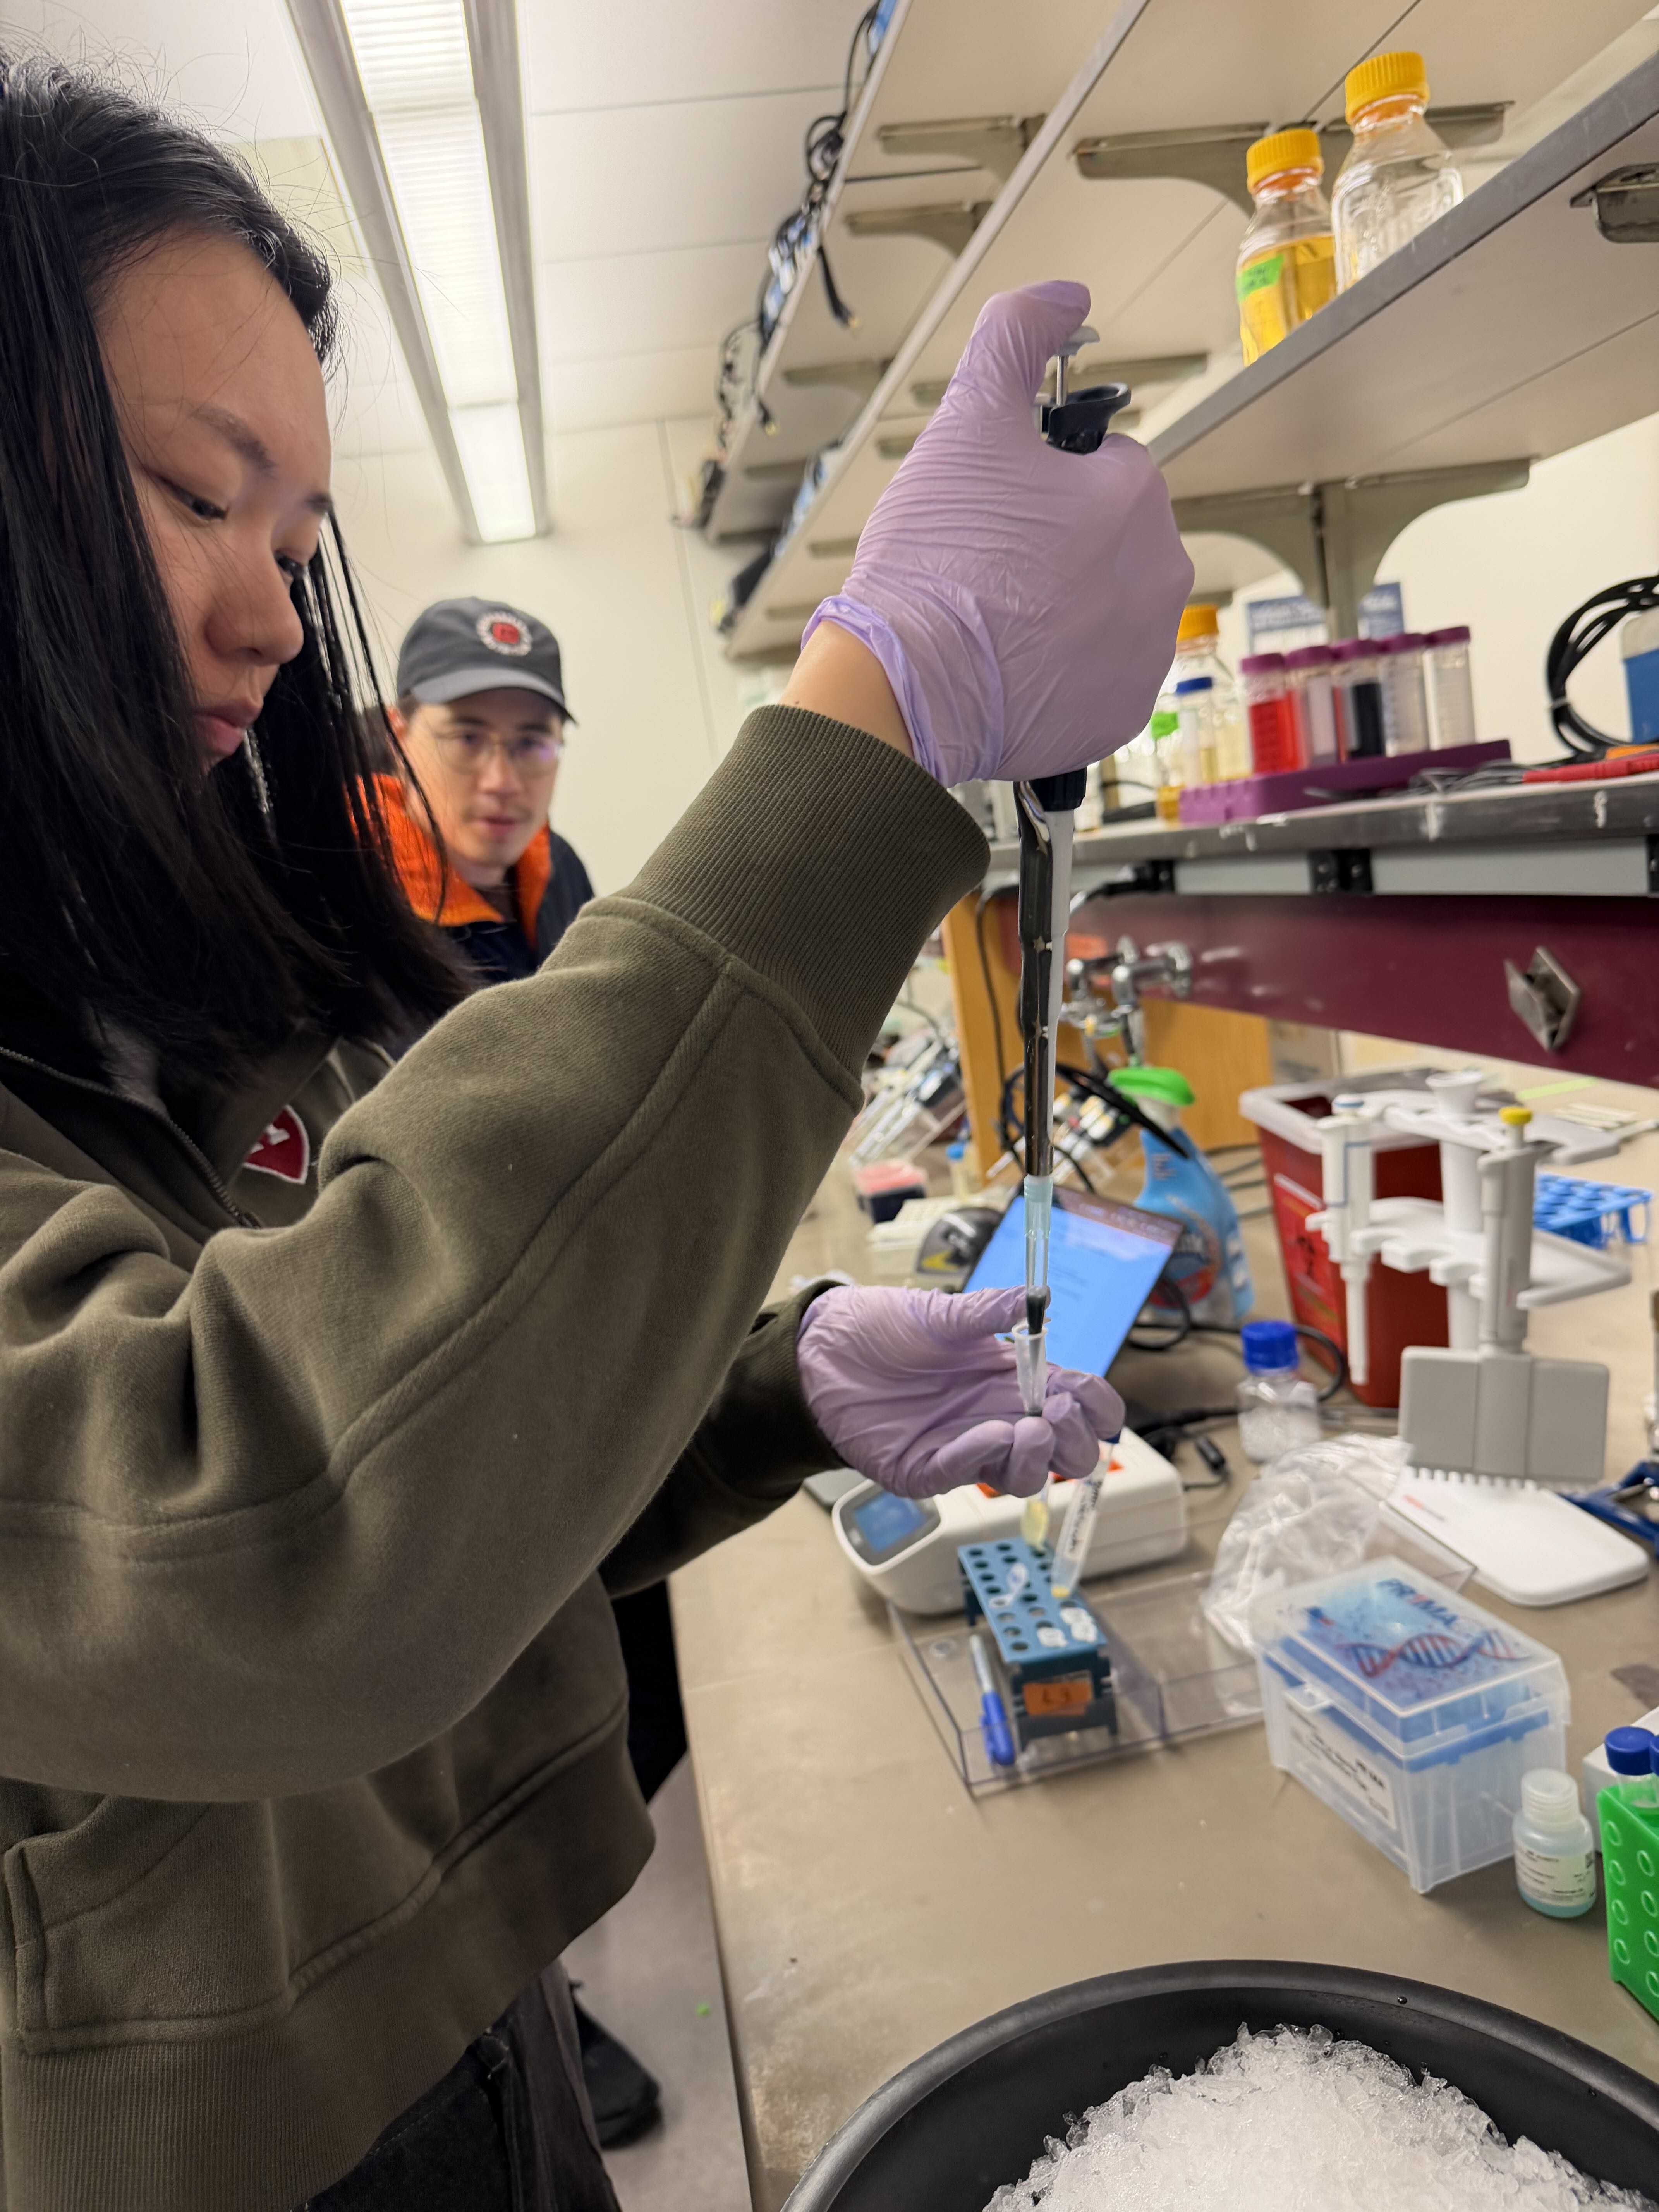
Pipetting Art In Week 1 Lab, I practiced pipetting process by creating art with colored dyes on a petri dish. This exercise helped me master volume control and steady hand movement.
Liquid Preparation and Mixing Techniques During this stage, I learned how to distinguish the precision ranges of different pipettes and how to adjust the volume for each. I practiced the proper operational sequence for aspirating liquid without contaminating the source and dispensing it into Eppendorf tubes. Additionally, I practiced the blow-out and mixing techniques using the pipette to ensure consistent color density across my palette.
Overview In this lab, I focus on the practical application of DNA restriction digestion and agarose gel electrophoresis. The goal is to design and create DNA gel art by using selected restriction enzymes to generate DNA fragments of specific lengths, then resolving those fragments on a gel to form an image. For this experiment, I aim to produce a “boring face” (—_—) pattern.
Image credit: HTGAA 2026 Lab: Opentrons Artwork In this week’s lab, I made two custom Opentrons OT-2 protocols and used the liquid-handling robot to print Fluorescent E. coli onto black (charcoal) agar plates. I produced two pieces using different design workflows:
In Week 1 Lab, I practiced pipetting process by creating art with colored dyes on a petri dish. This exercise helped me master volume control and steady hand movement.
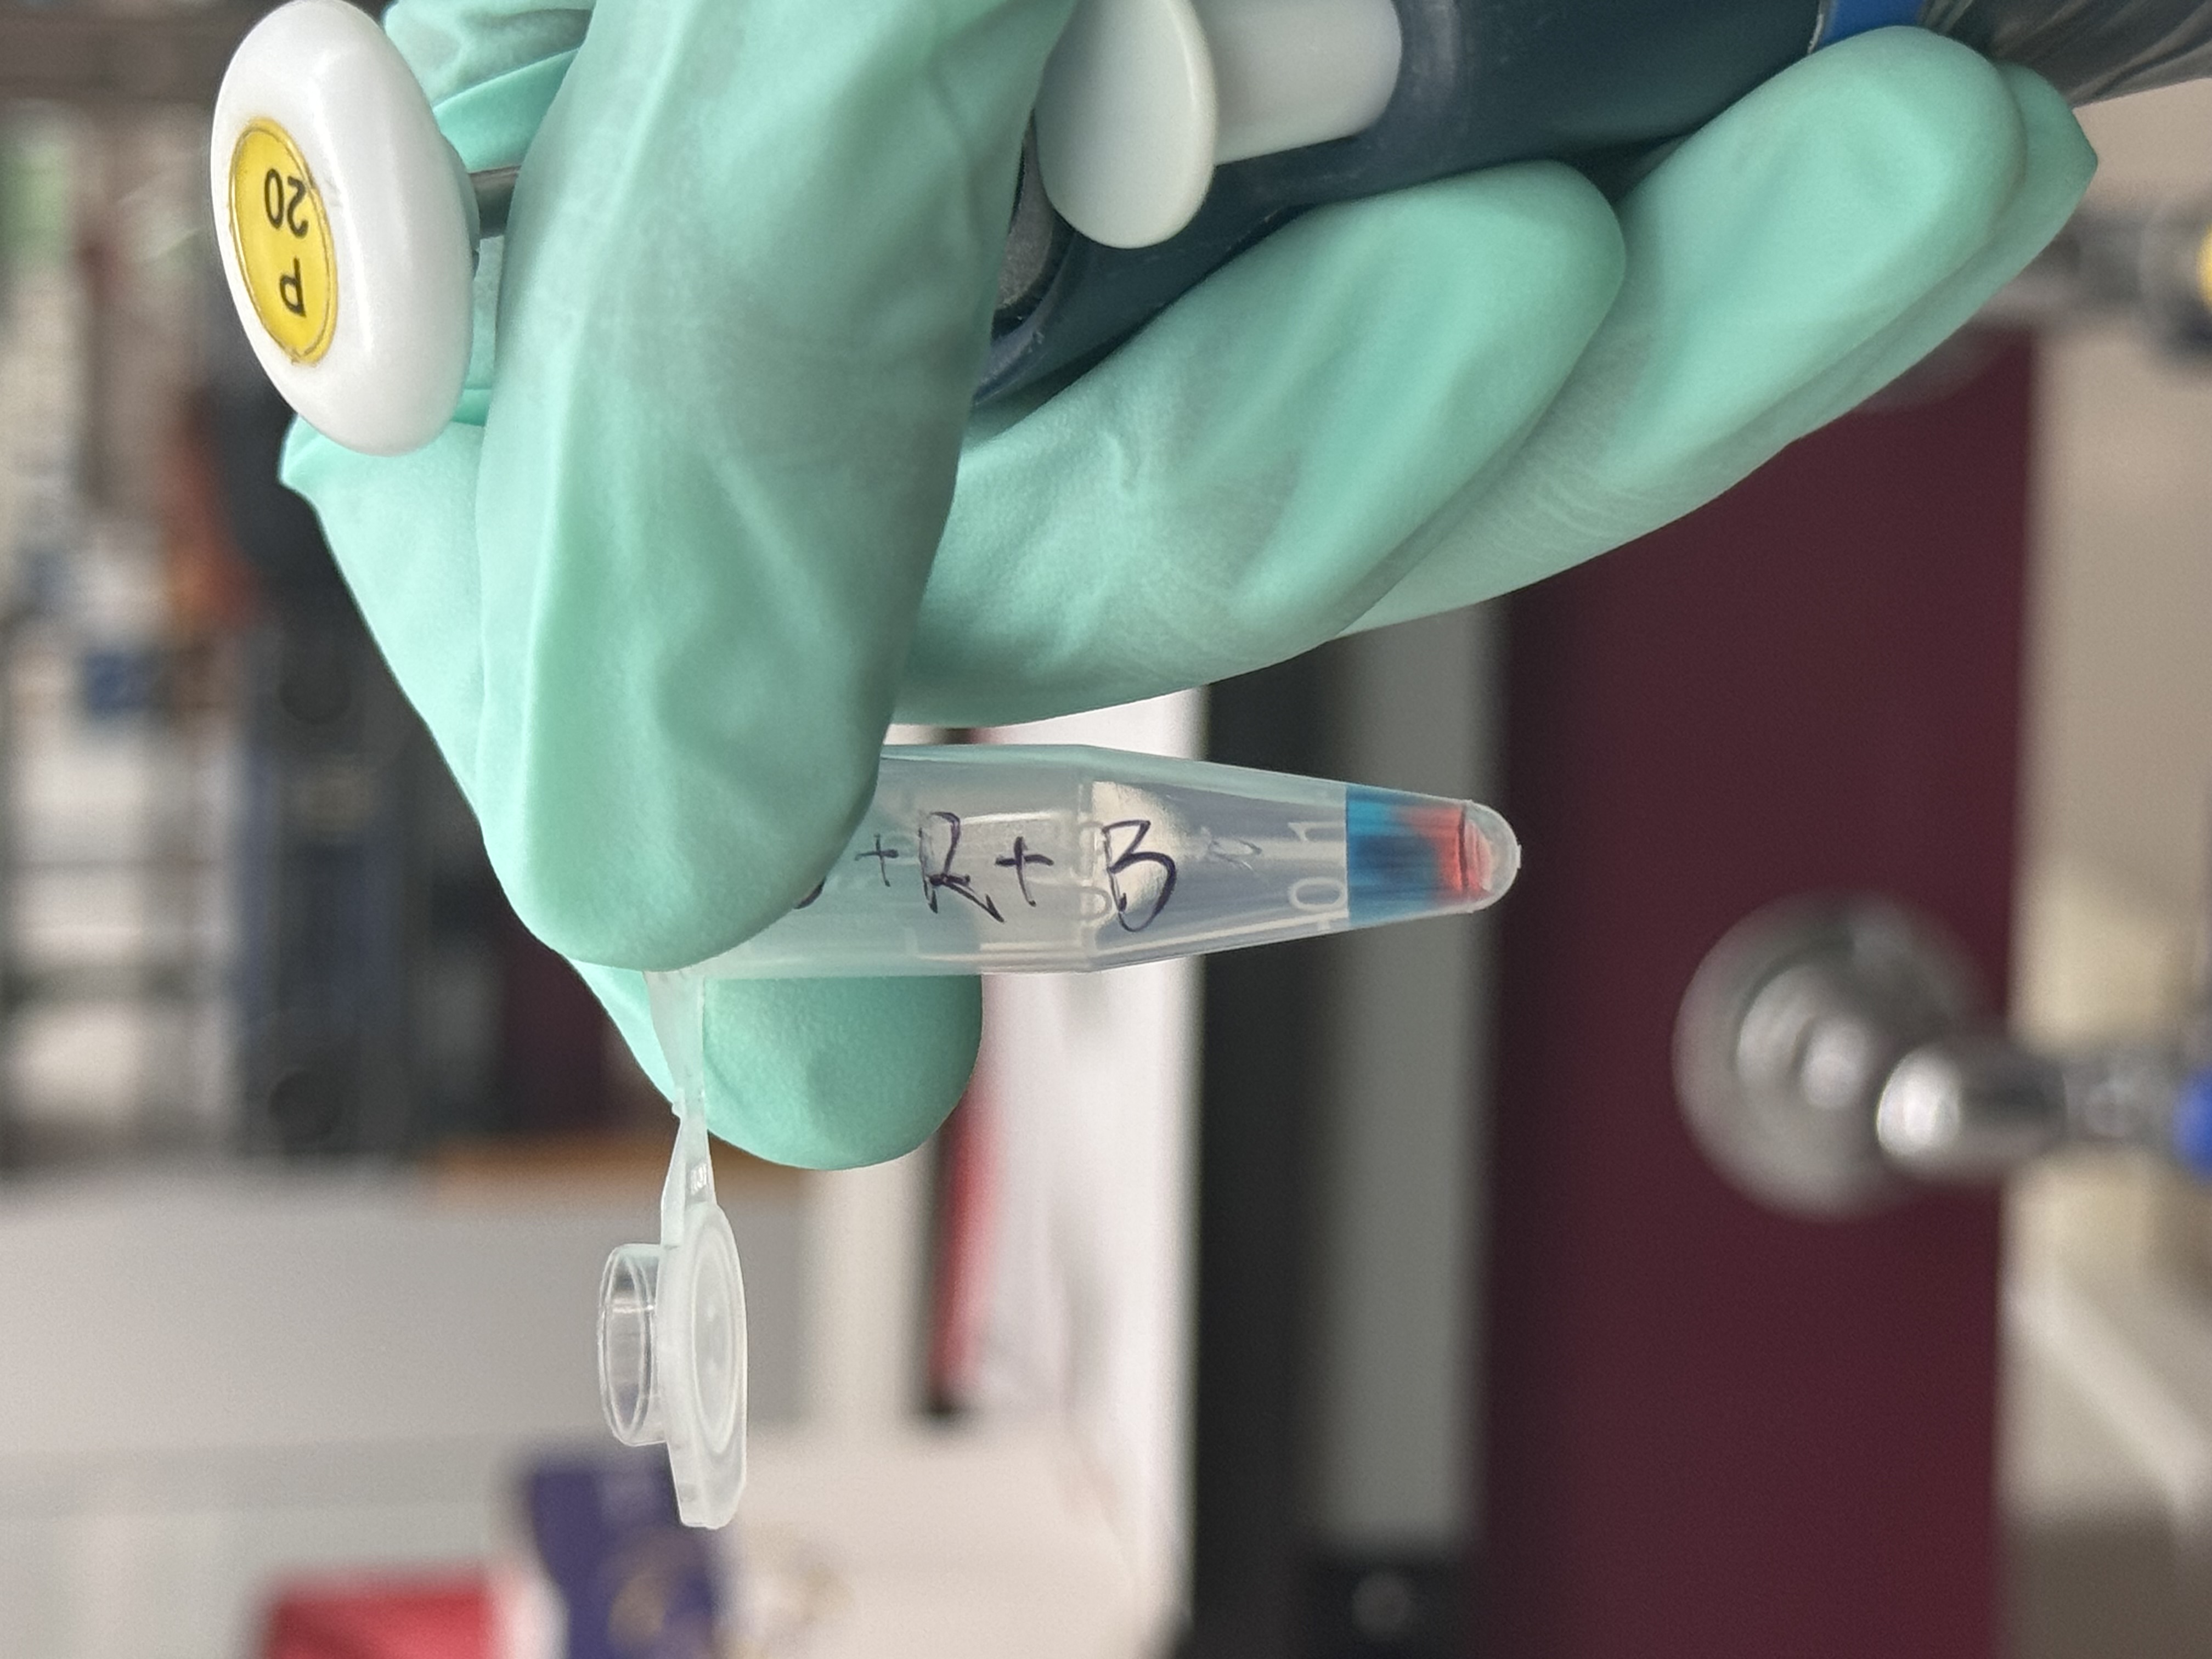
01. Liquid Preparation and Mixing Techniques
During this stage, I learned how to distinguish the precision ranges of different pipettes and how to adjust the volume for each. I practiced the proper operational sequence for aspirating liquid without contaminating the source and dispensing it into Eppendorf tubes. Additionally, I practiced the blow-out and mixing techniques using the pipette to ensure consistent color density across my palette.
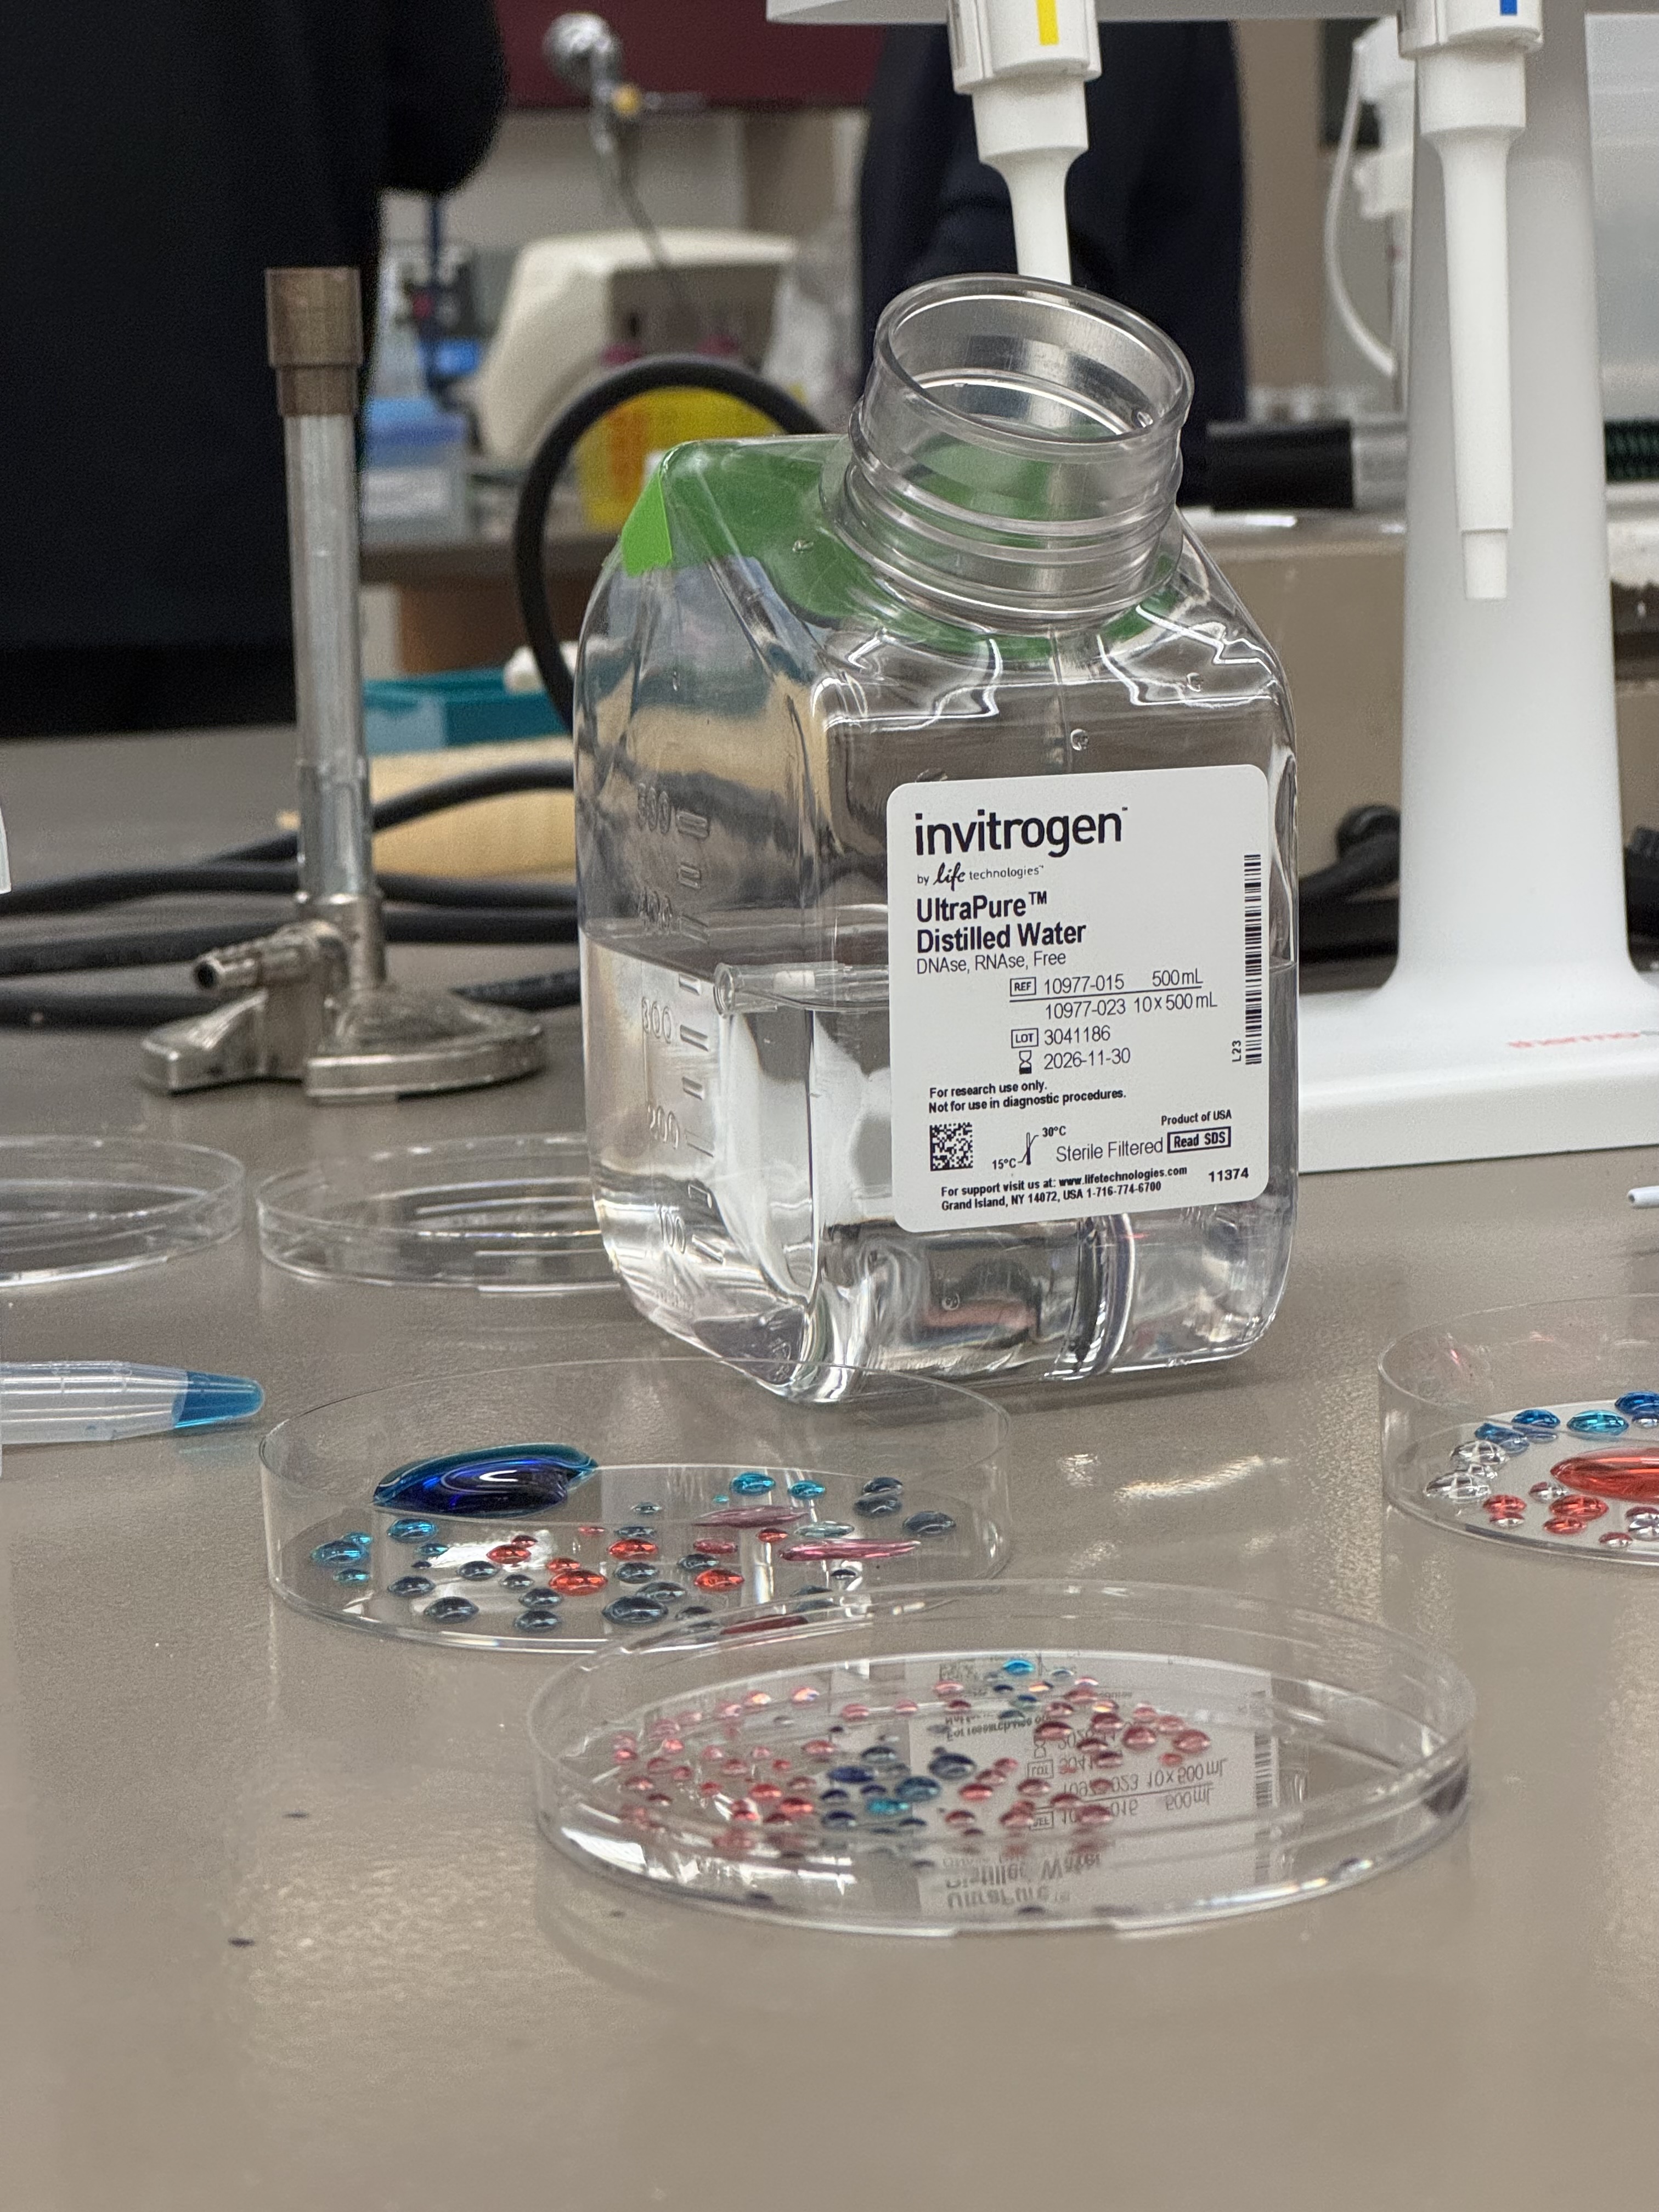
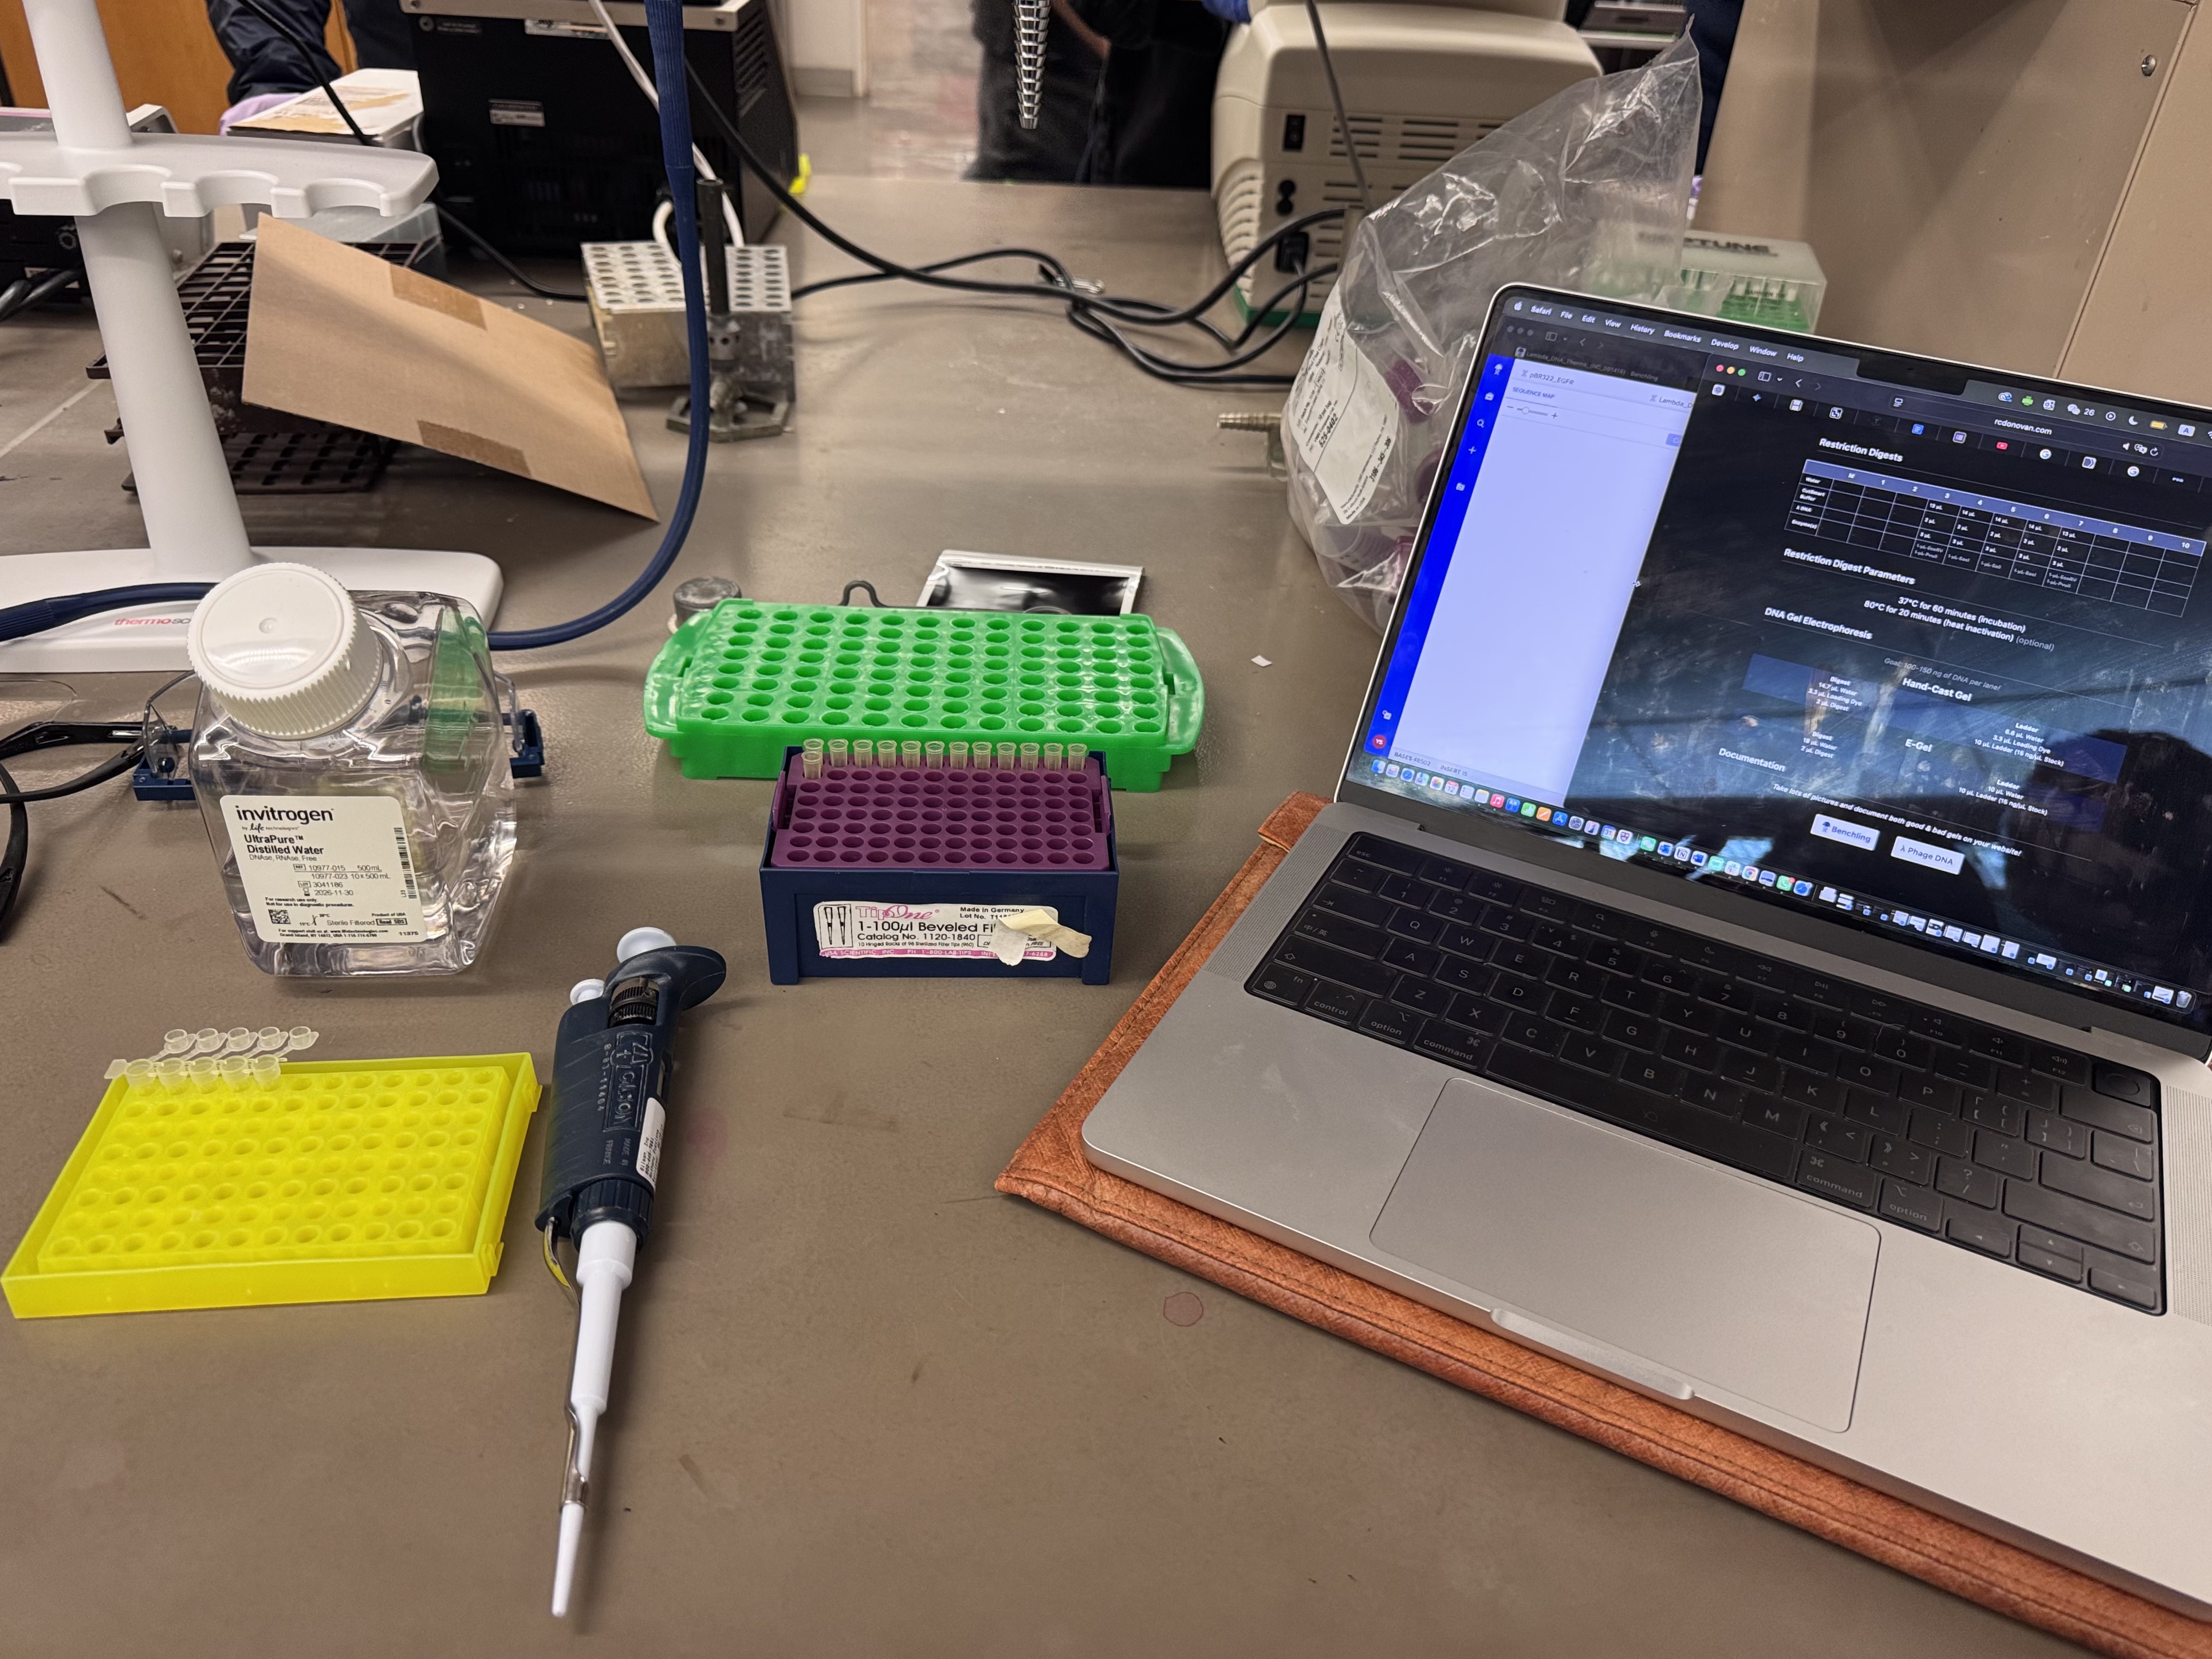
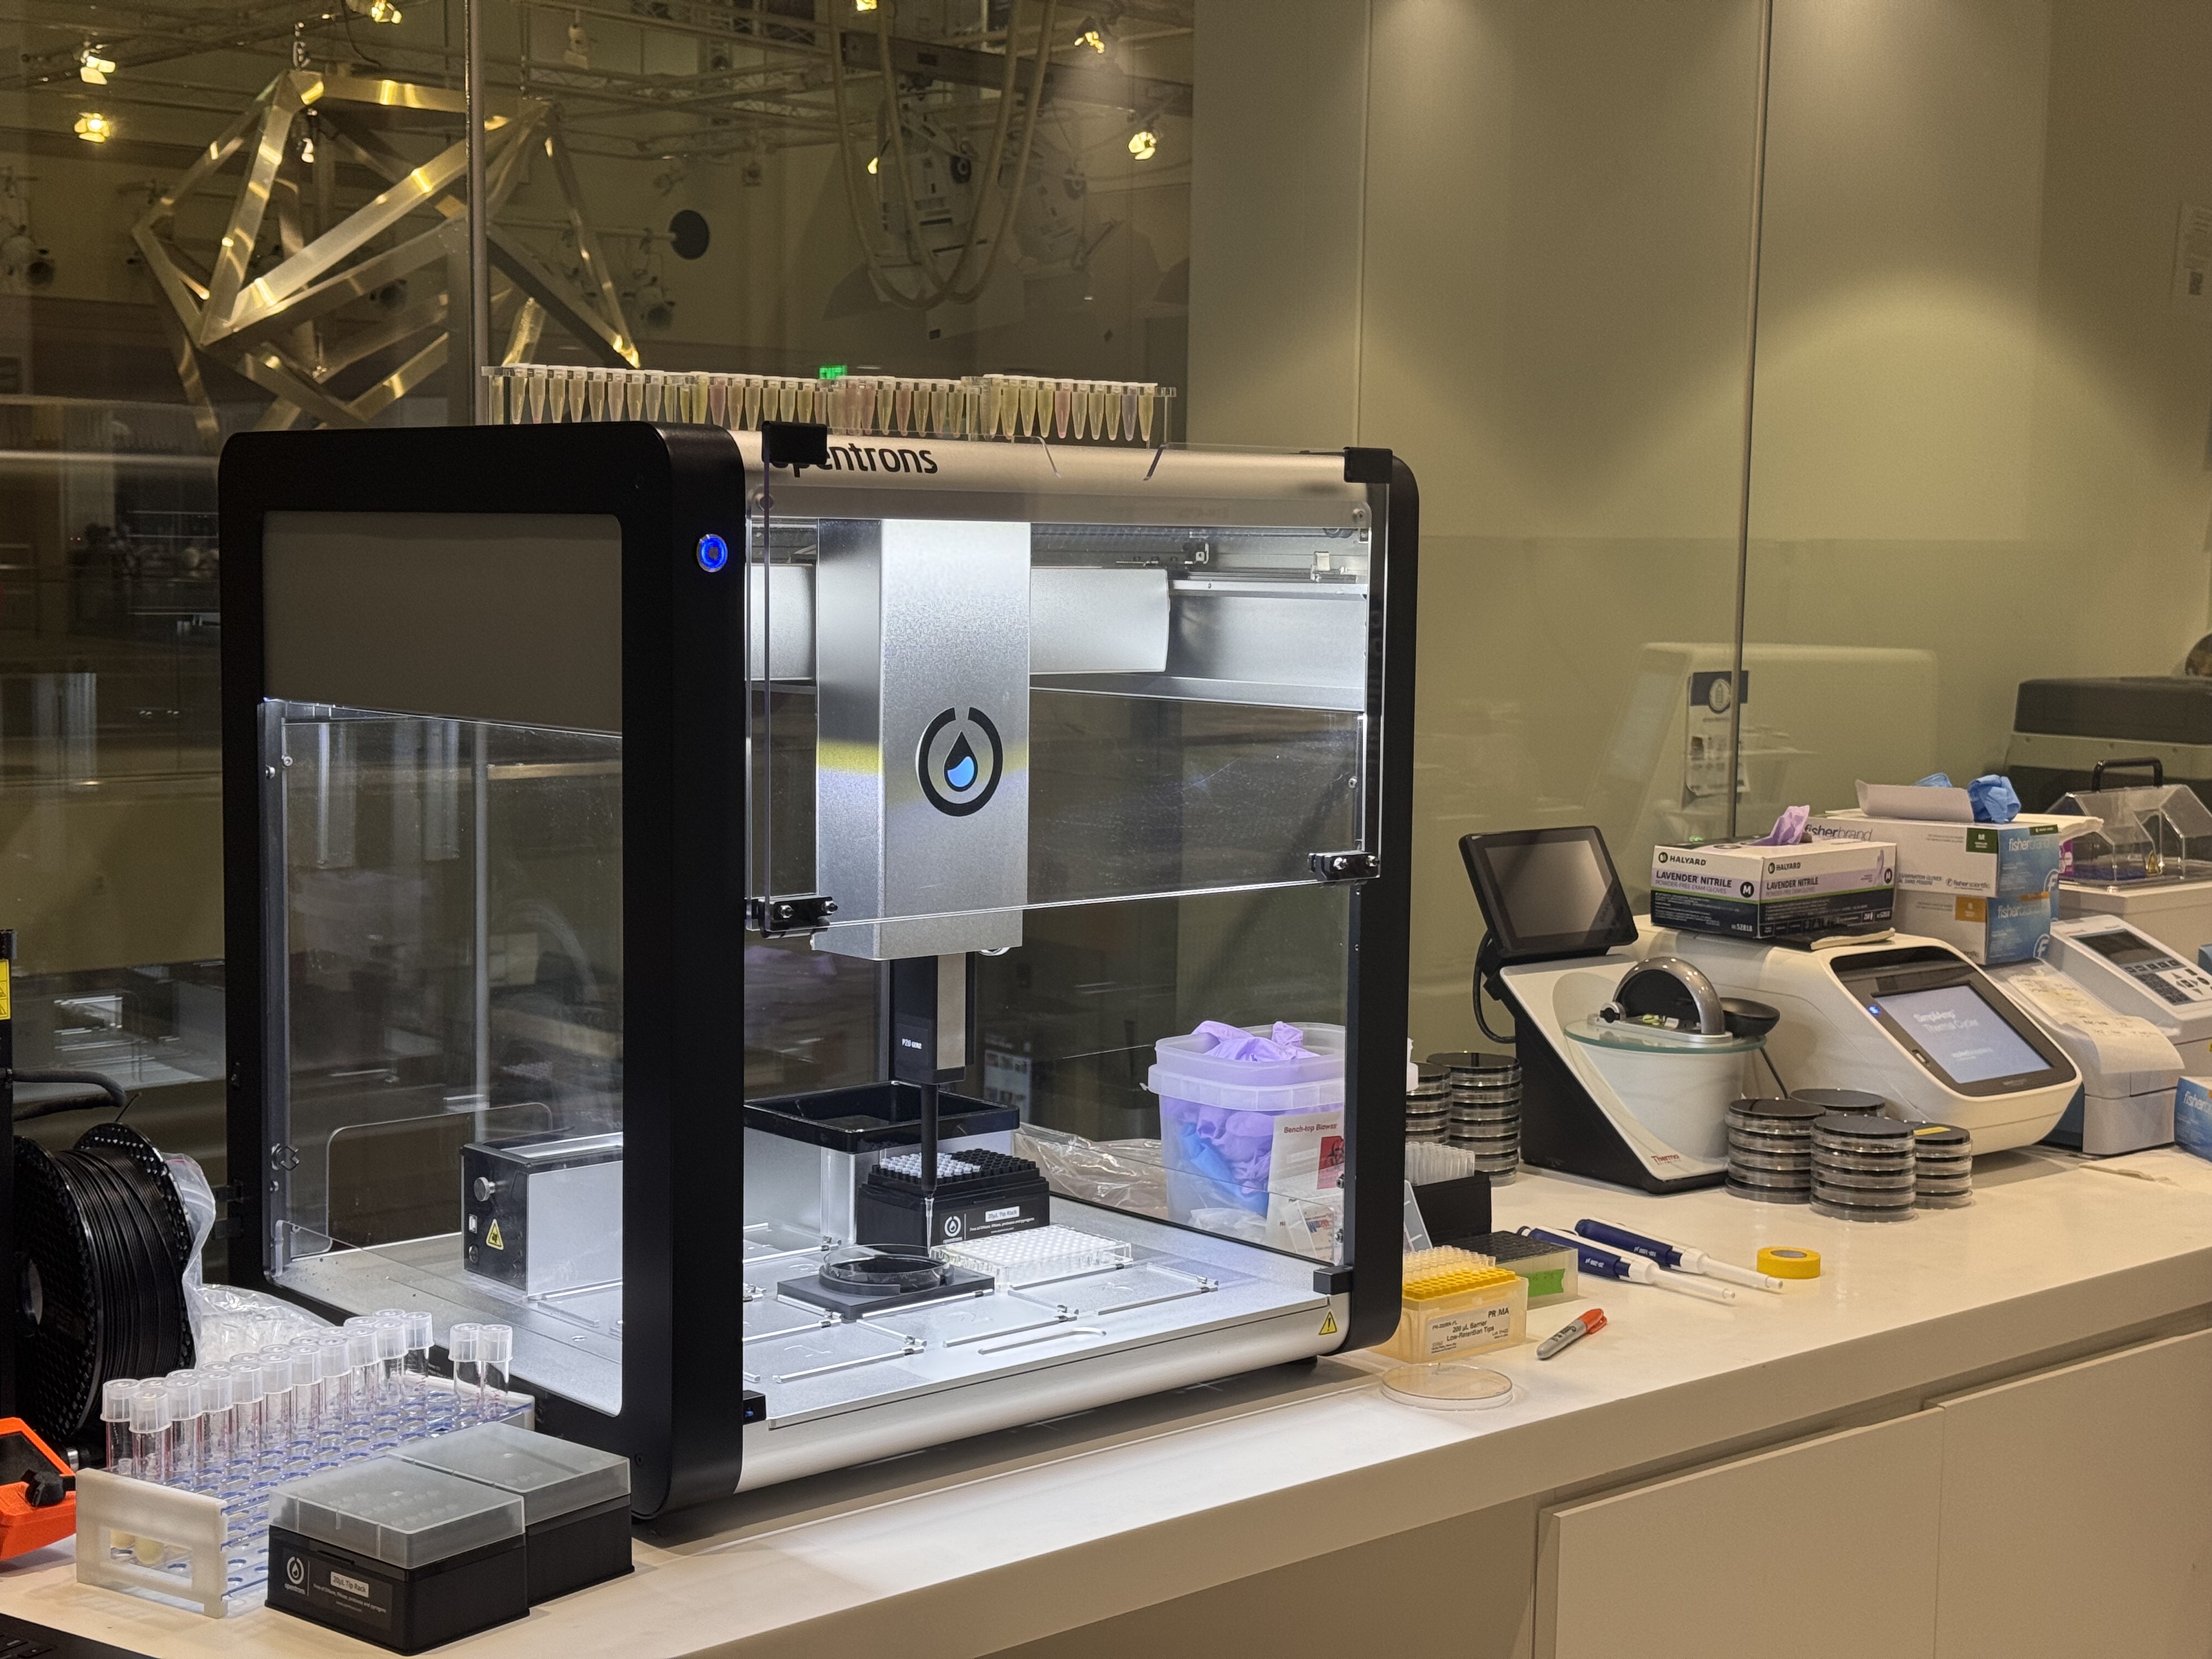
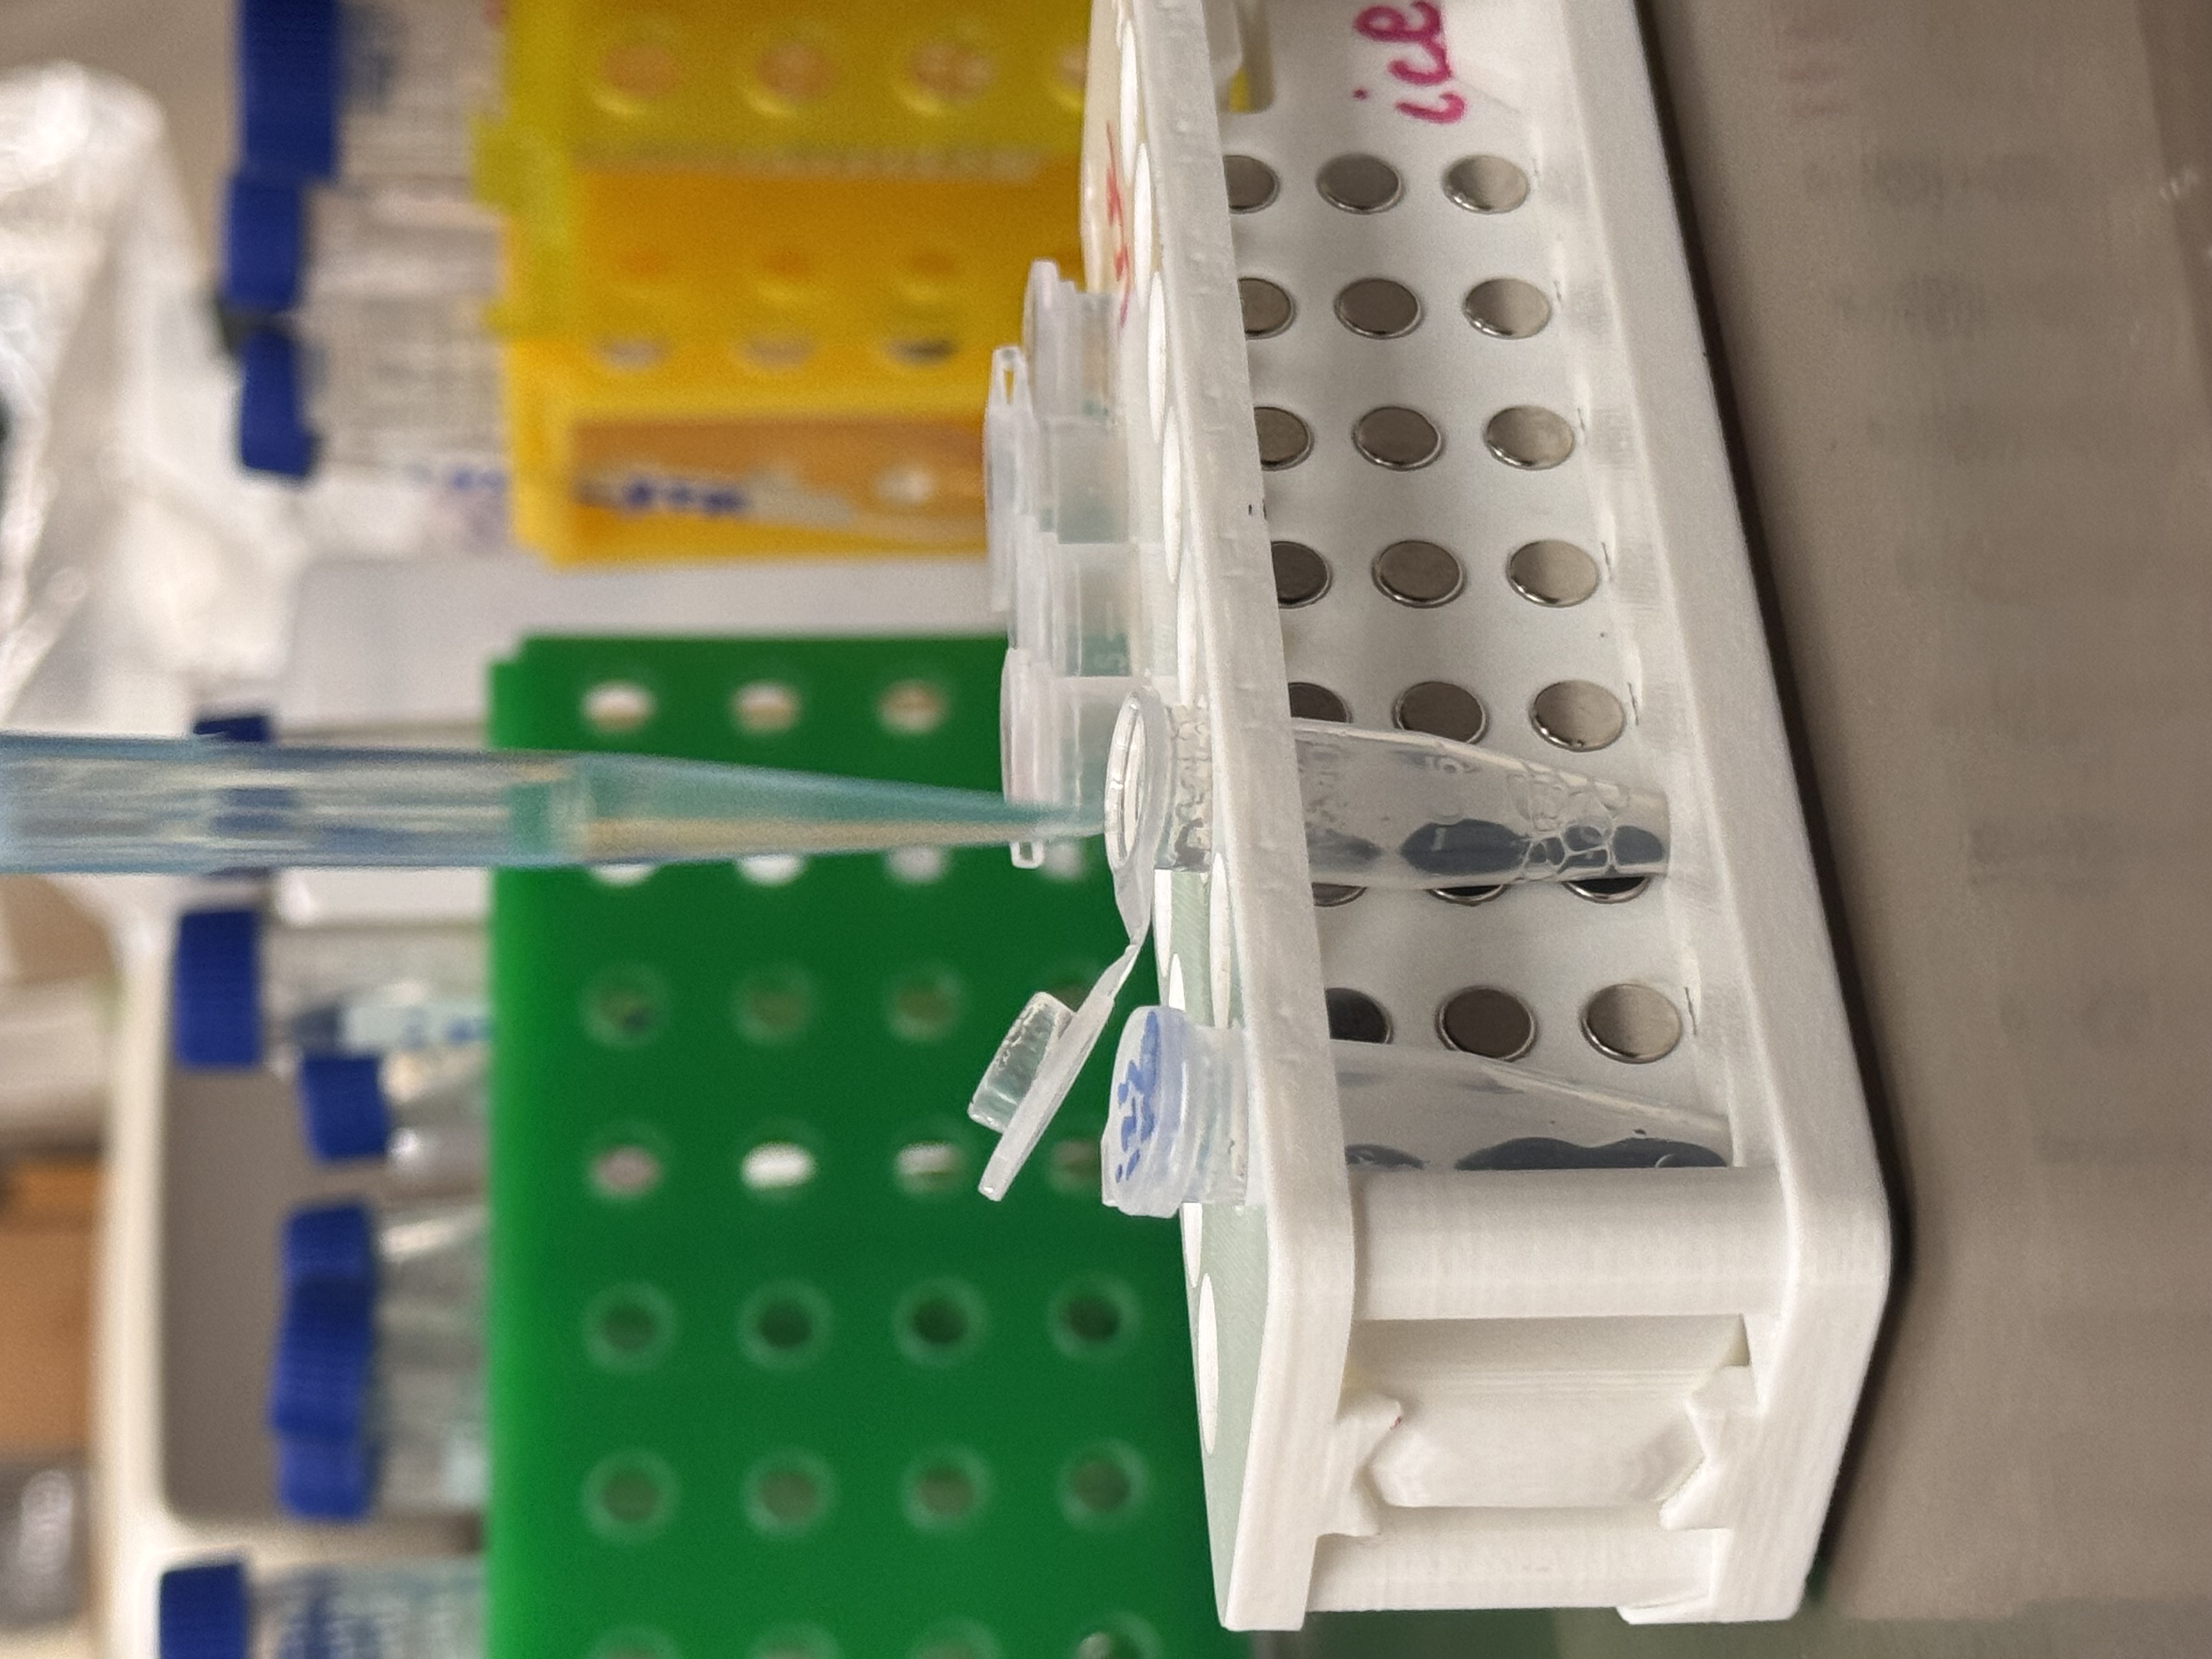
02. Workspace Setup
A glimpse of the workspace: the bench is equipped with Distilled Water and features various pieces of “Pipetting Art” created by myself and my classmates. Maintaining an organized area is essential for a smooth workflow during the creative process.
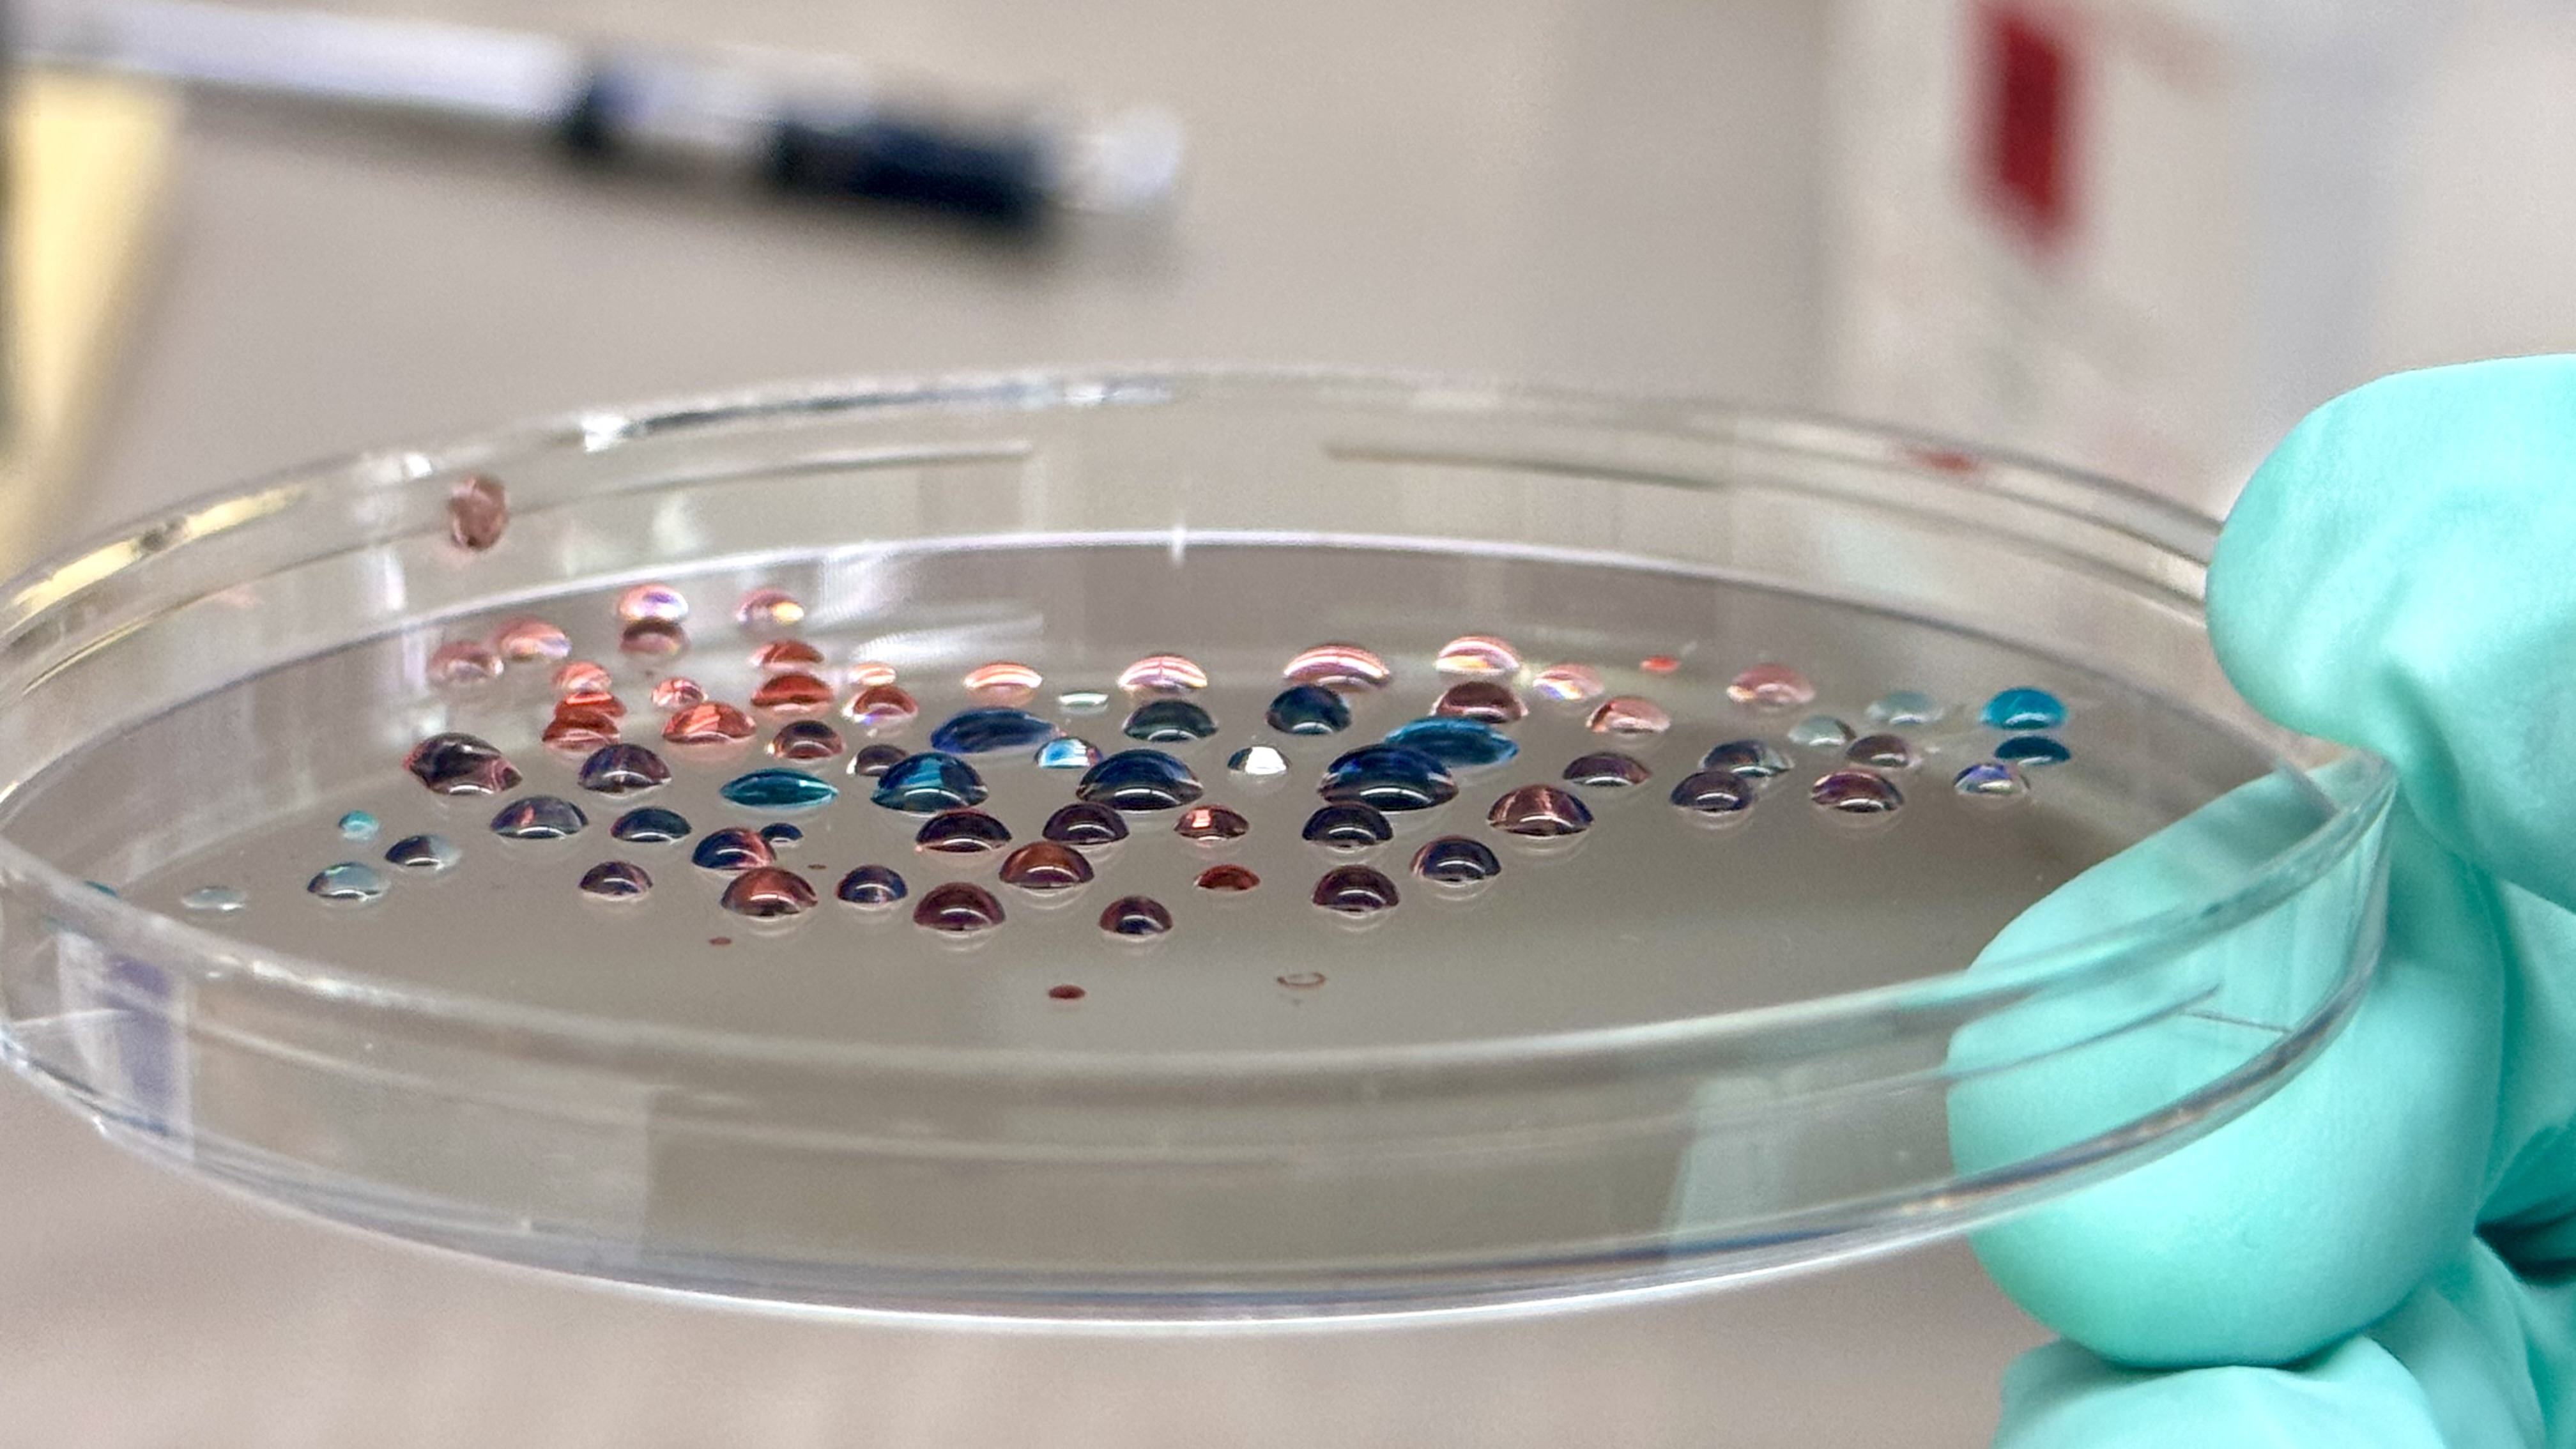
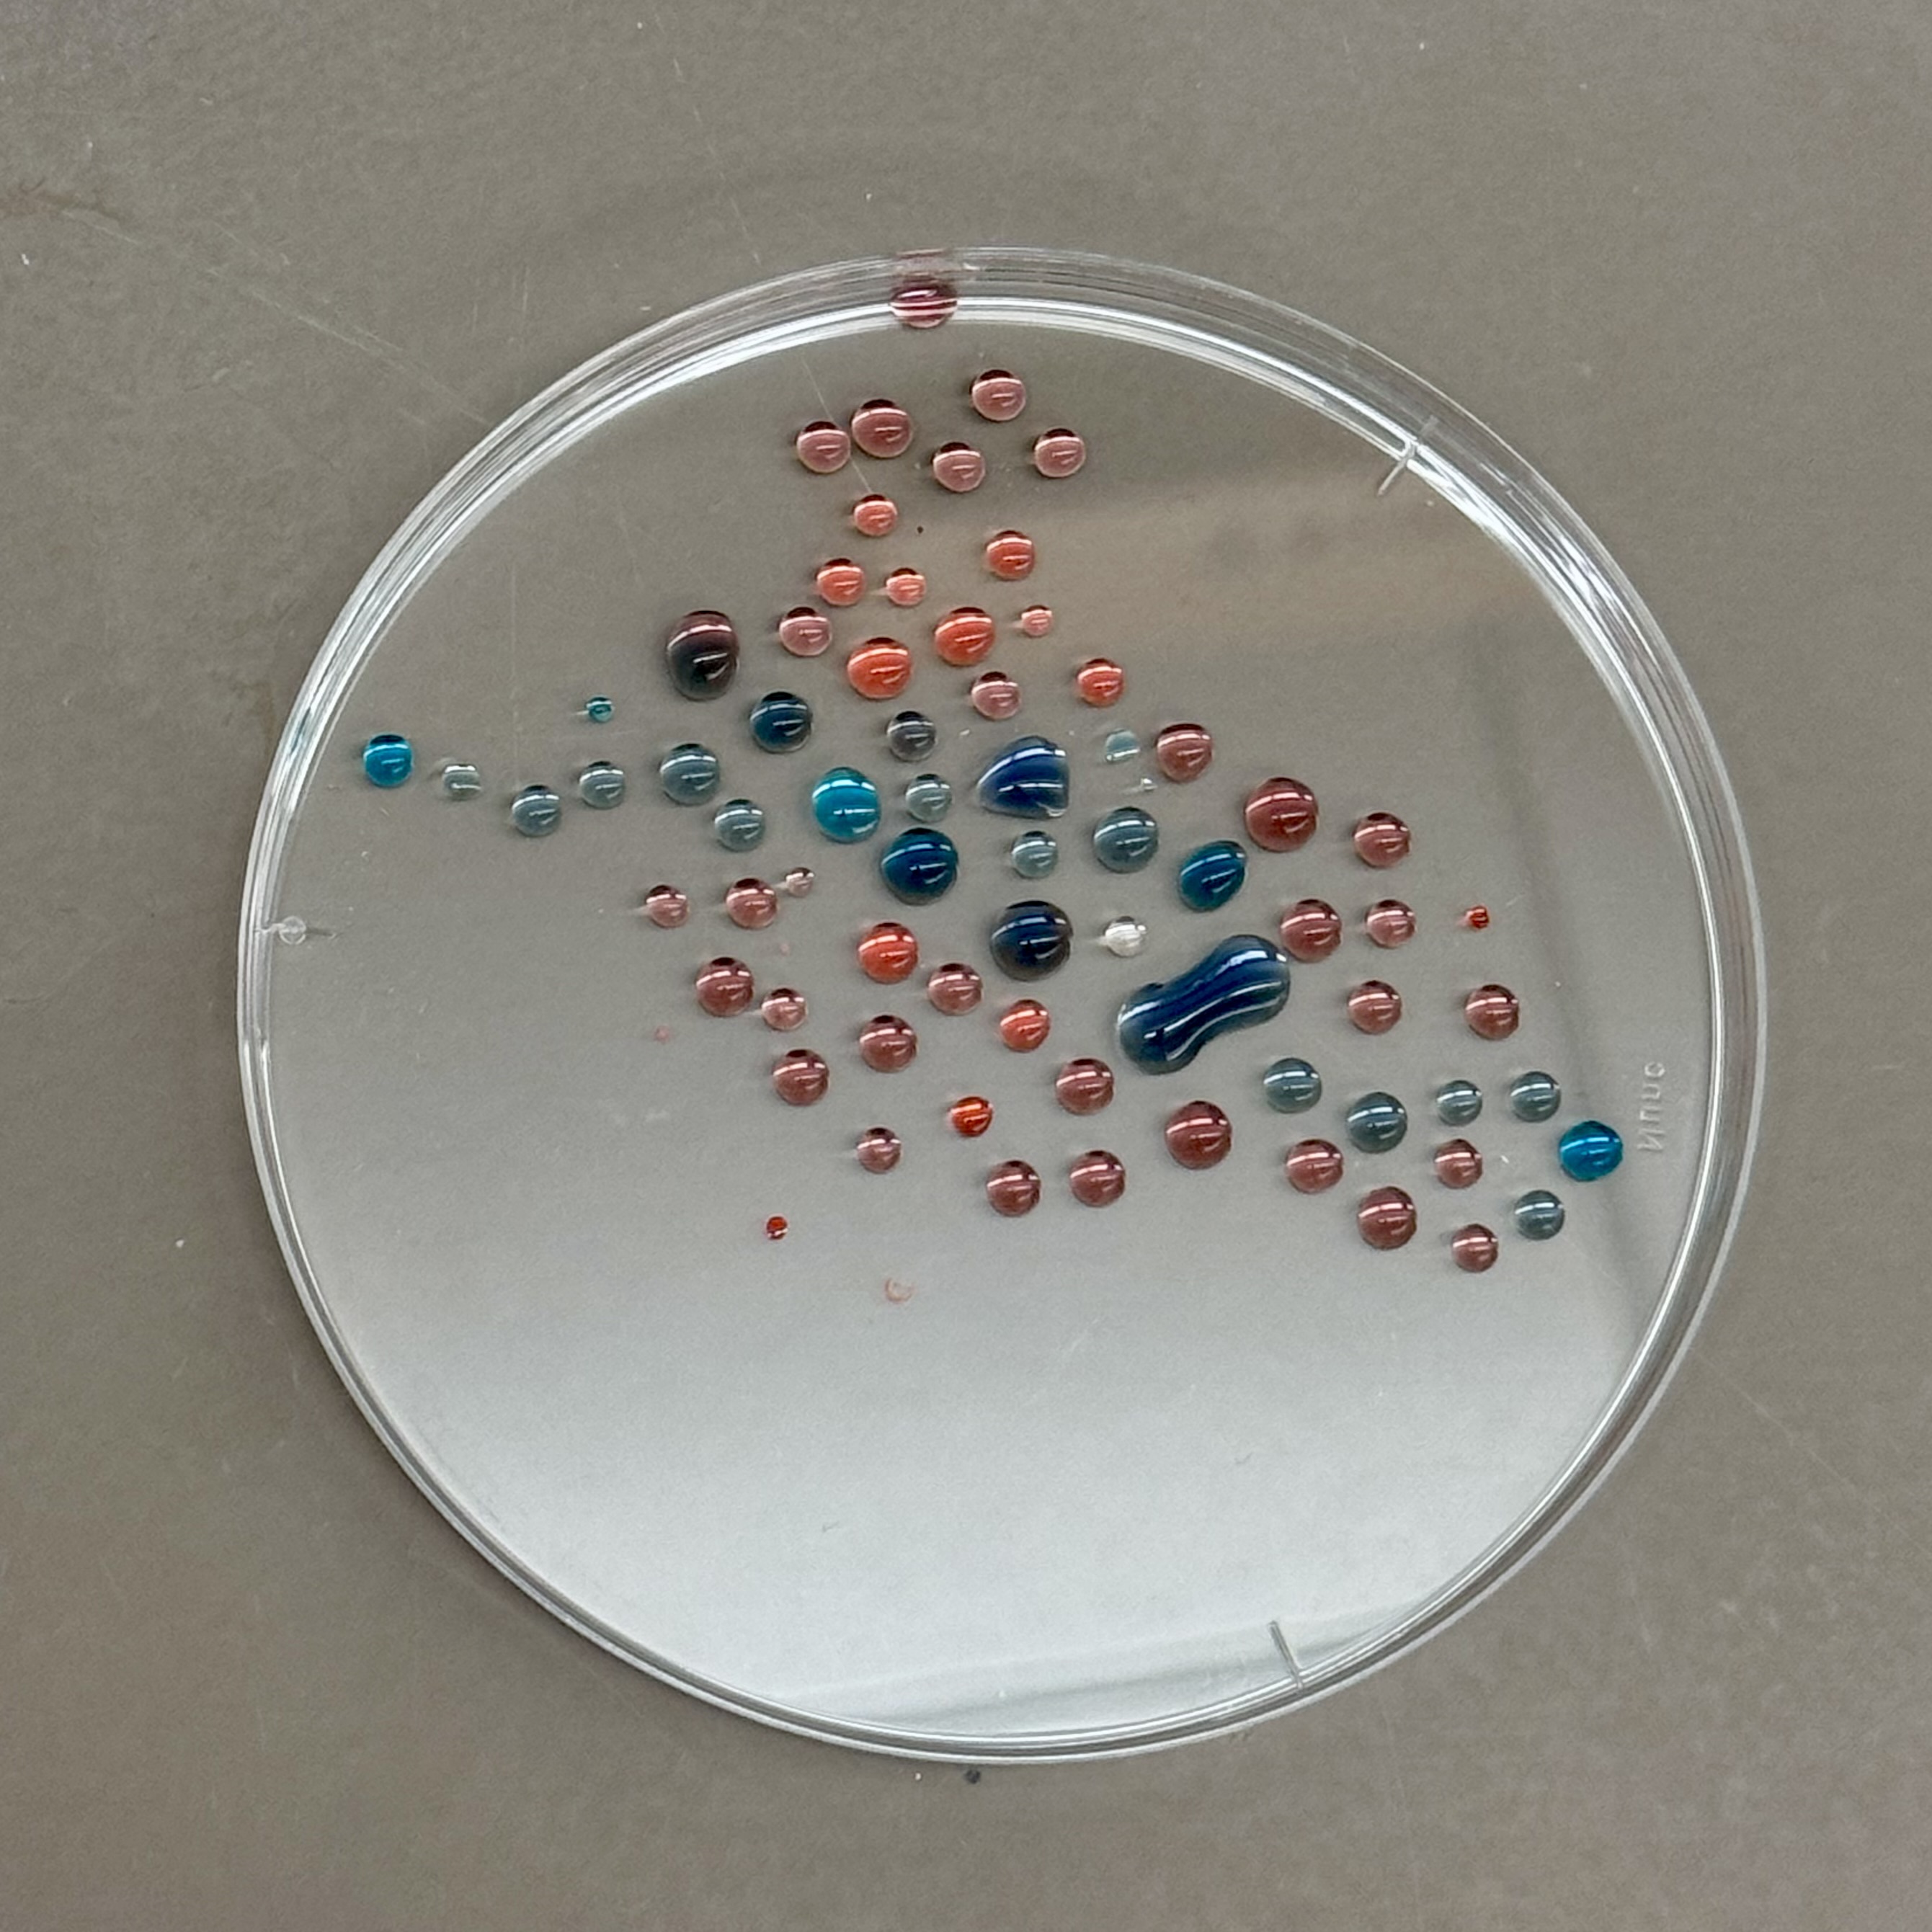
03. Final Pipetting Art
This is the final composition created by controlled droplets. Each dot represents a specific volume dispensed with careful pressure on the pipette plunger, showcasing the result of repetitive precision practice.
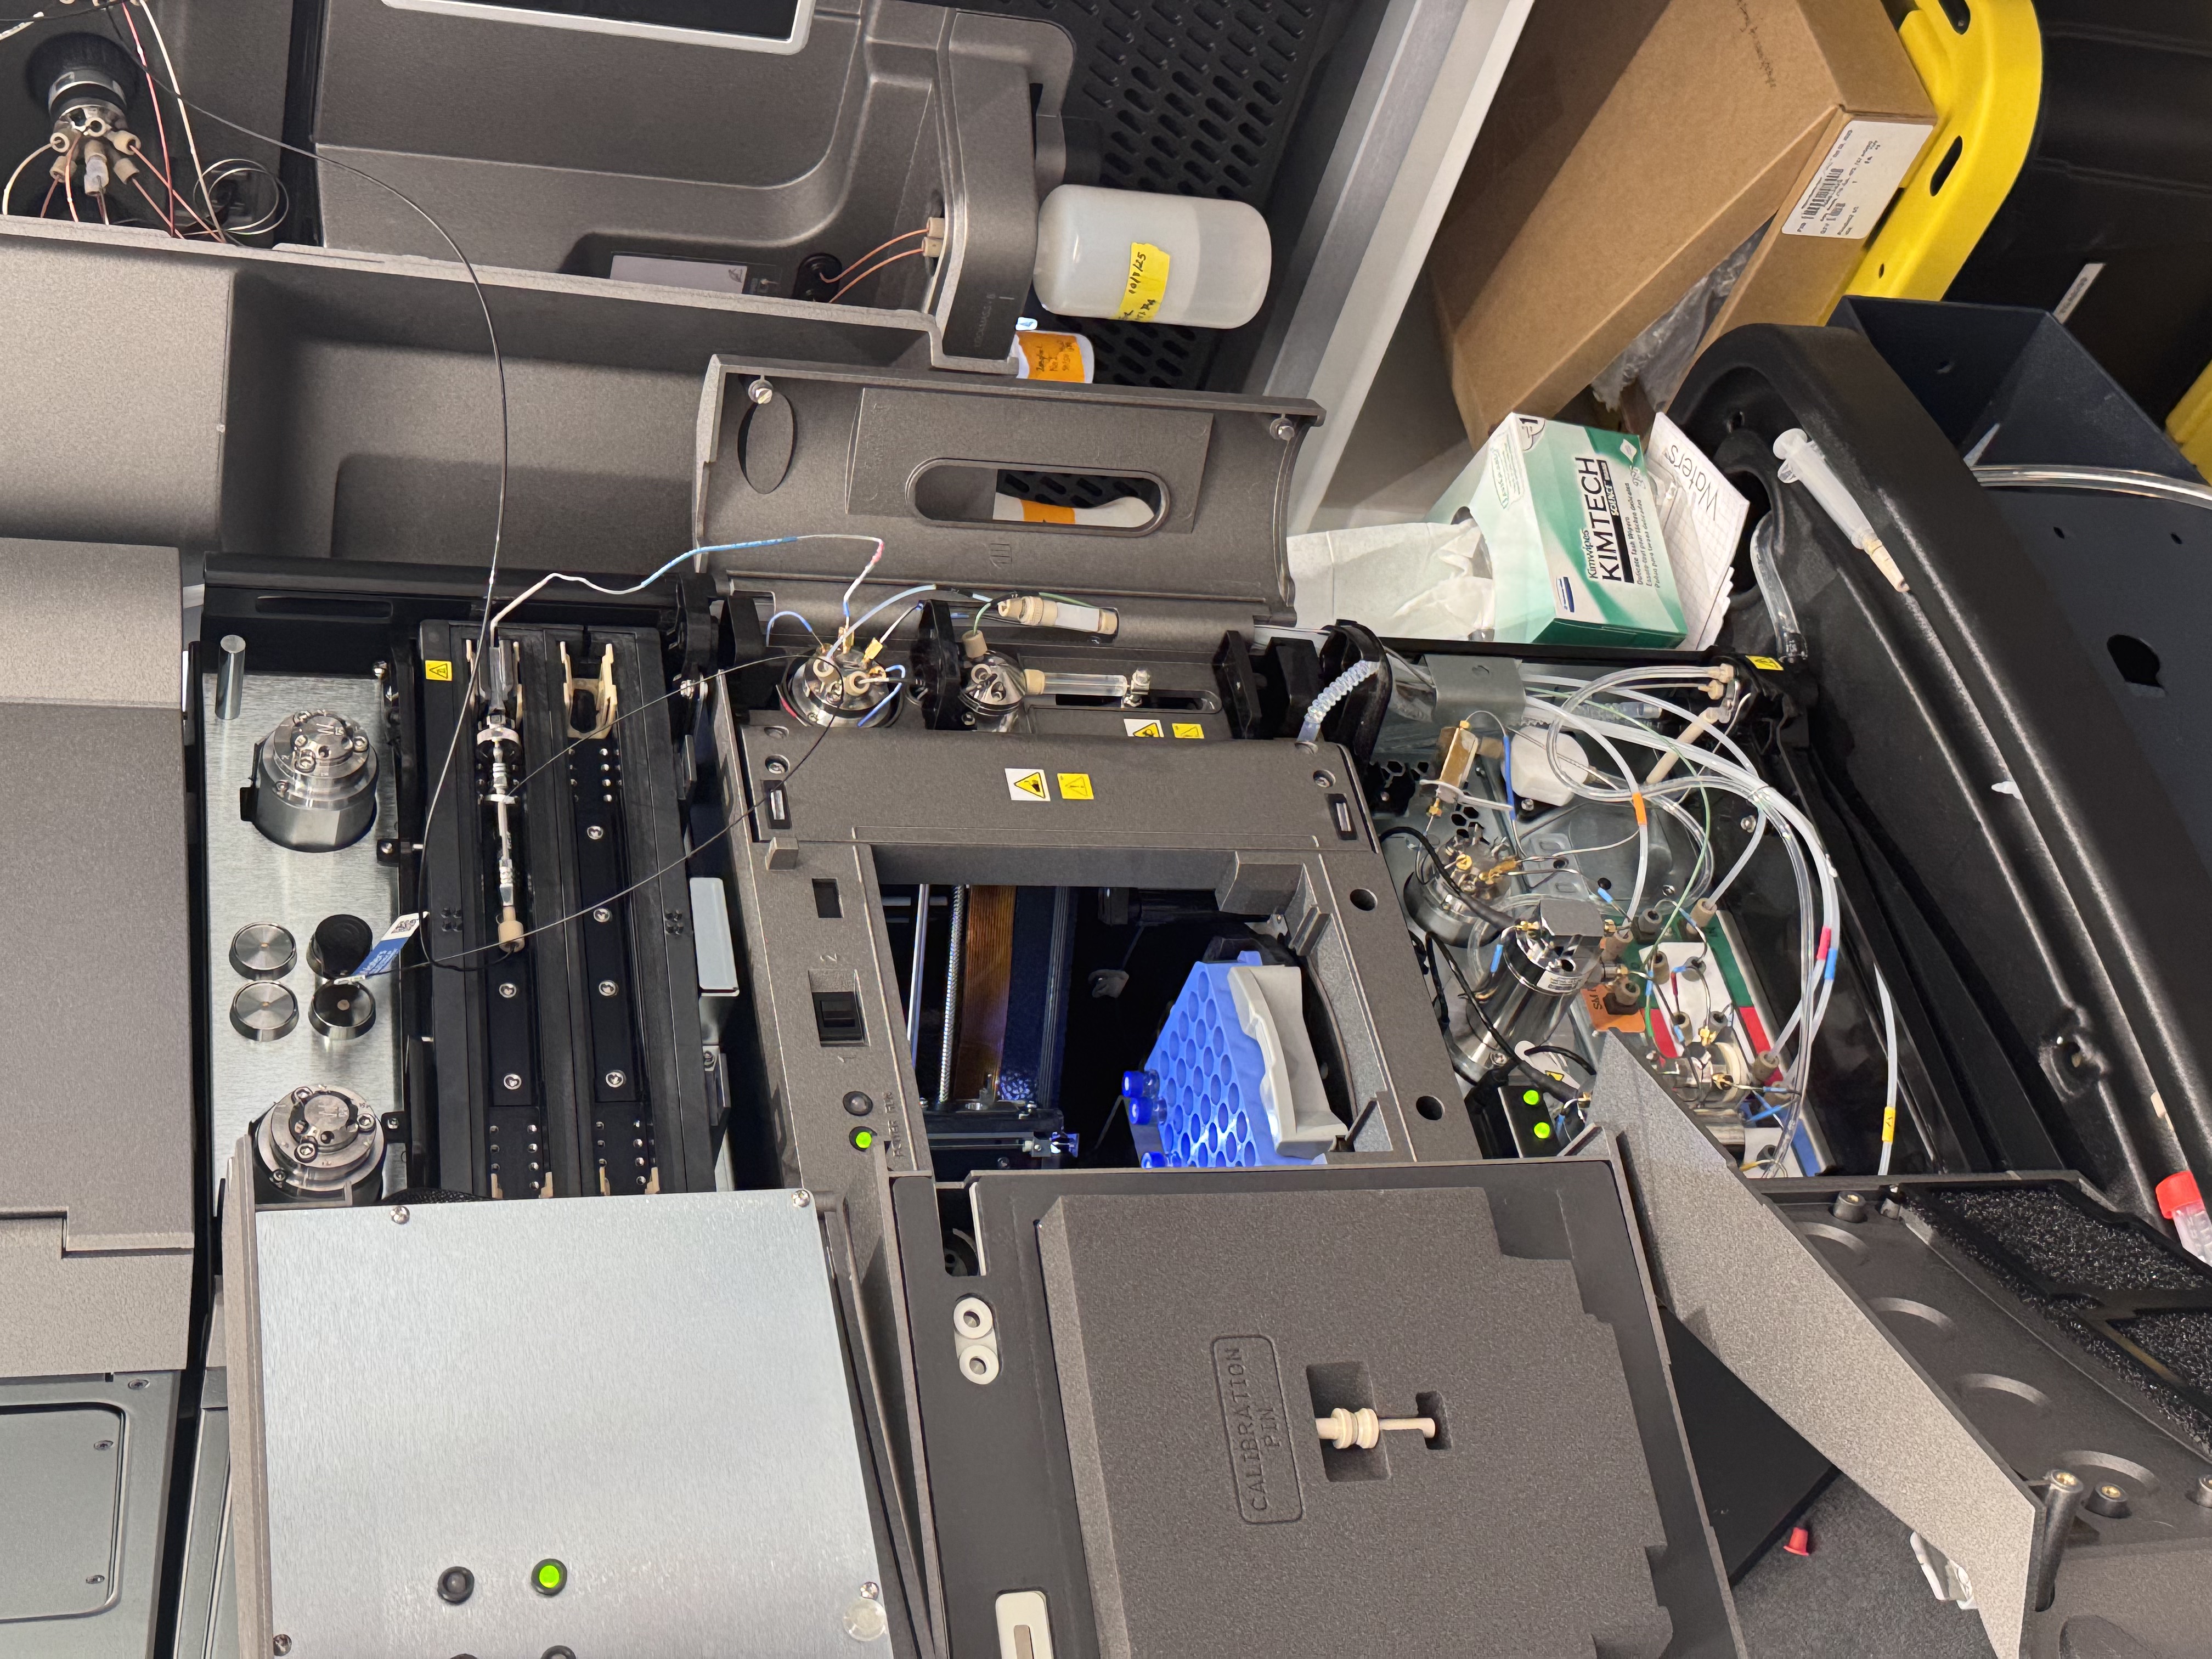
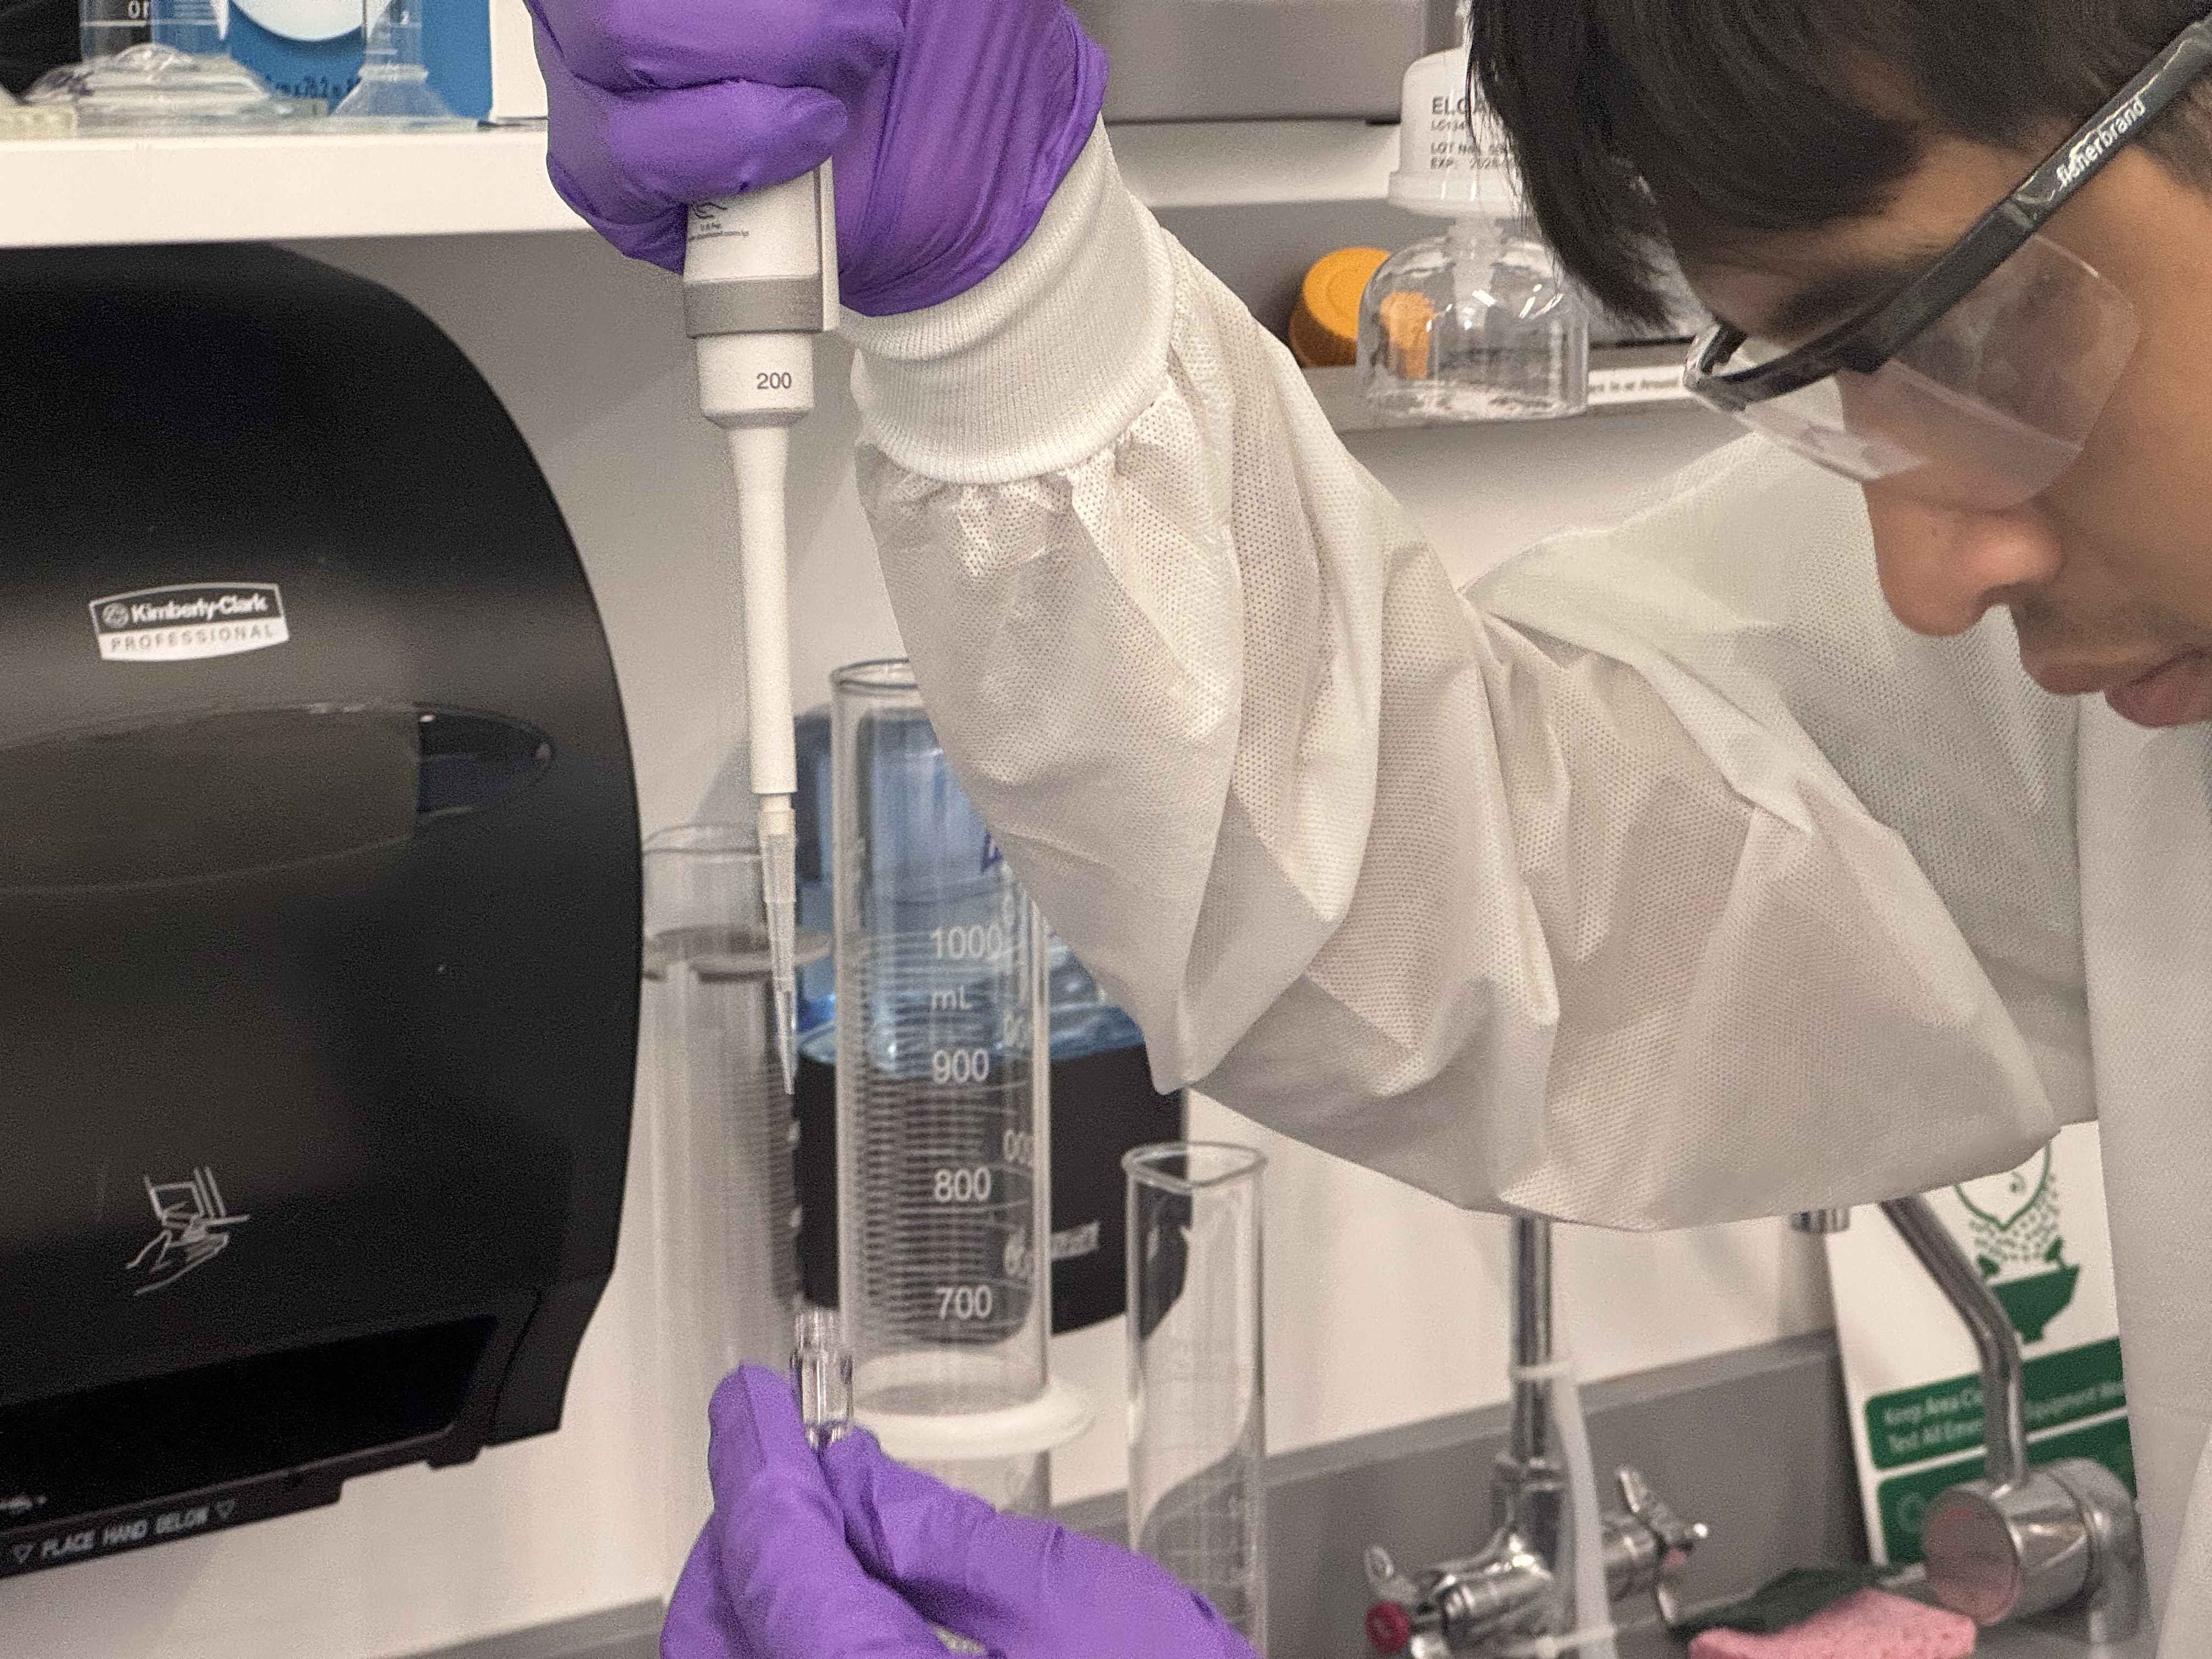
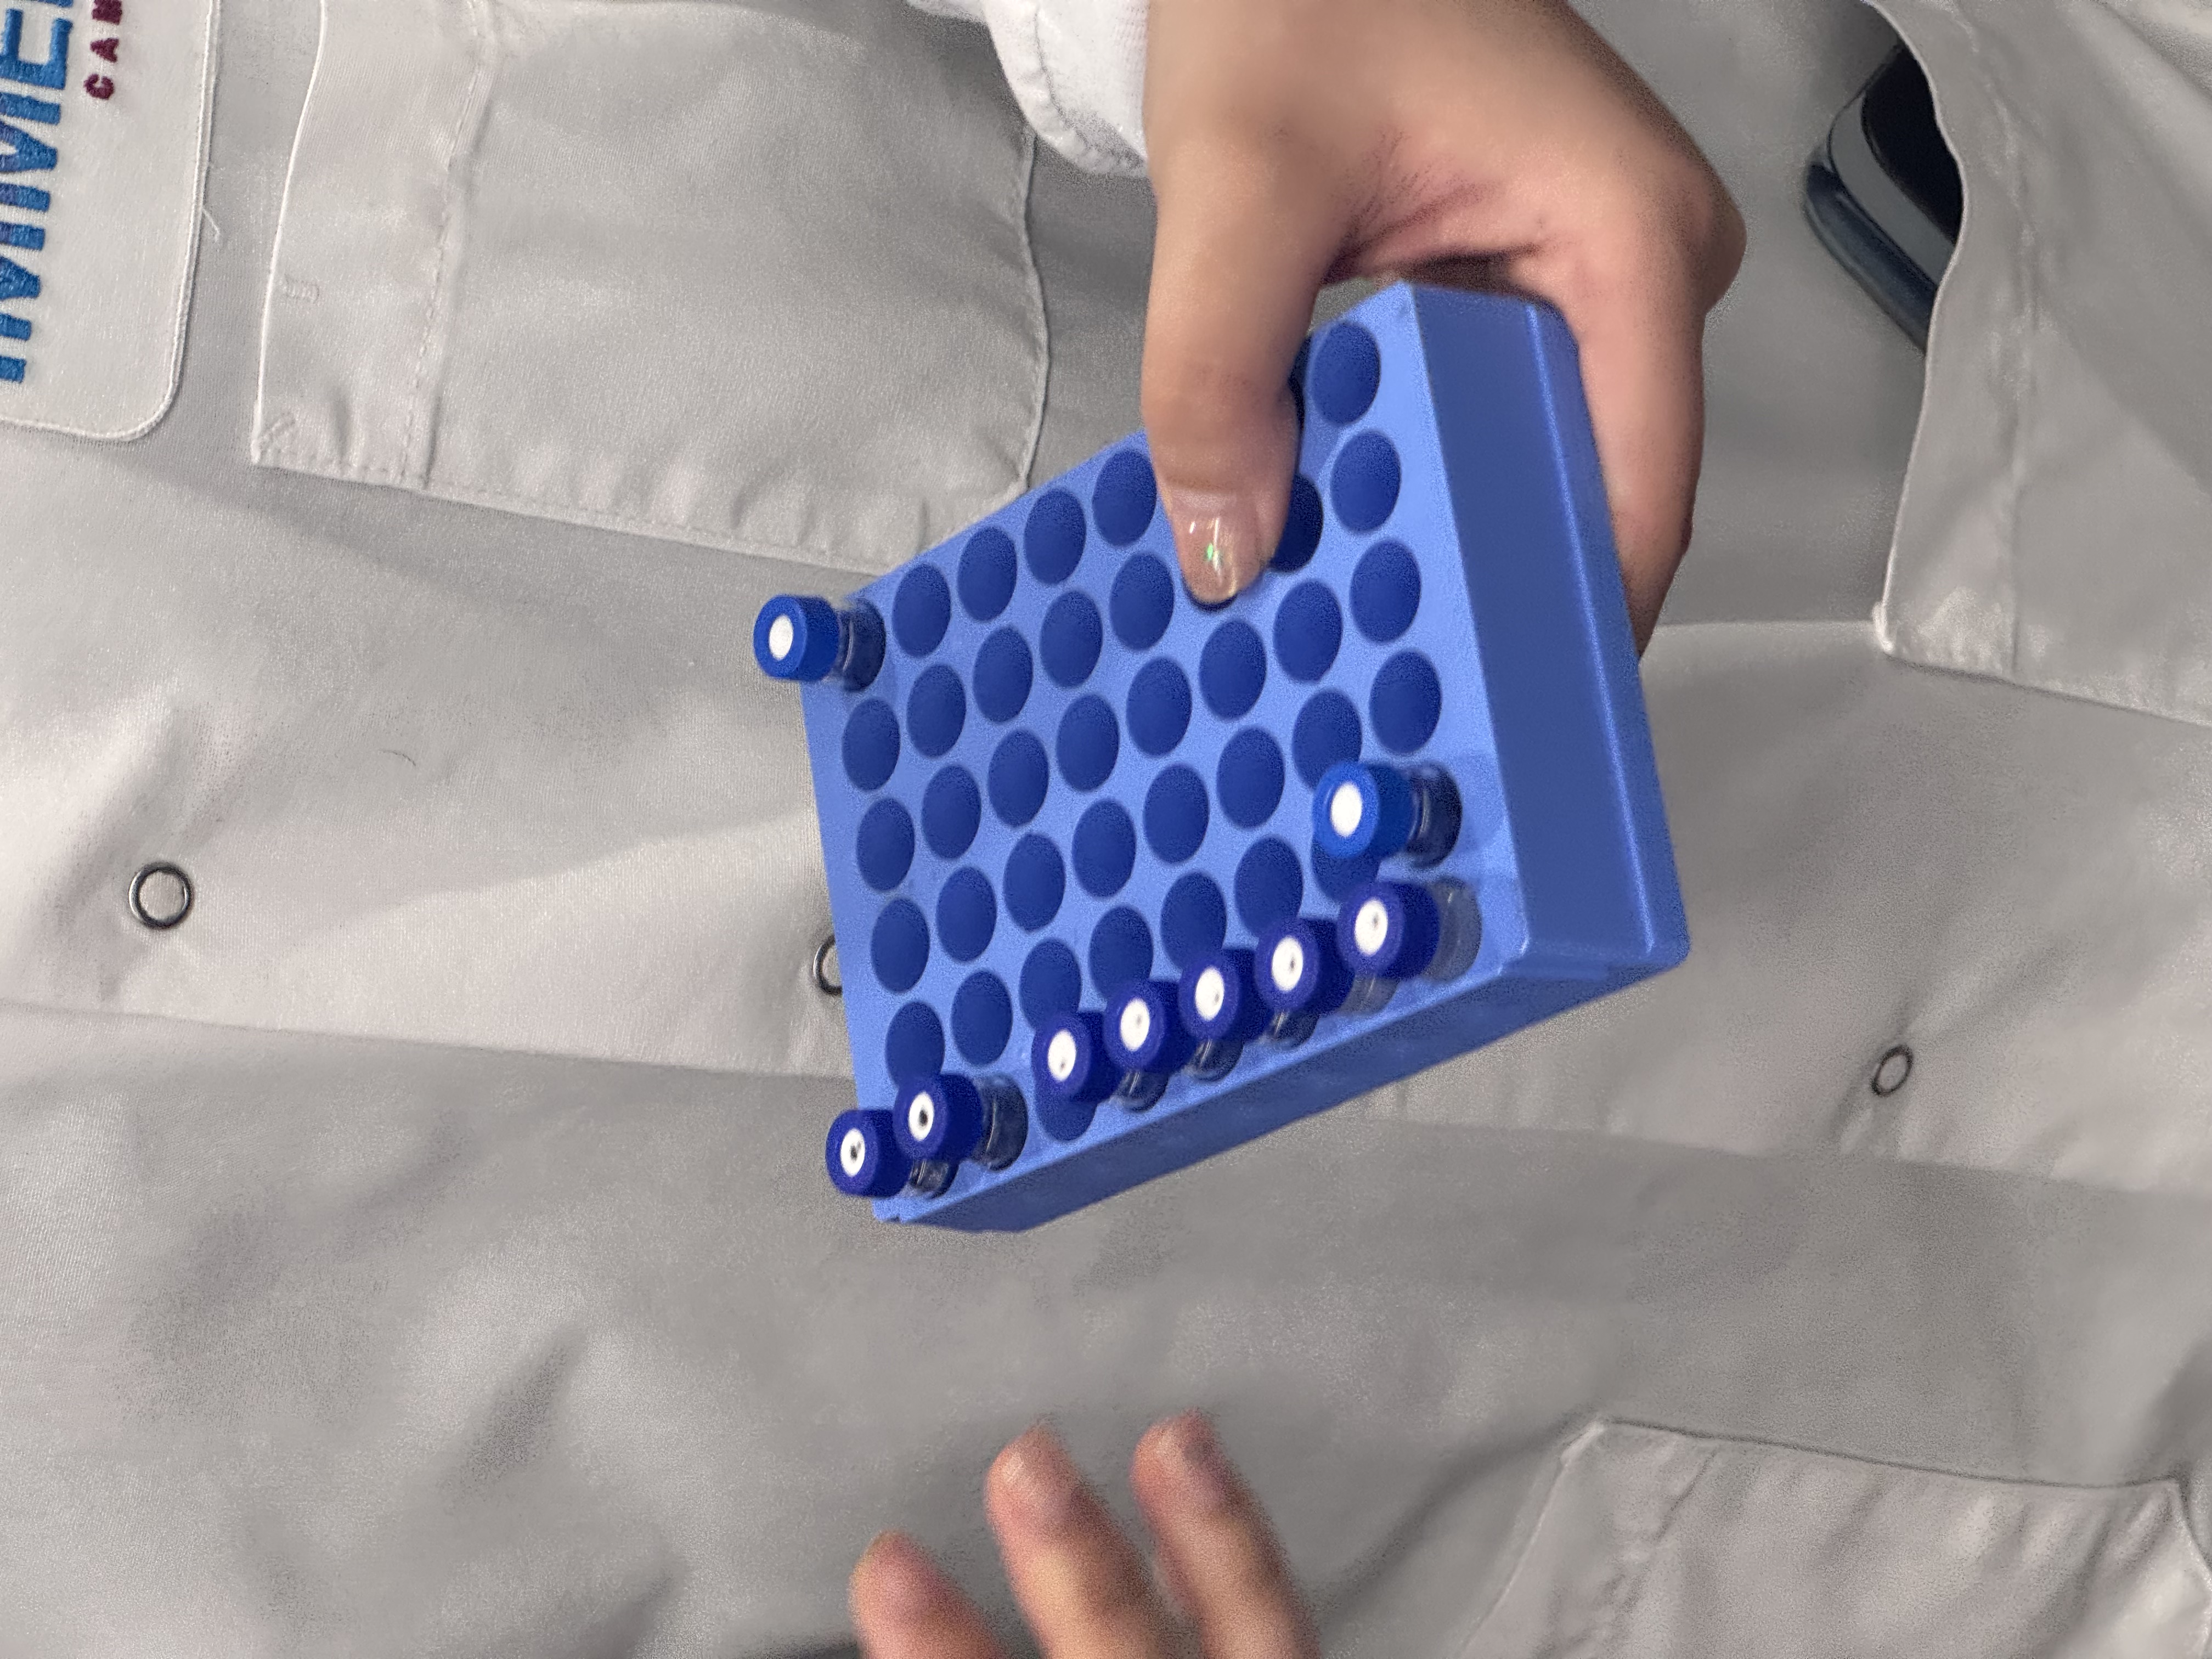
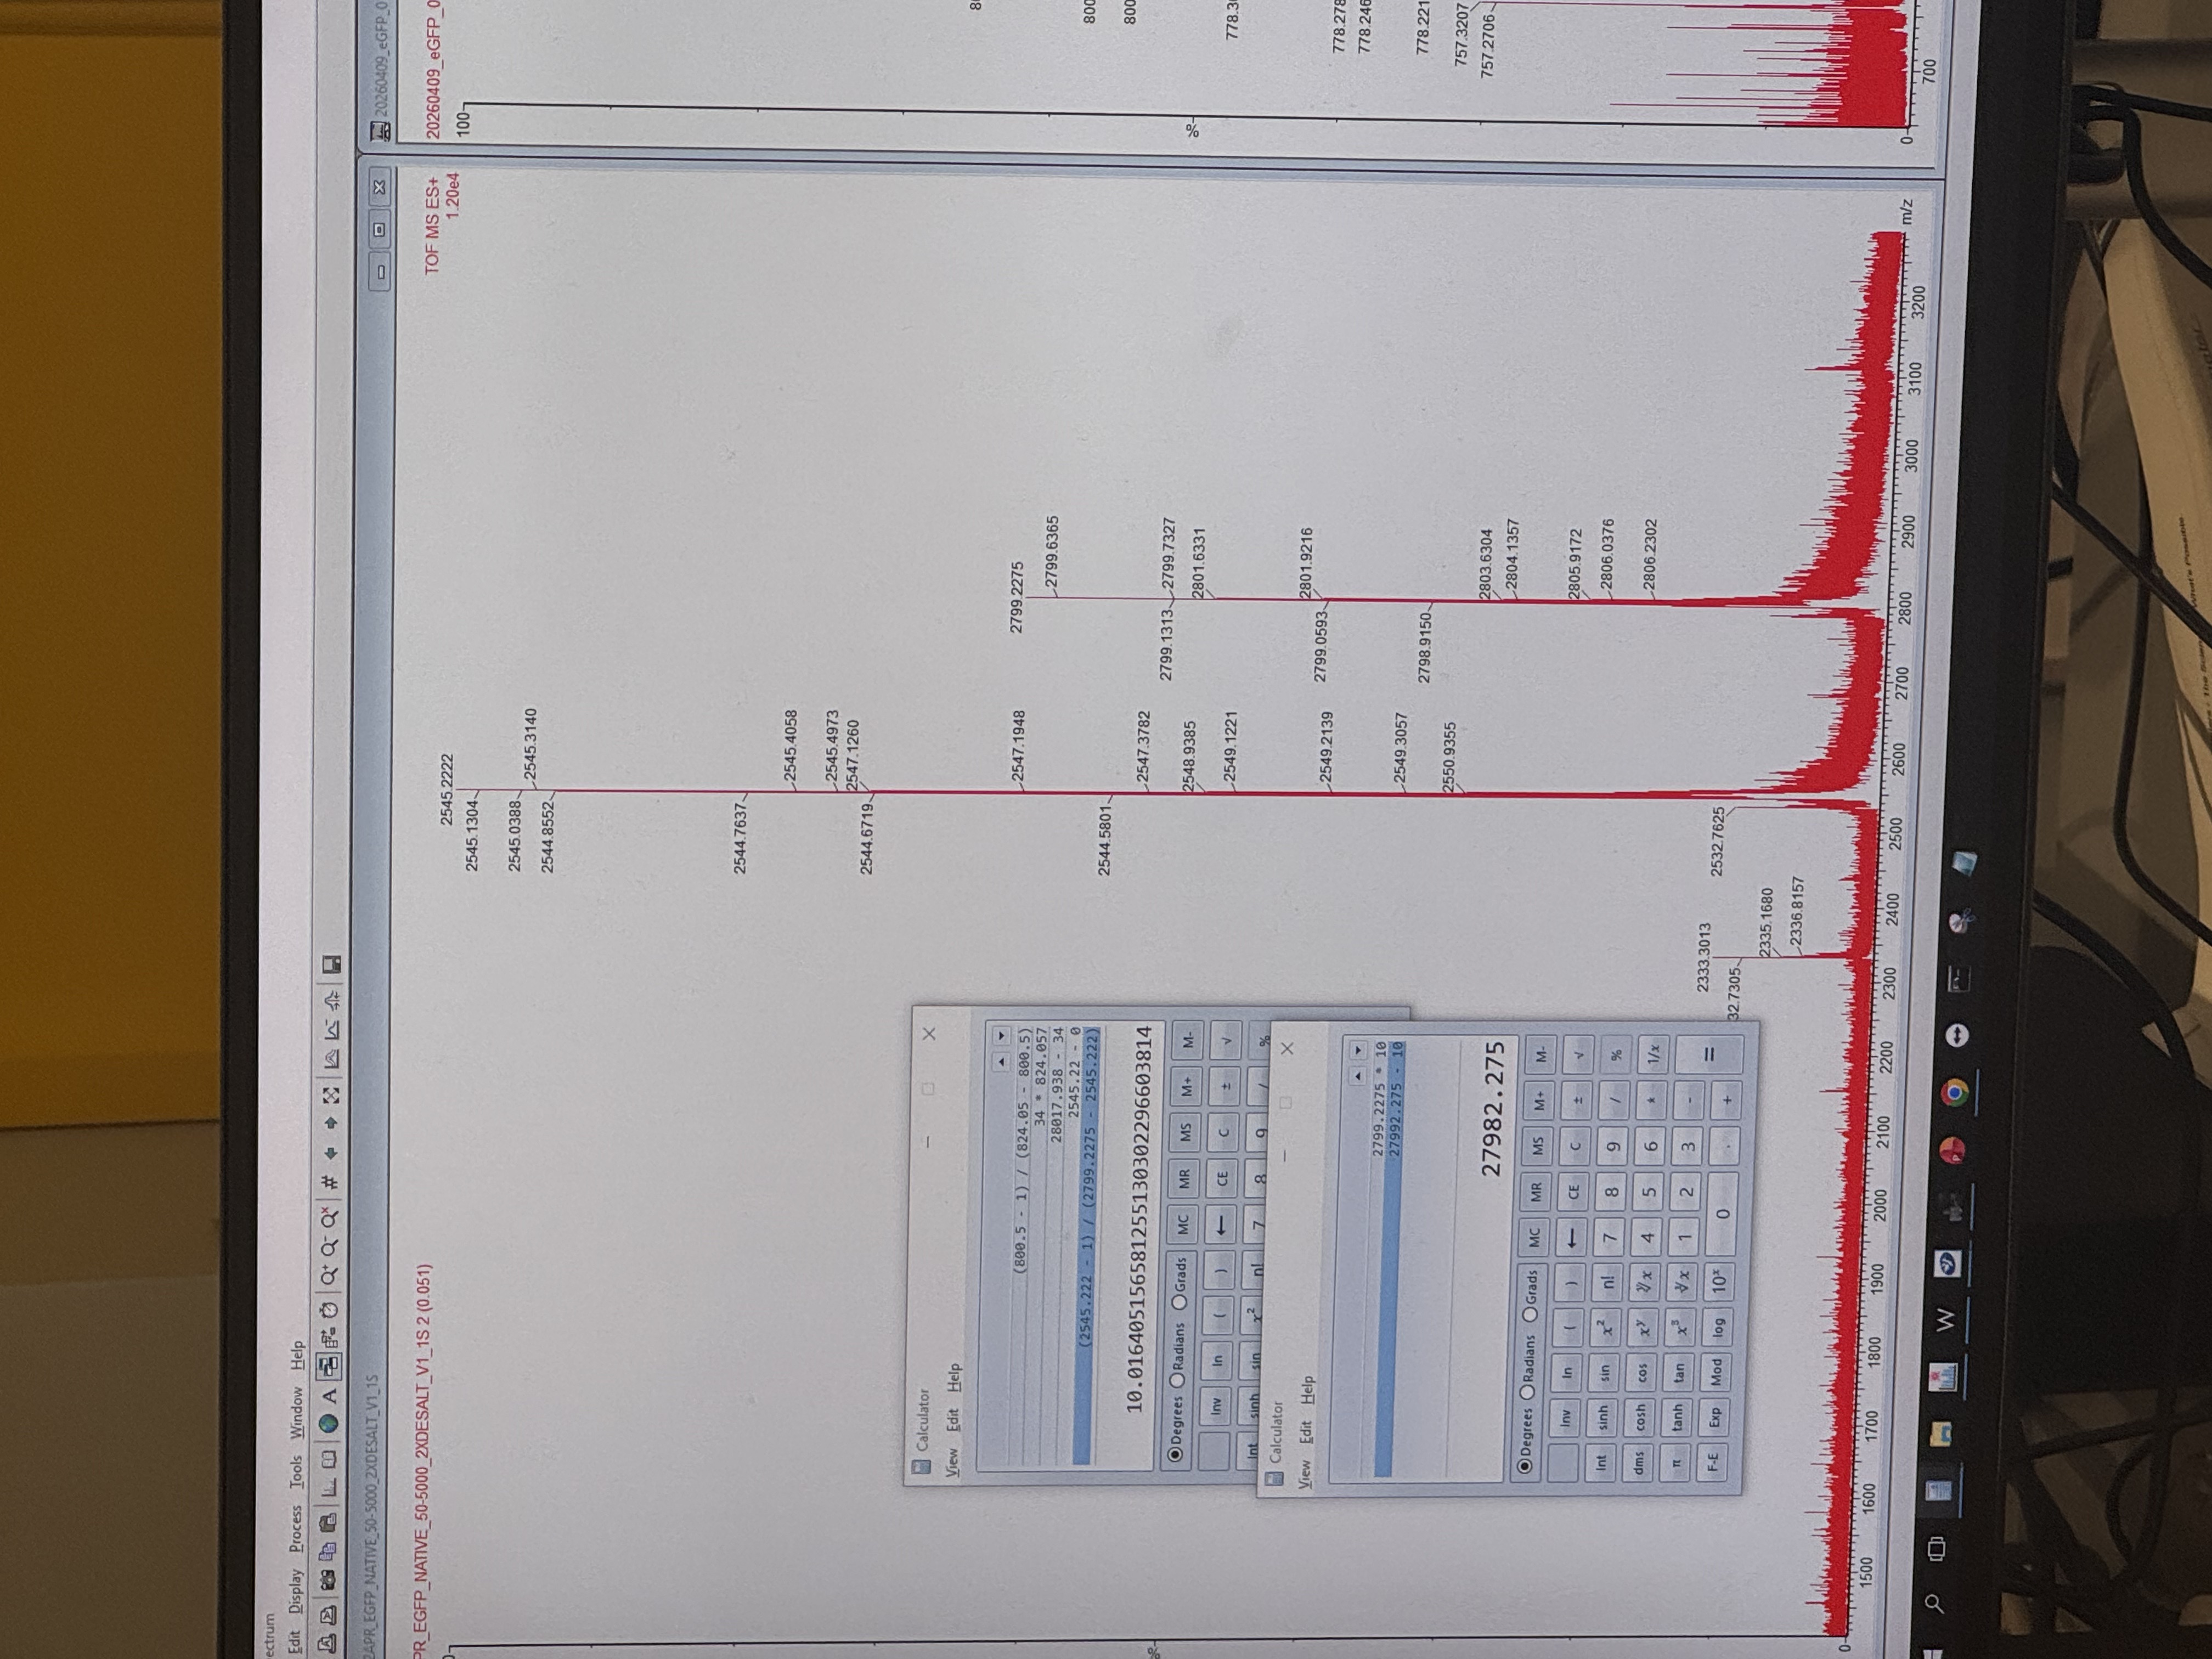
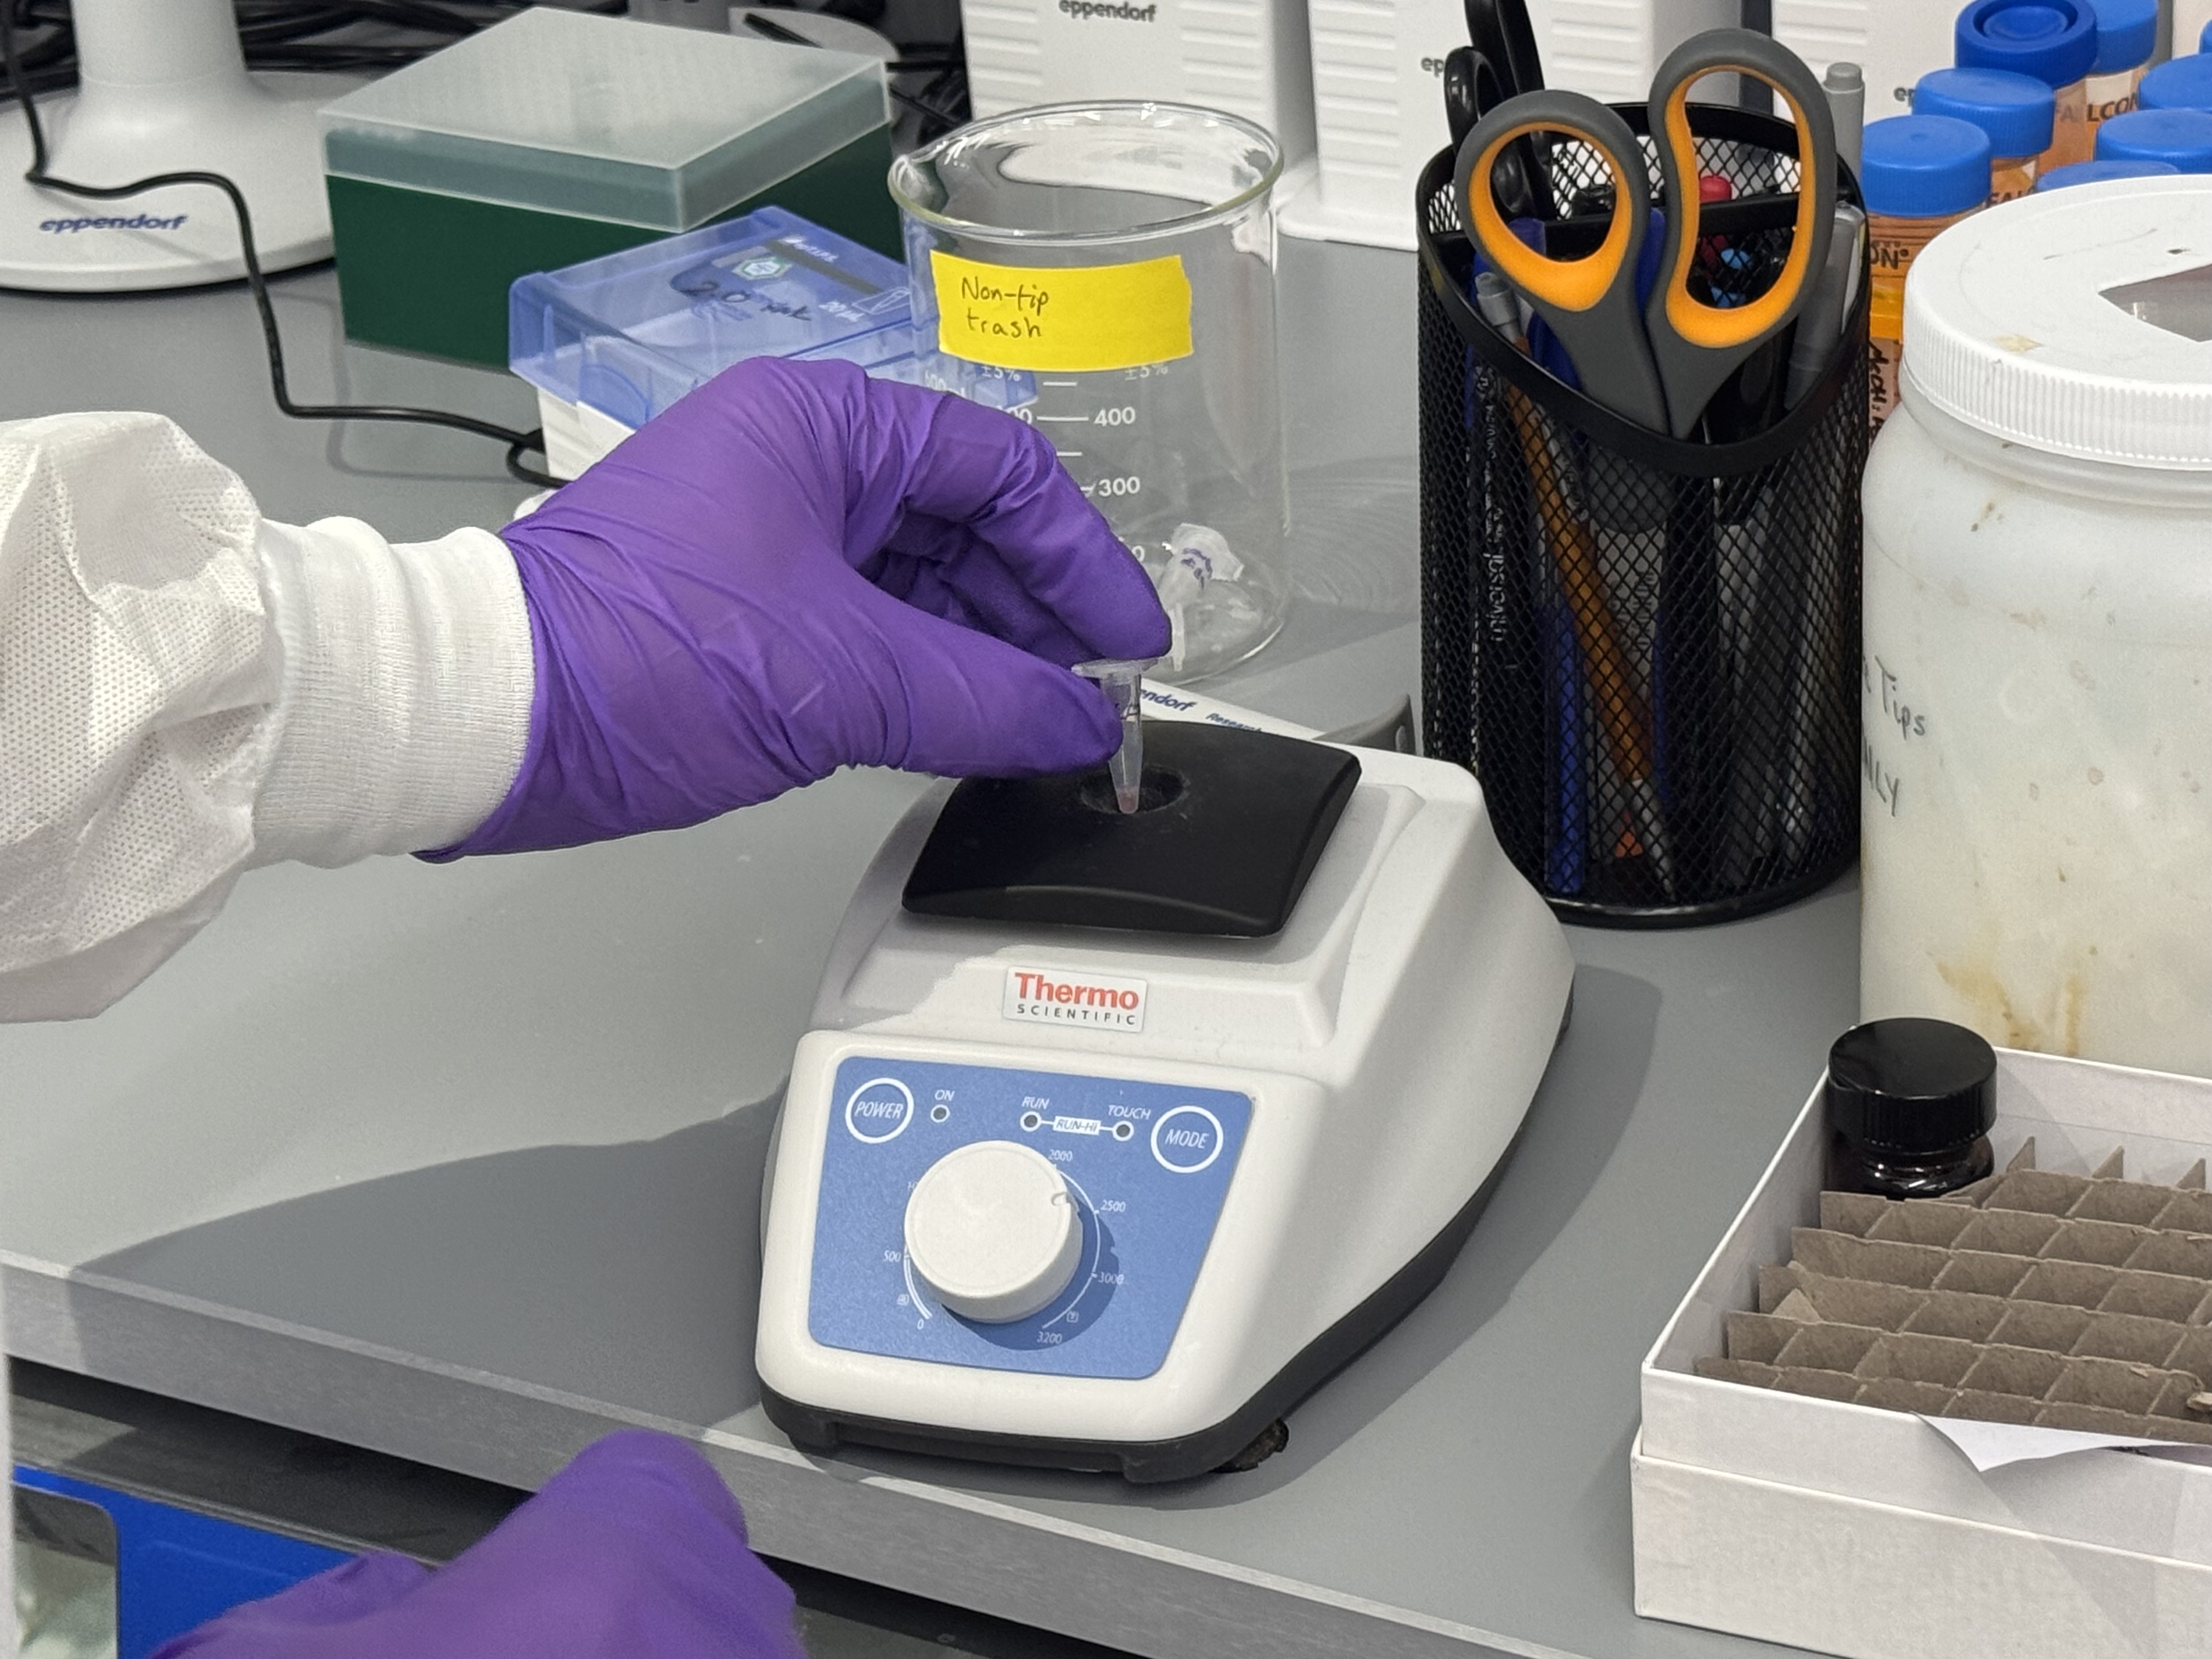
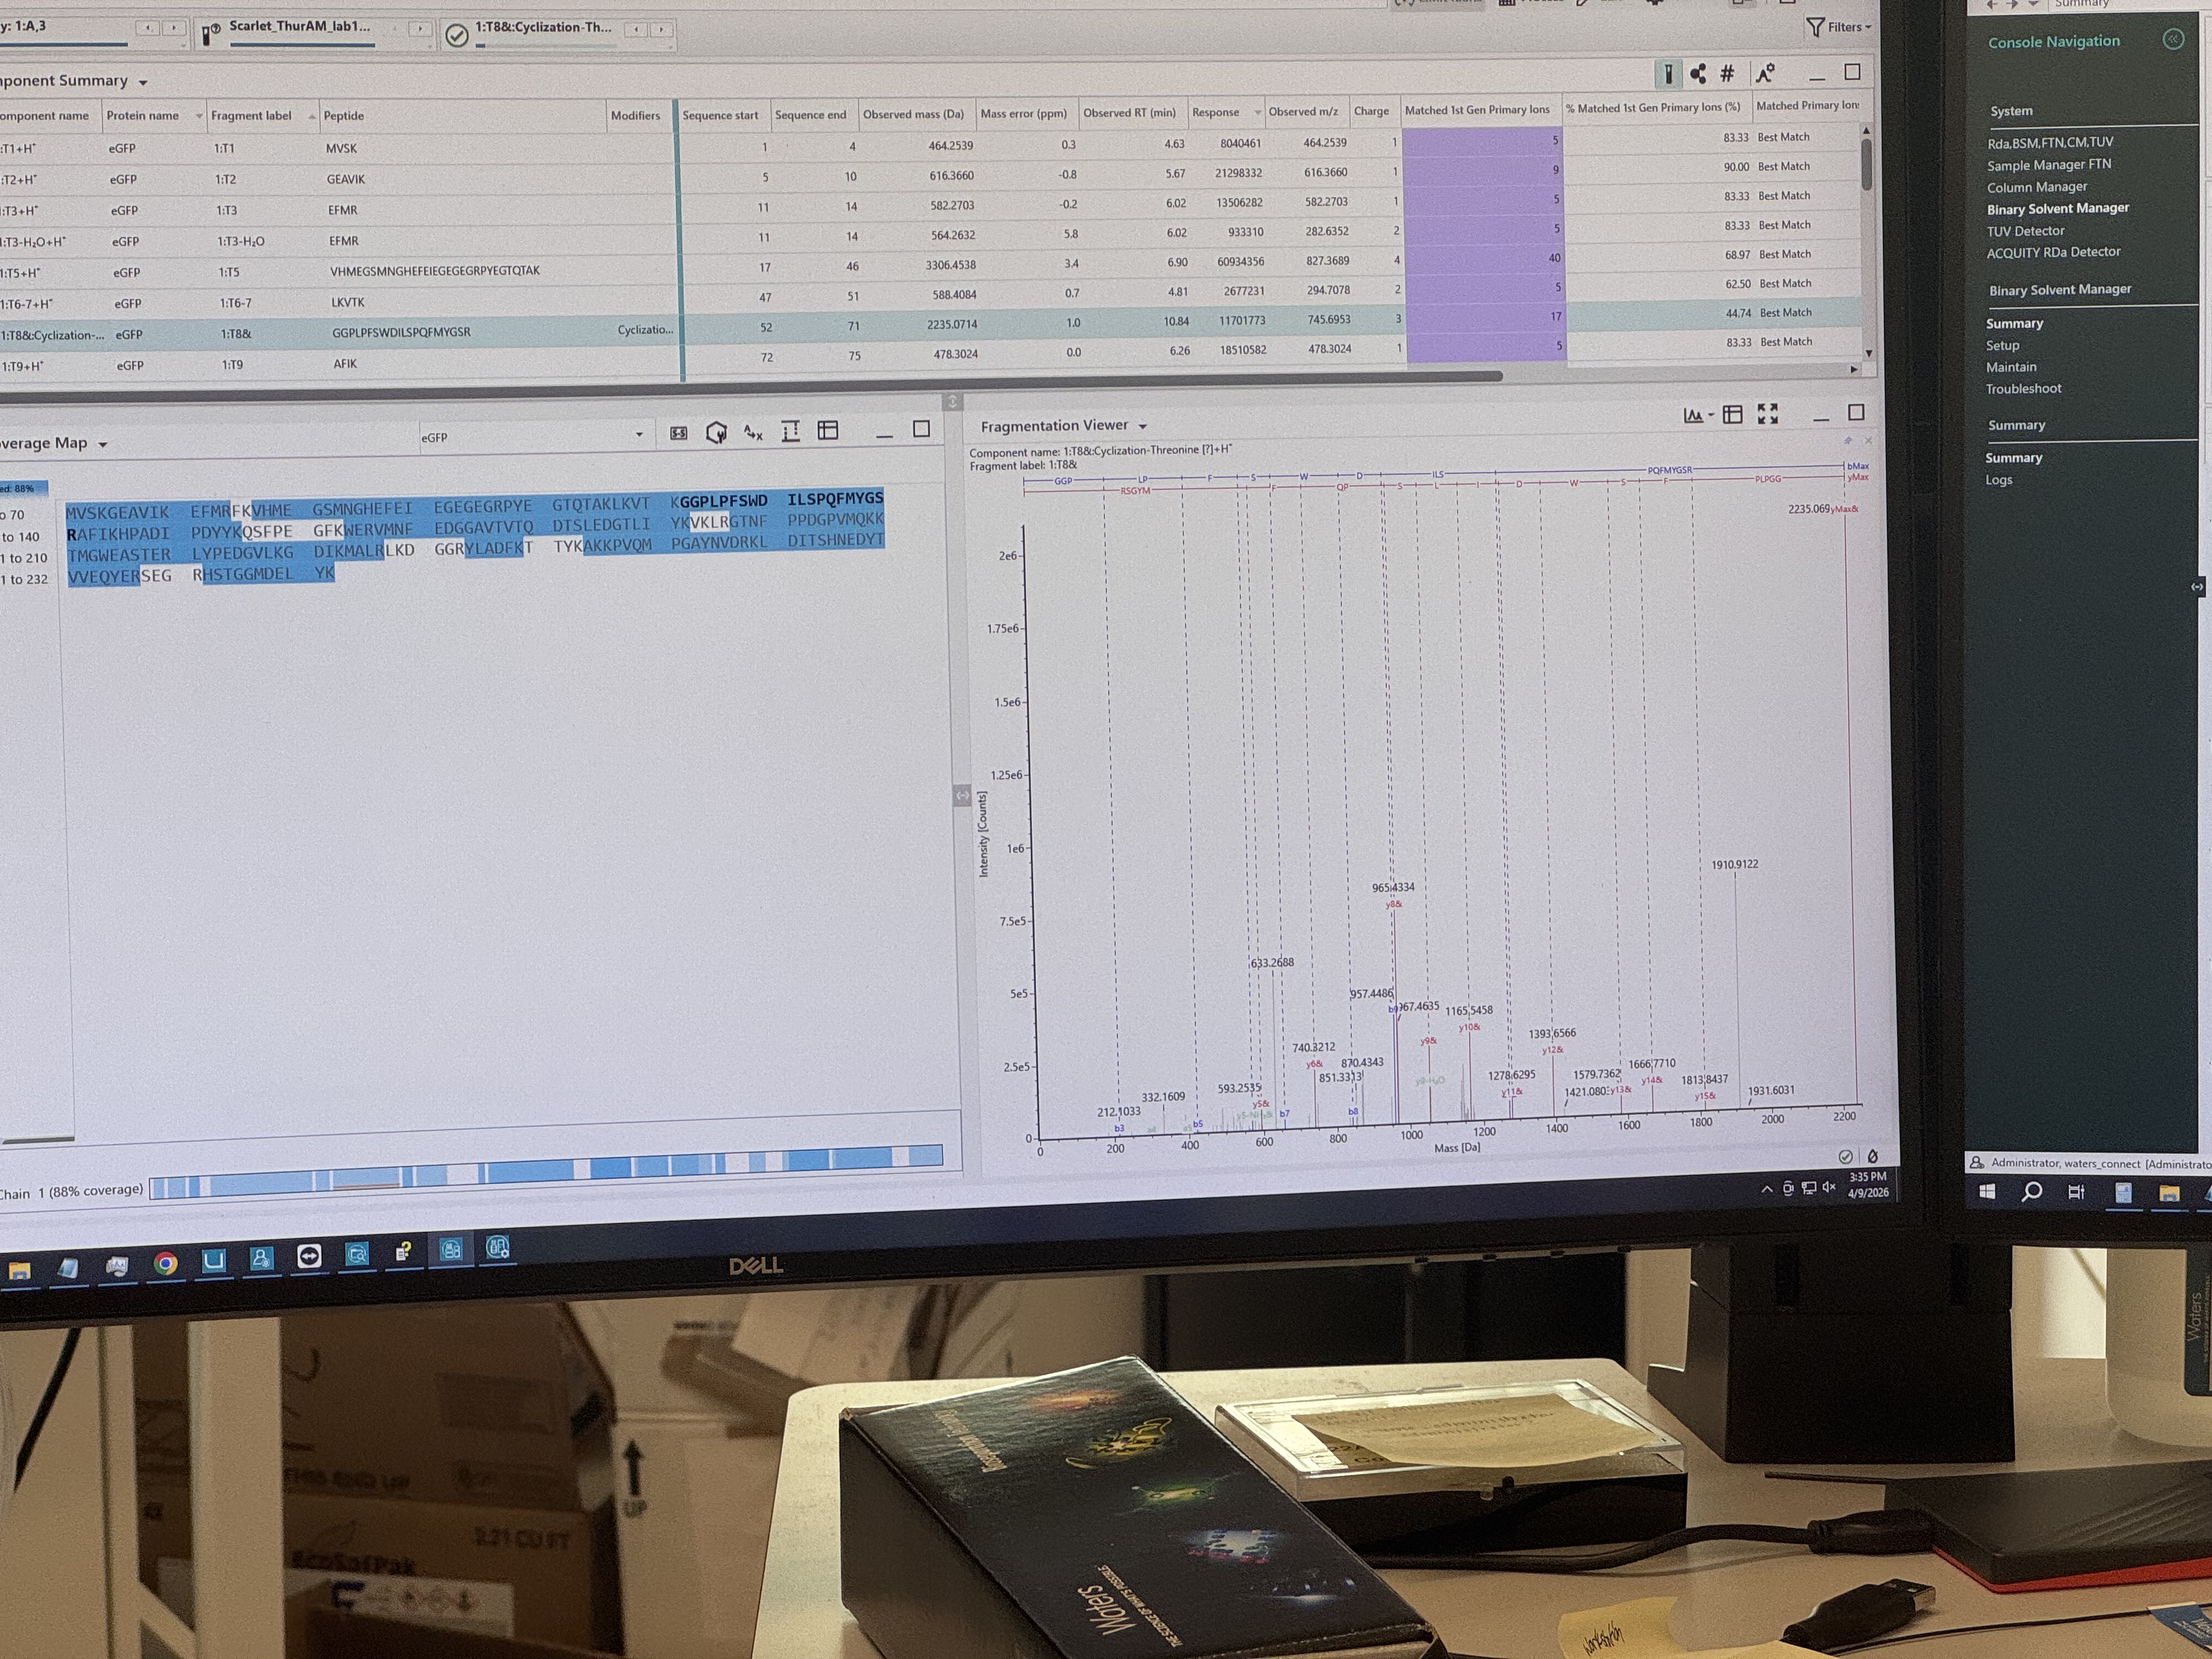
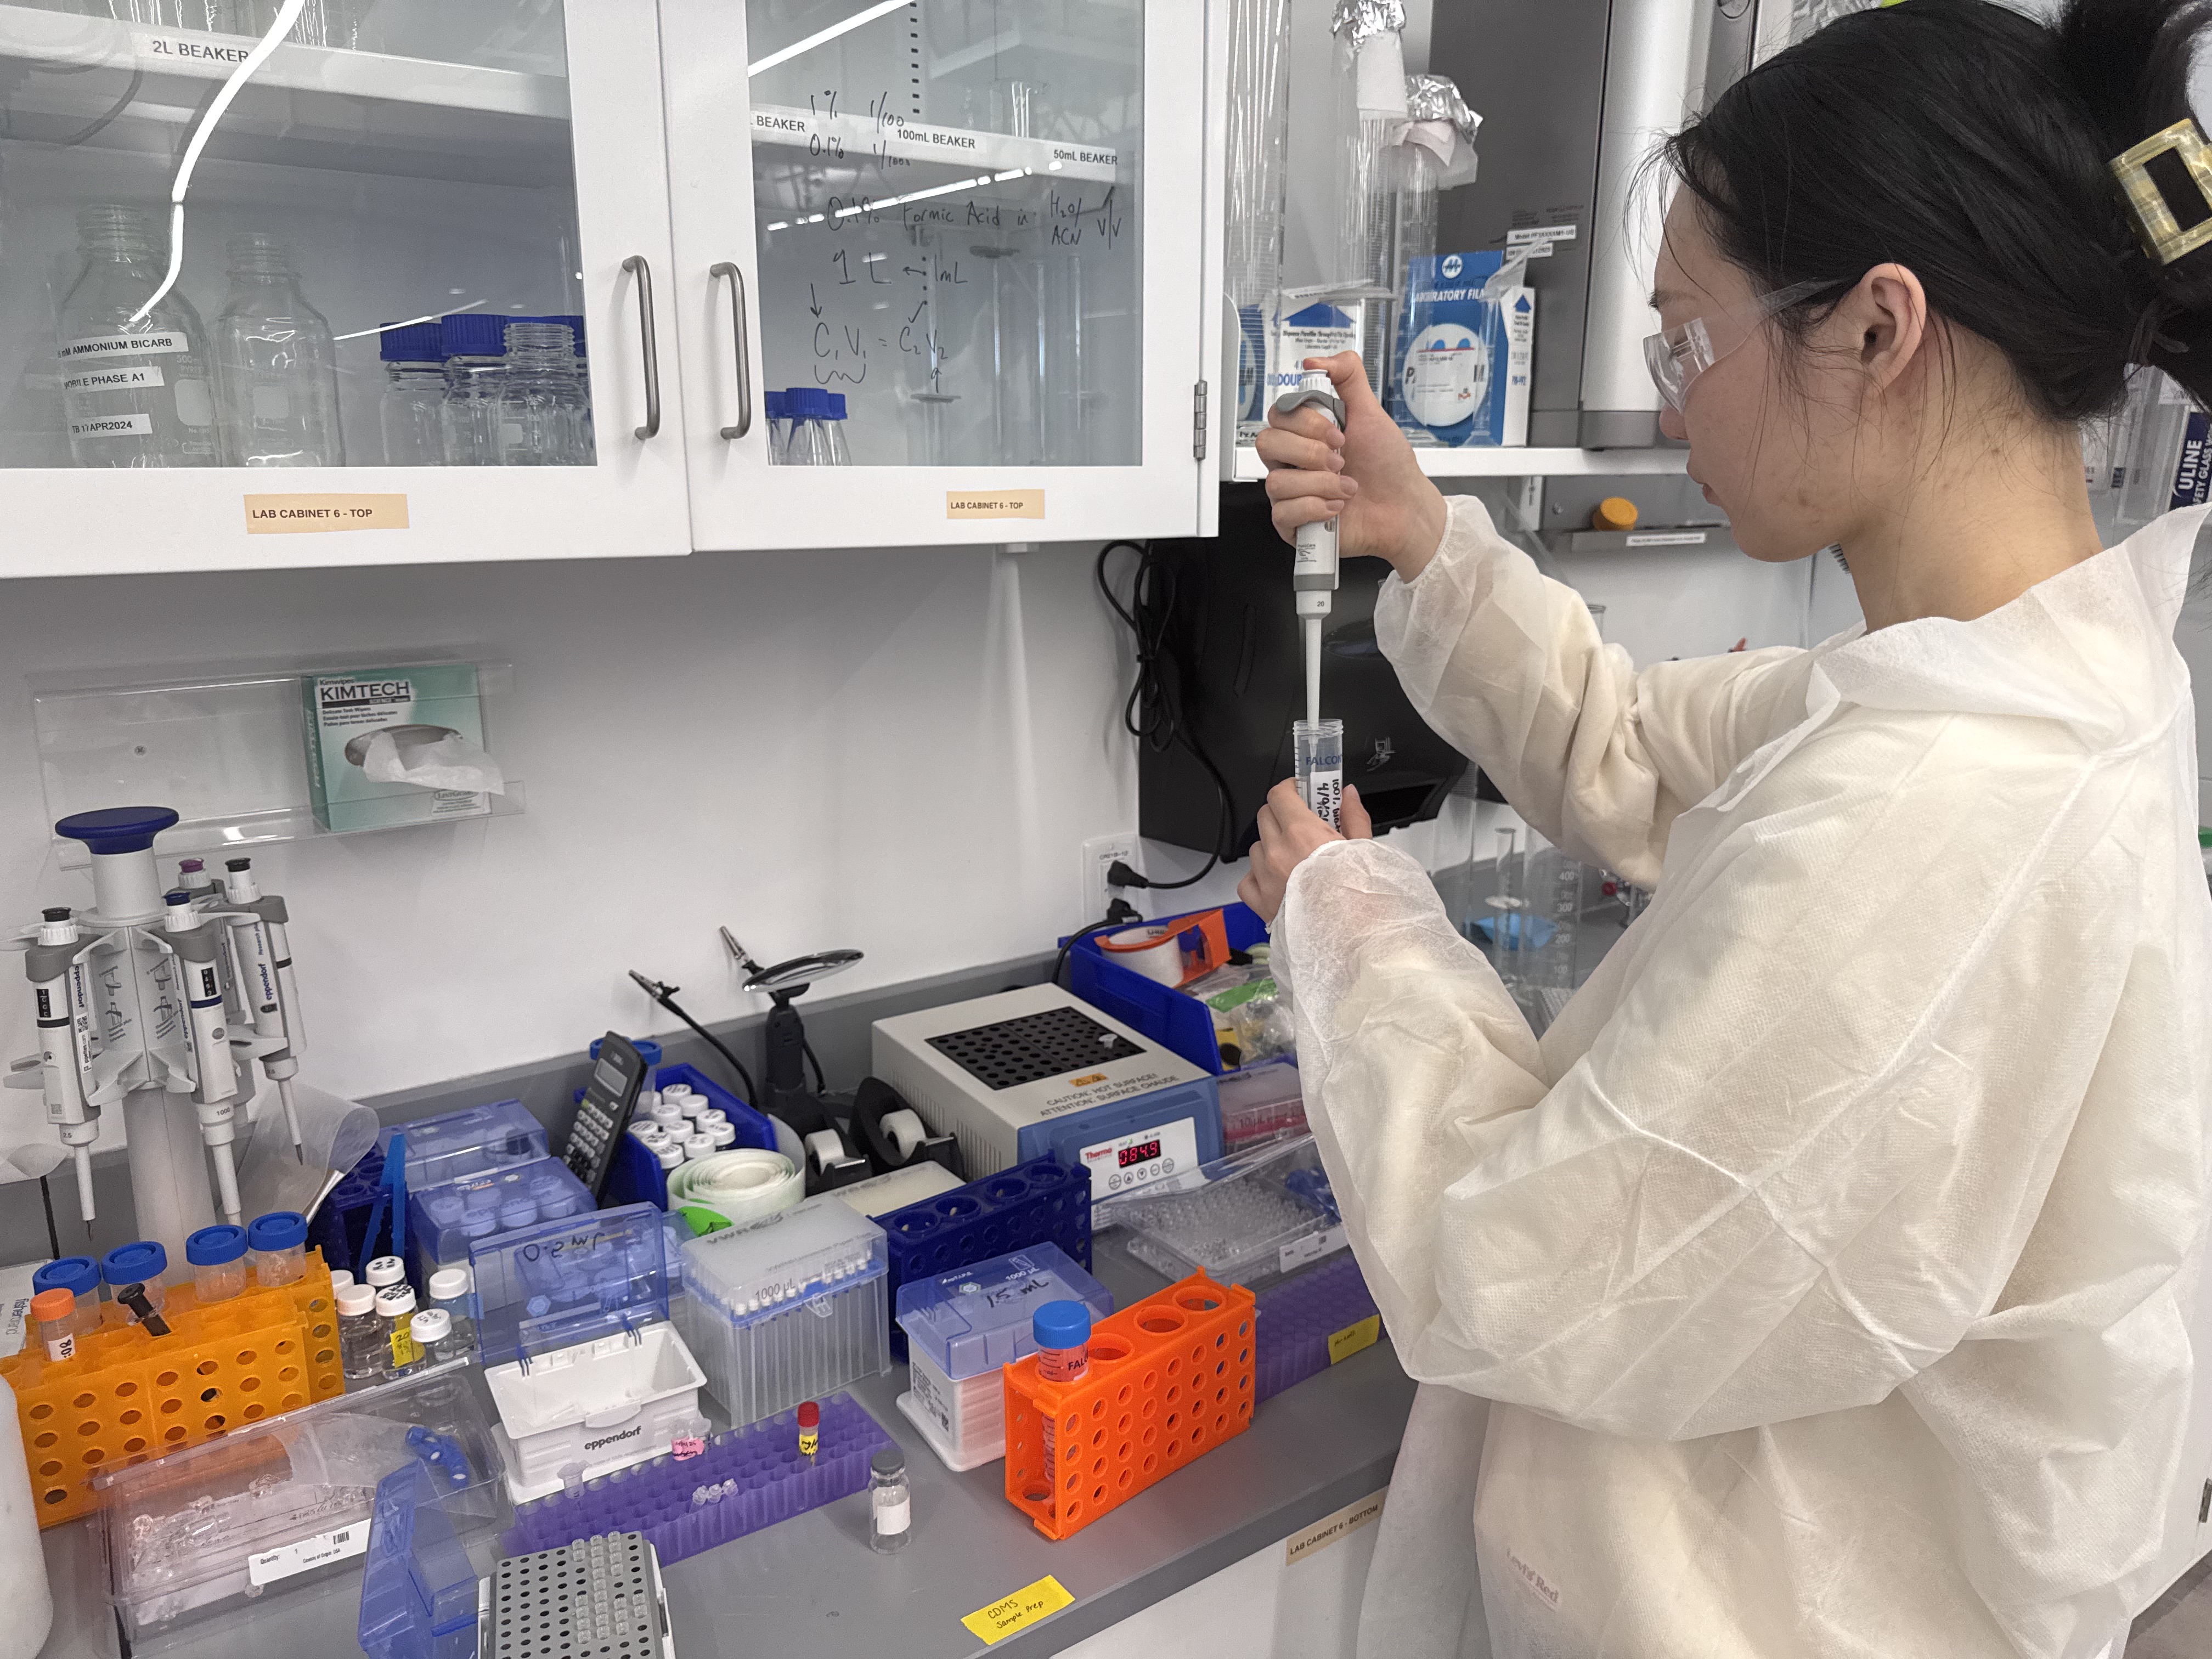
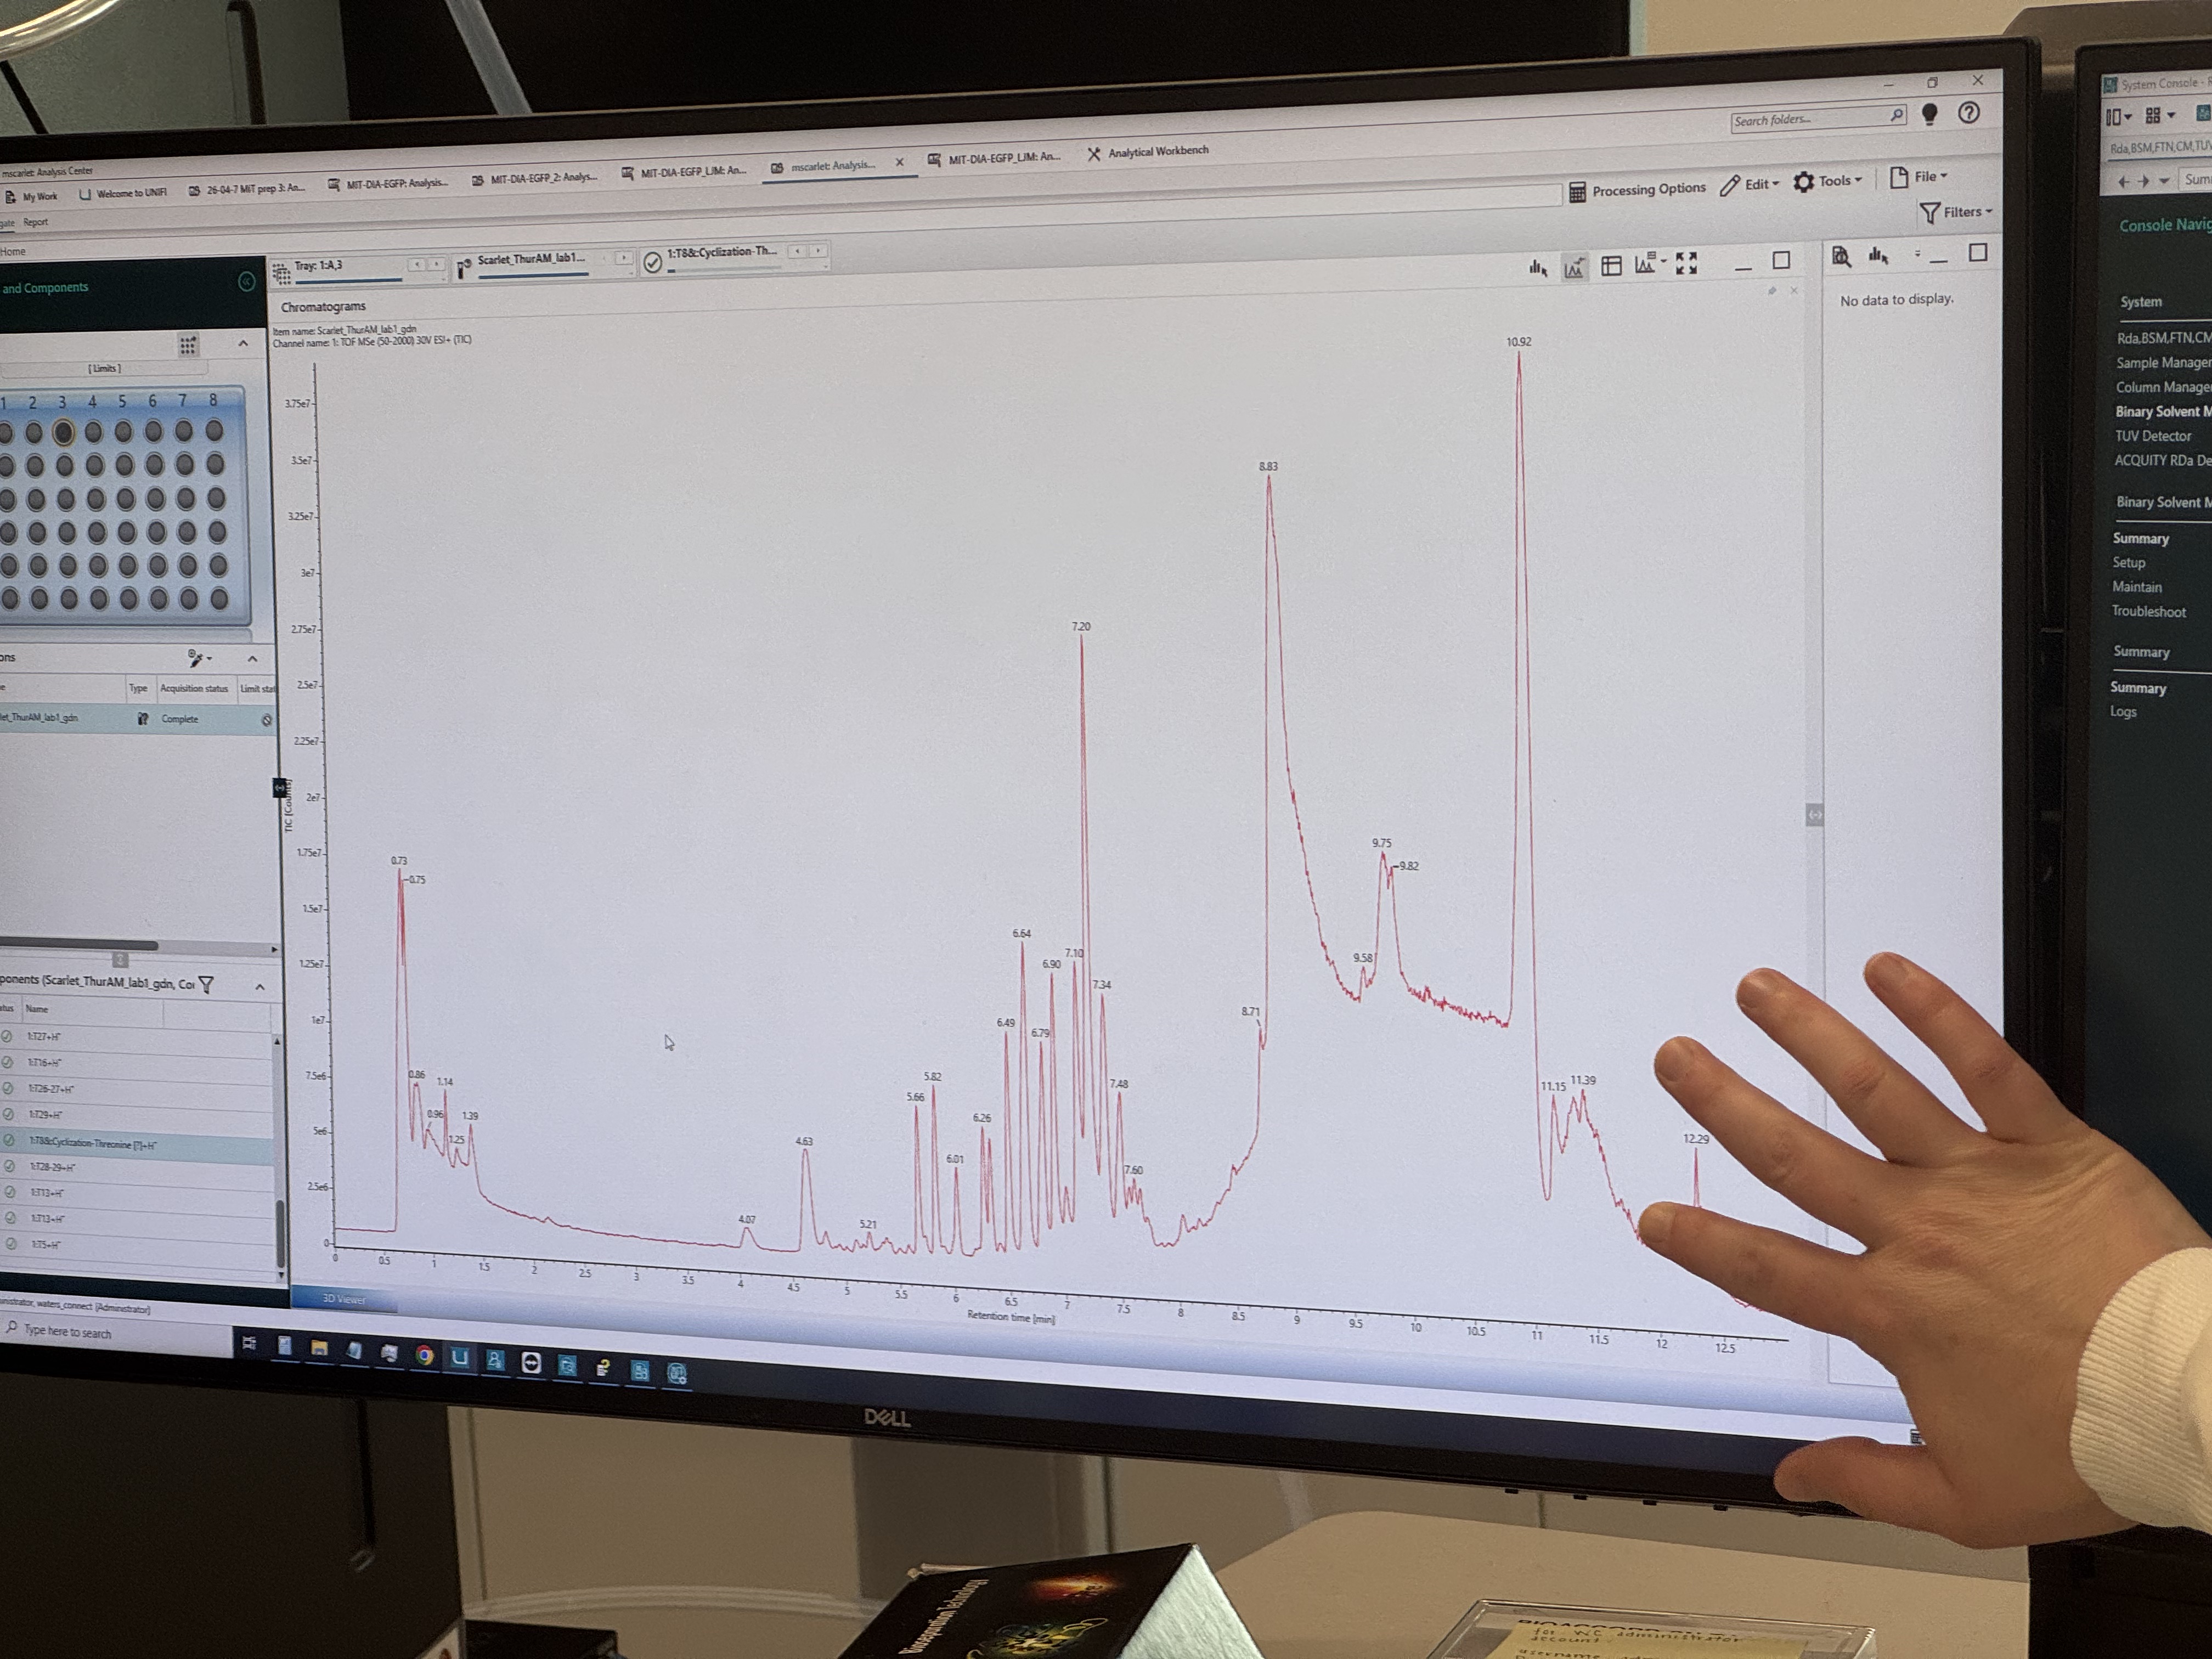
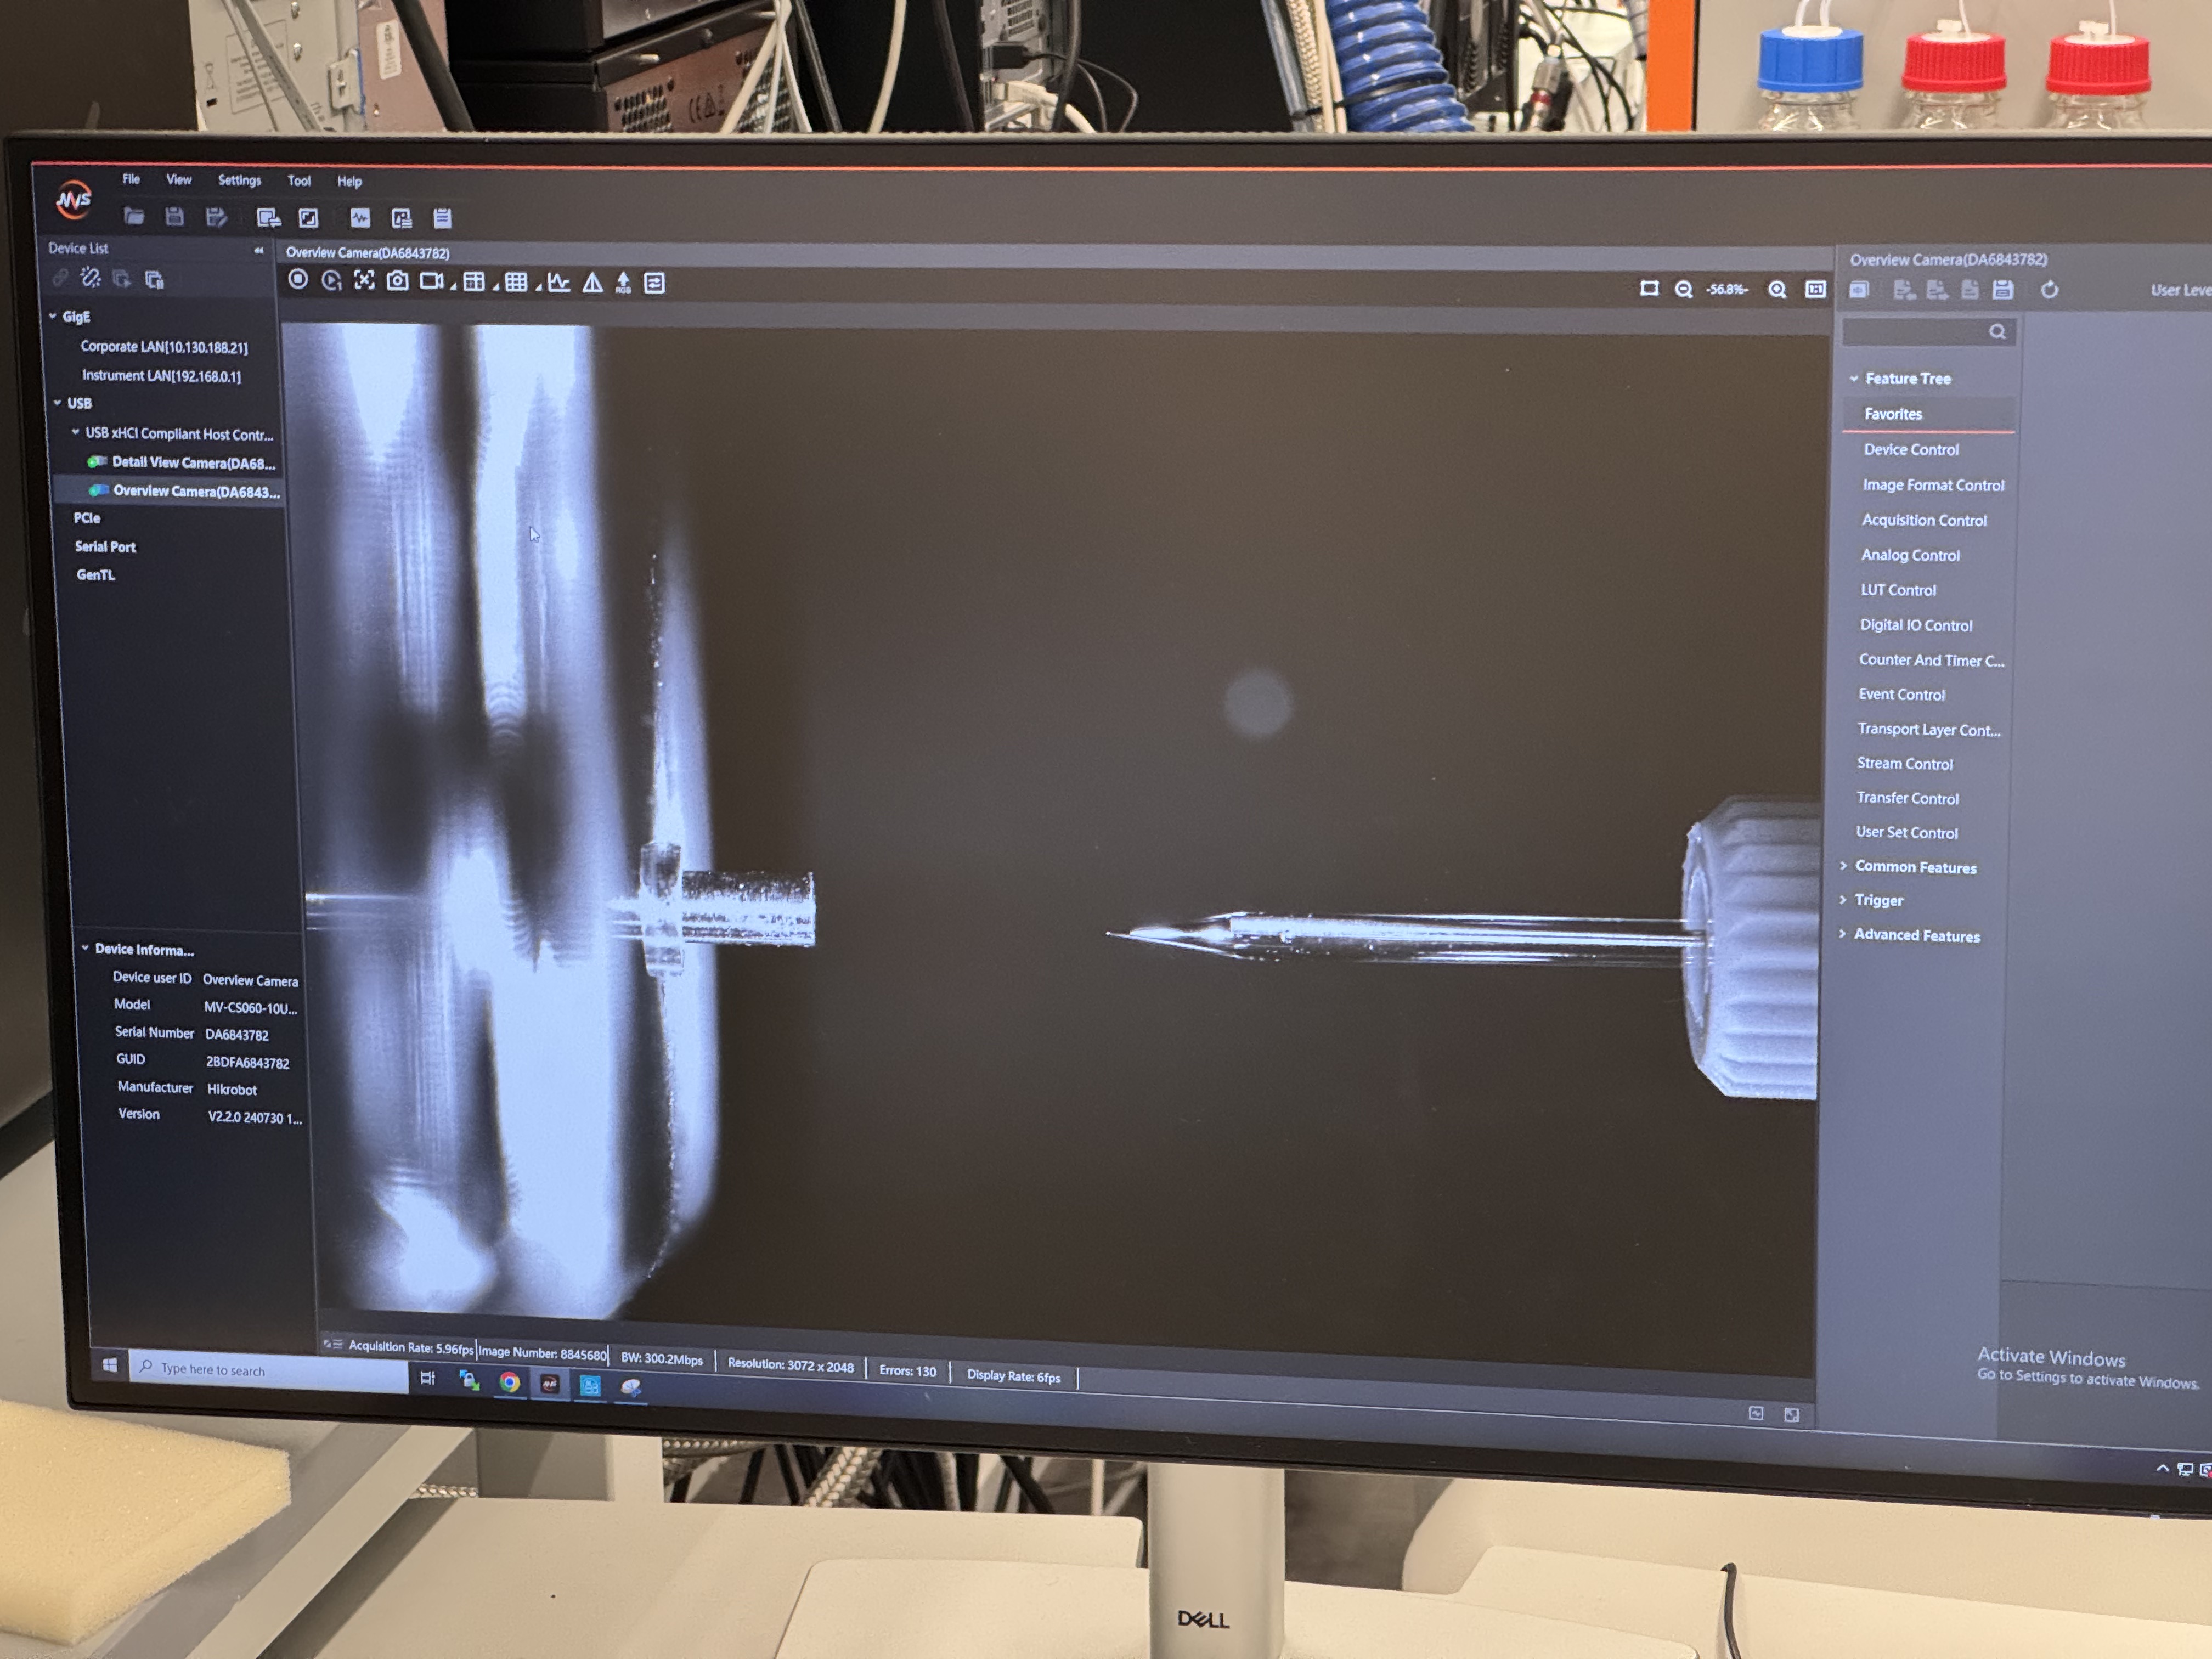
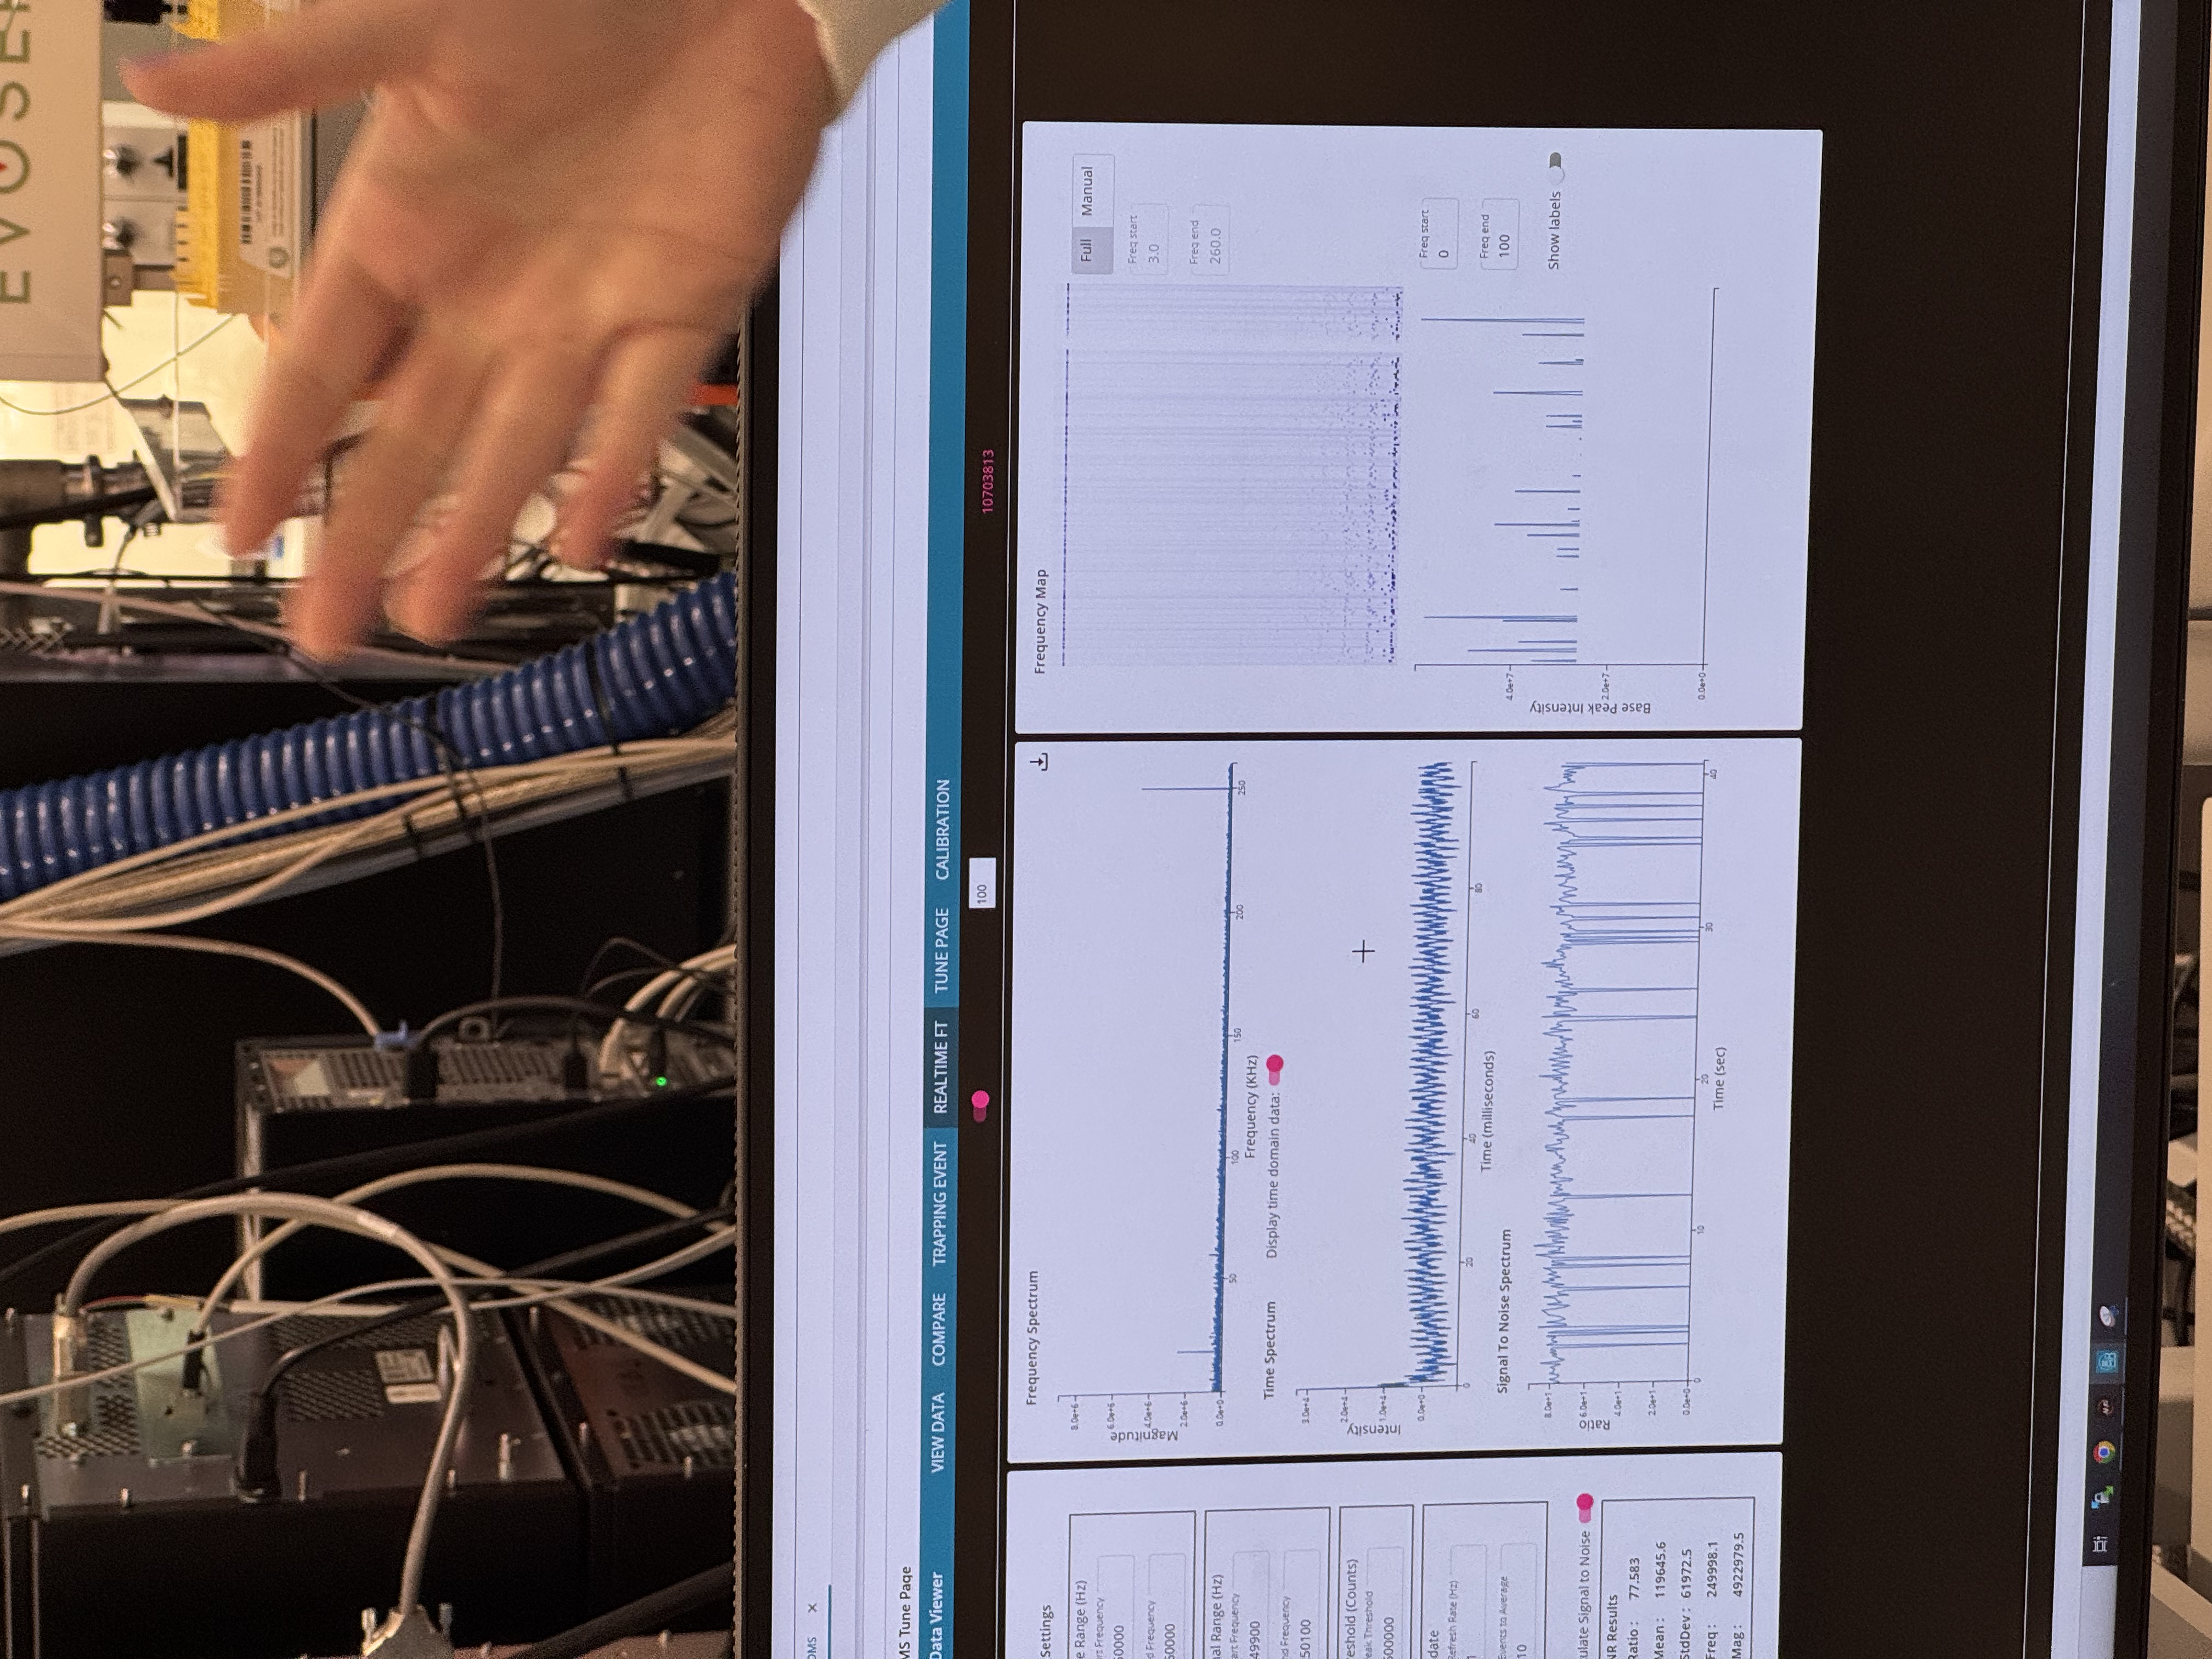
Week 10 Lab: MASS SPECTROMETRY
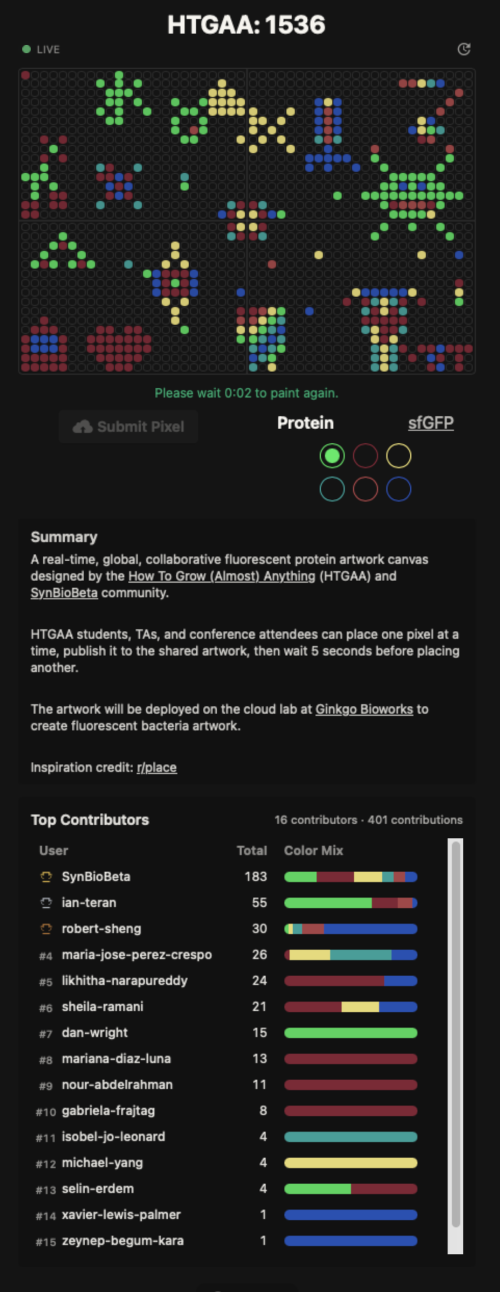
Week 11 Lab: Cloud Lab
Week 2 Lab: DNA Gel Art
Overview
In this lab, I focus on the practical application of DNA restriction digestion and agarose gel electrophoresis. The goal is to design and create DNA gel art by using selected restriction enzymes to generate DNA fragments of specific lengths, then resolving those fragments on a gel to form an image. For this experiment, I aim to produce a “boring face” (—_—) pattern.
Part 1: In-silico Design
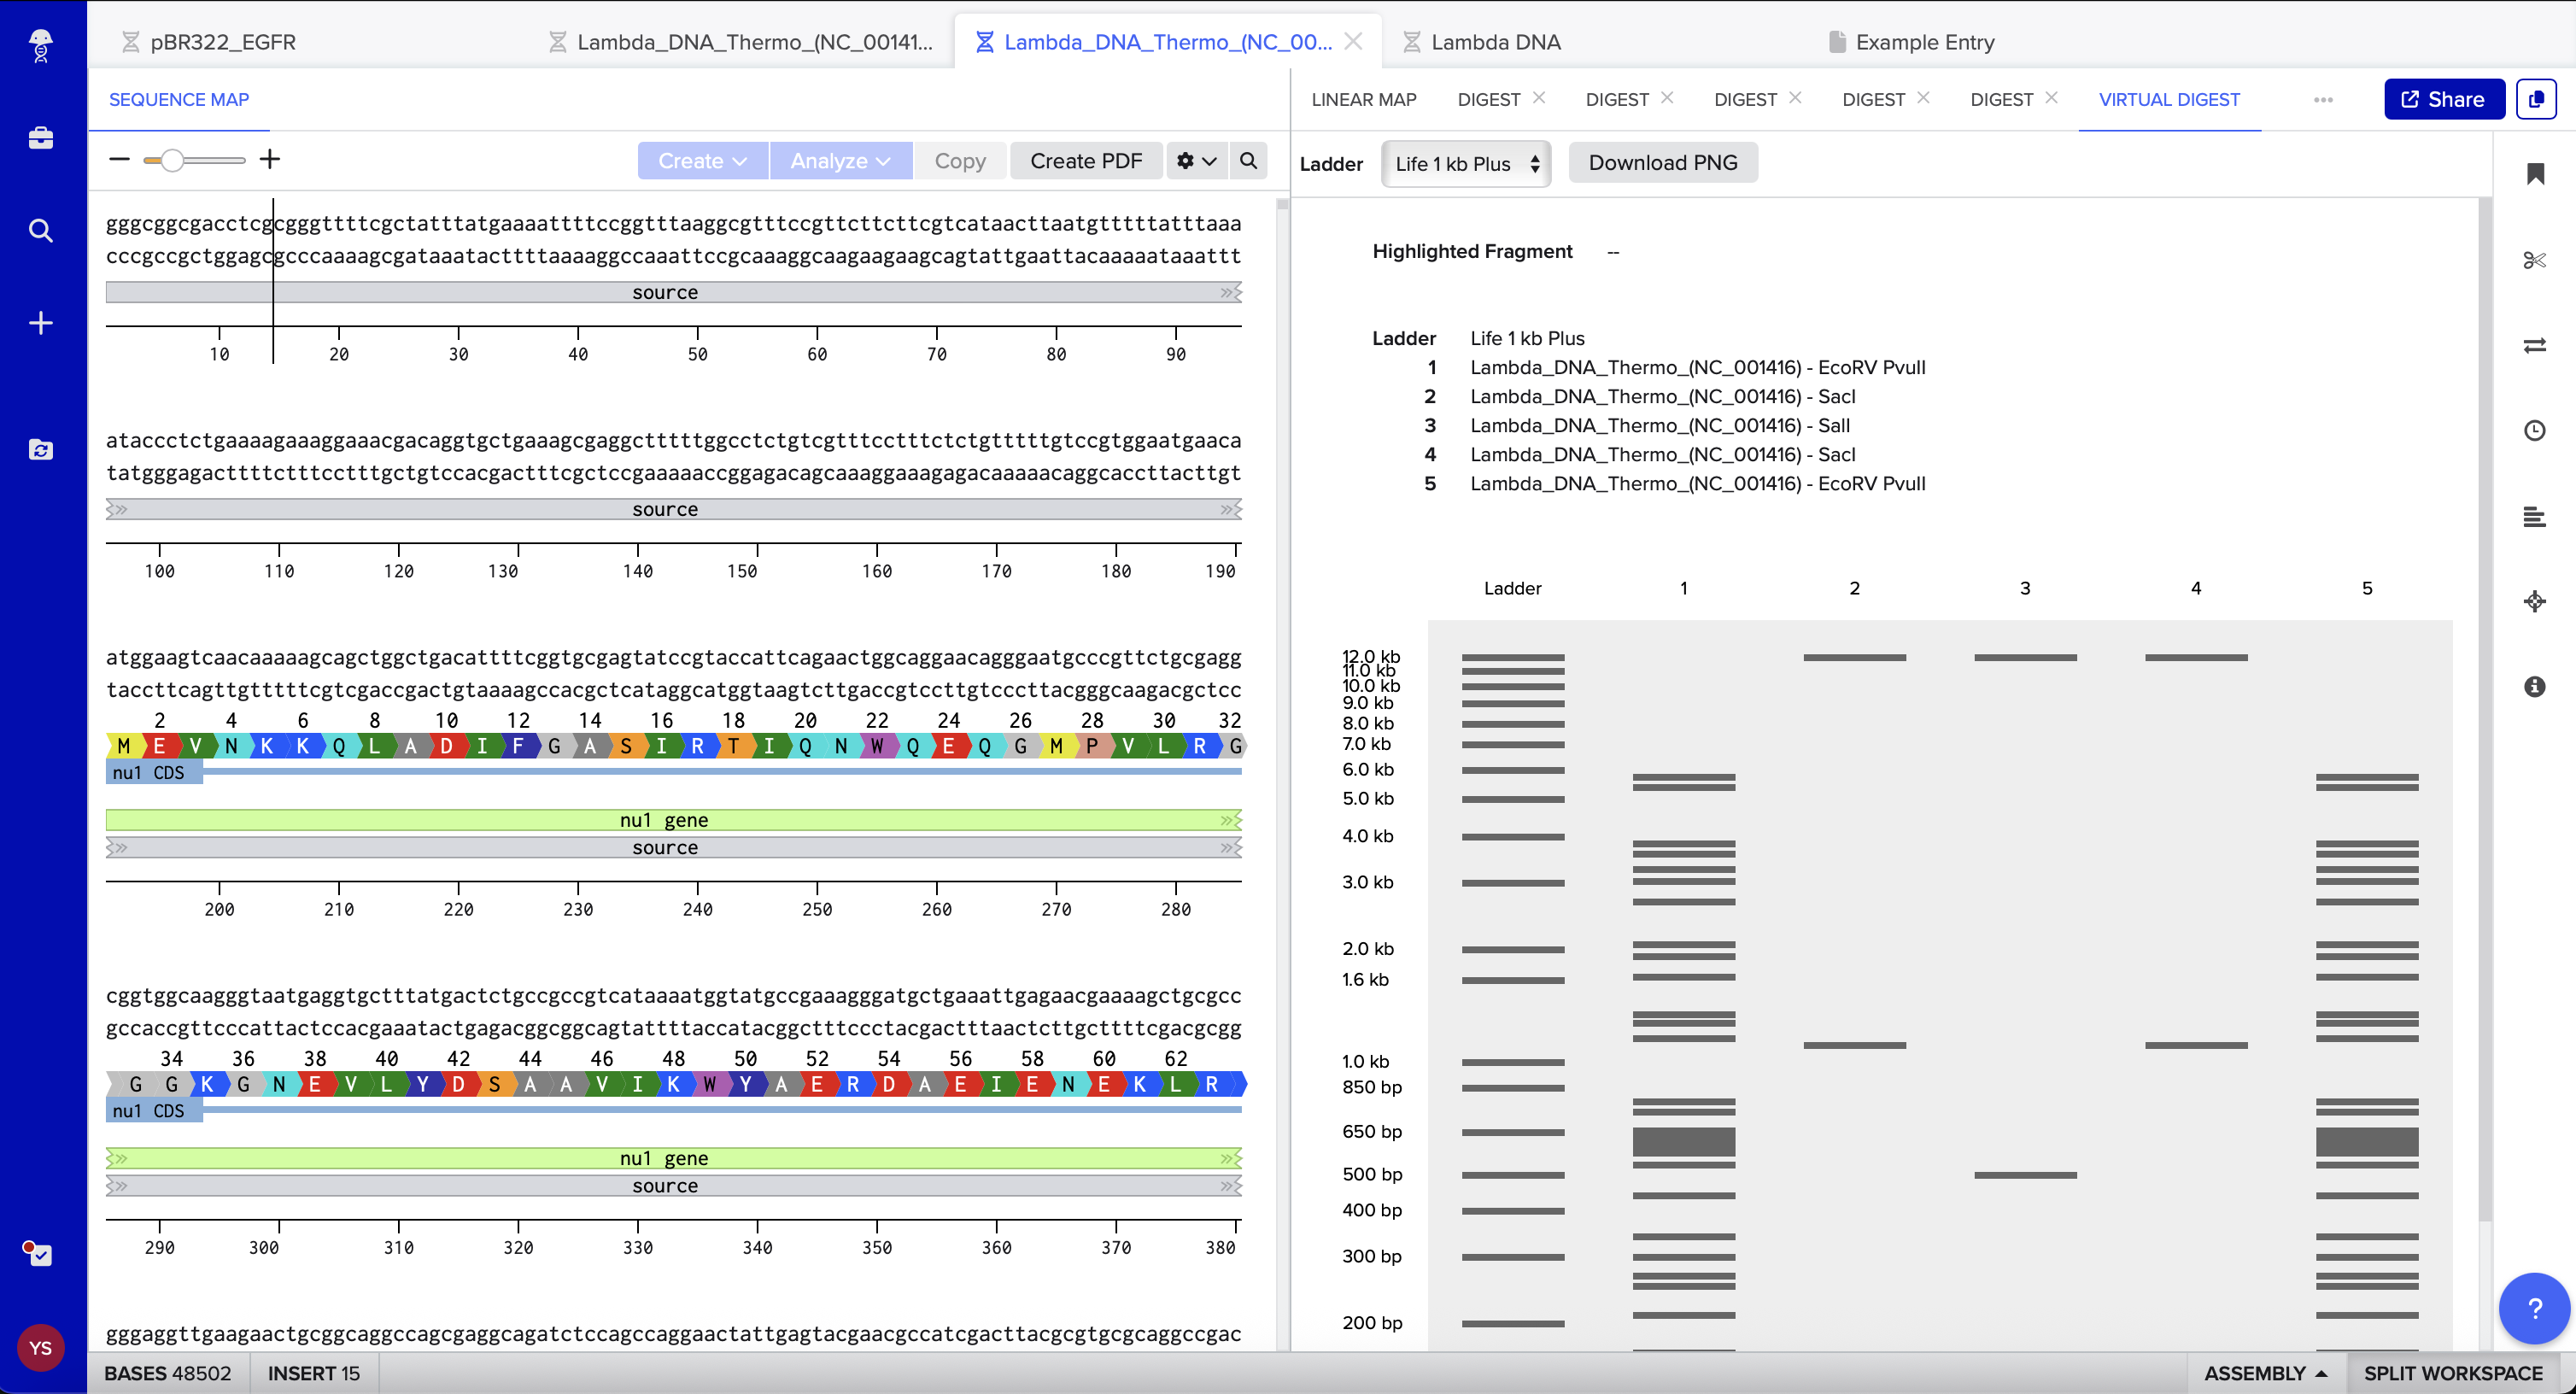
Before entering the lab, I iterated on the target pattern using Ronan’s Automation Art website and used Benchling to simulate how Lambda DNA (48,502 bp) would be cleaved by selected restriction enzymes. This digital preparation enabled me to anticipate the expected banding patterns on the agarose gel and provided a reference for later interpretation of the experimental results.
1.1 Artistic Mapping and Enzyme Selection
For this experiment, I assigned specific enzymes to represent different facial features based on the fragment sizes they produce:
EcoRV and PvuII: forms the outer “ ( ) ” boundaries.
SacI: creates the eye bands “ — ”.
SalI: creates the mouth band “ _ ”.
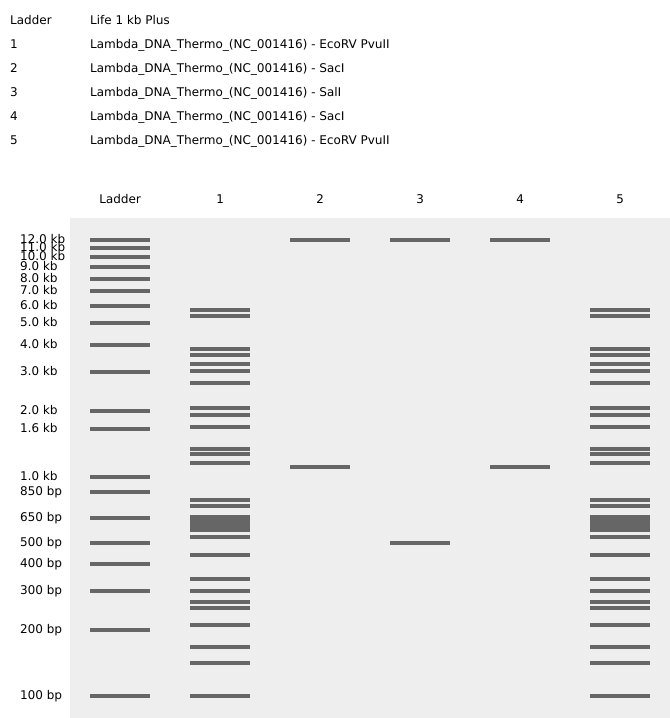
1.2 Virtual Gel Prediction
I used Benchling’s virtual gel tool to verify that the fragments for the eyes, mouth, and face boundaries would migrate to the intended relative positions. The simulation confirmed that the selected enzymes should produce a clear, distinguishable “boring face” pattern on the agarose gel. The required restriction-digest reagents and volumes were generated using the Automation Art website and used as the setup guide for the subsequent wet lab procedure.
Part 2: Wet-lab Experiment
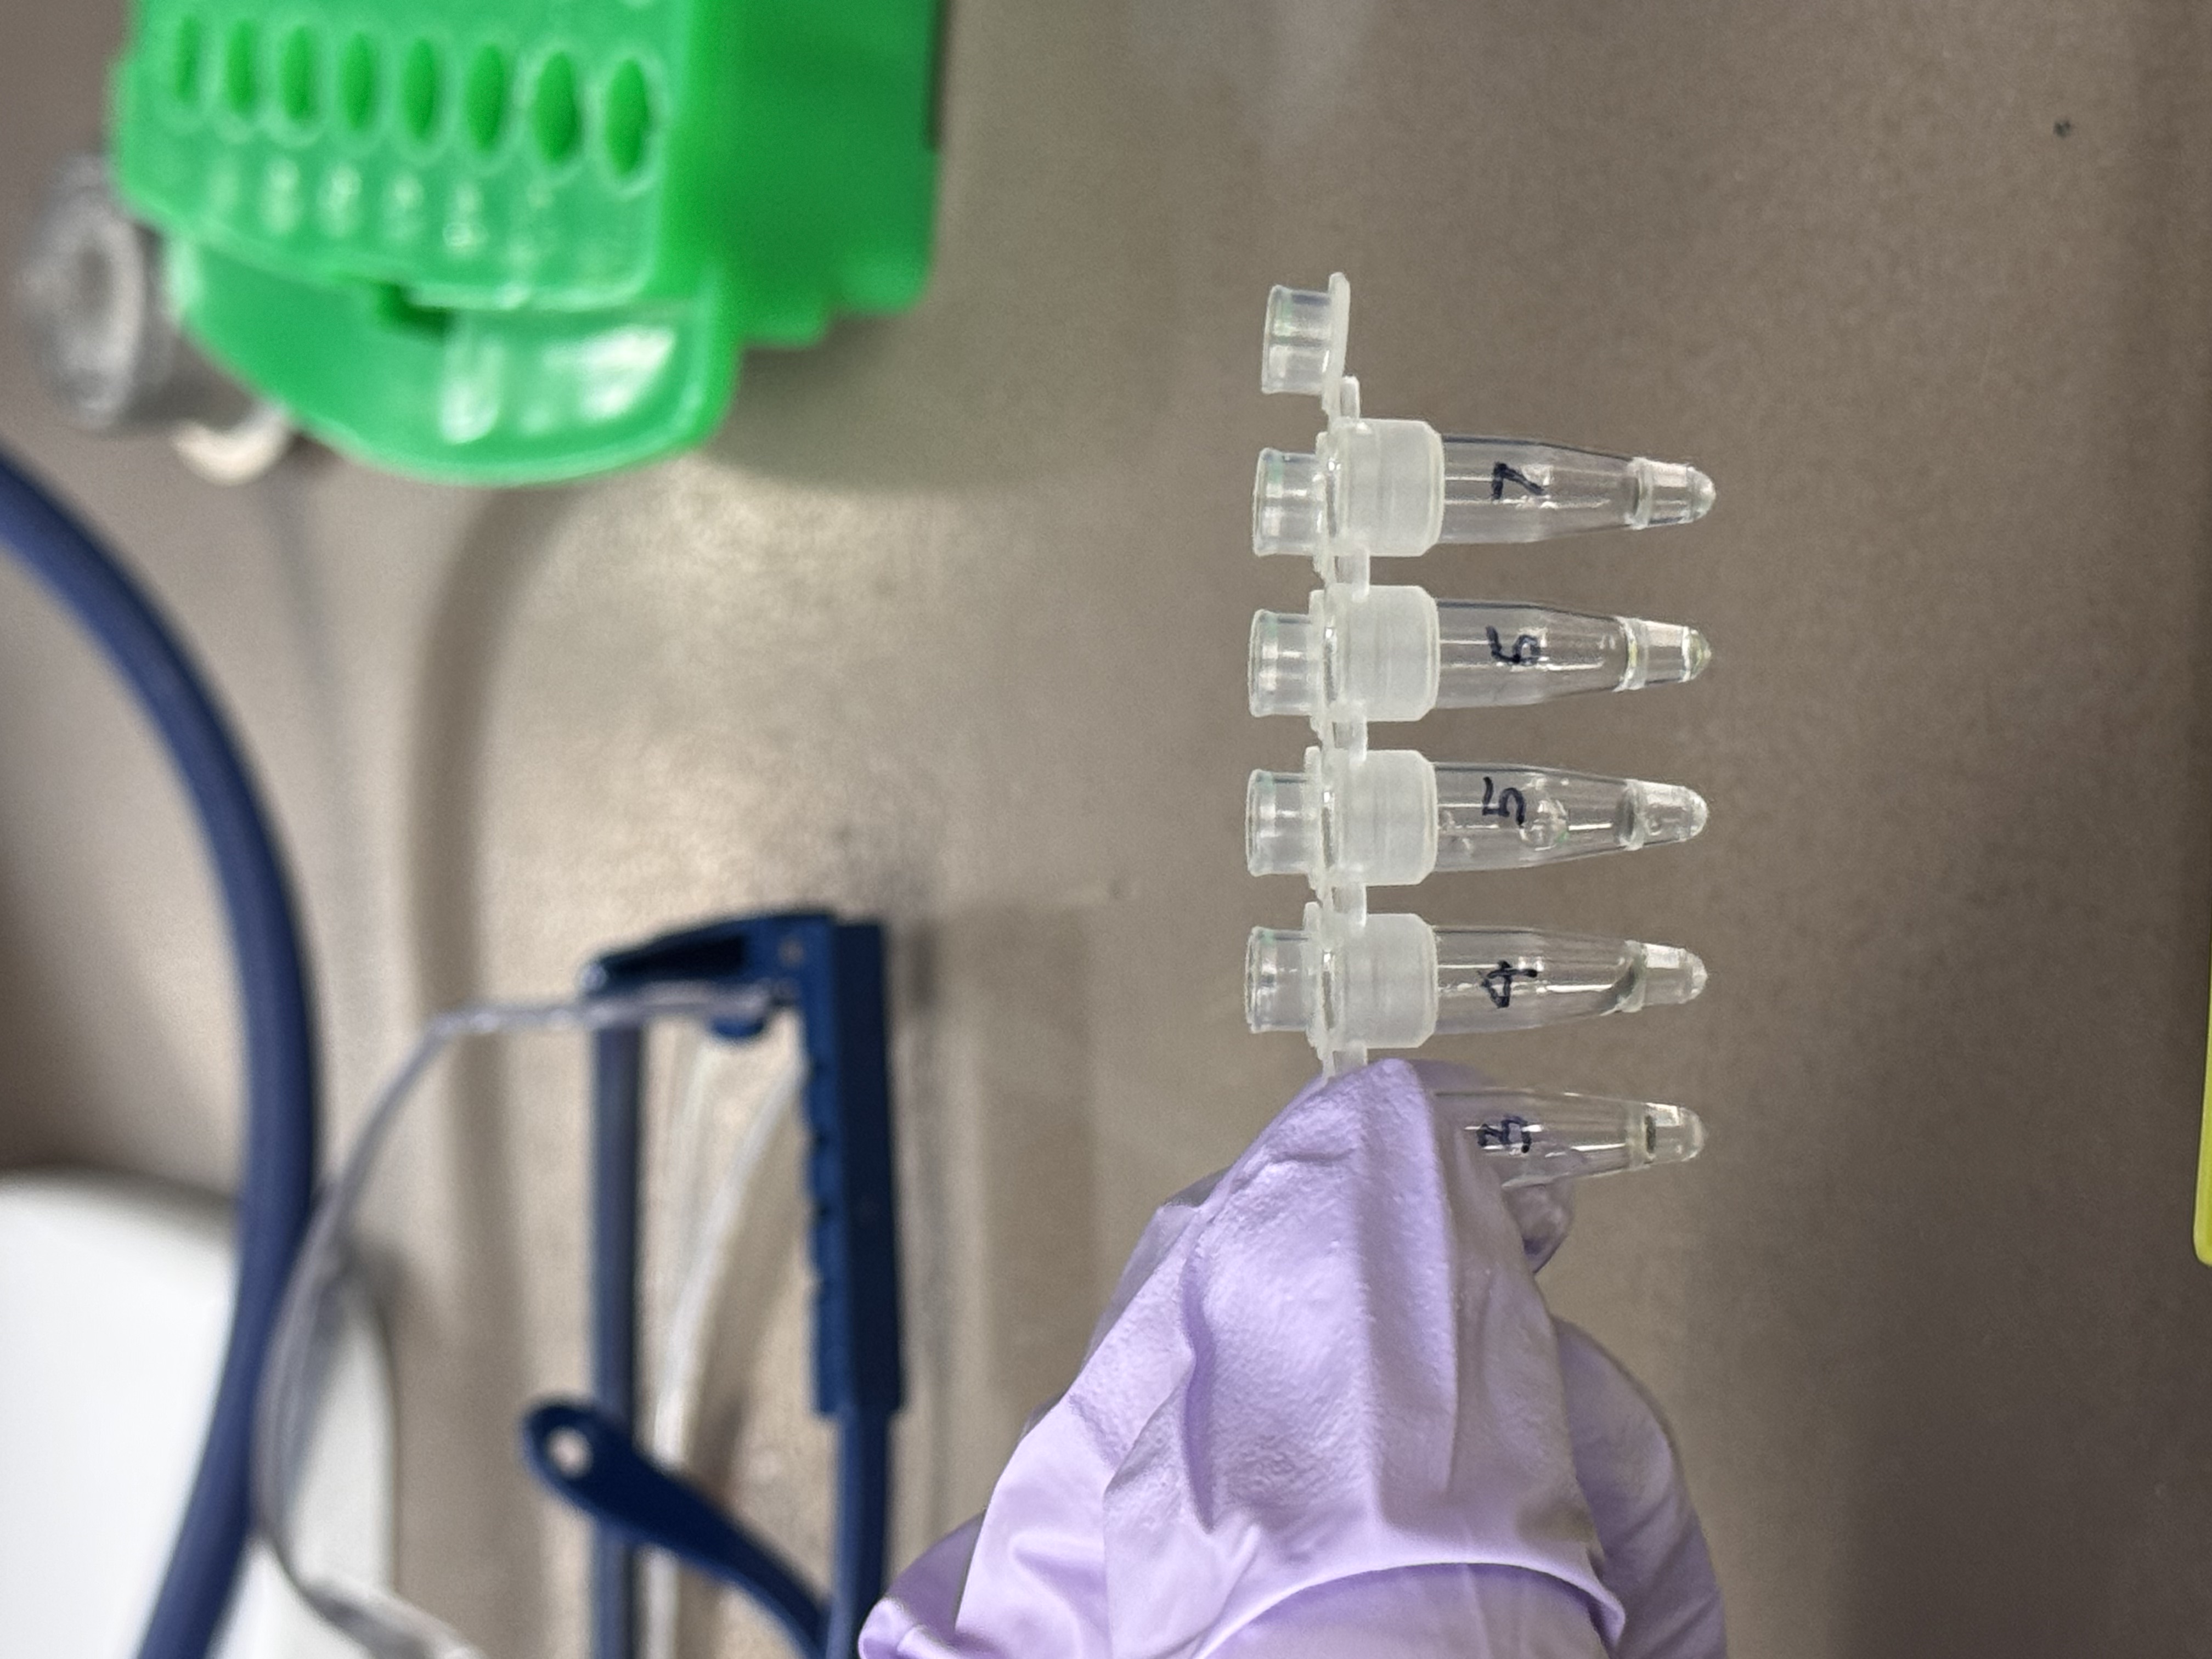
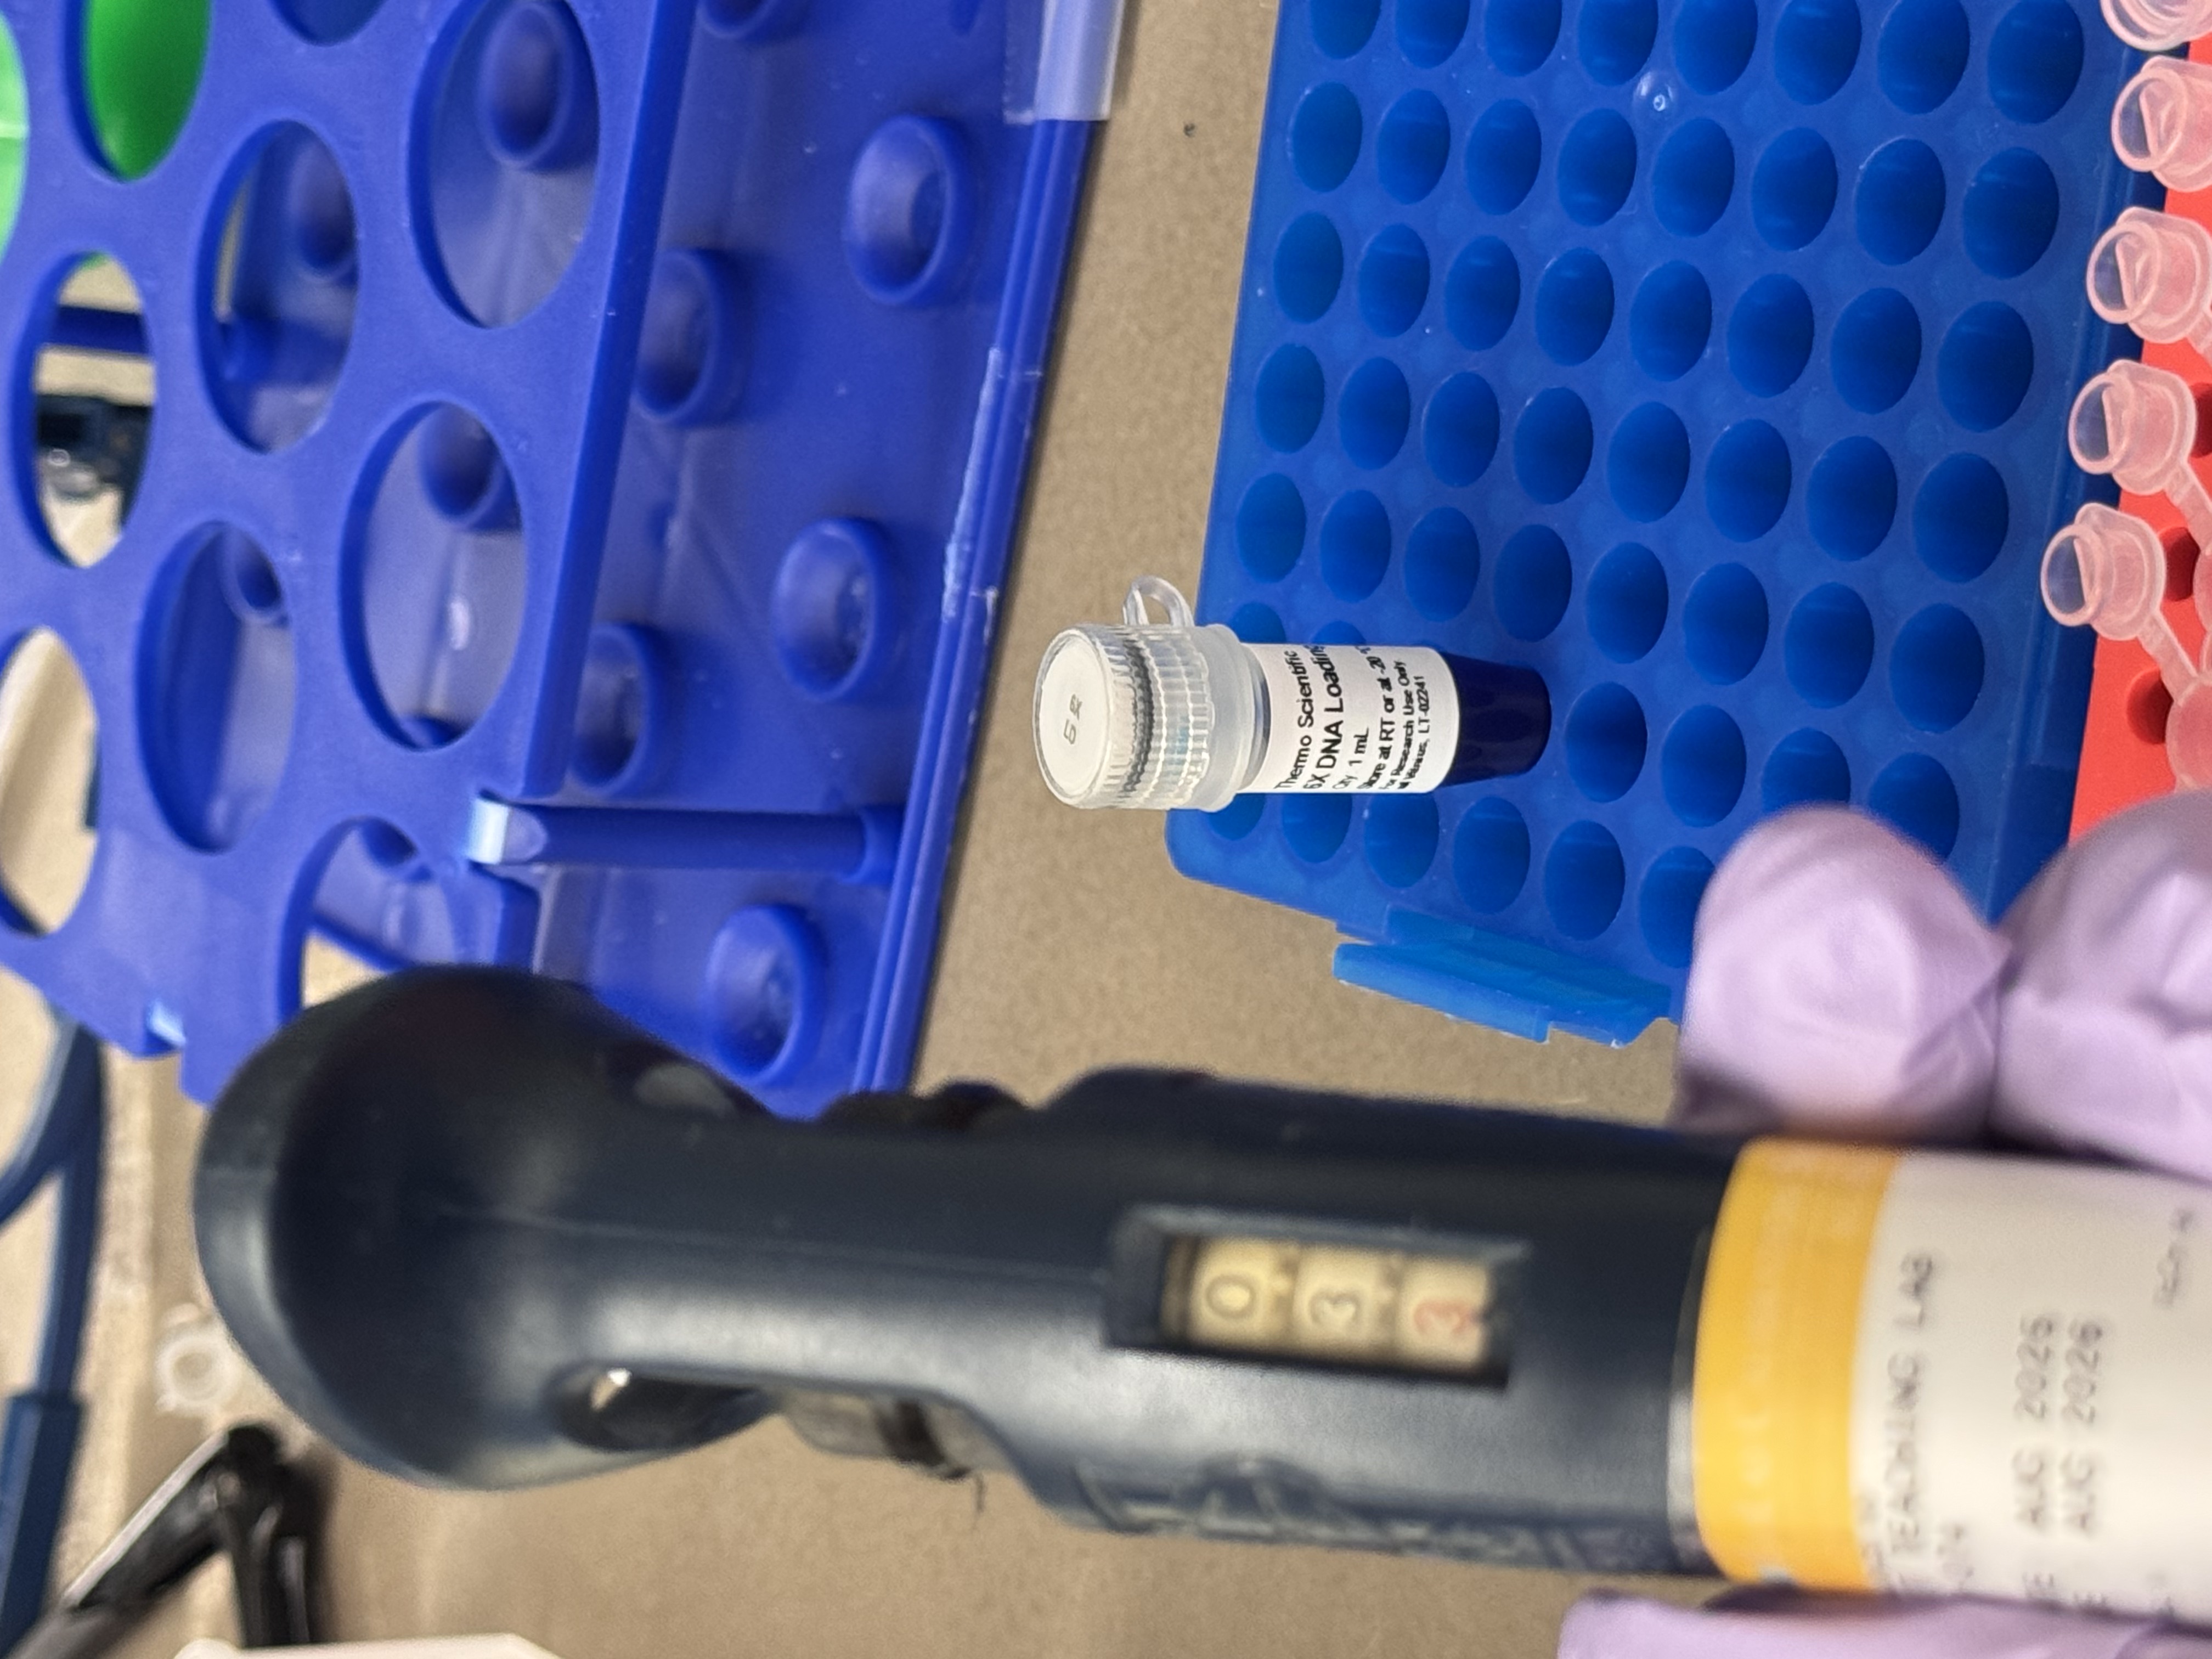
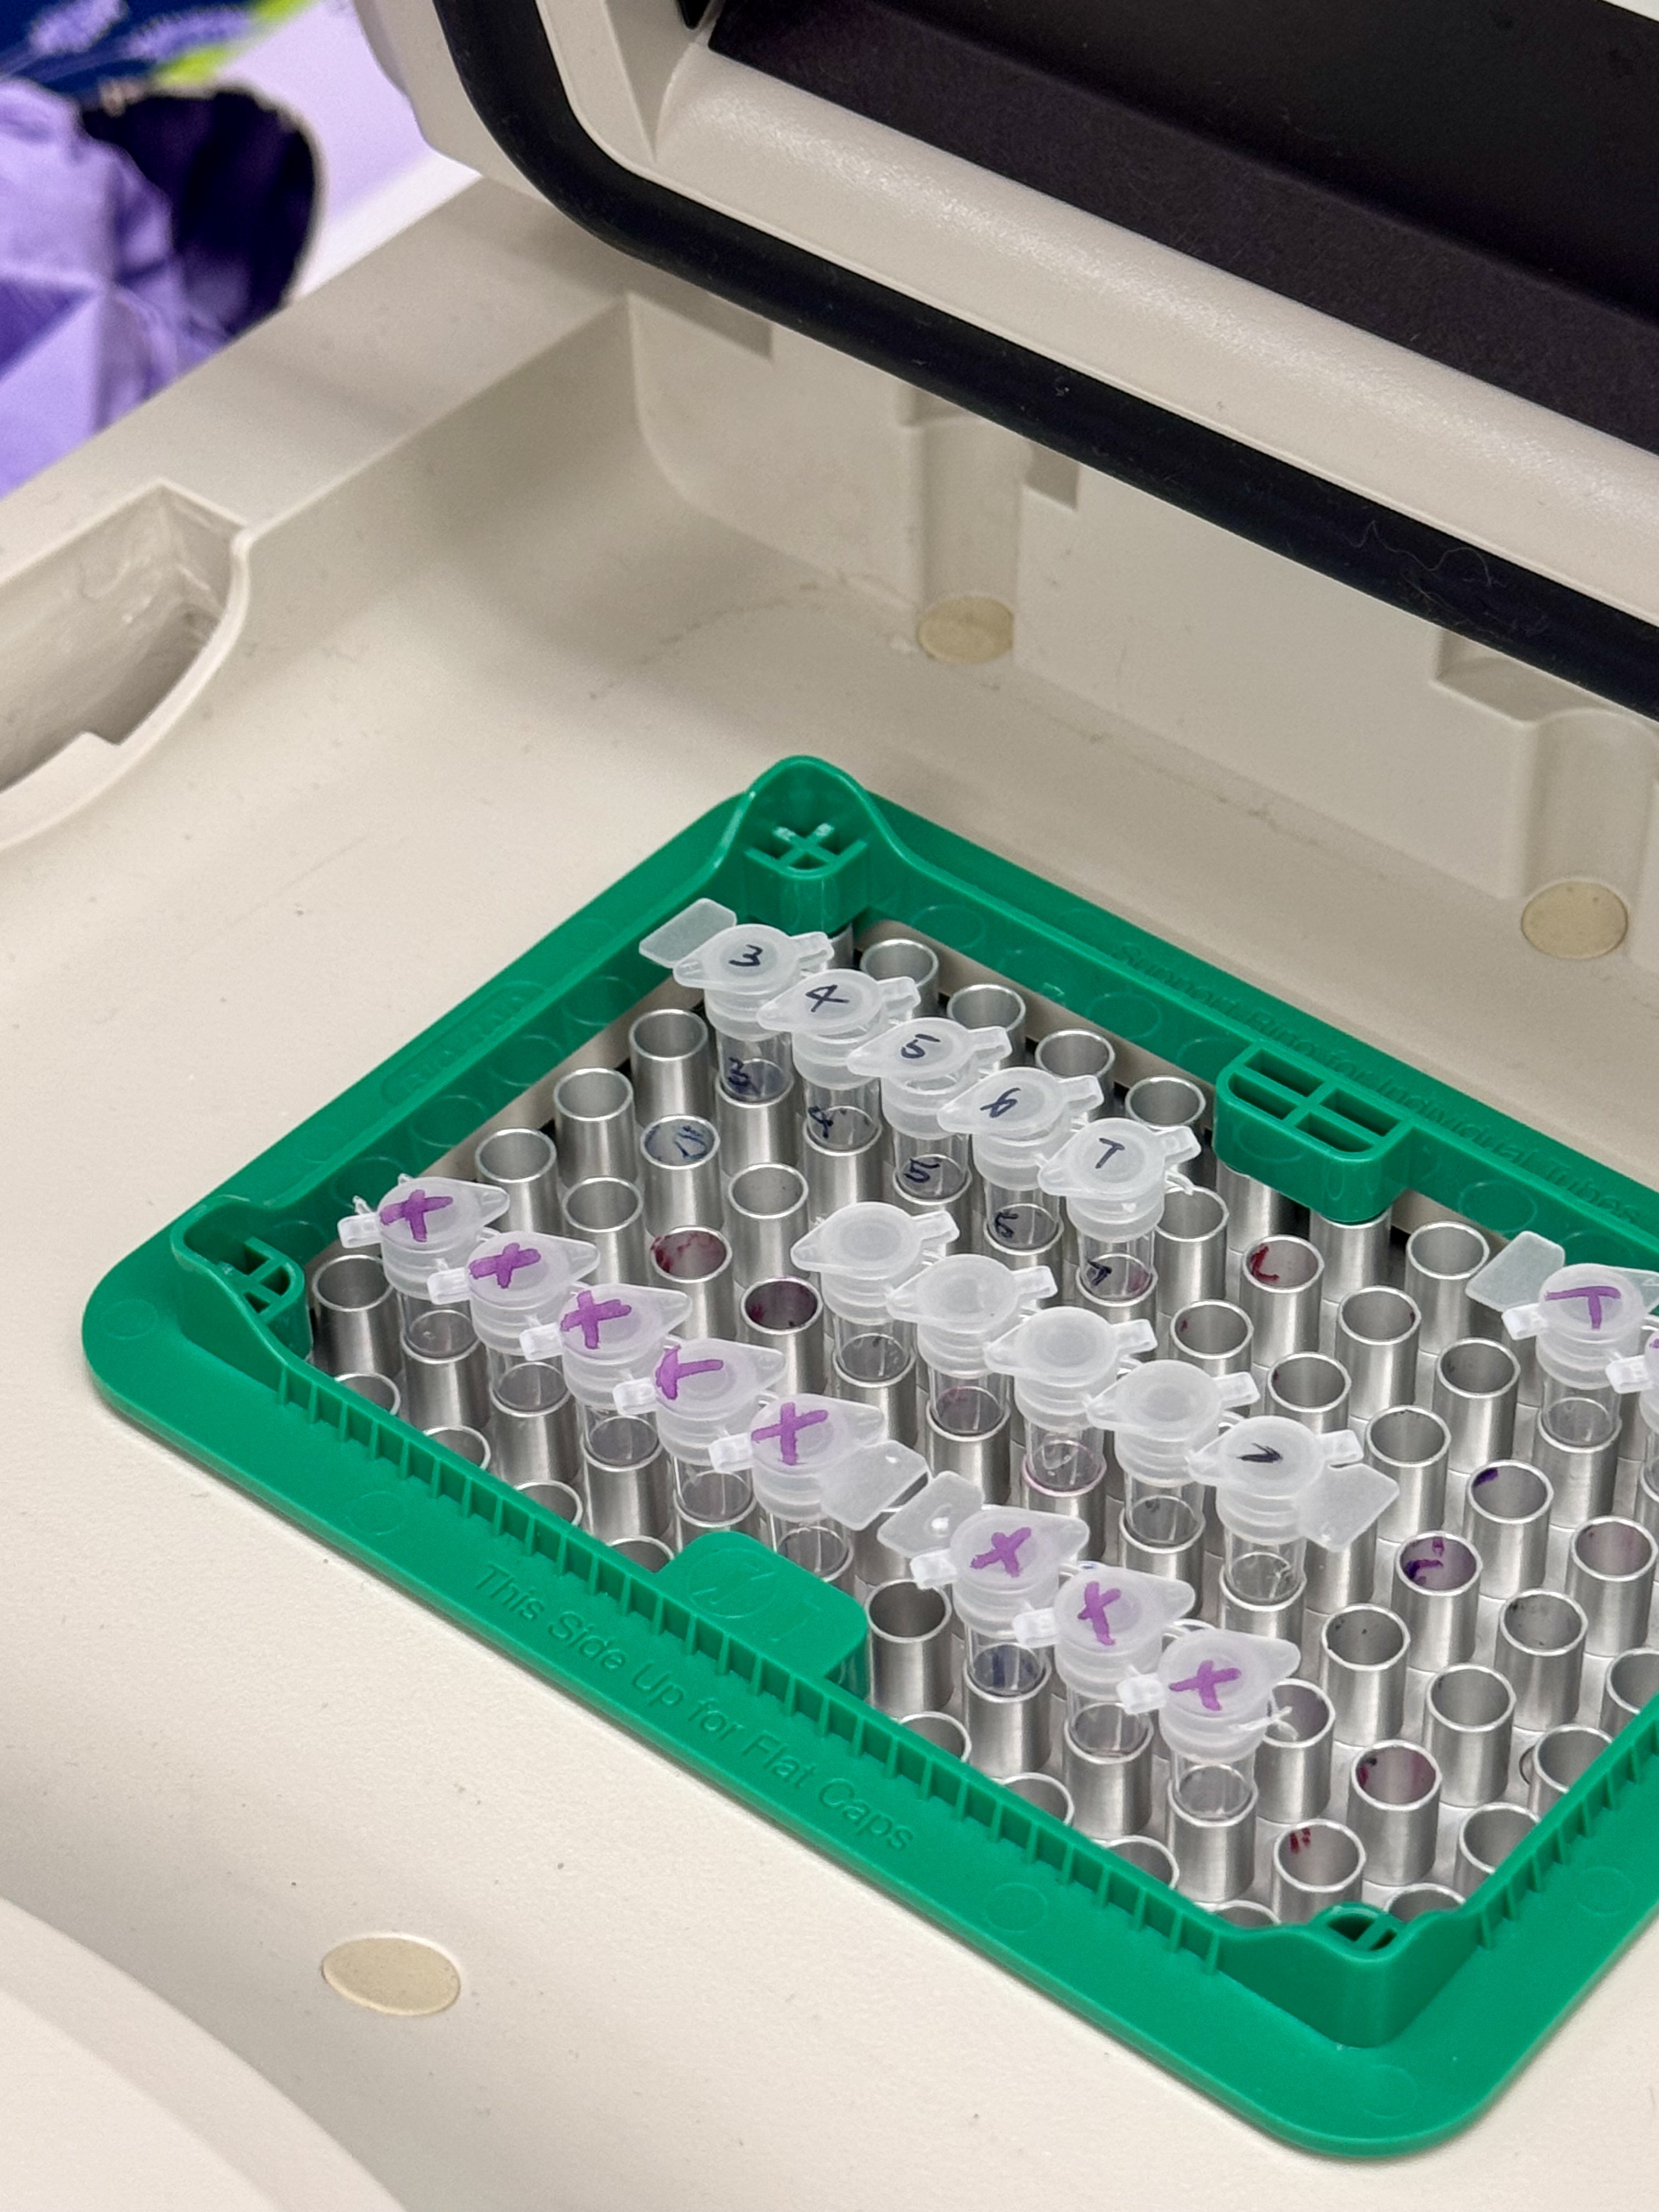
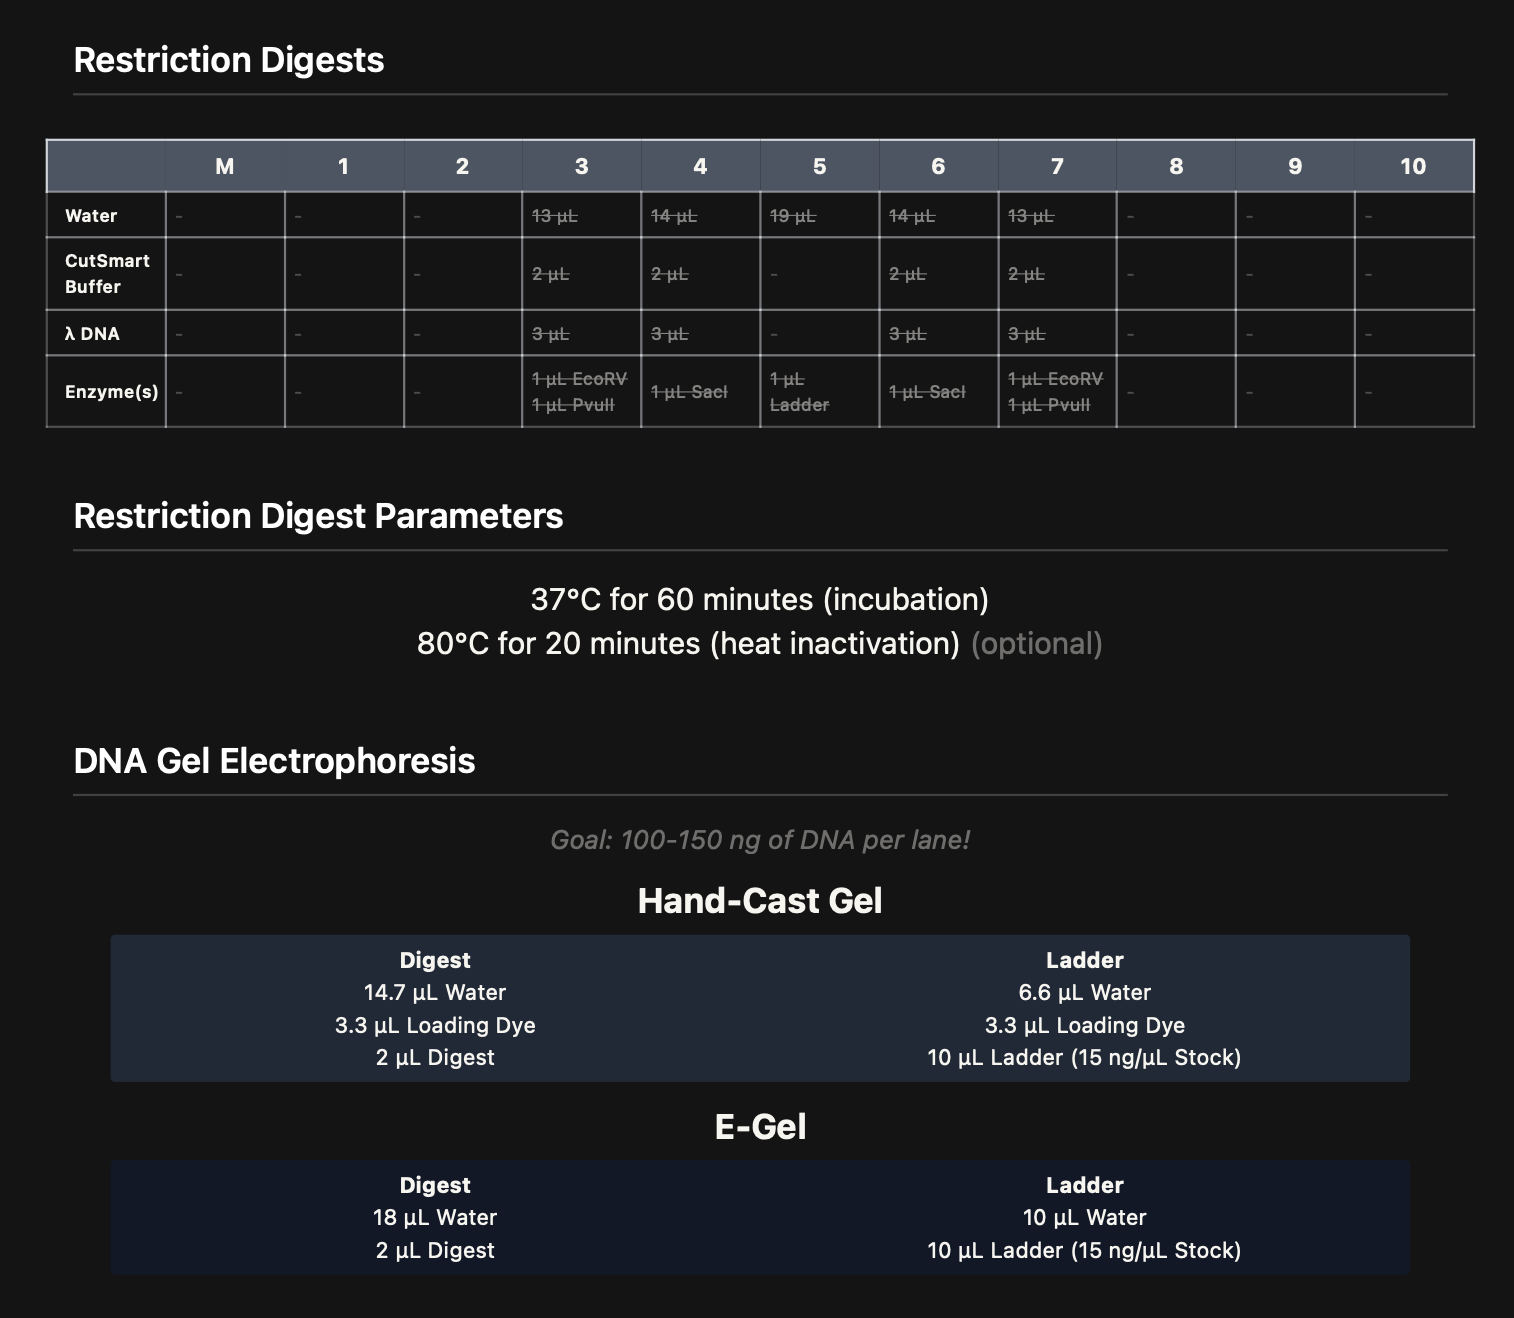
2.1 Restriction Digest
I prepared restriction digests using Lambda DNA and 10X CutSmart buffer for all reactions. Enzymes were added last.
DNA: Lambda DNA
Buffer: 10X CutSmart
Enzymes: restriction enzymes
Incubation: 37°C, 40 min
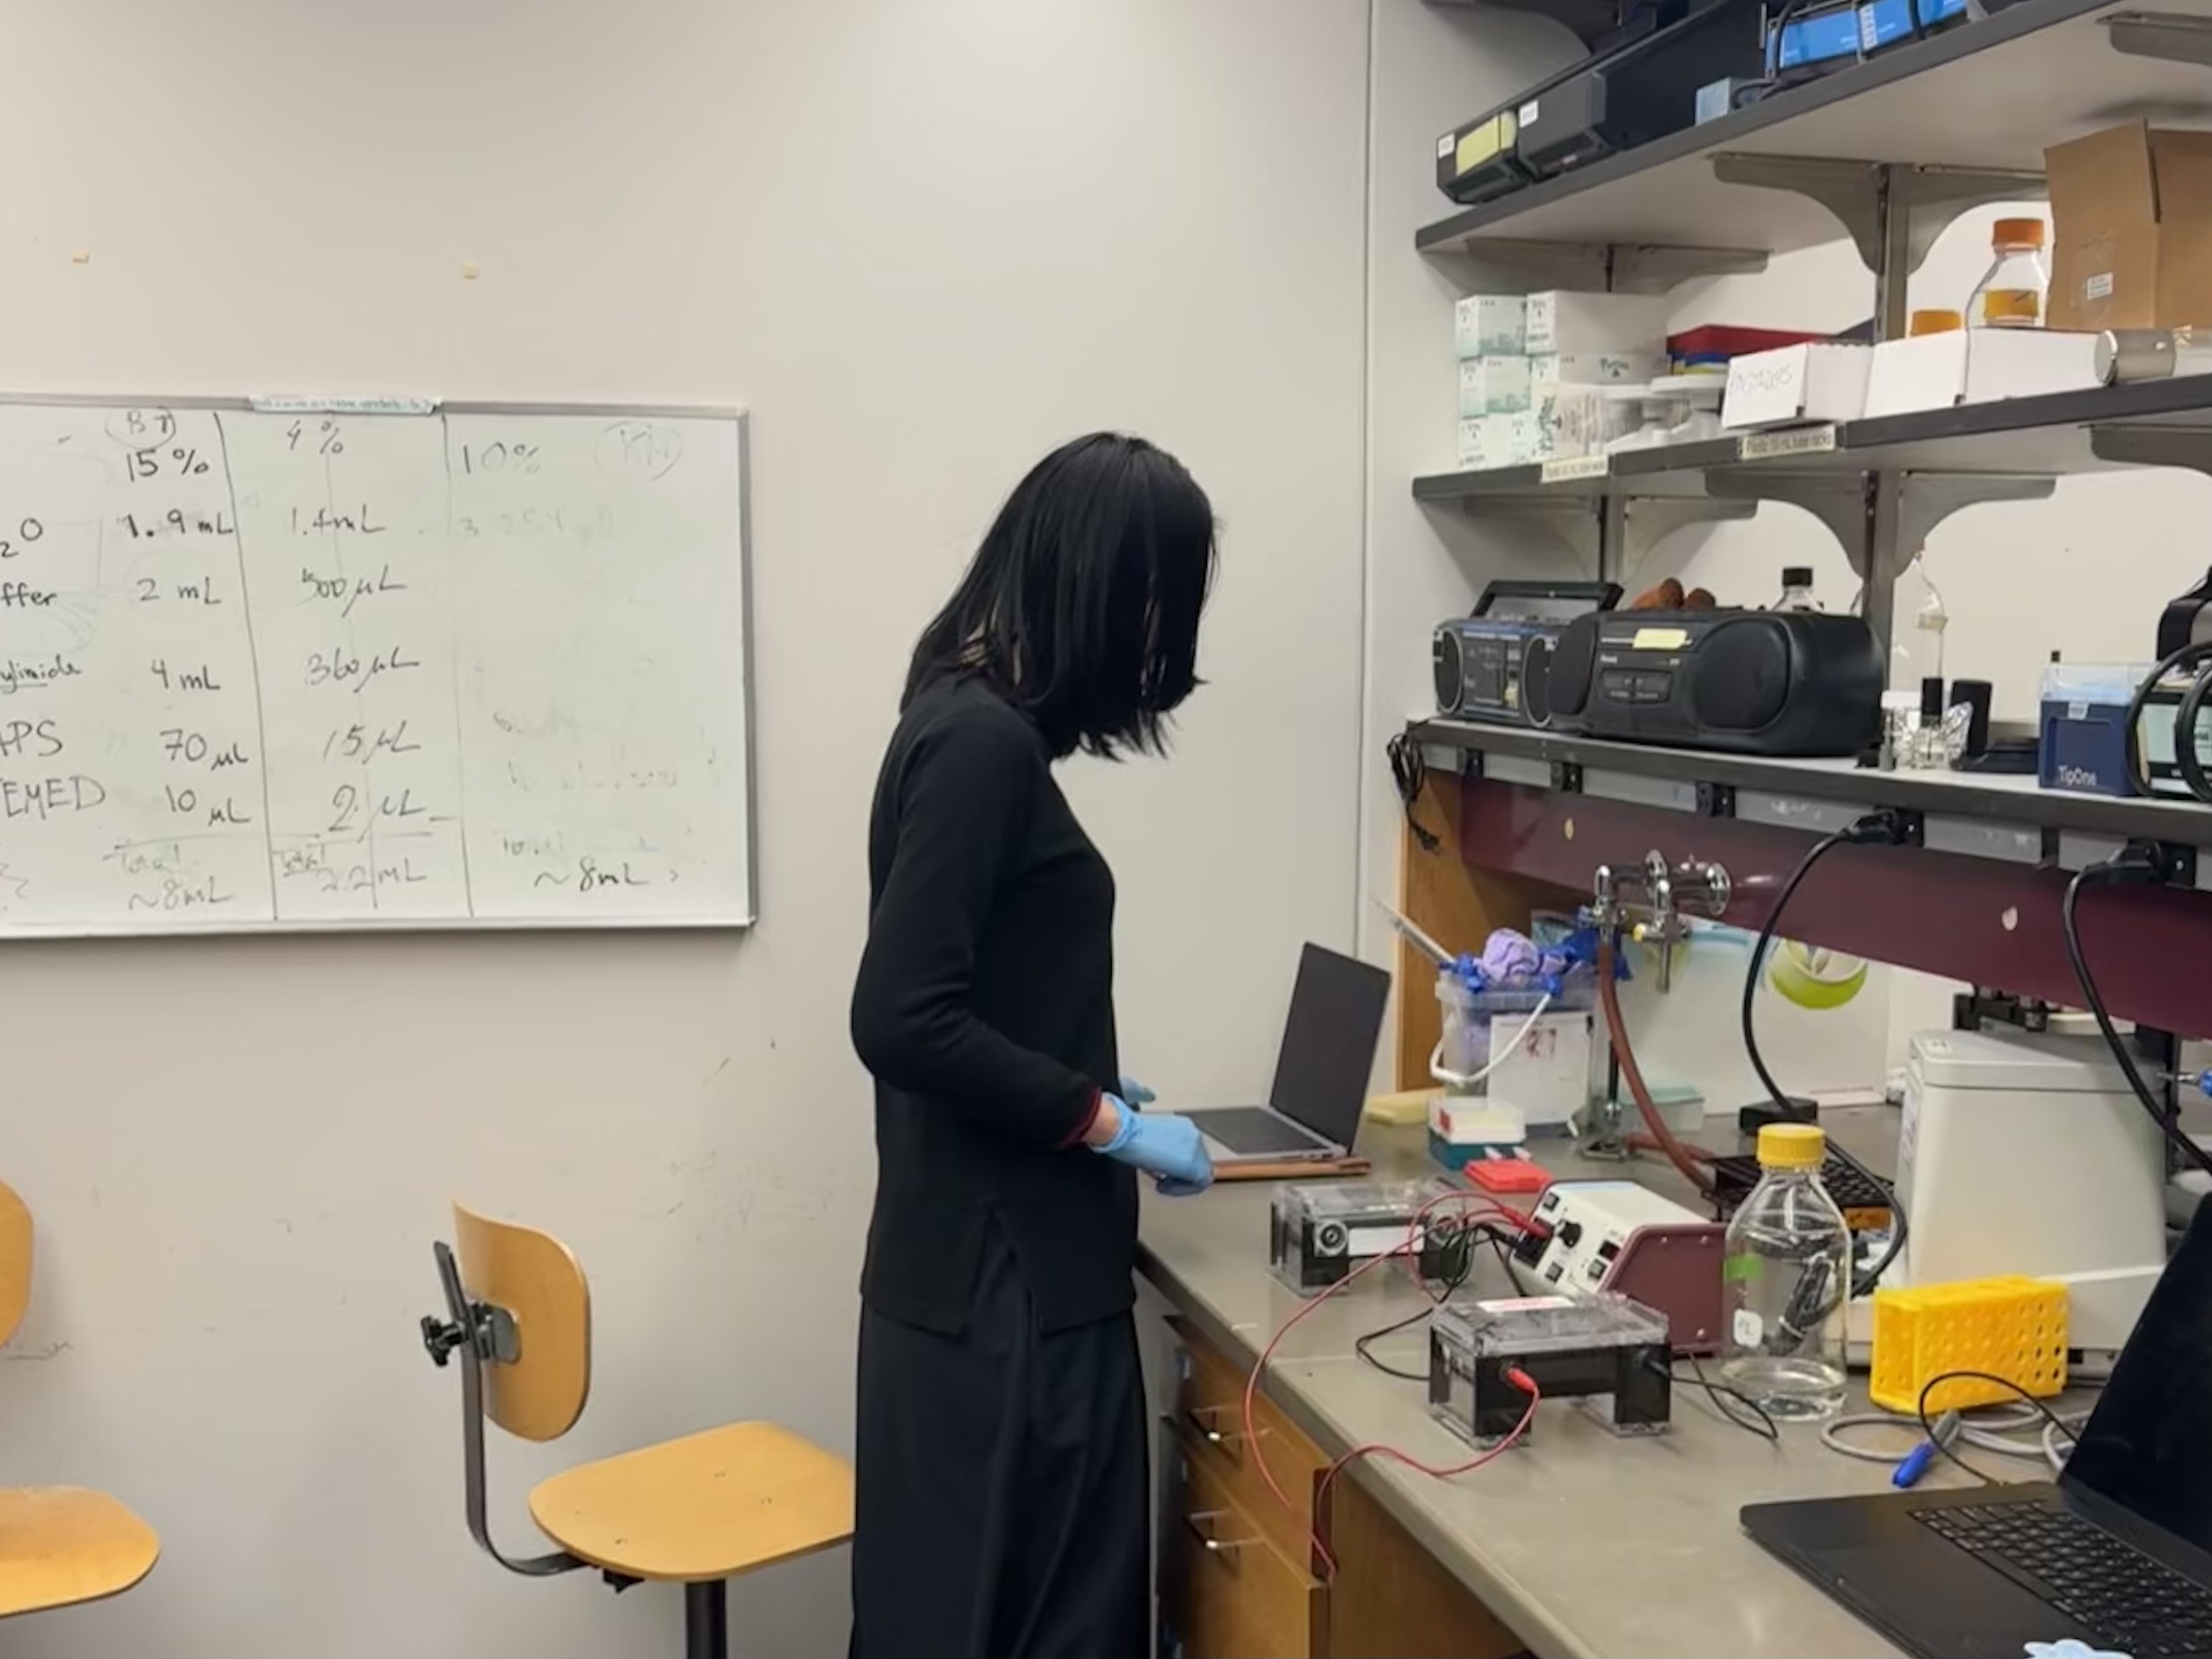
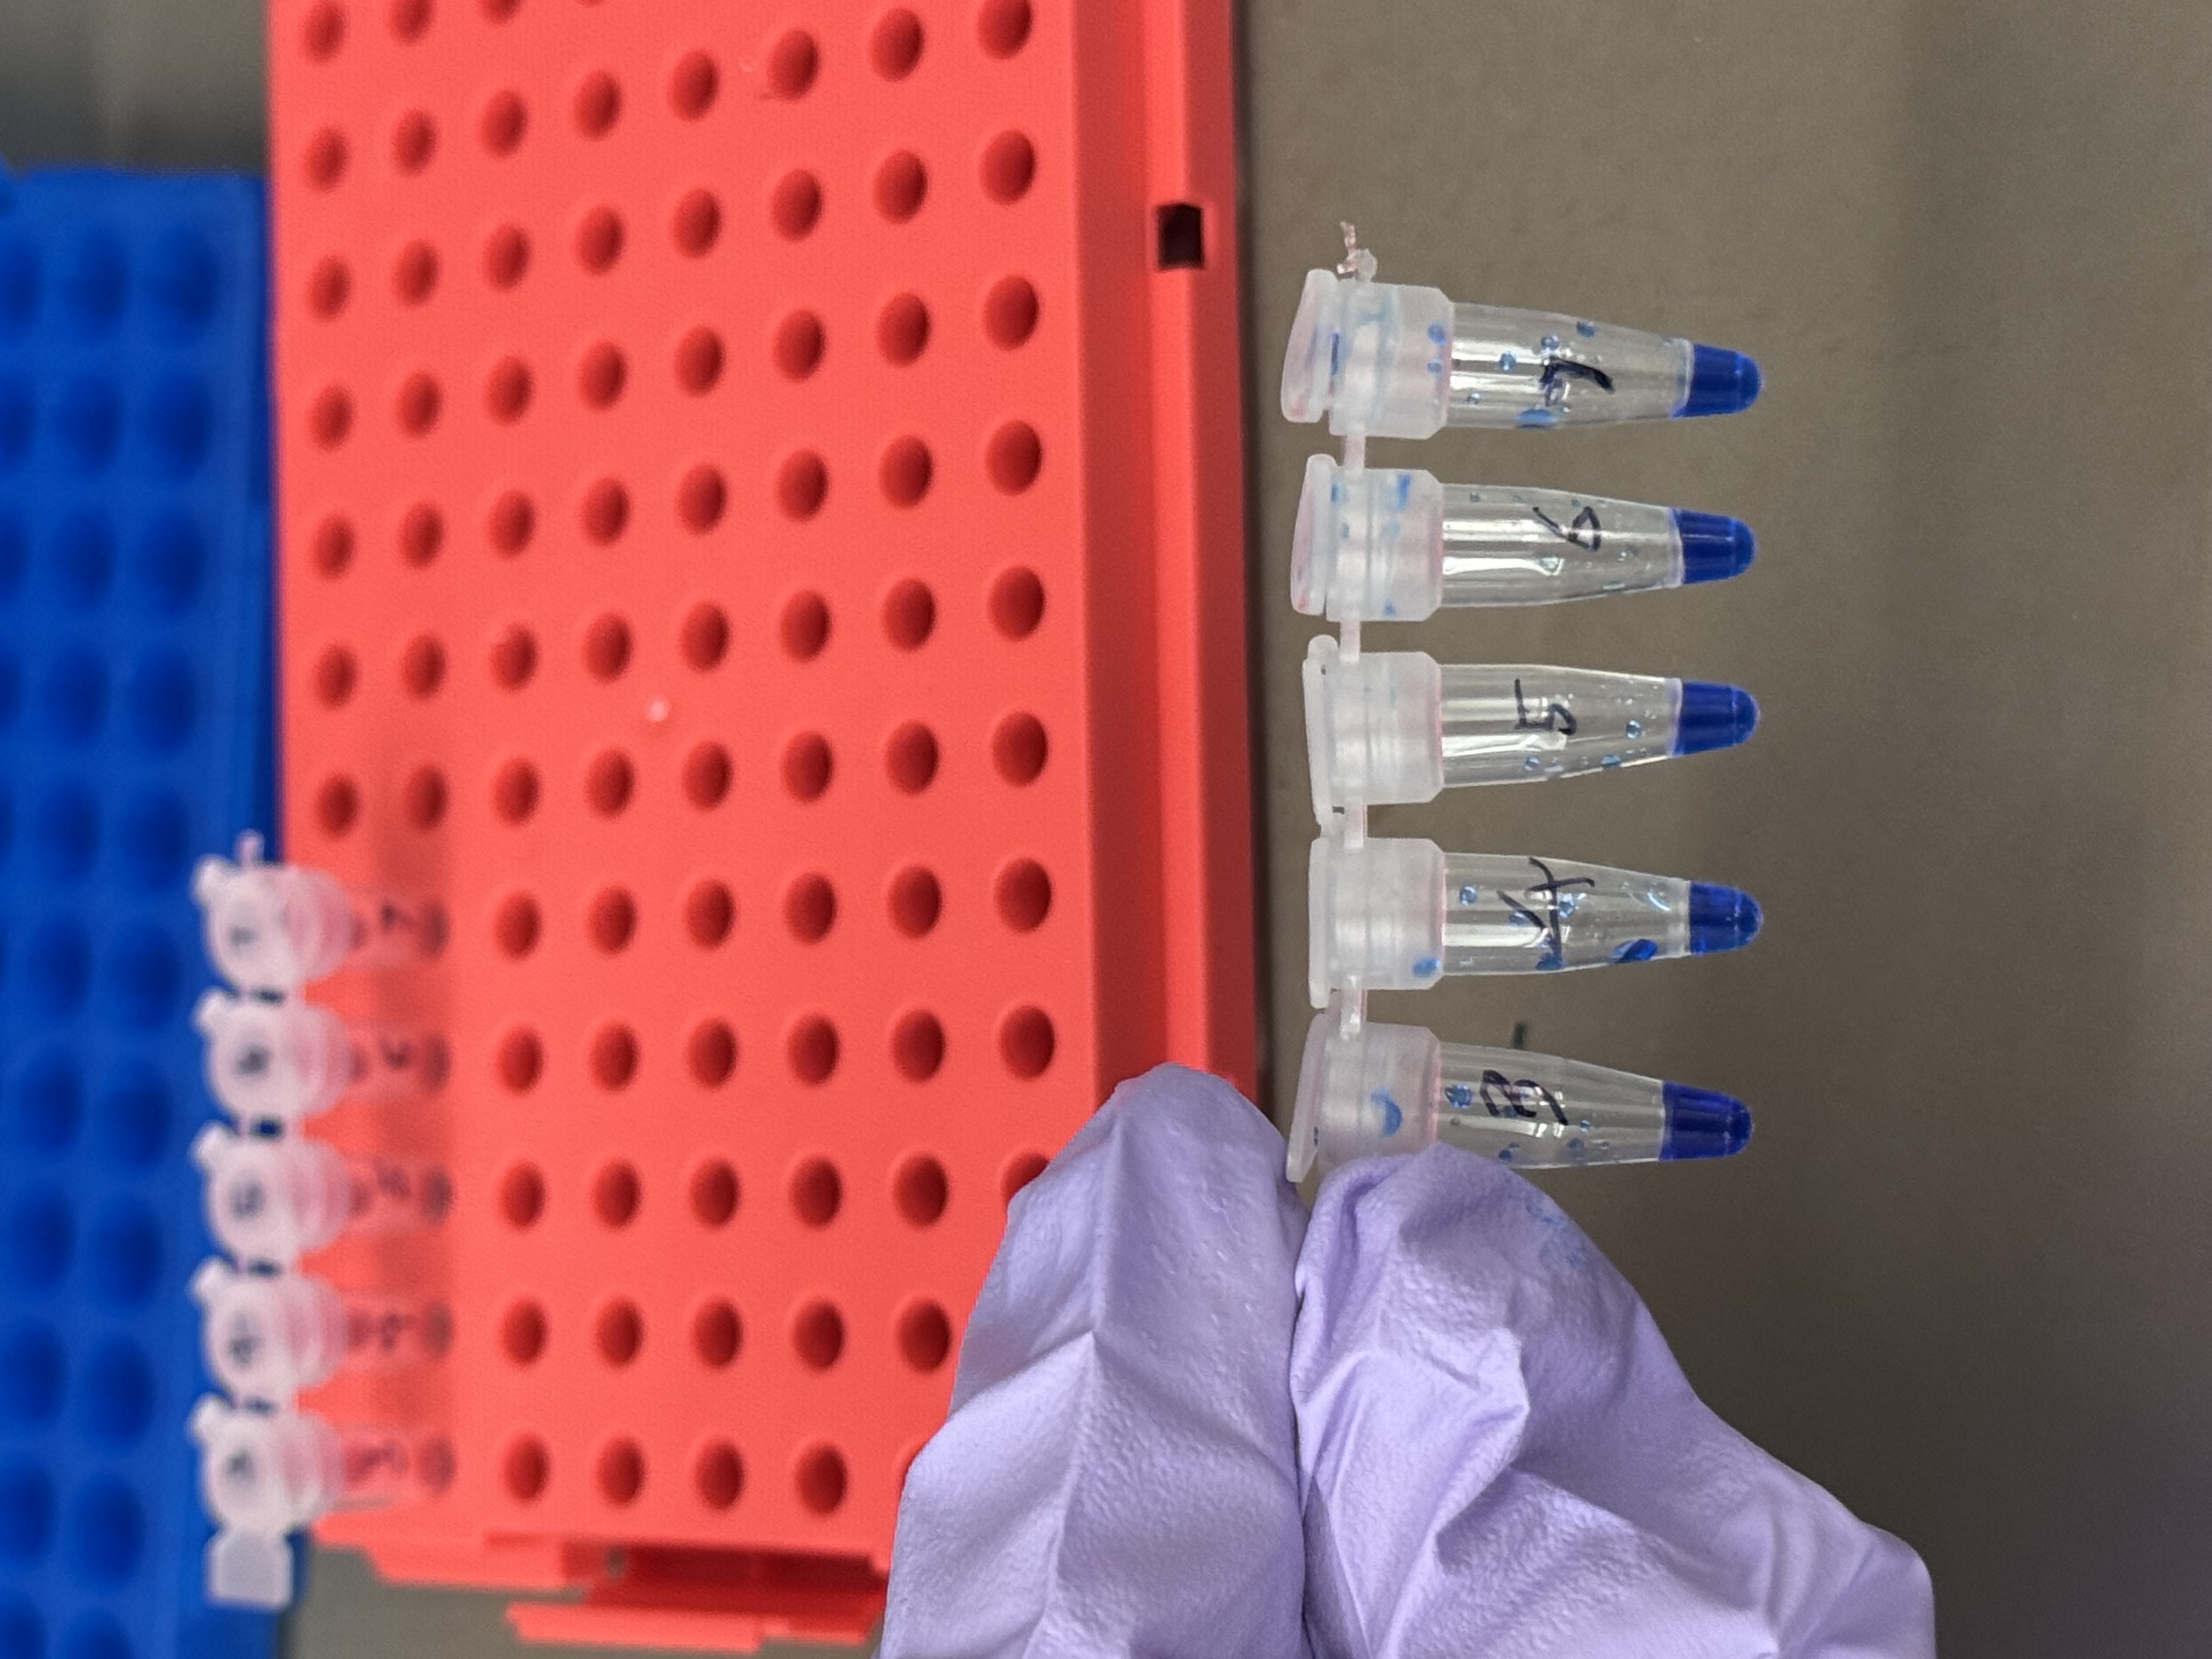
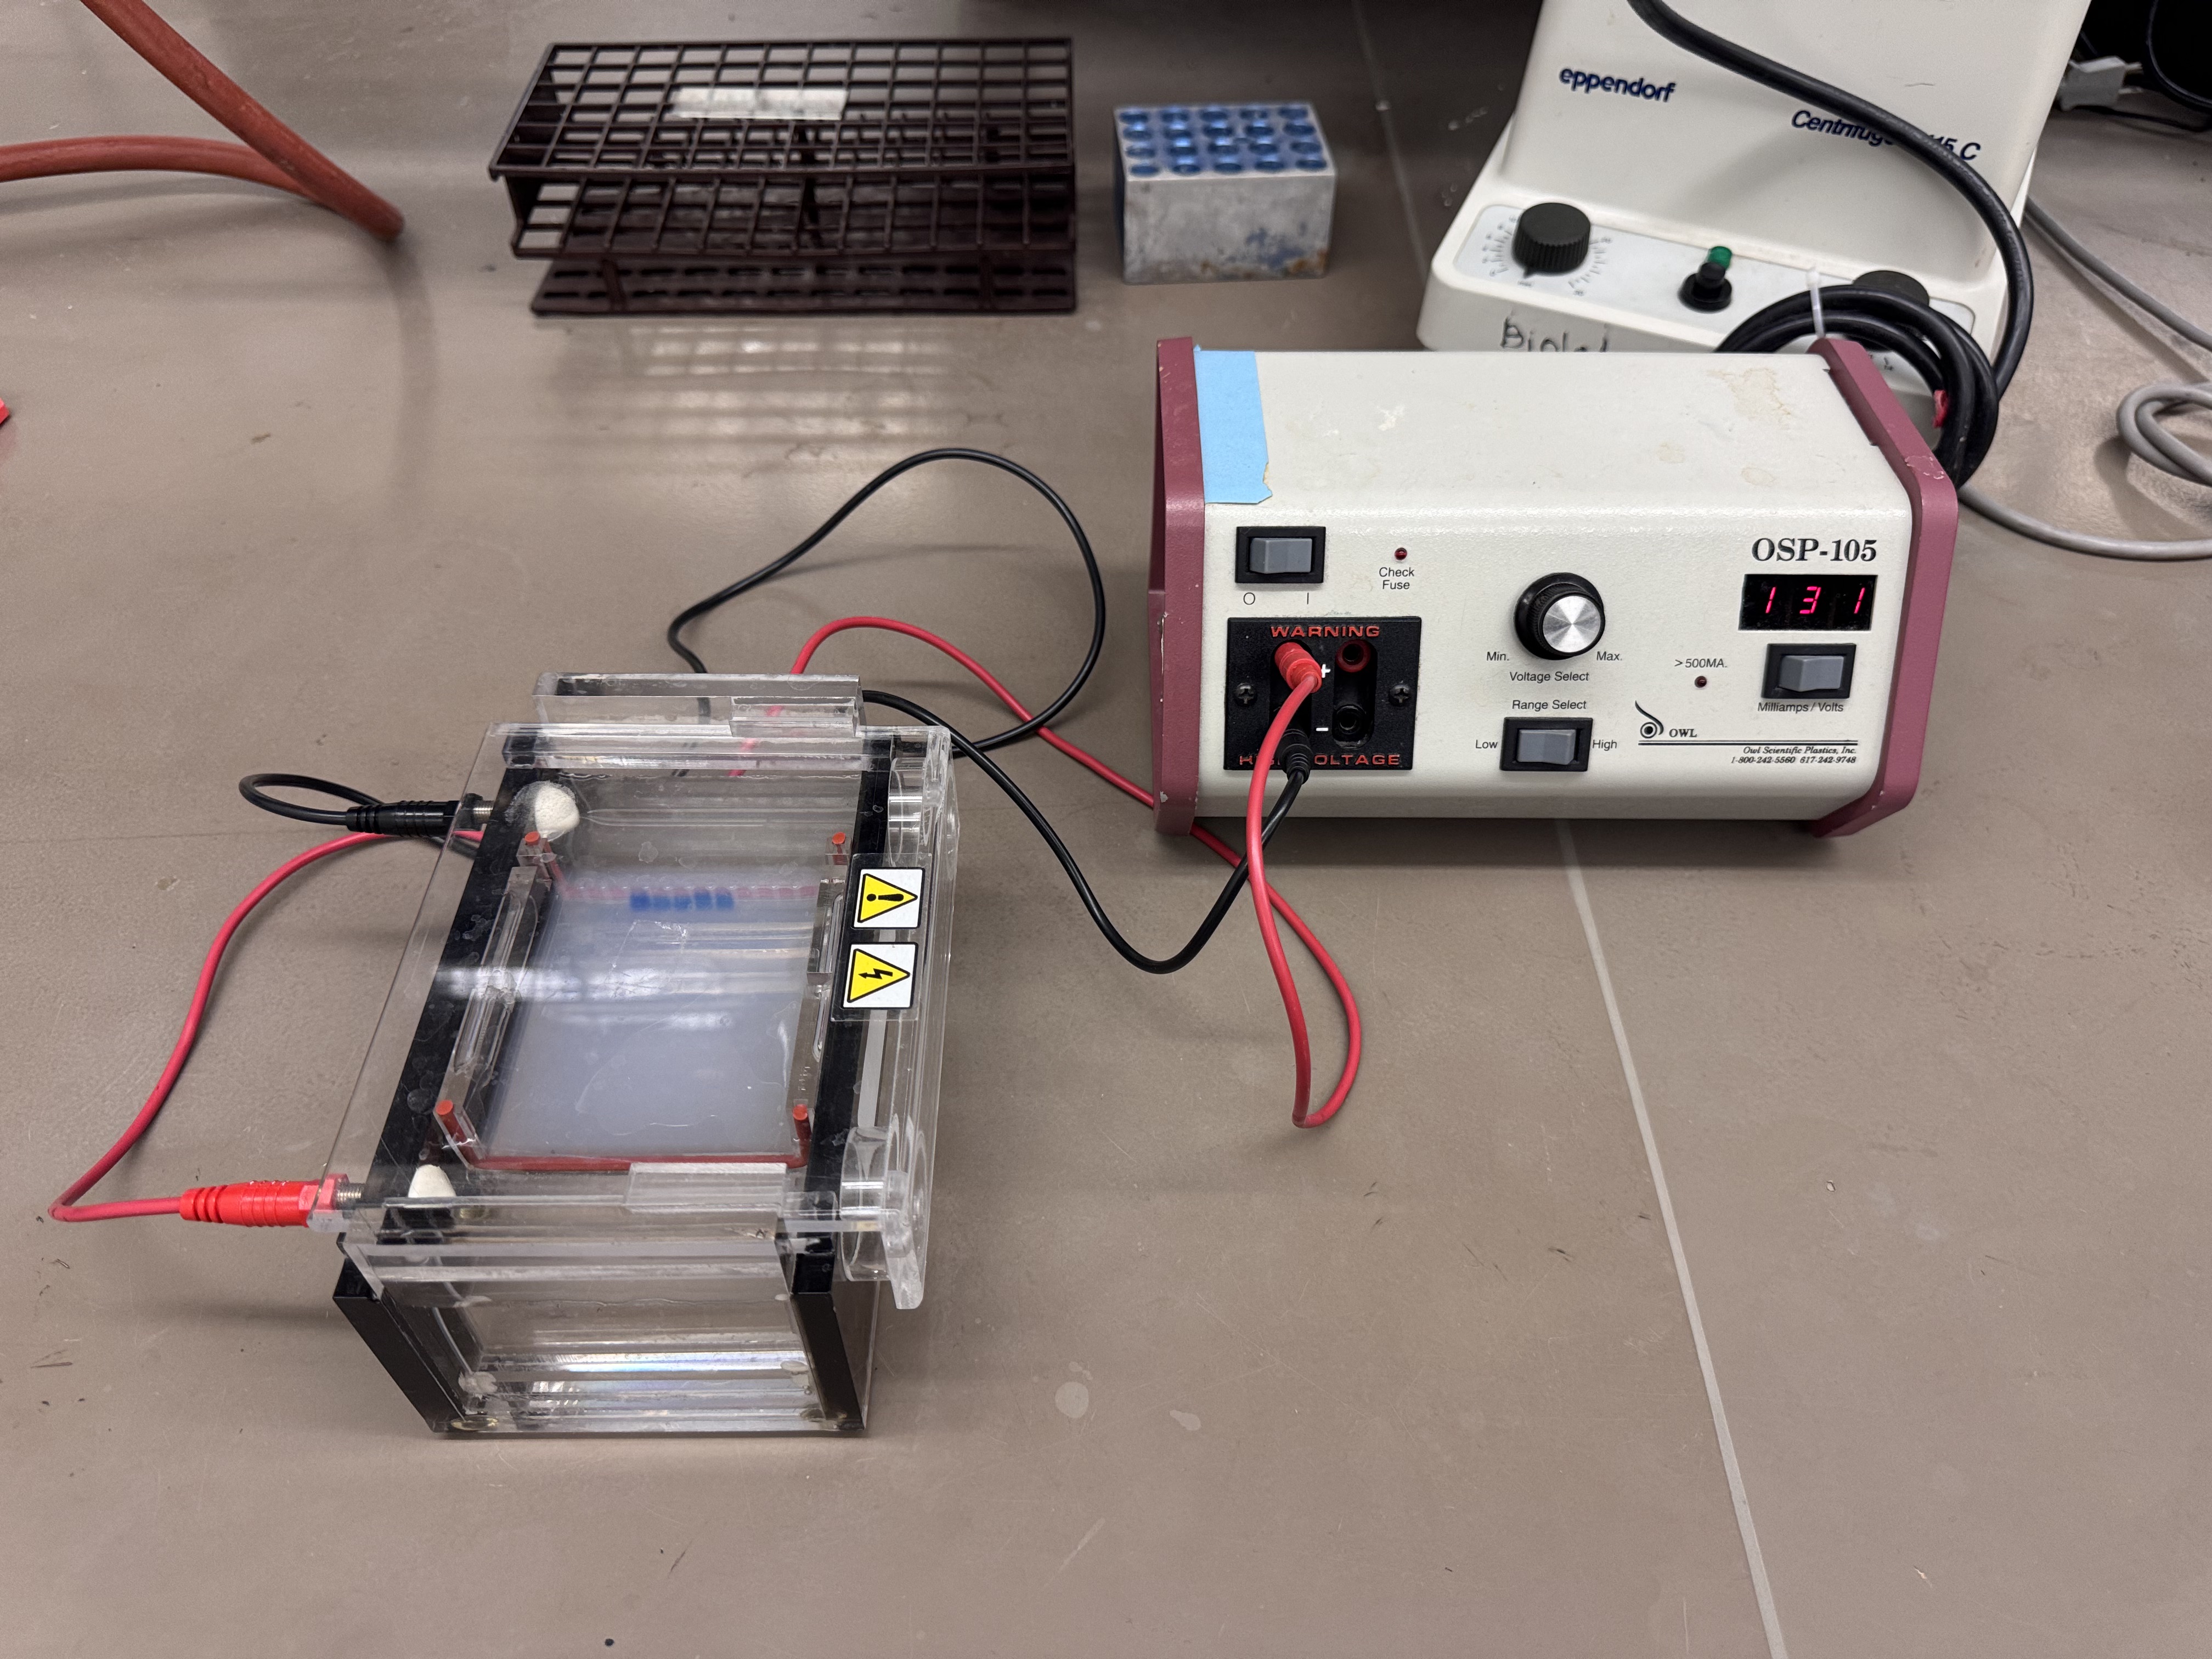
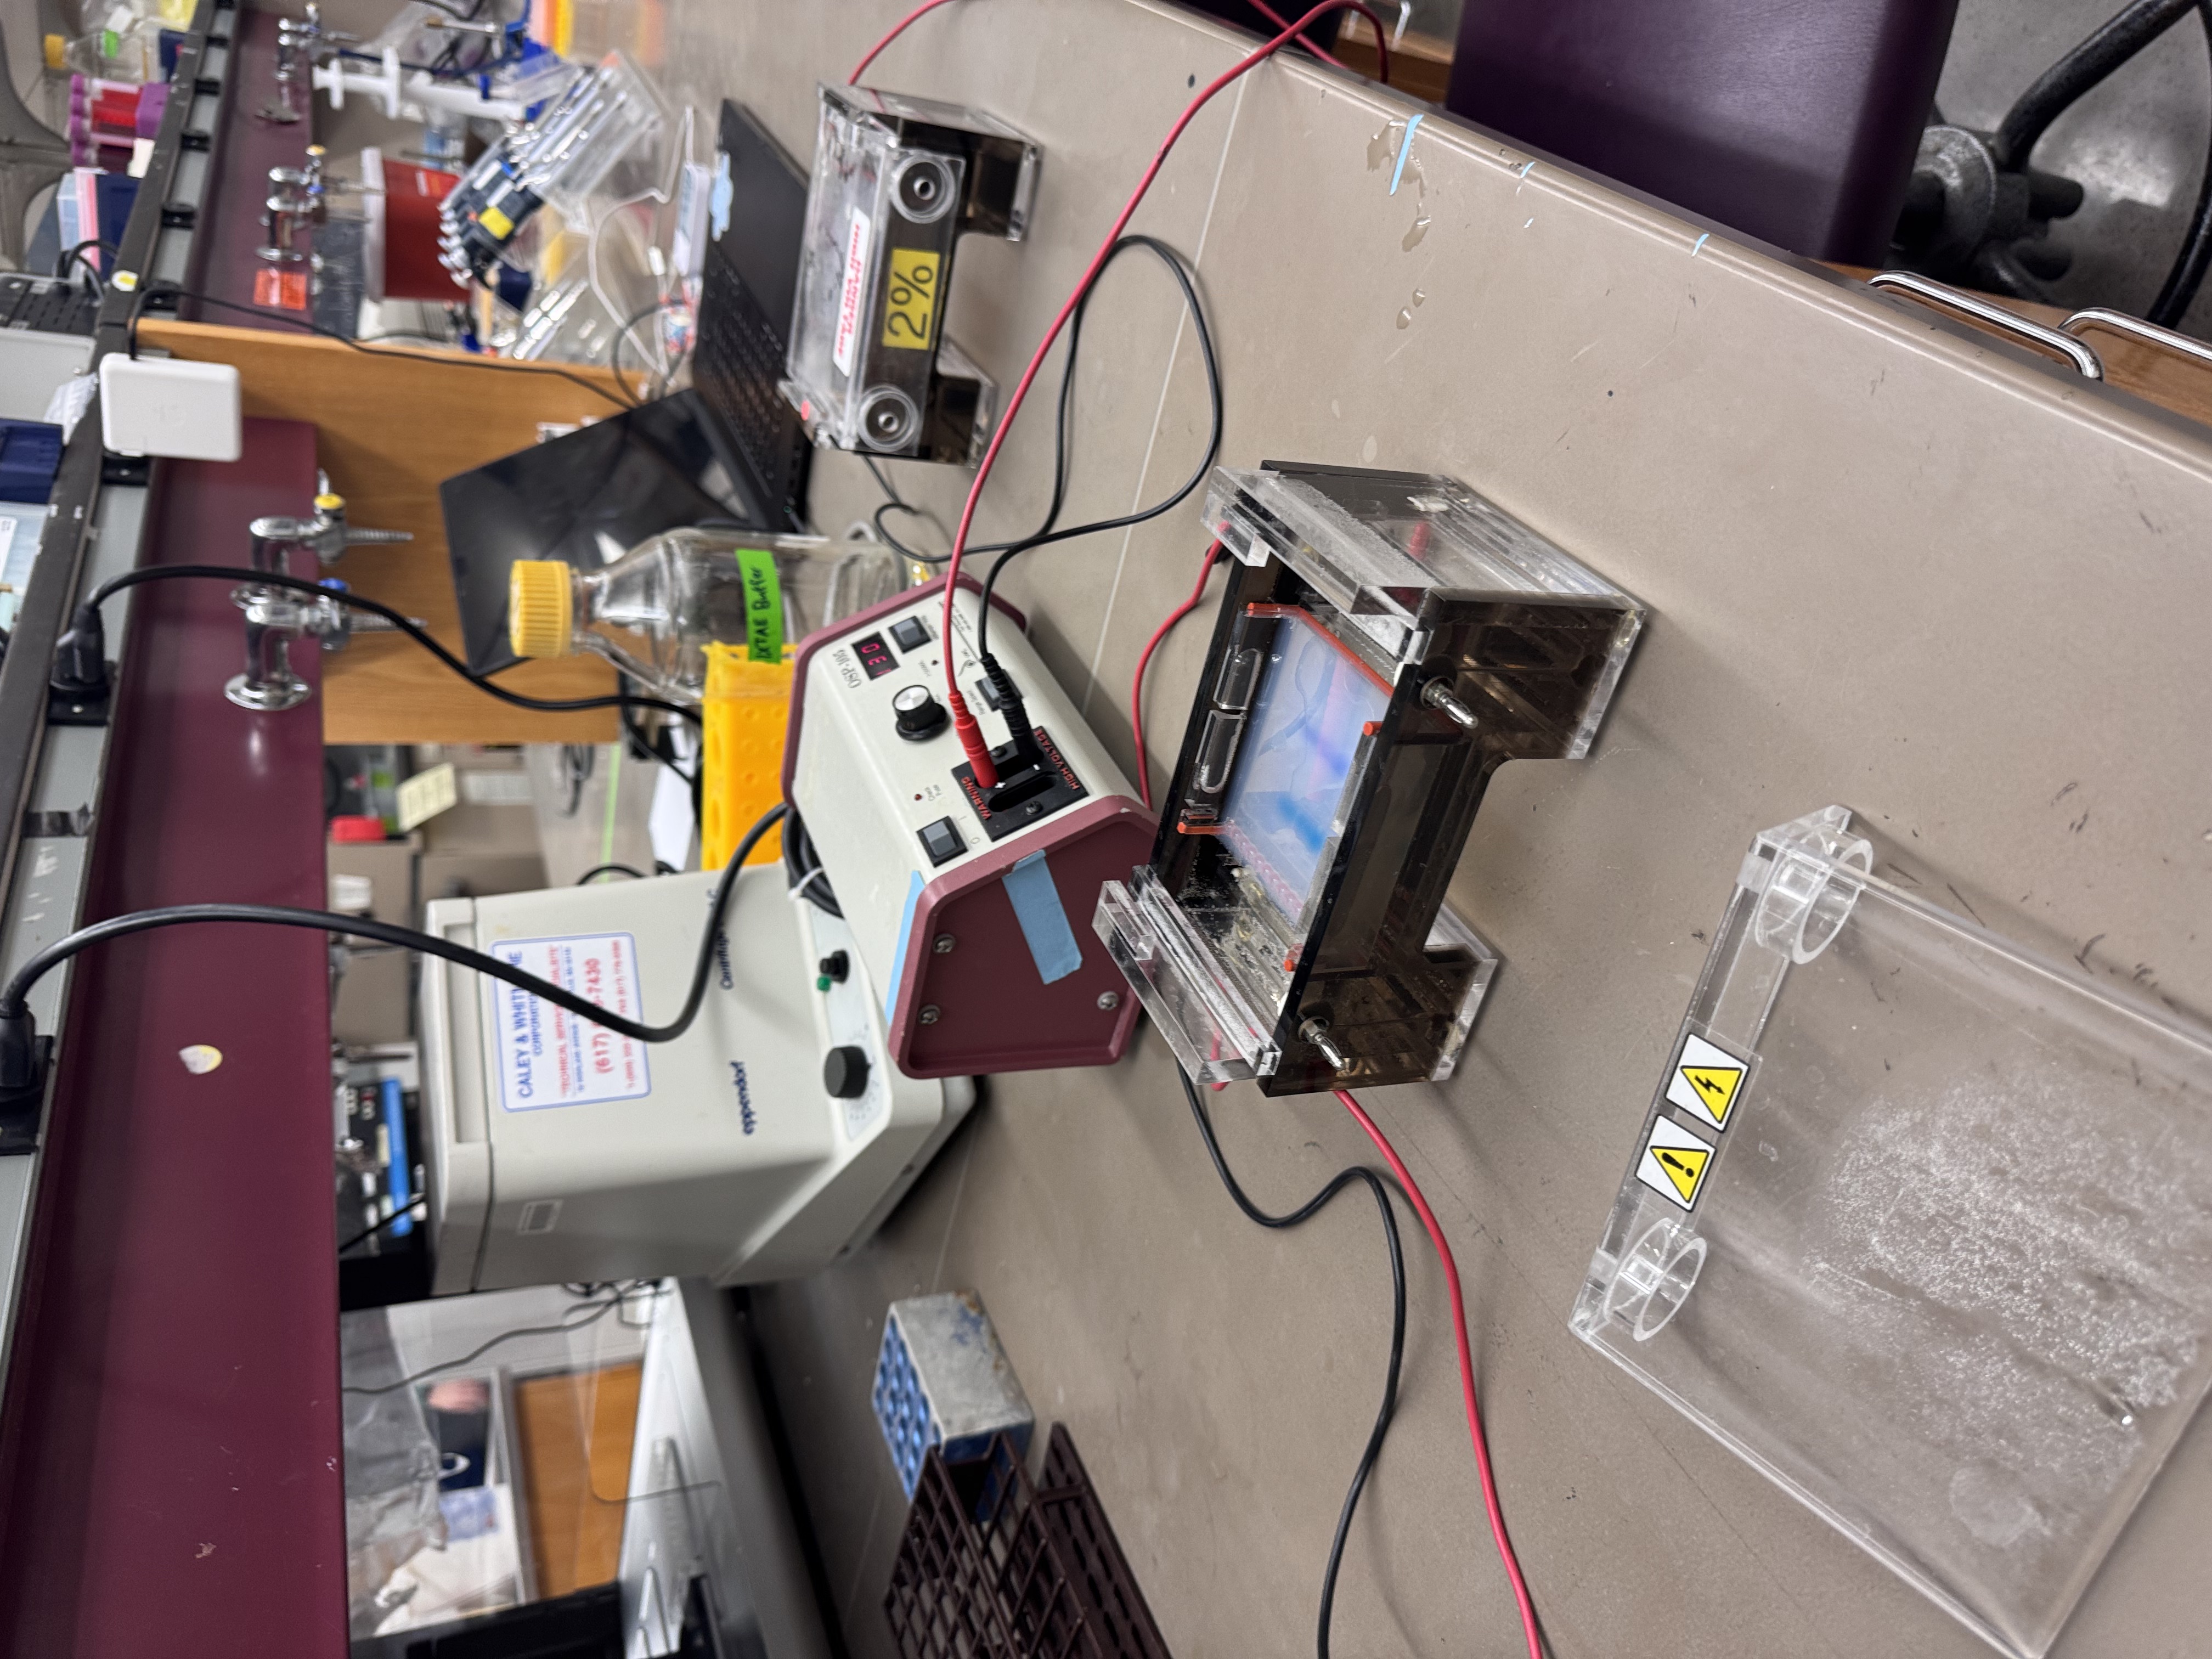
2.2 Gel Electrophoresis
I used a 1% agarose gel and loaded the digested samples into the wells.
Voltage: 130V
Time: 40 mins
2.3 Deviation
The intended mouth lane (lane 5) in Benchling was Lambda_DNA_Thermo_(NC_001416) + SalI. Due to an Automation Art configuration error, the corresponding wet-lab reaction was prepared without SalI.
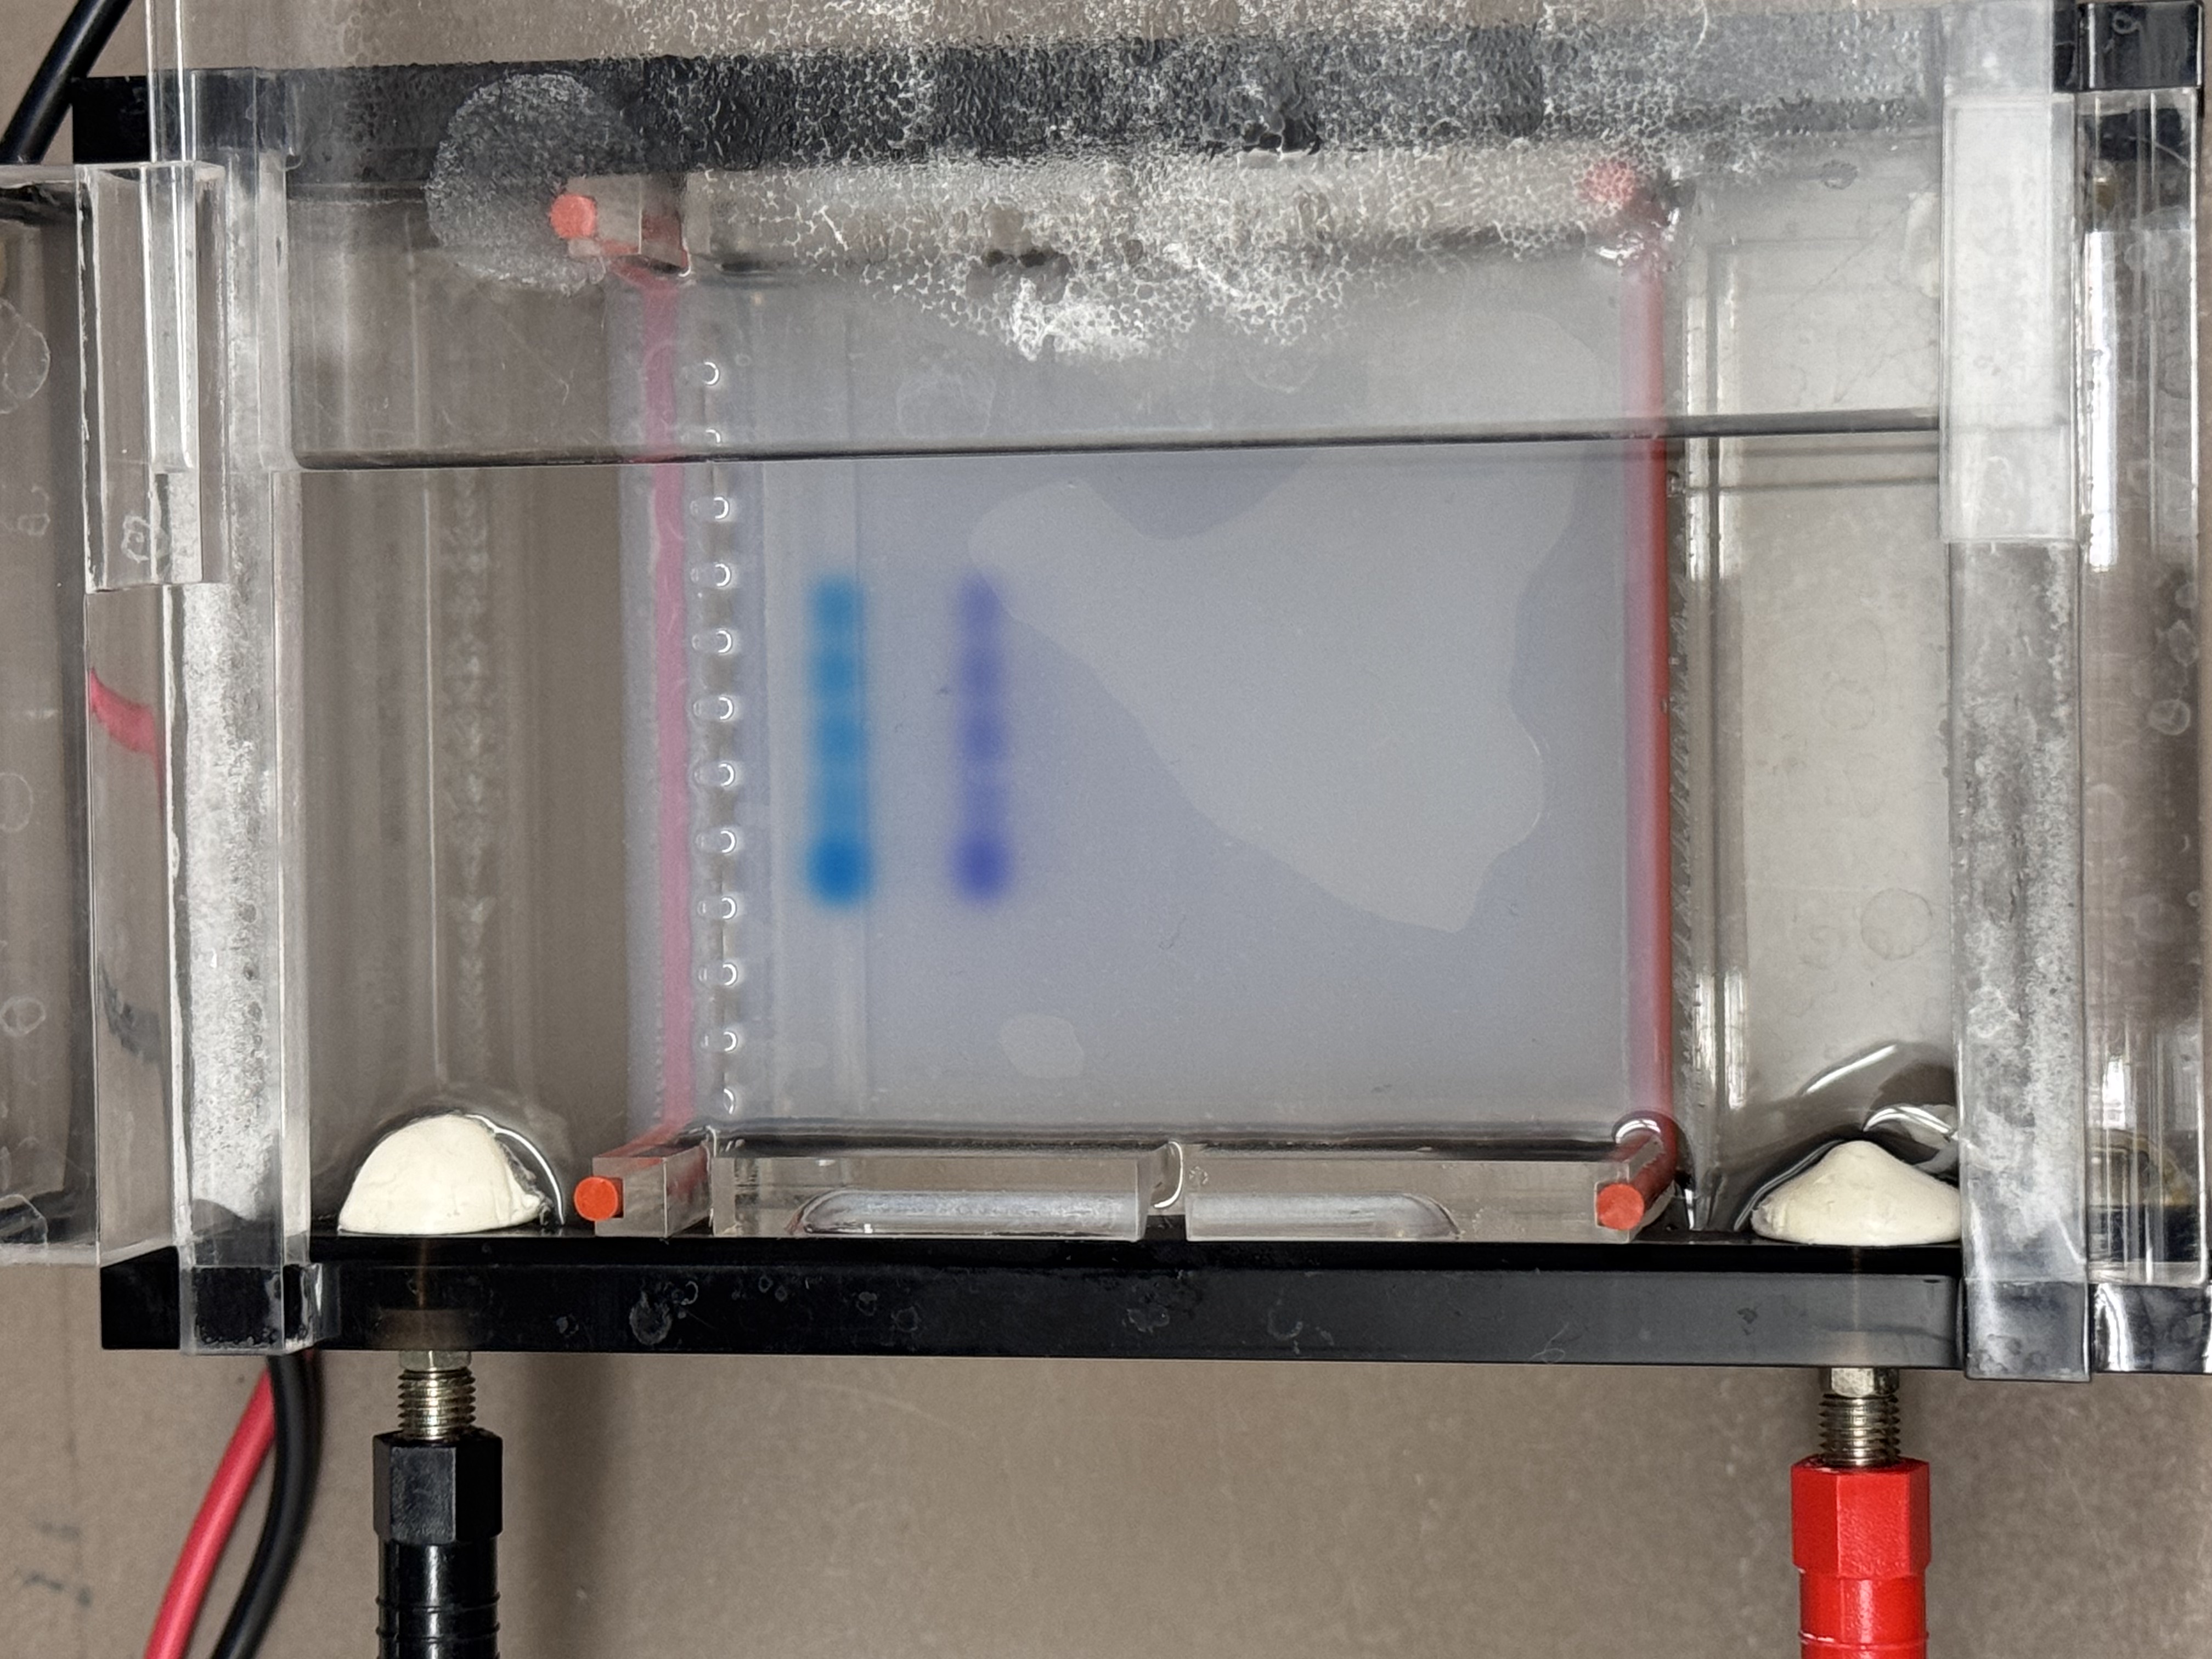
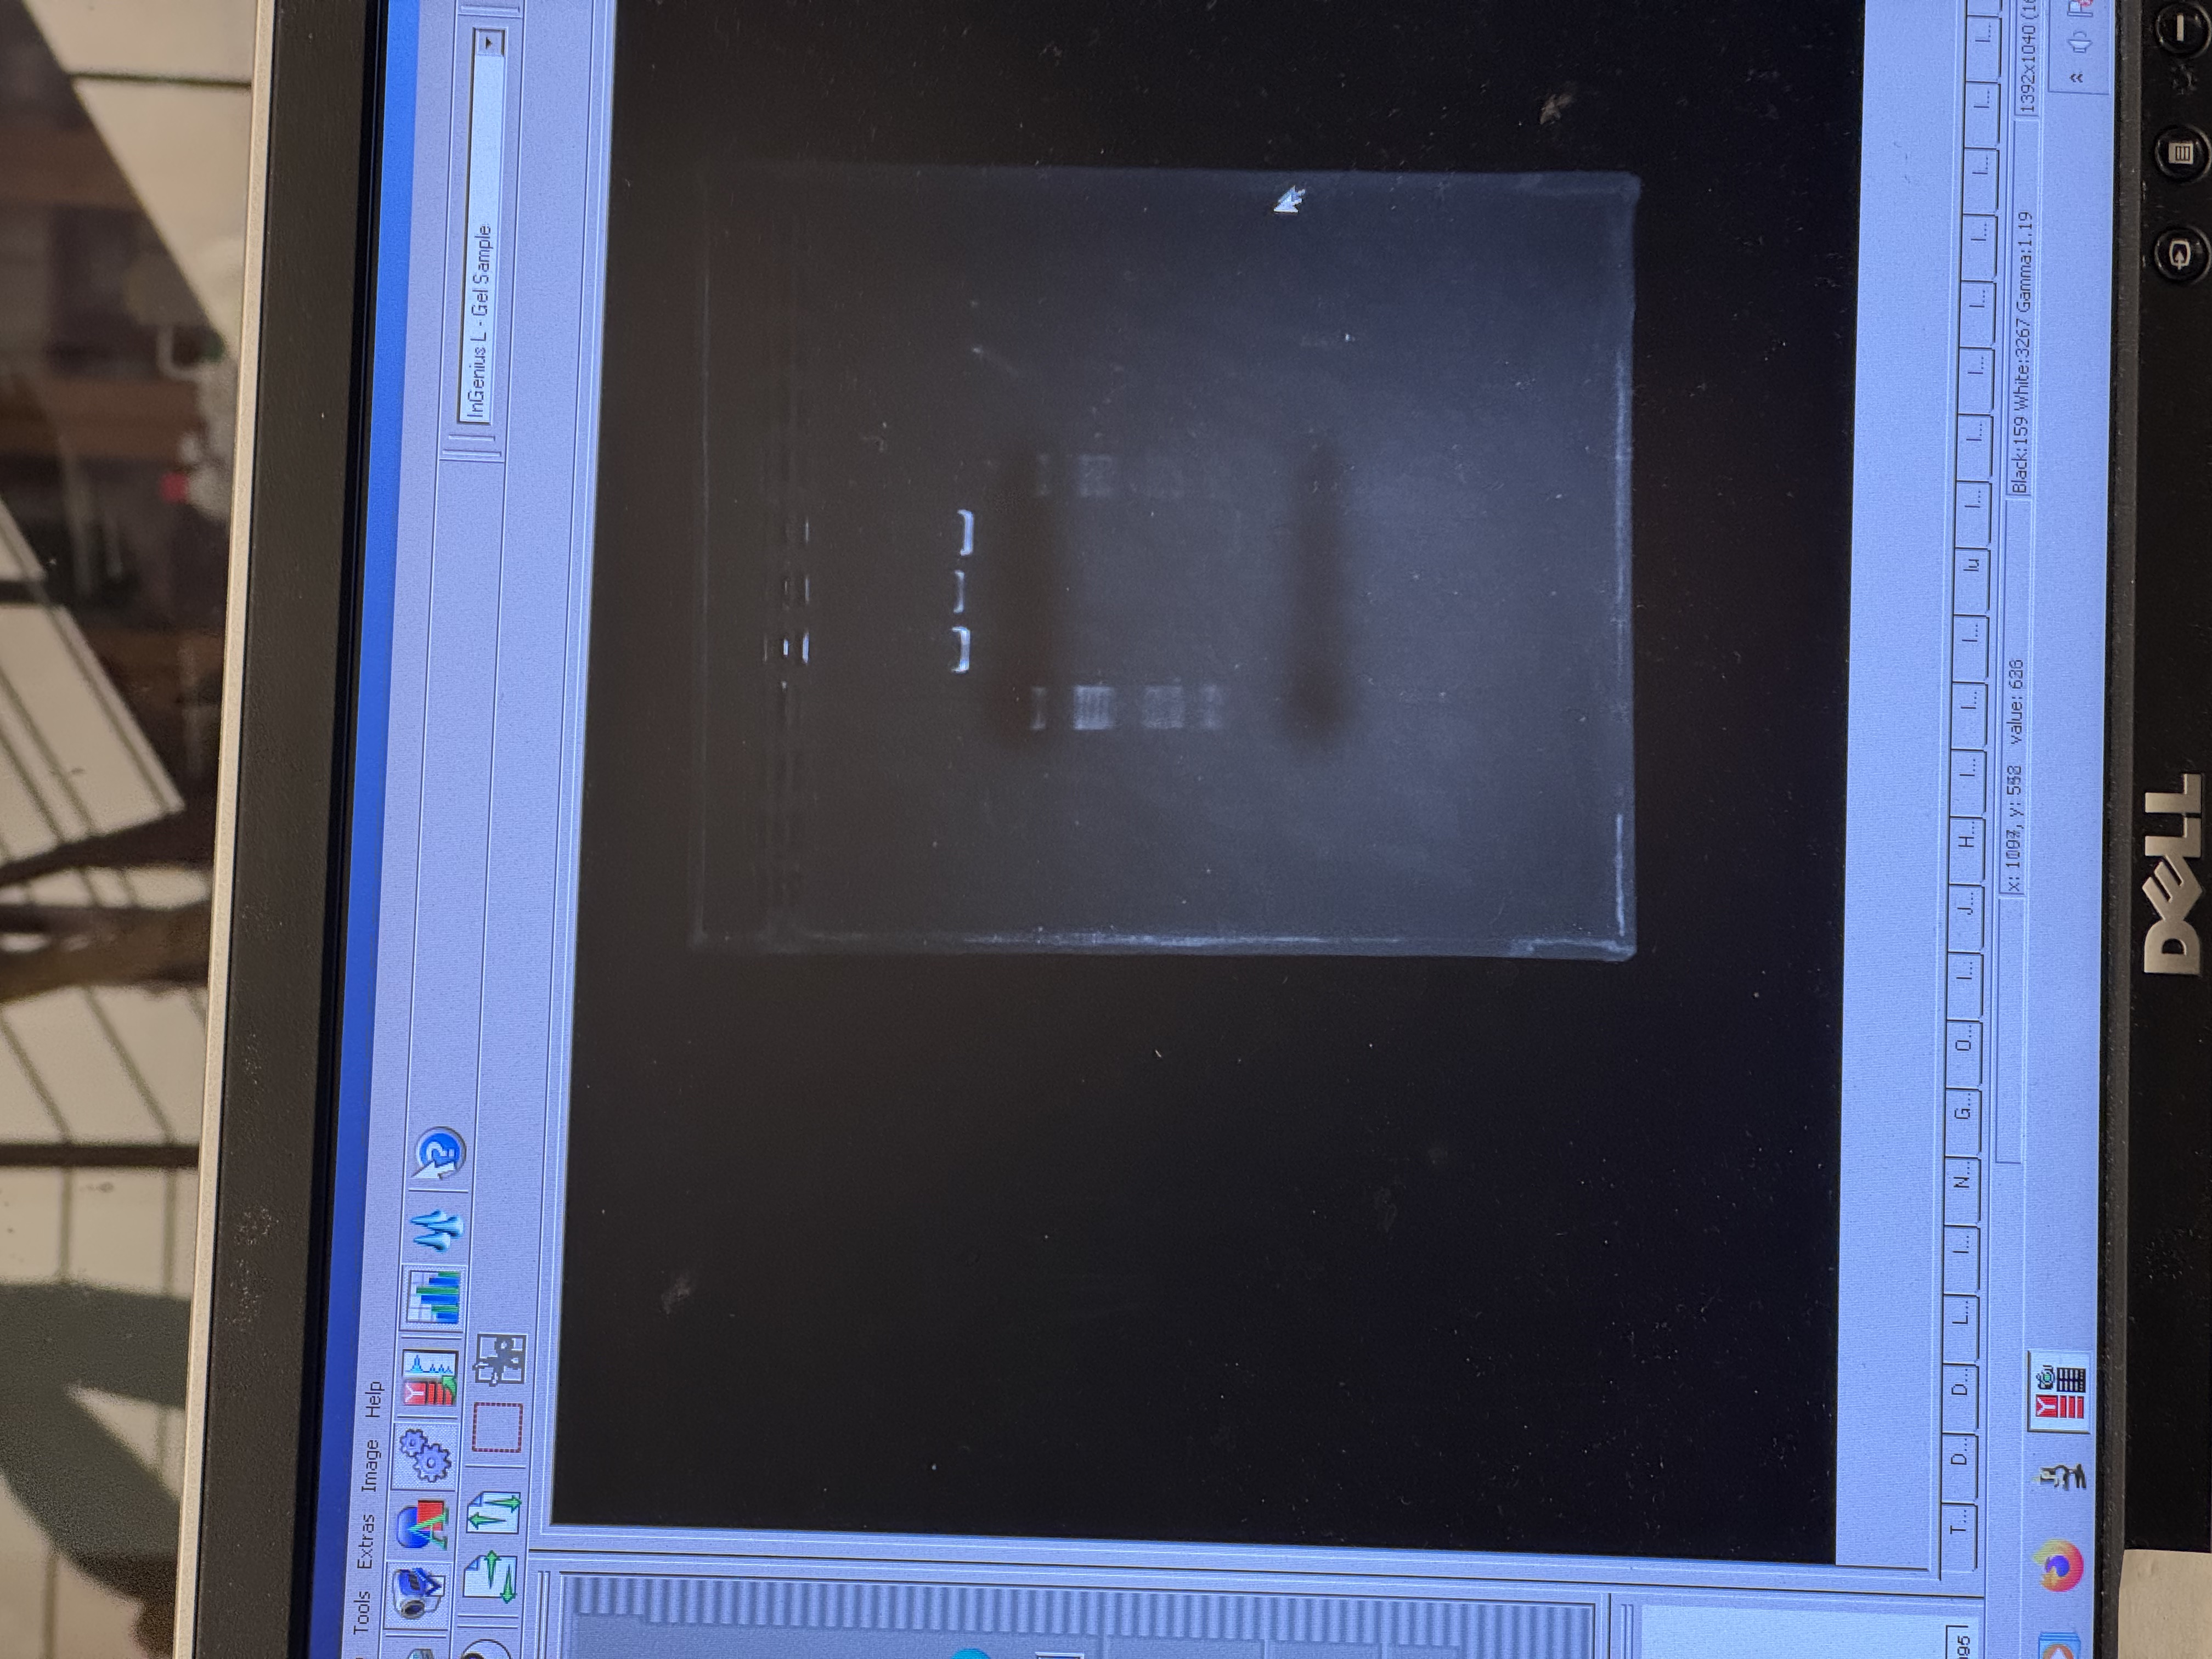
3. Results and Observations
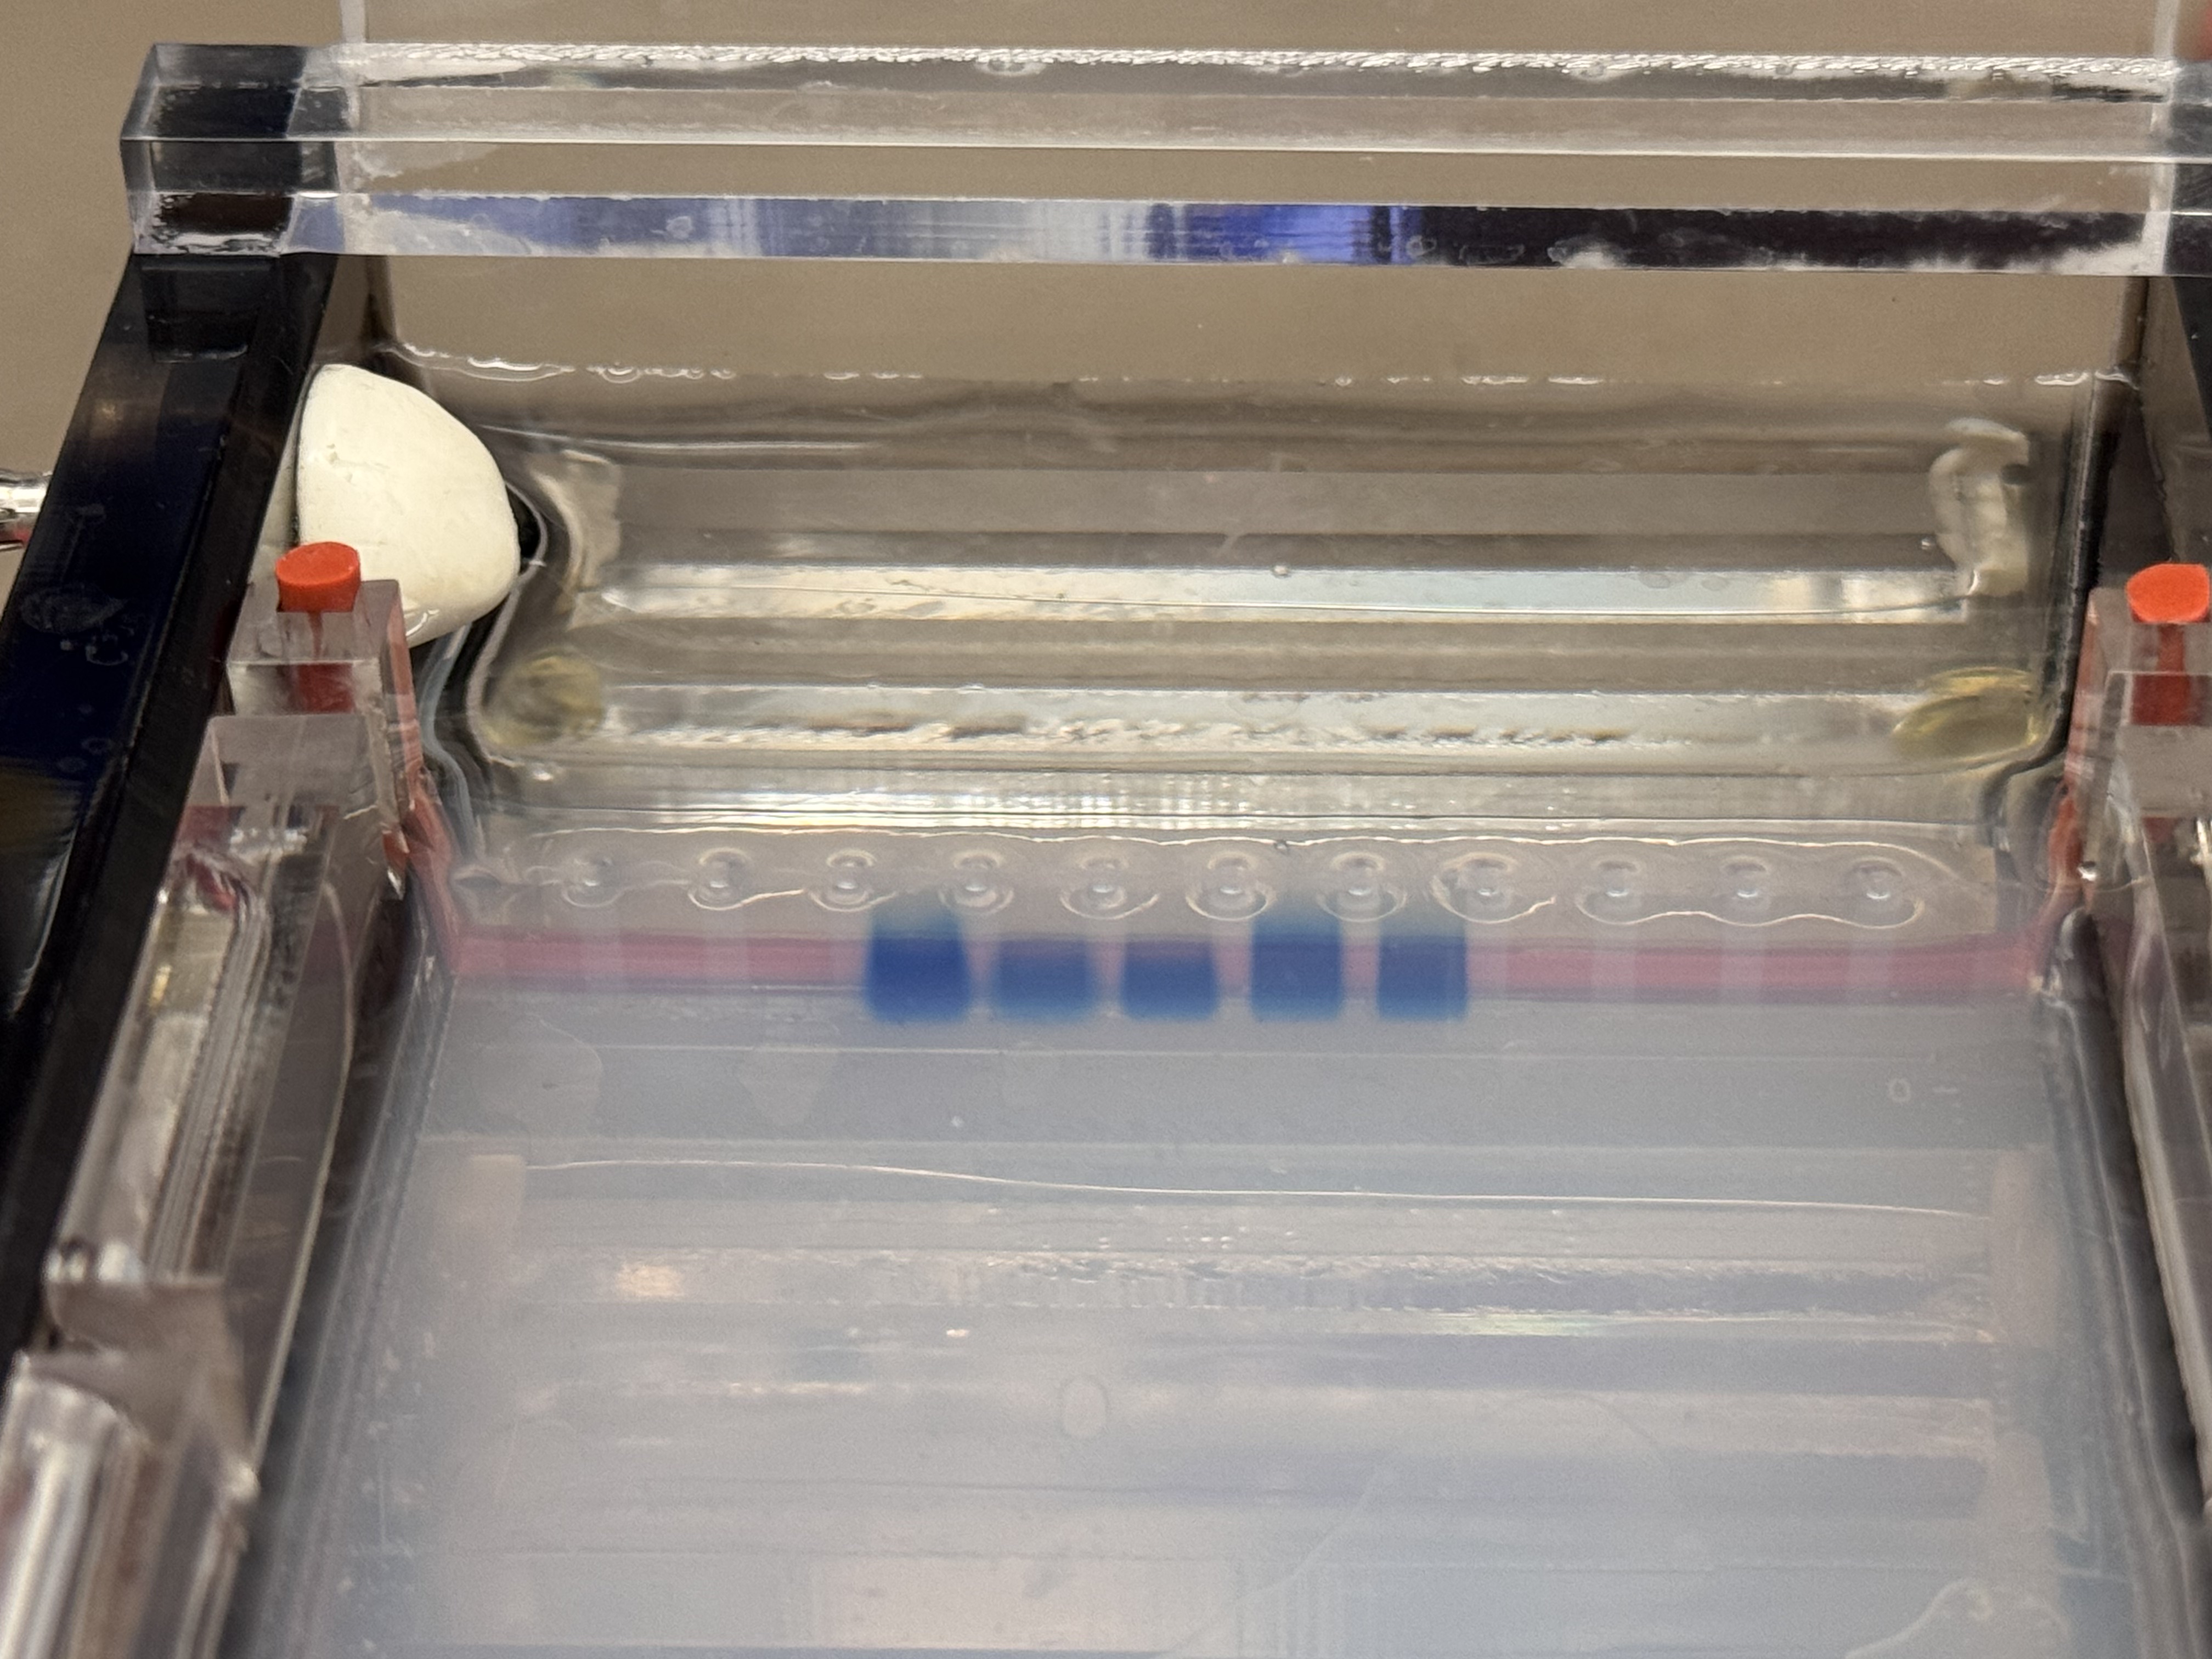
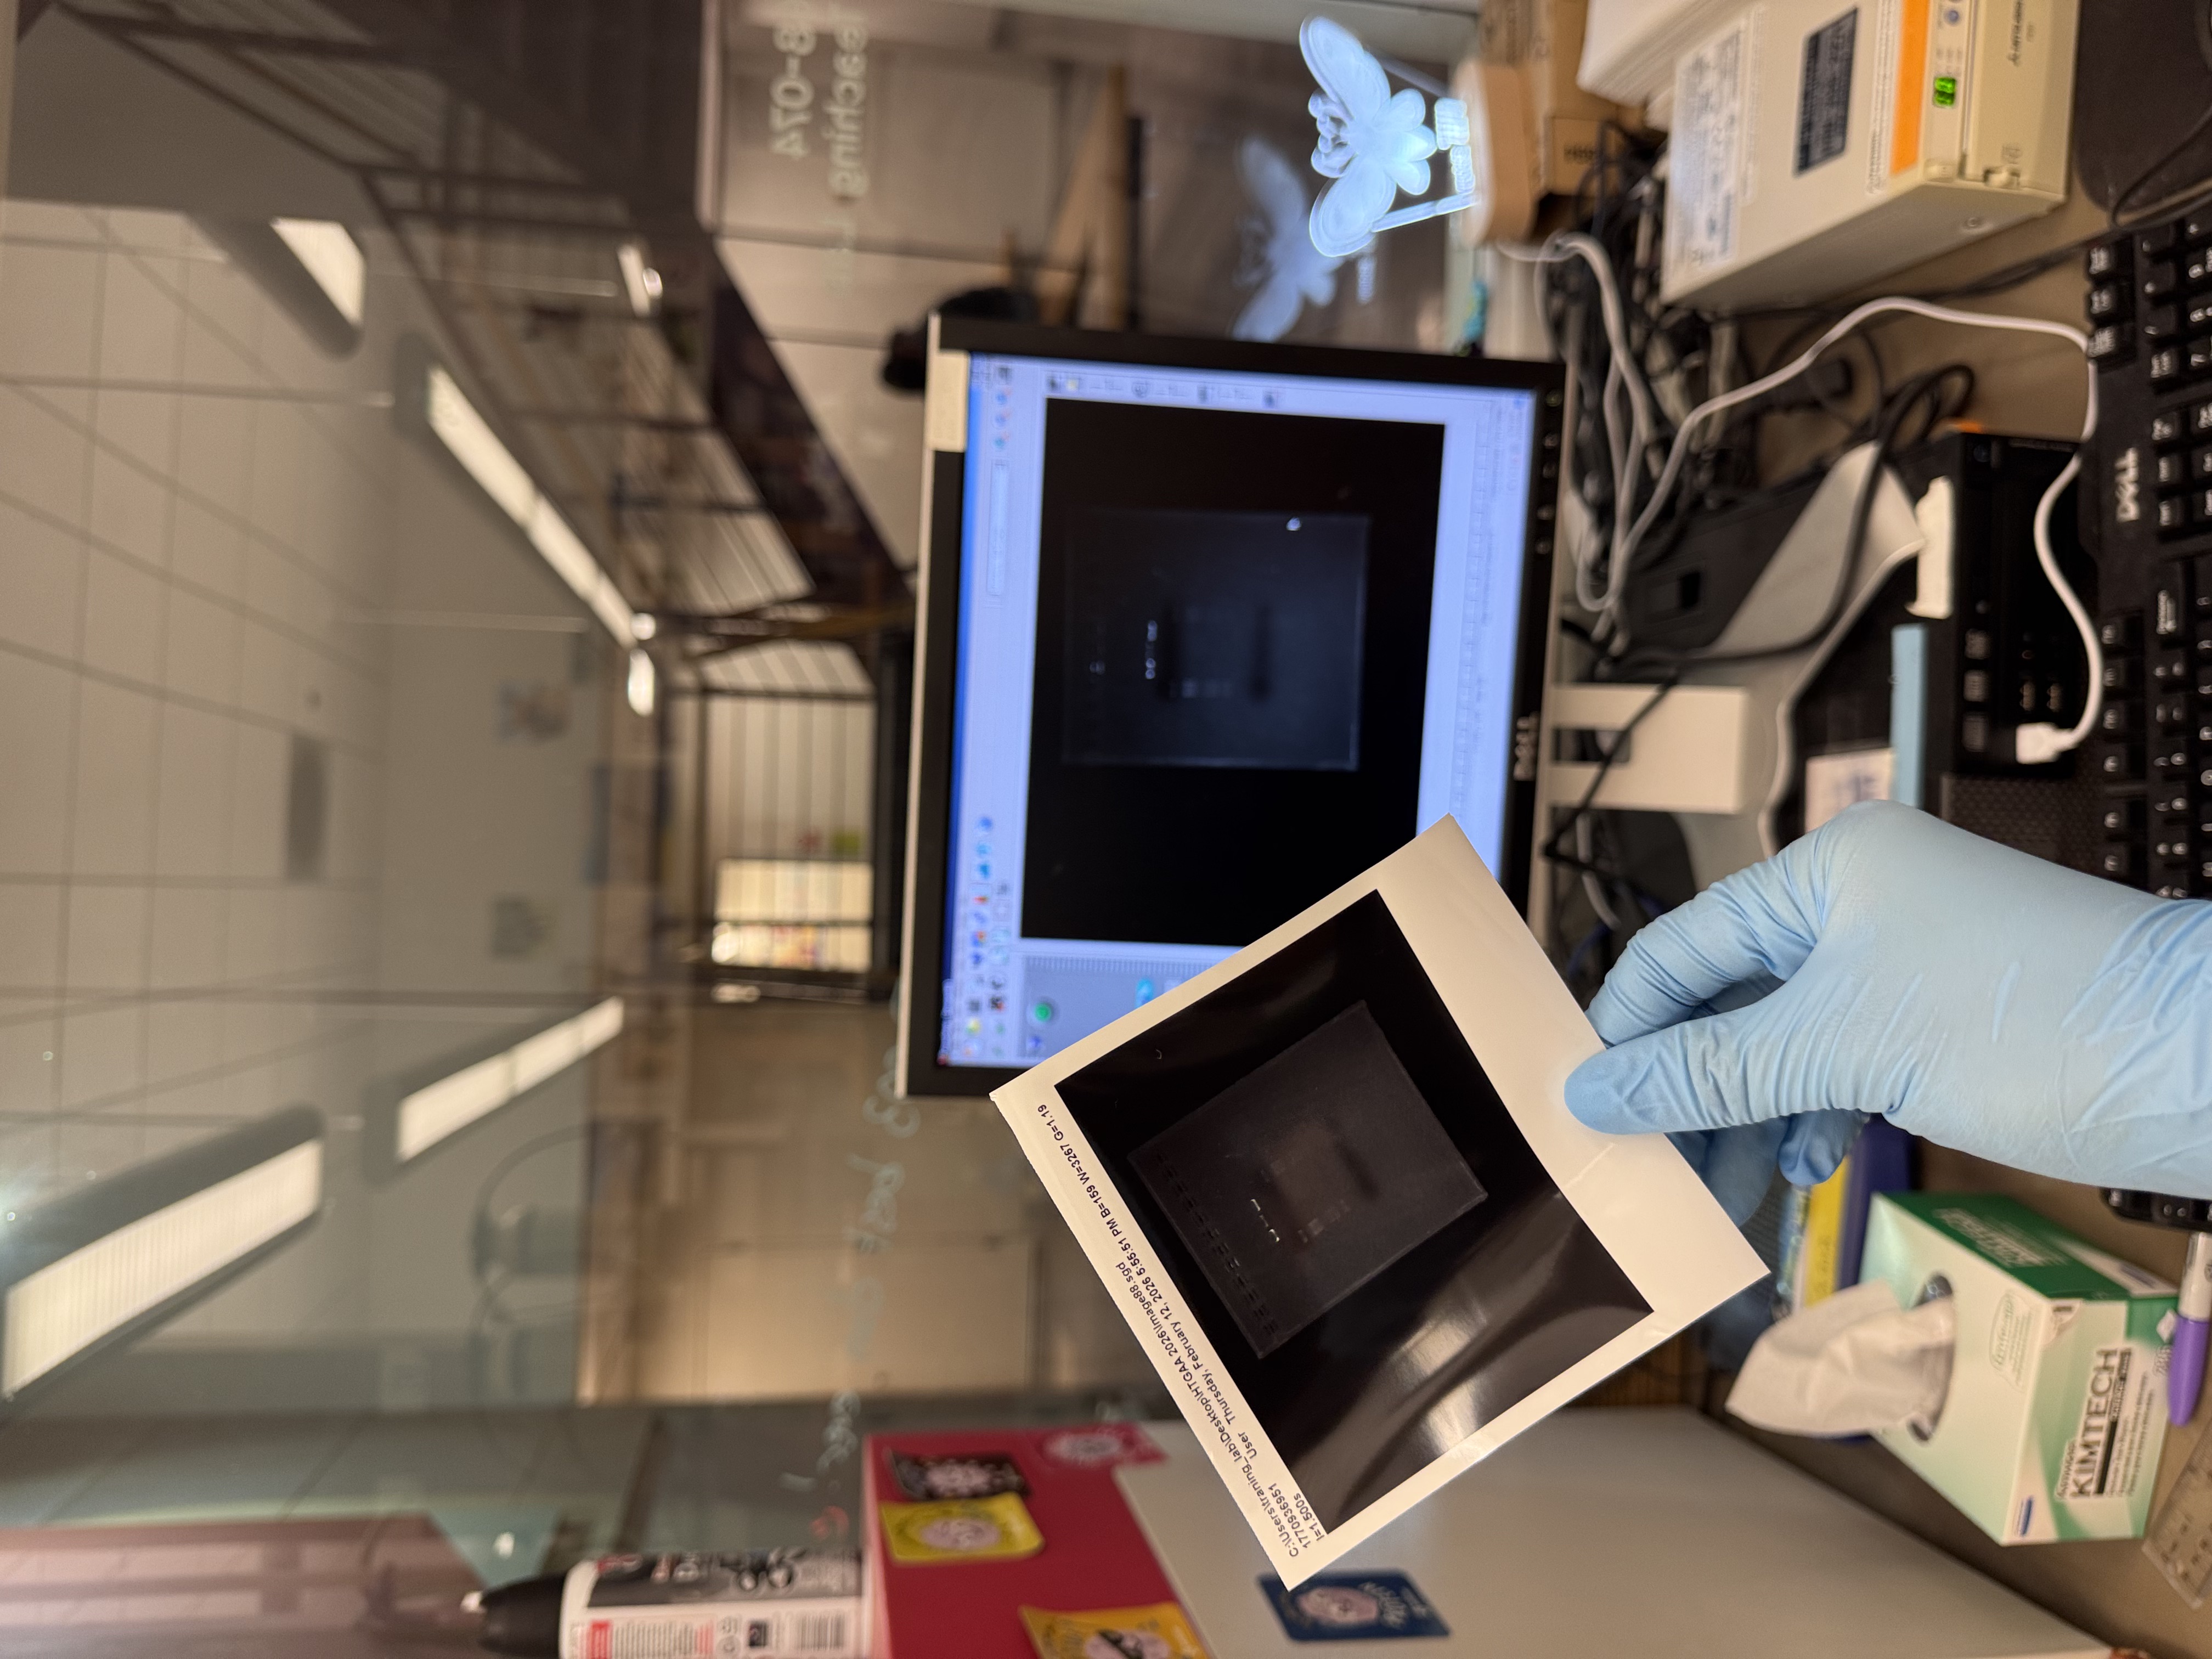
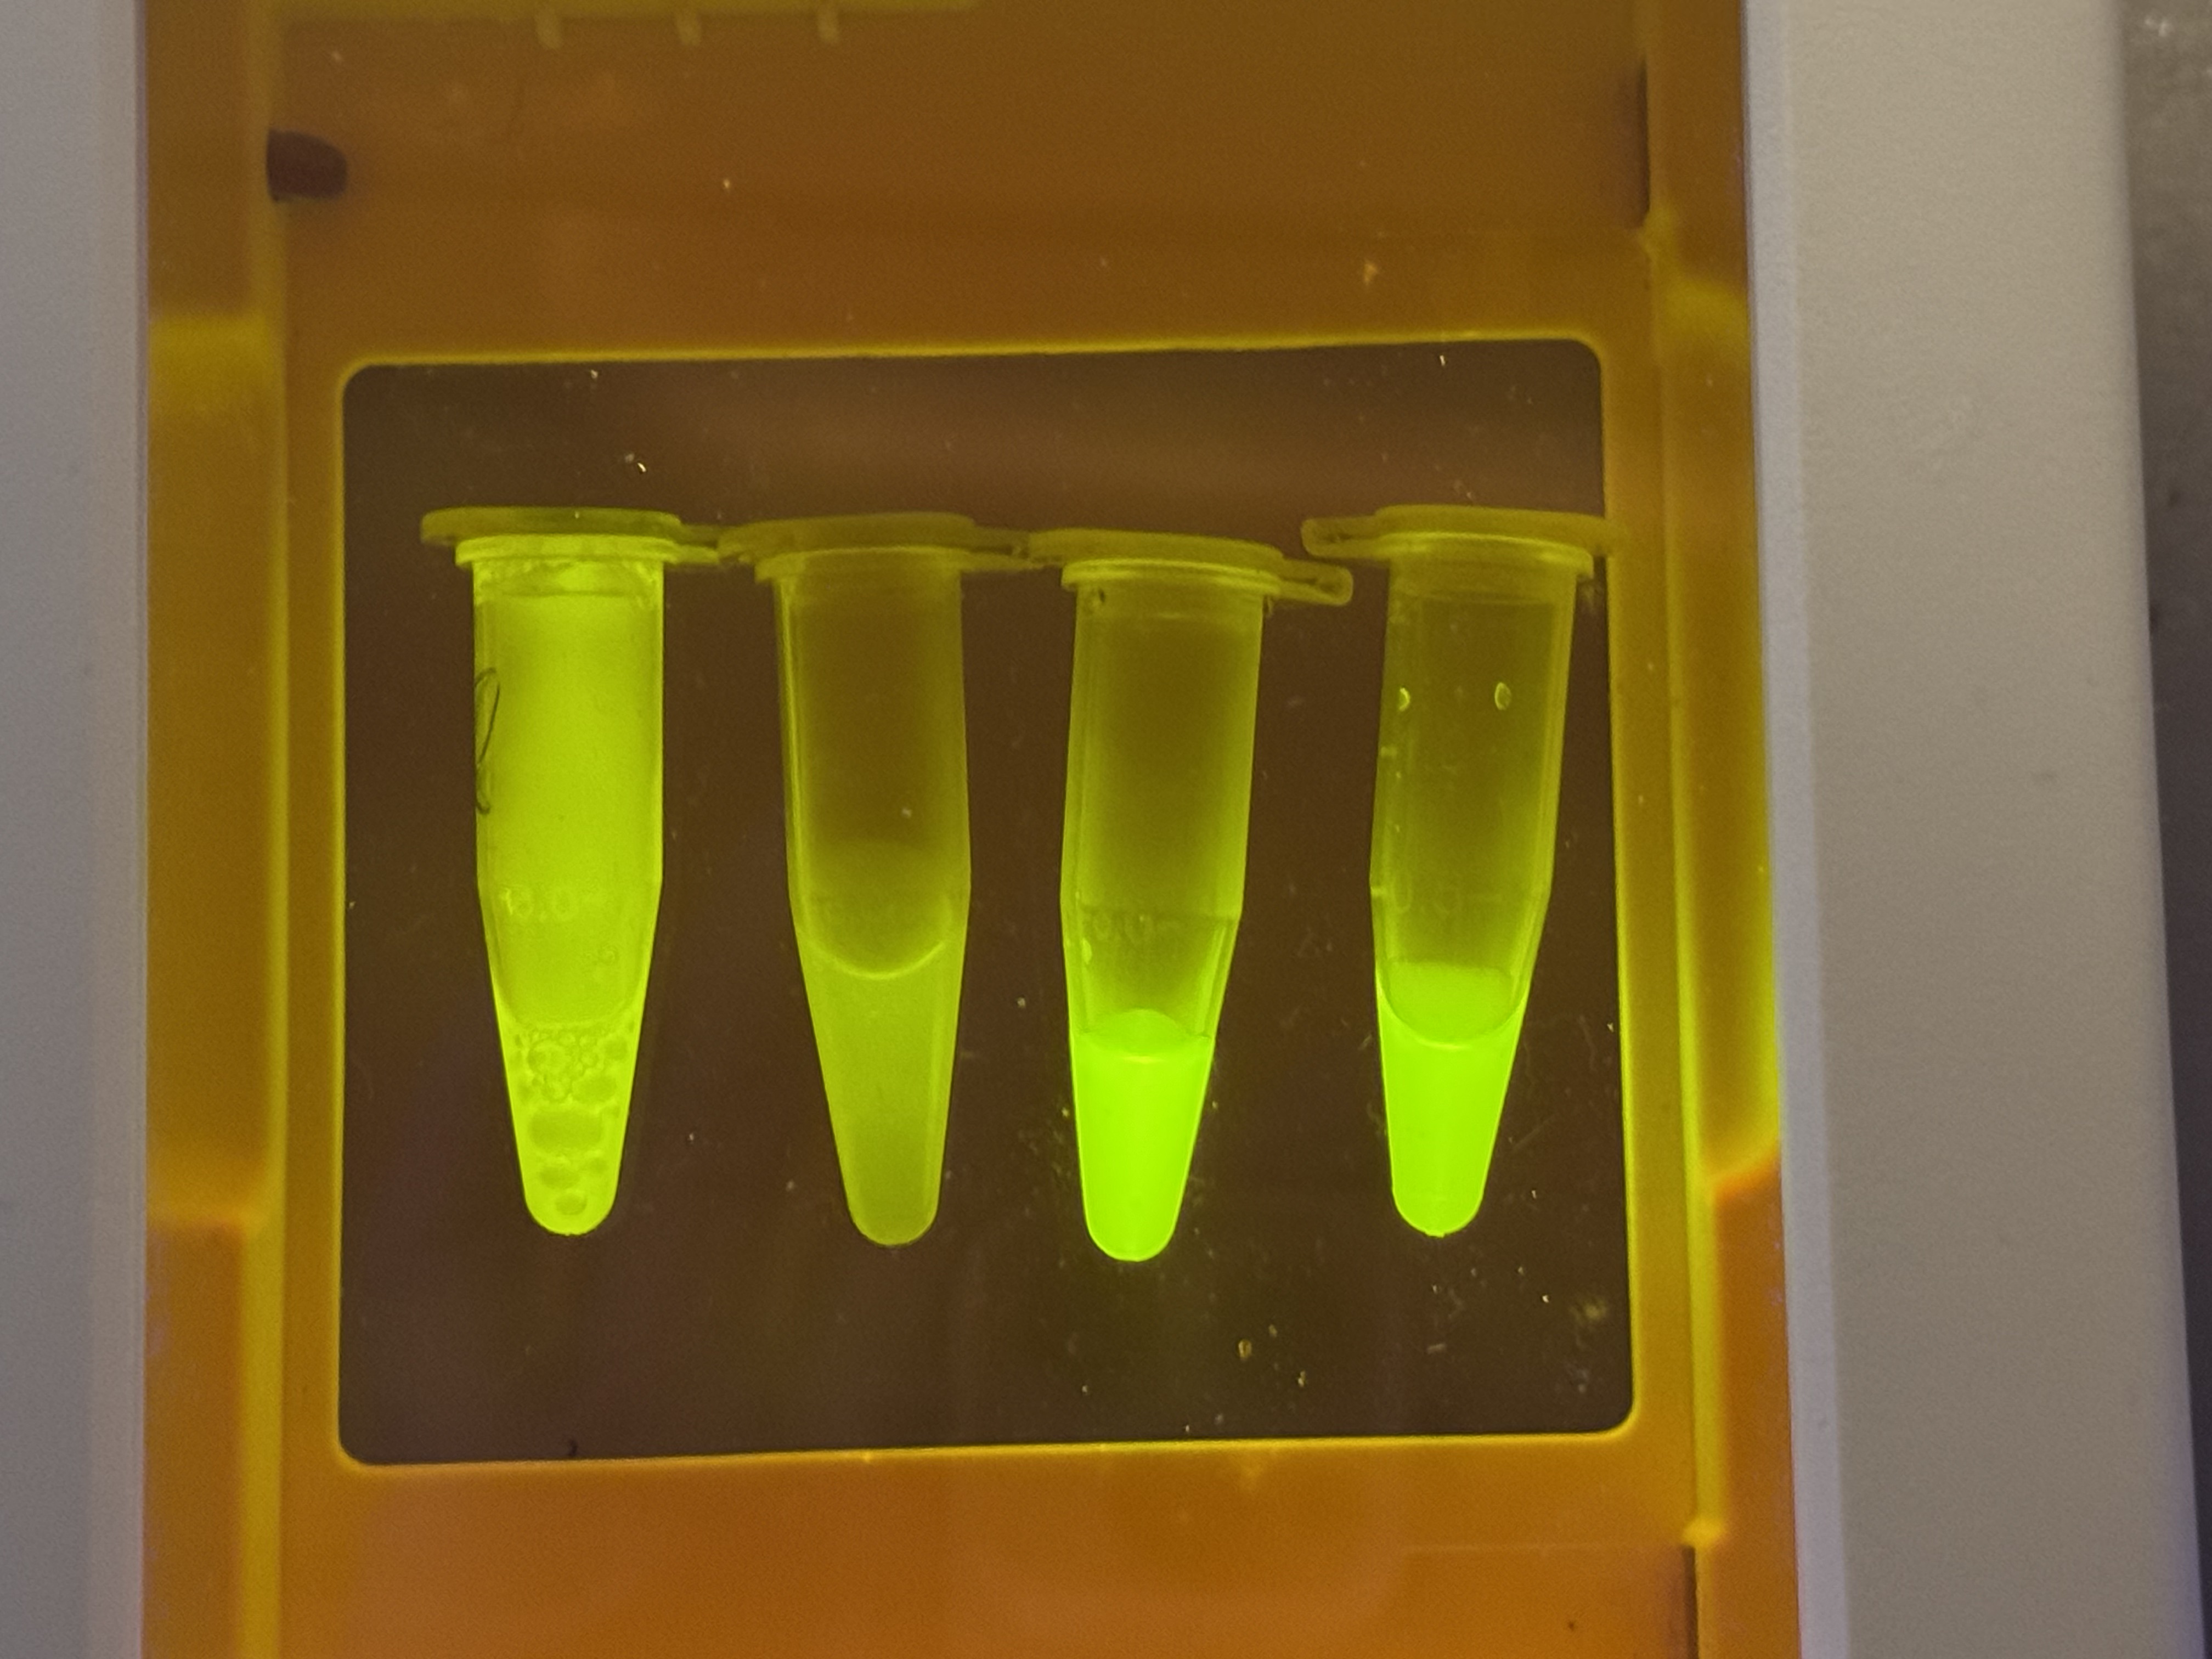
3.1 The Final Gel Art
3.2 Failures & Reflections
In the final gel, lanes 4 and 6 most closely matched the expected composite pattern in terms of band position and clarity. Lane 5 produced a visible band, but it likely reflects a setup error rather than the intended condition: in Benchling, the “mouth” lane was designed as Lambda_DNA_Thermo_(NC_001416) + SalI, but a mid-process misconfiguration in Automation Art propagated into the wet-lab setup, and the corresponding reaction was prepared without SalI (buffer + λ DNA added, SalI omitted). Lanes 3 and 7 did not yield a legible gel-art “image” in this run (lane 3 shows the ladder; lane 7 is faint).
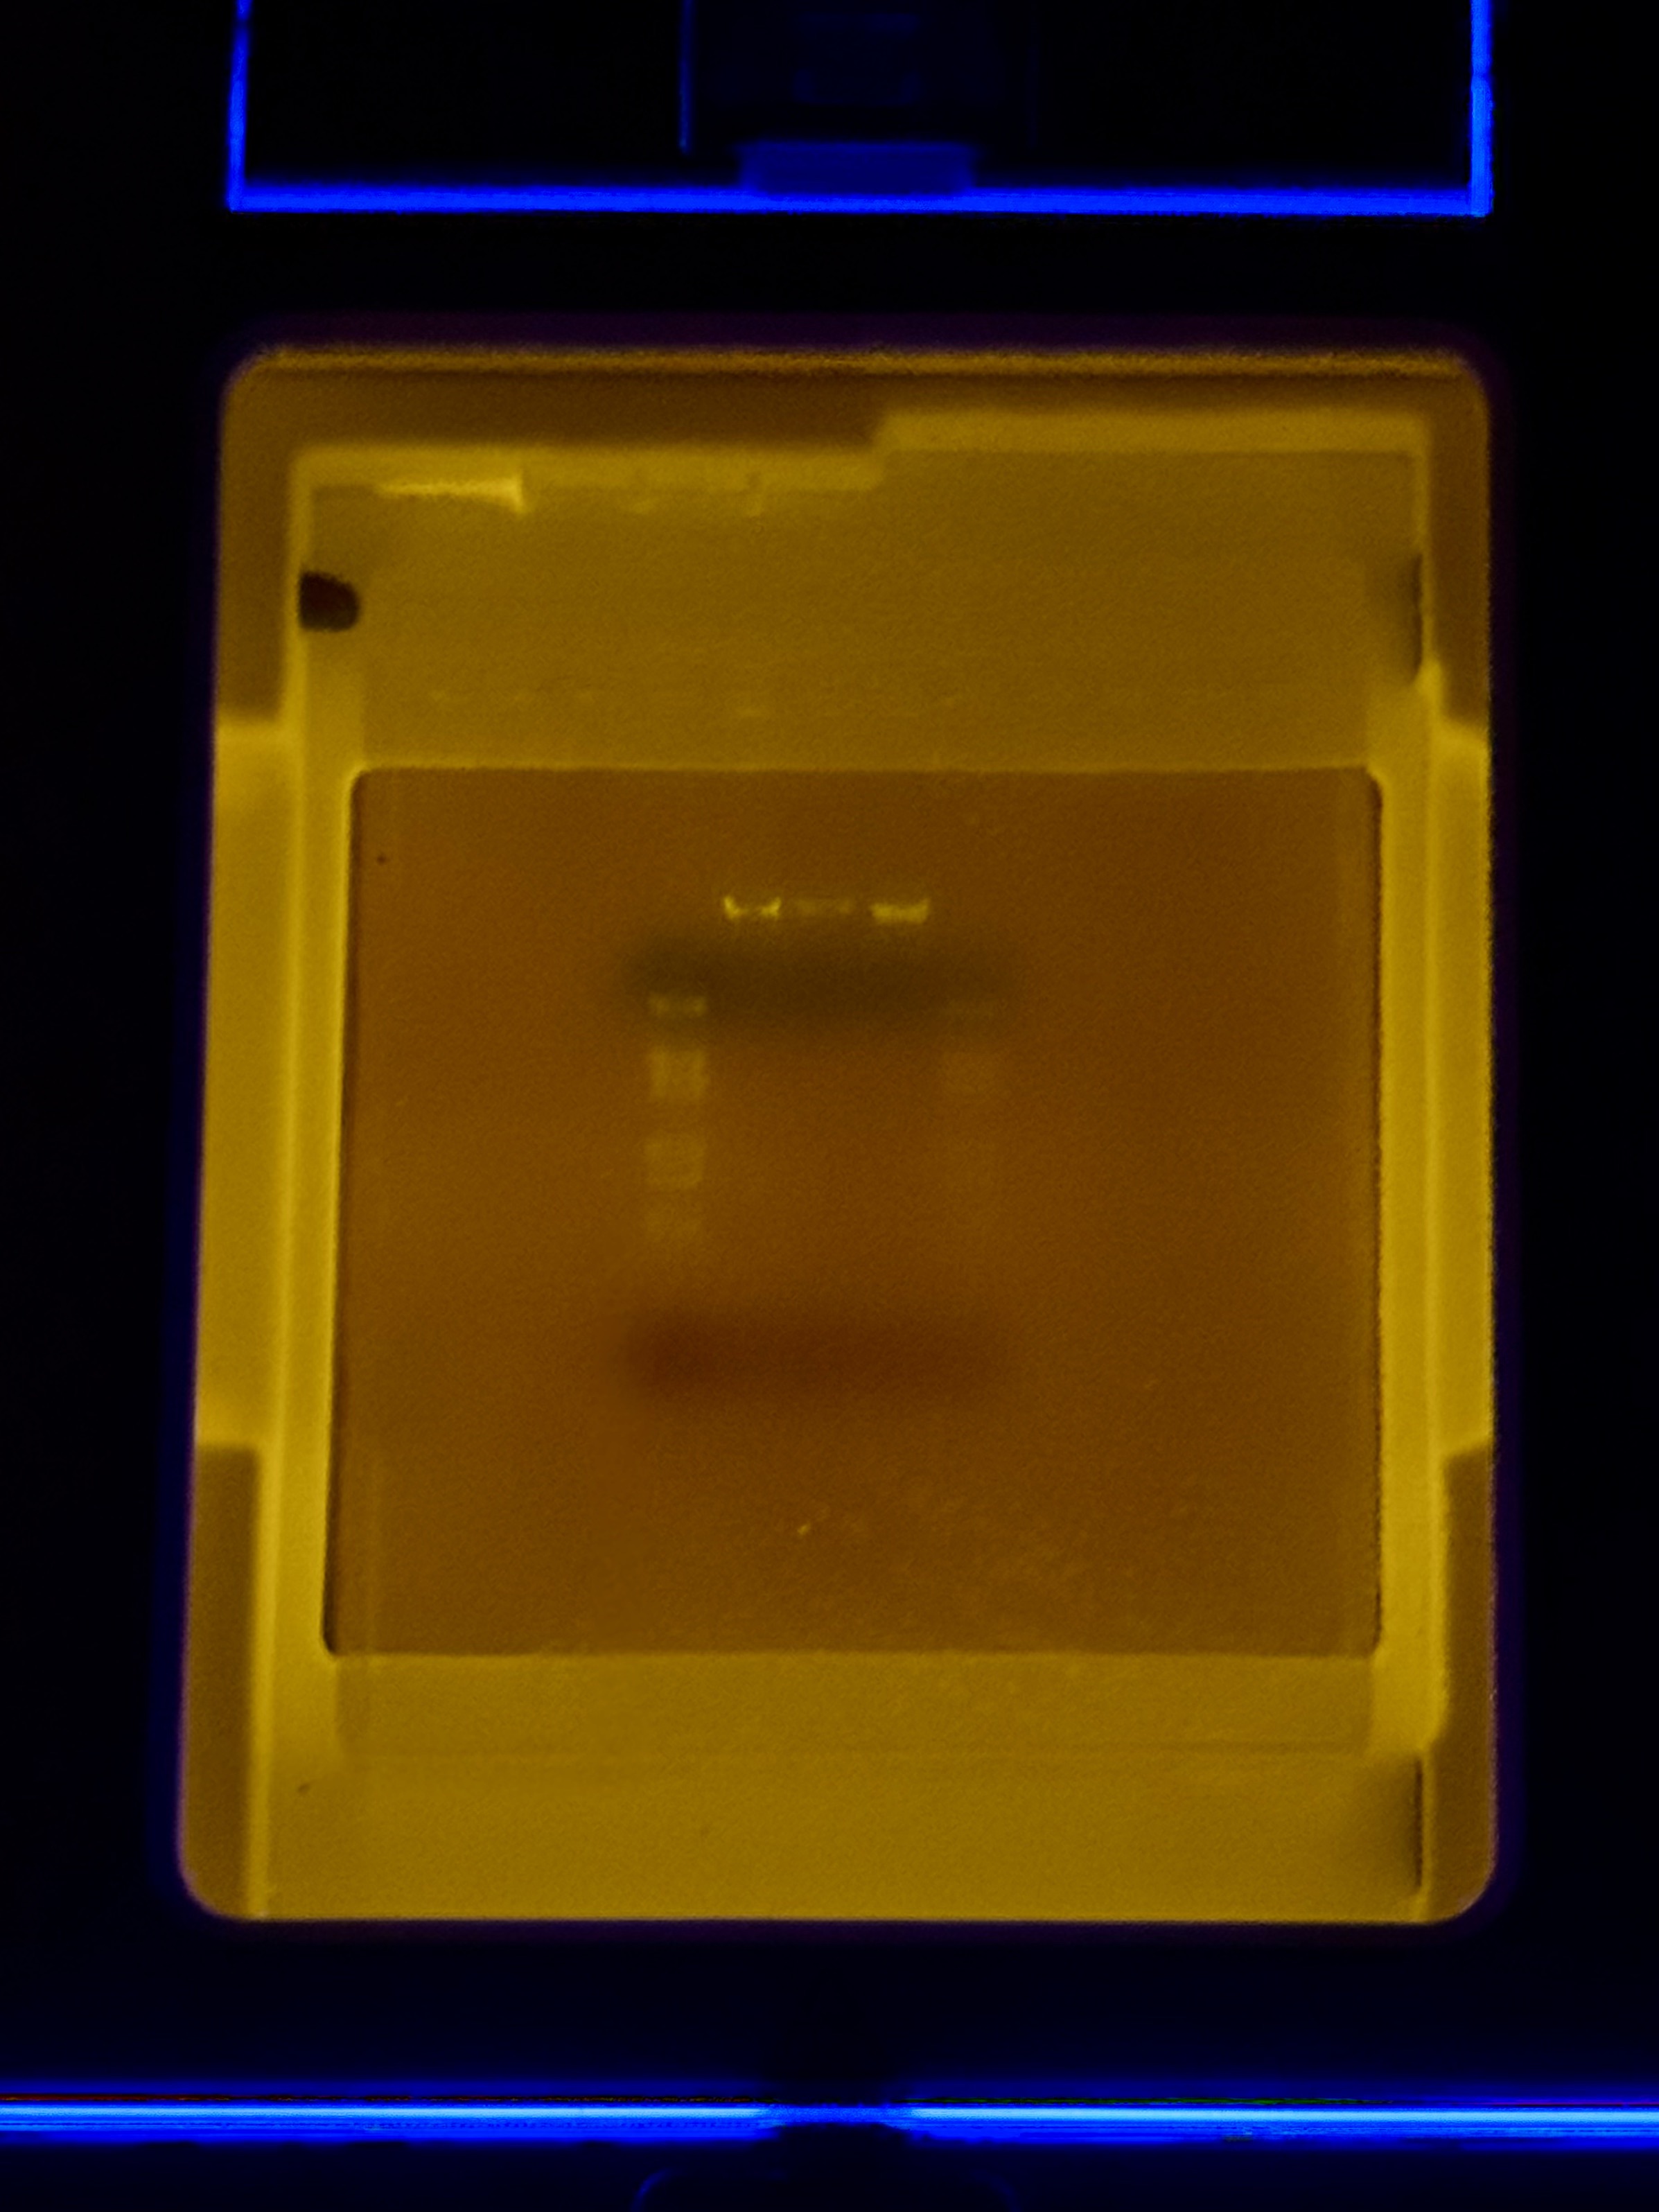
Compared with the exported gel image, the raw transilluminator photo shows weaker contrast: the ladder lane is faint but detectable, and only the central lanes show distinct bands near the wells; the rest of the gel has low signal with a visible dye front.
Issue 1: Low Overall Fluorescence and Weak Contrast
Observation: The raw transilluminator photo displayed weaker contrast compared to the exported gel image. Overall band visibility was low across most lanes.
Speculation: Shared Lambda DNA and enzymes were frequently handled and moved between storage and benches by multiple users. Repeated freeze thaw cycling likely reduced enzyme activity or DNA quality. Potential cross contamination during shared reagent handling may have also affected reaction performance.
Issue 2: Inconsistent Lane Clarity in Lanes 4 and 6
Observation: Only lanes 4 and 6 produced clear bands that closely matched the expected composite pattern. Lane 7 appeared faint compared with lanes 4 and 6.
Speculation: Lane 4 contained a higher volume of loading dye which likely improved sample density and helped it settle consistently in the well to increase visibility. In weaker lanes, small sample volumes between 2 to 5 microliters may have remained inside pipette tips during loading. Furthermore, differences in loading dye volume can change apparent intensity even when the digest chemistry is identical.
Issue 3: Design Mismatch in Lane 5
Observation: Lane 5 produced a visible band but failed to represent the intended mouth pattern using SalI as specified in the Benchling design.
Speculation: Lane 5 was prepared without SalI enzyme. This error likely originated from an initial configuration mistake in the Automation Art tool that propagated into the wet lab setup. Omitting the enzyme produced a band pattern that naturally does not match the prediction for the mouth feature.
Issue 4: Poor Resolution in the Lower Gel Half
Observation: A prominent dye front was visible but the lower half of the gel contained limited resolved band information.
Speculation: Running the electrophoresis at 130V for 40 minutes was likely too aggressive for smaller fragments. High voltage may have reduced the resolution of shorter DNA segments and pushed them toward or beyond the dye front before they could be clearly separated.
Issue 5: Buffer Limitations
Observation: All digestion reactions were performed using a single CutSmart buffer.
Speculation: While utilizing one universal buffer is convenient for all digests, it may have resulted in sub optimal cutting performance for specific enzymes or enzyme combinations that require different salt concentrations for maximum activity.
Week 3 Lab: Lab Automation
Image credit: HTGAA 2026
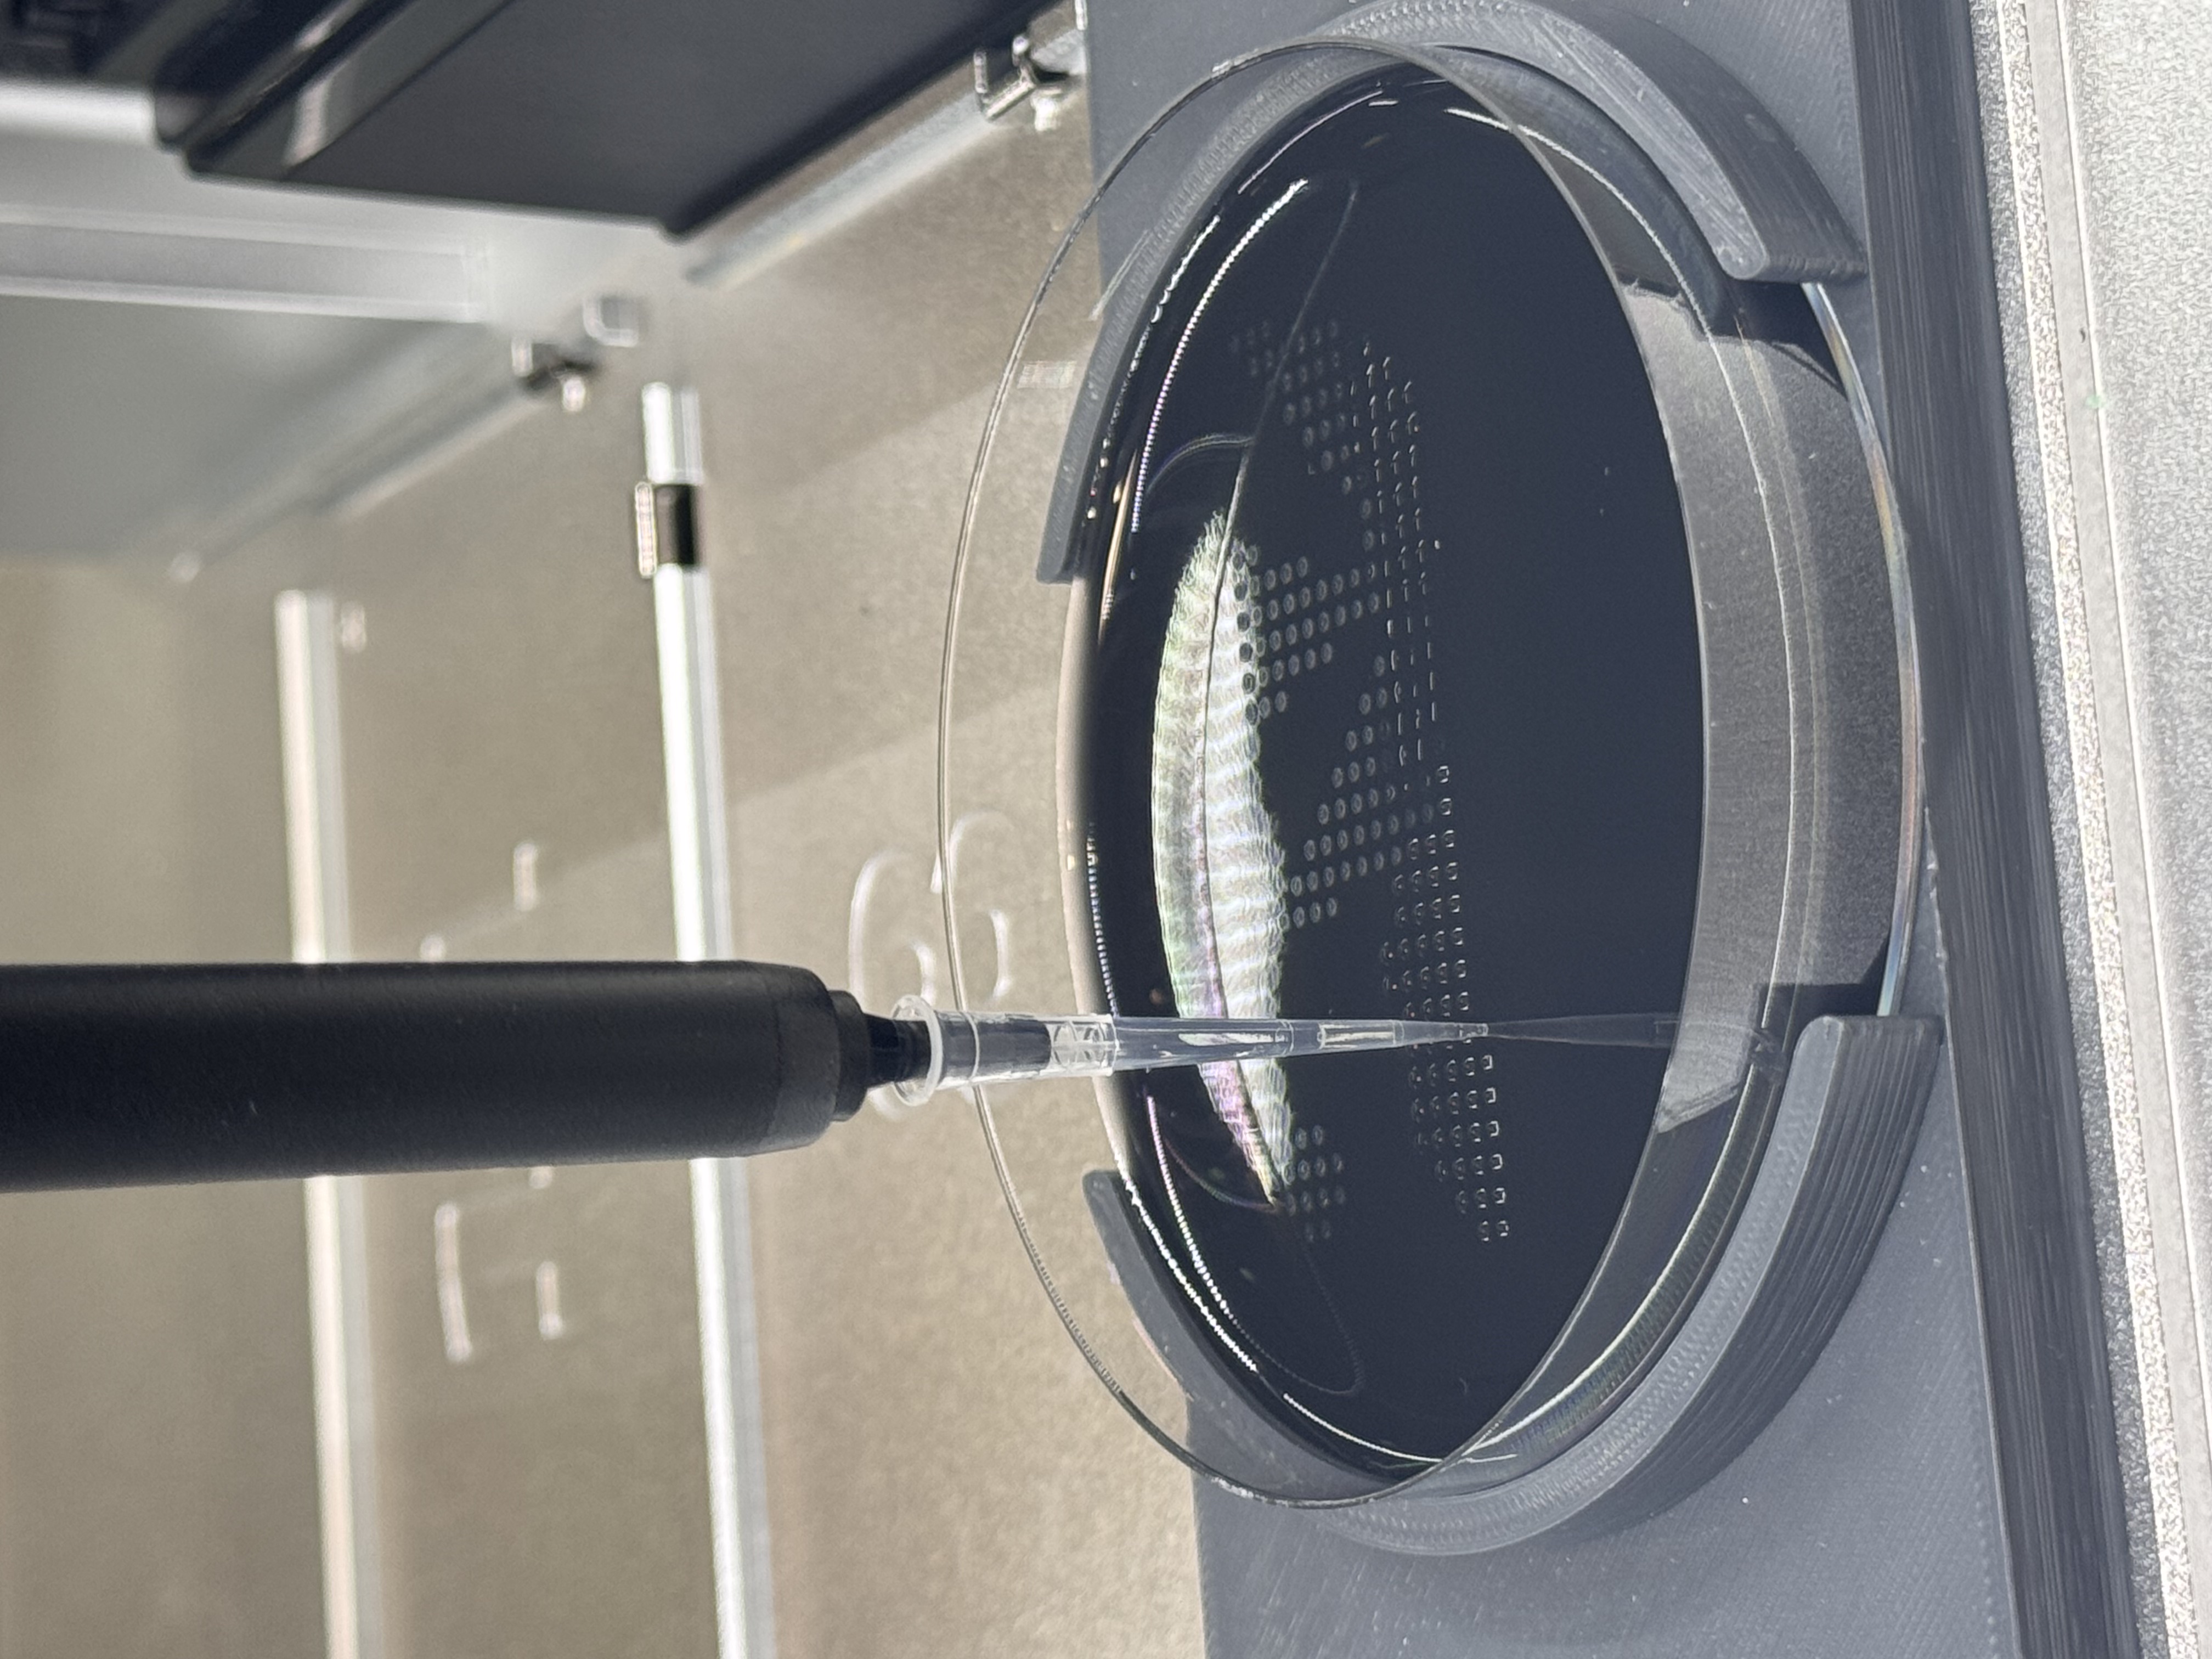
Lab: Opentrons Artwork
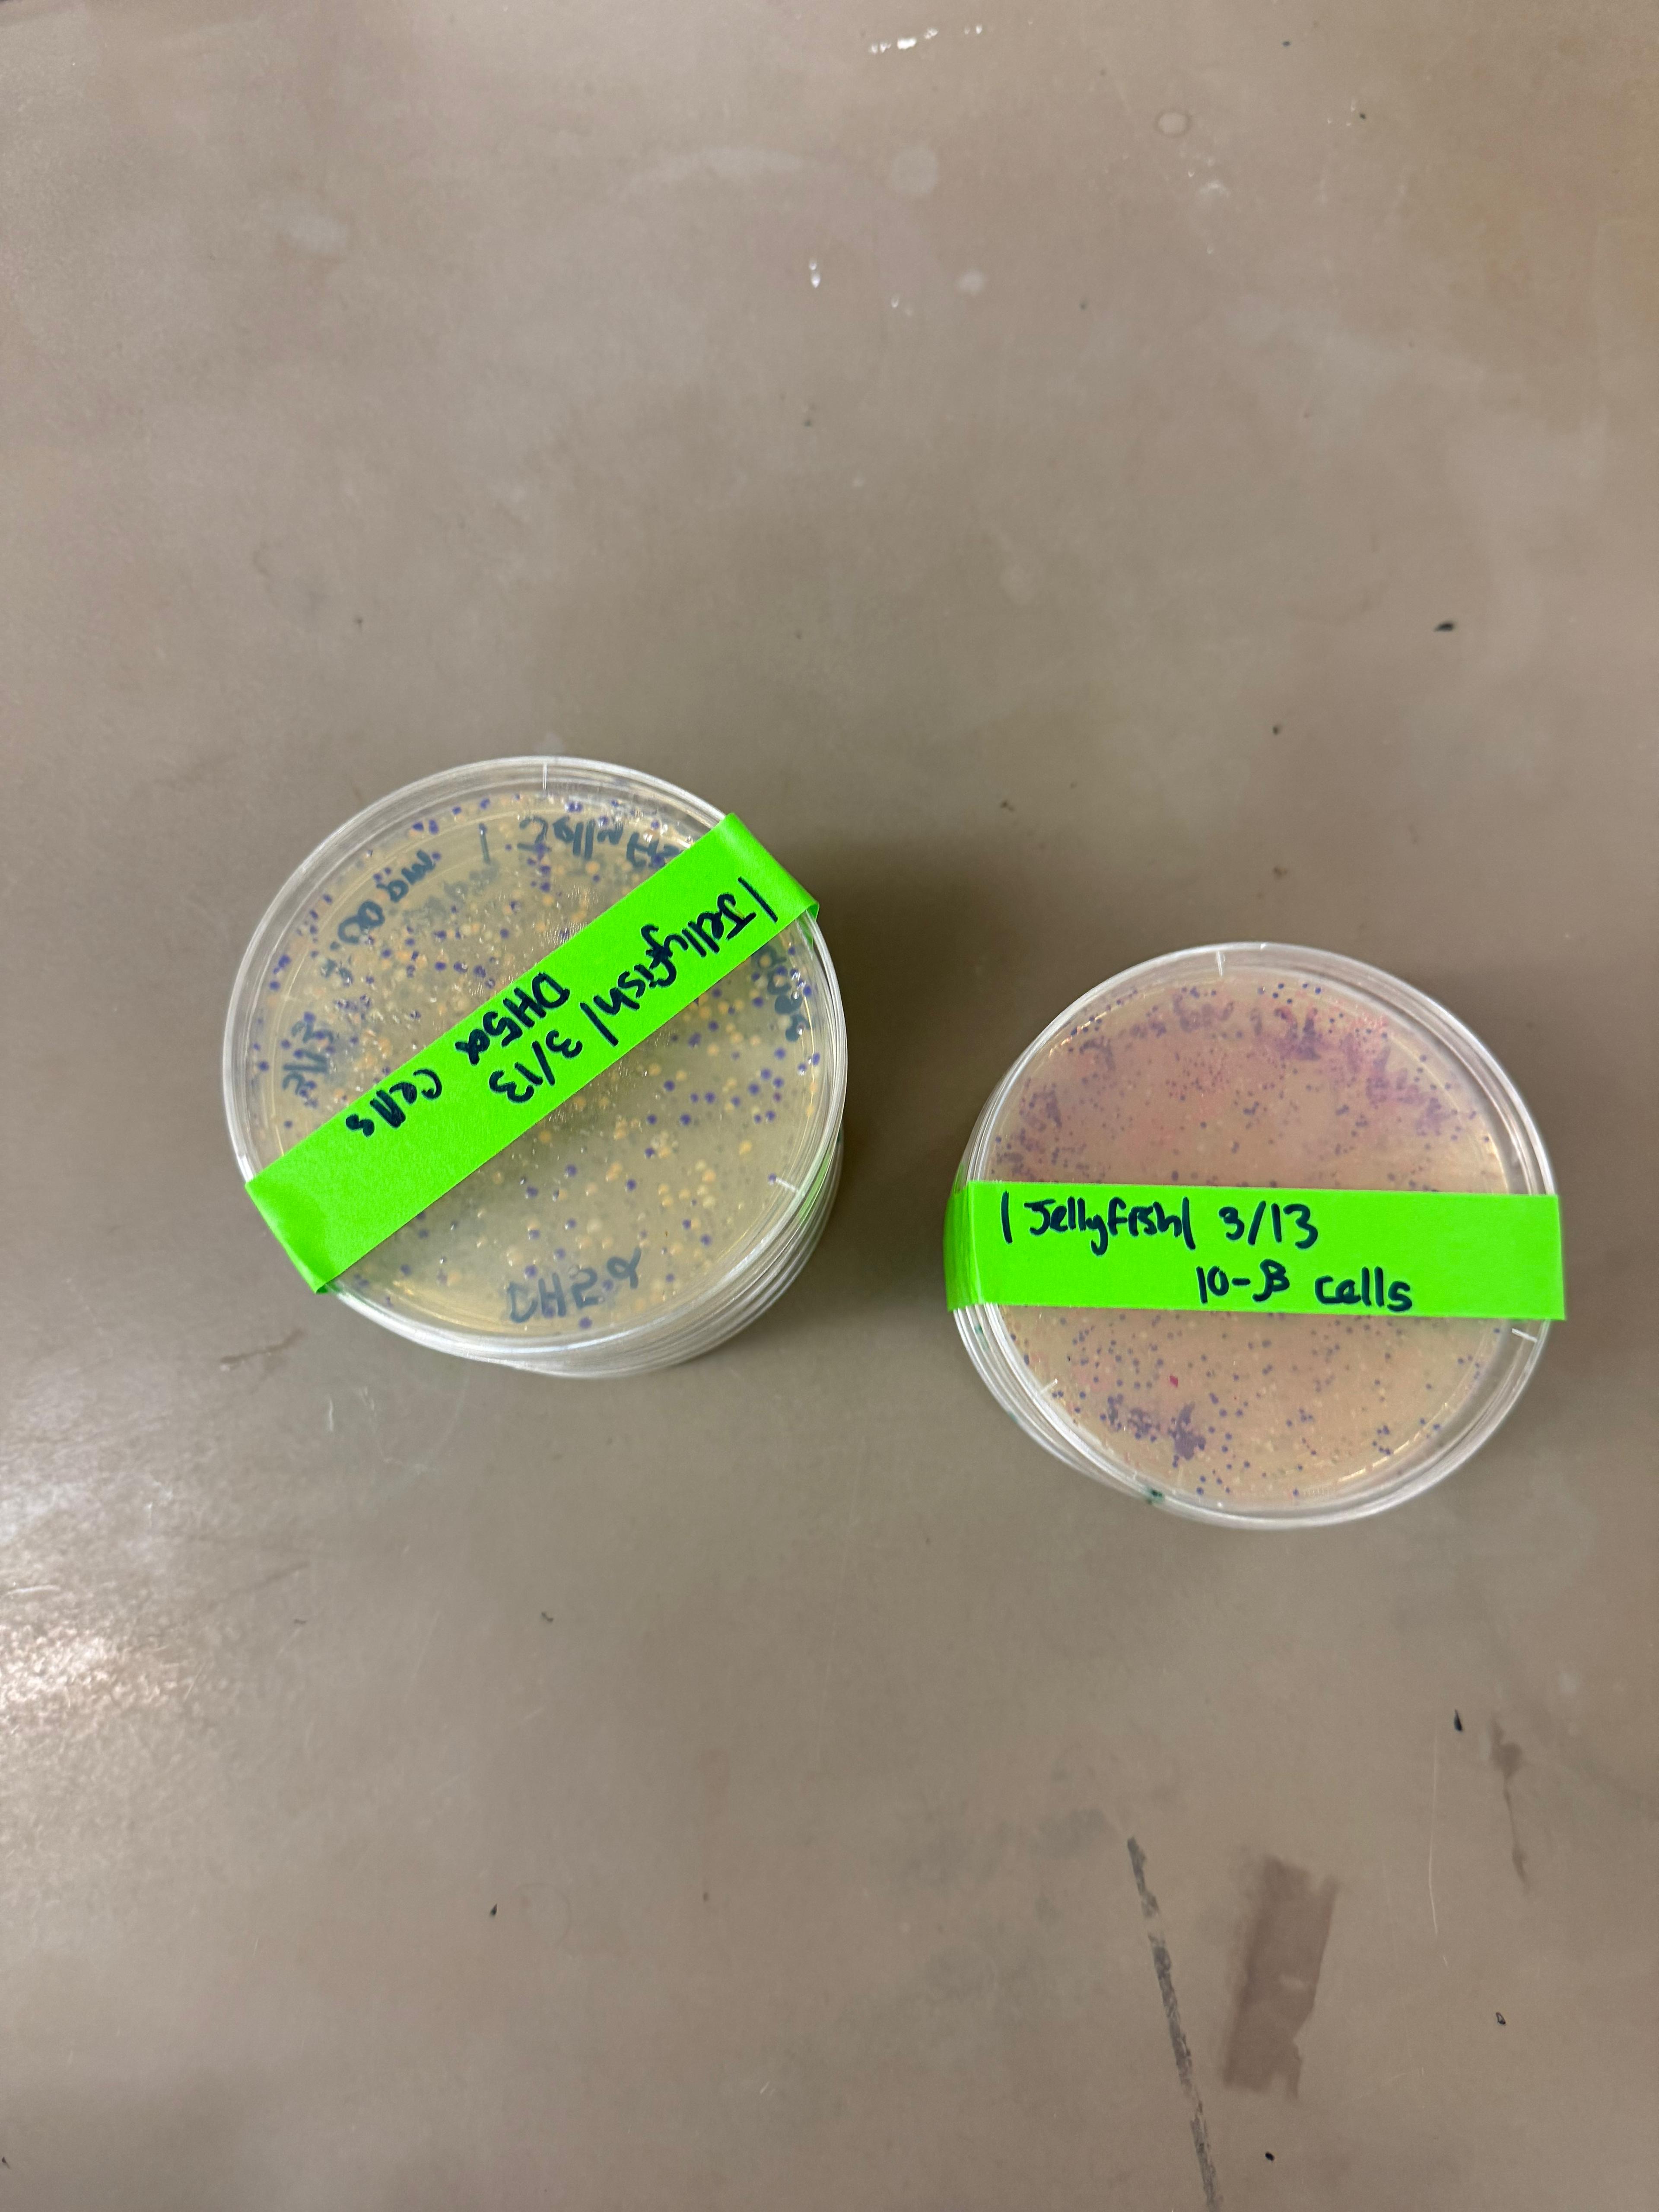
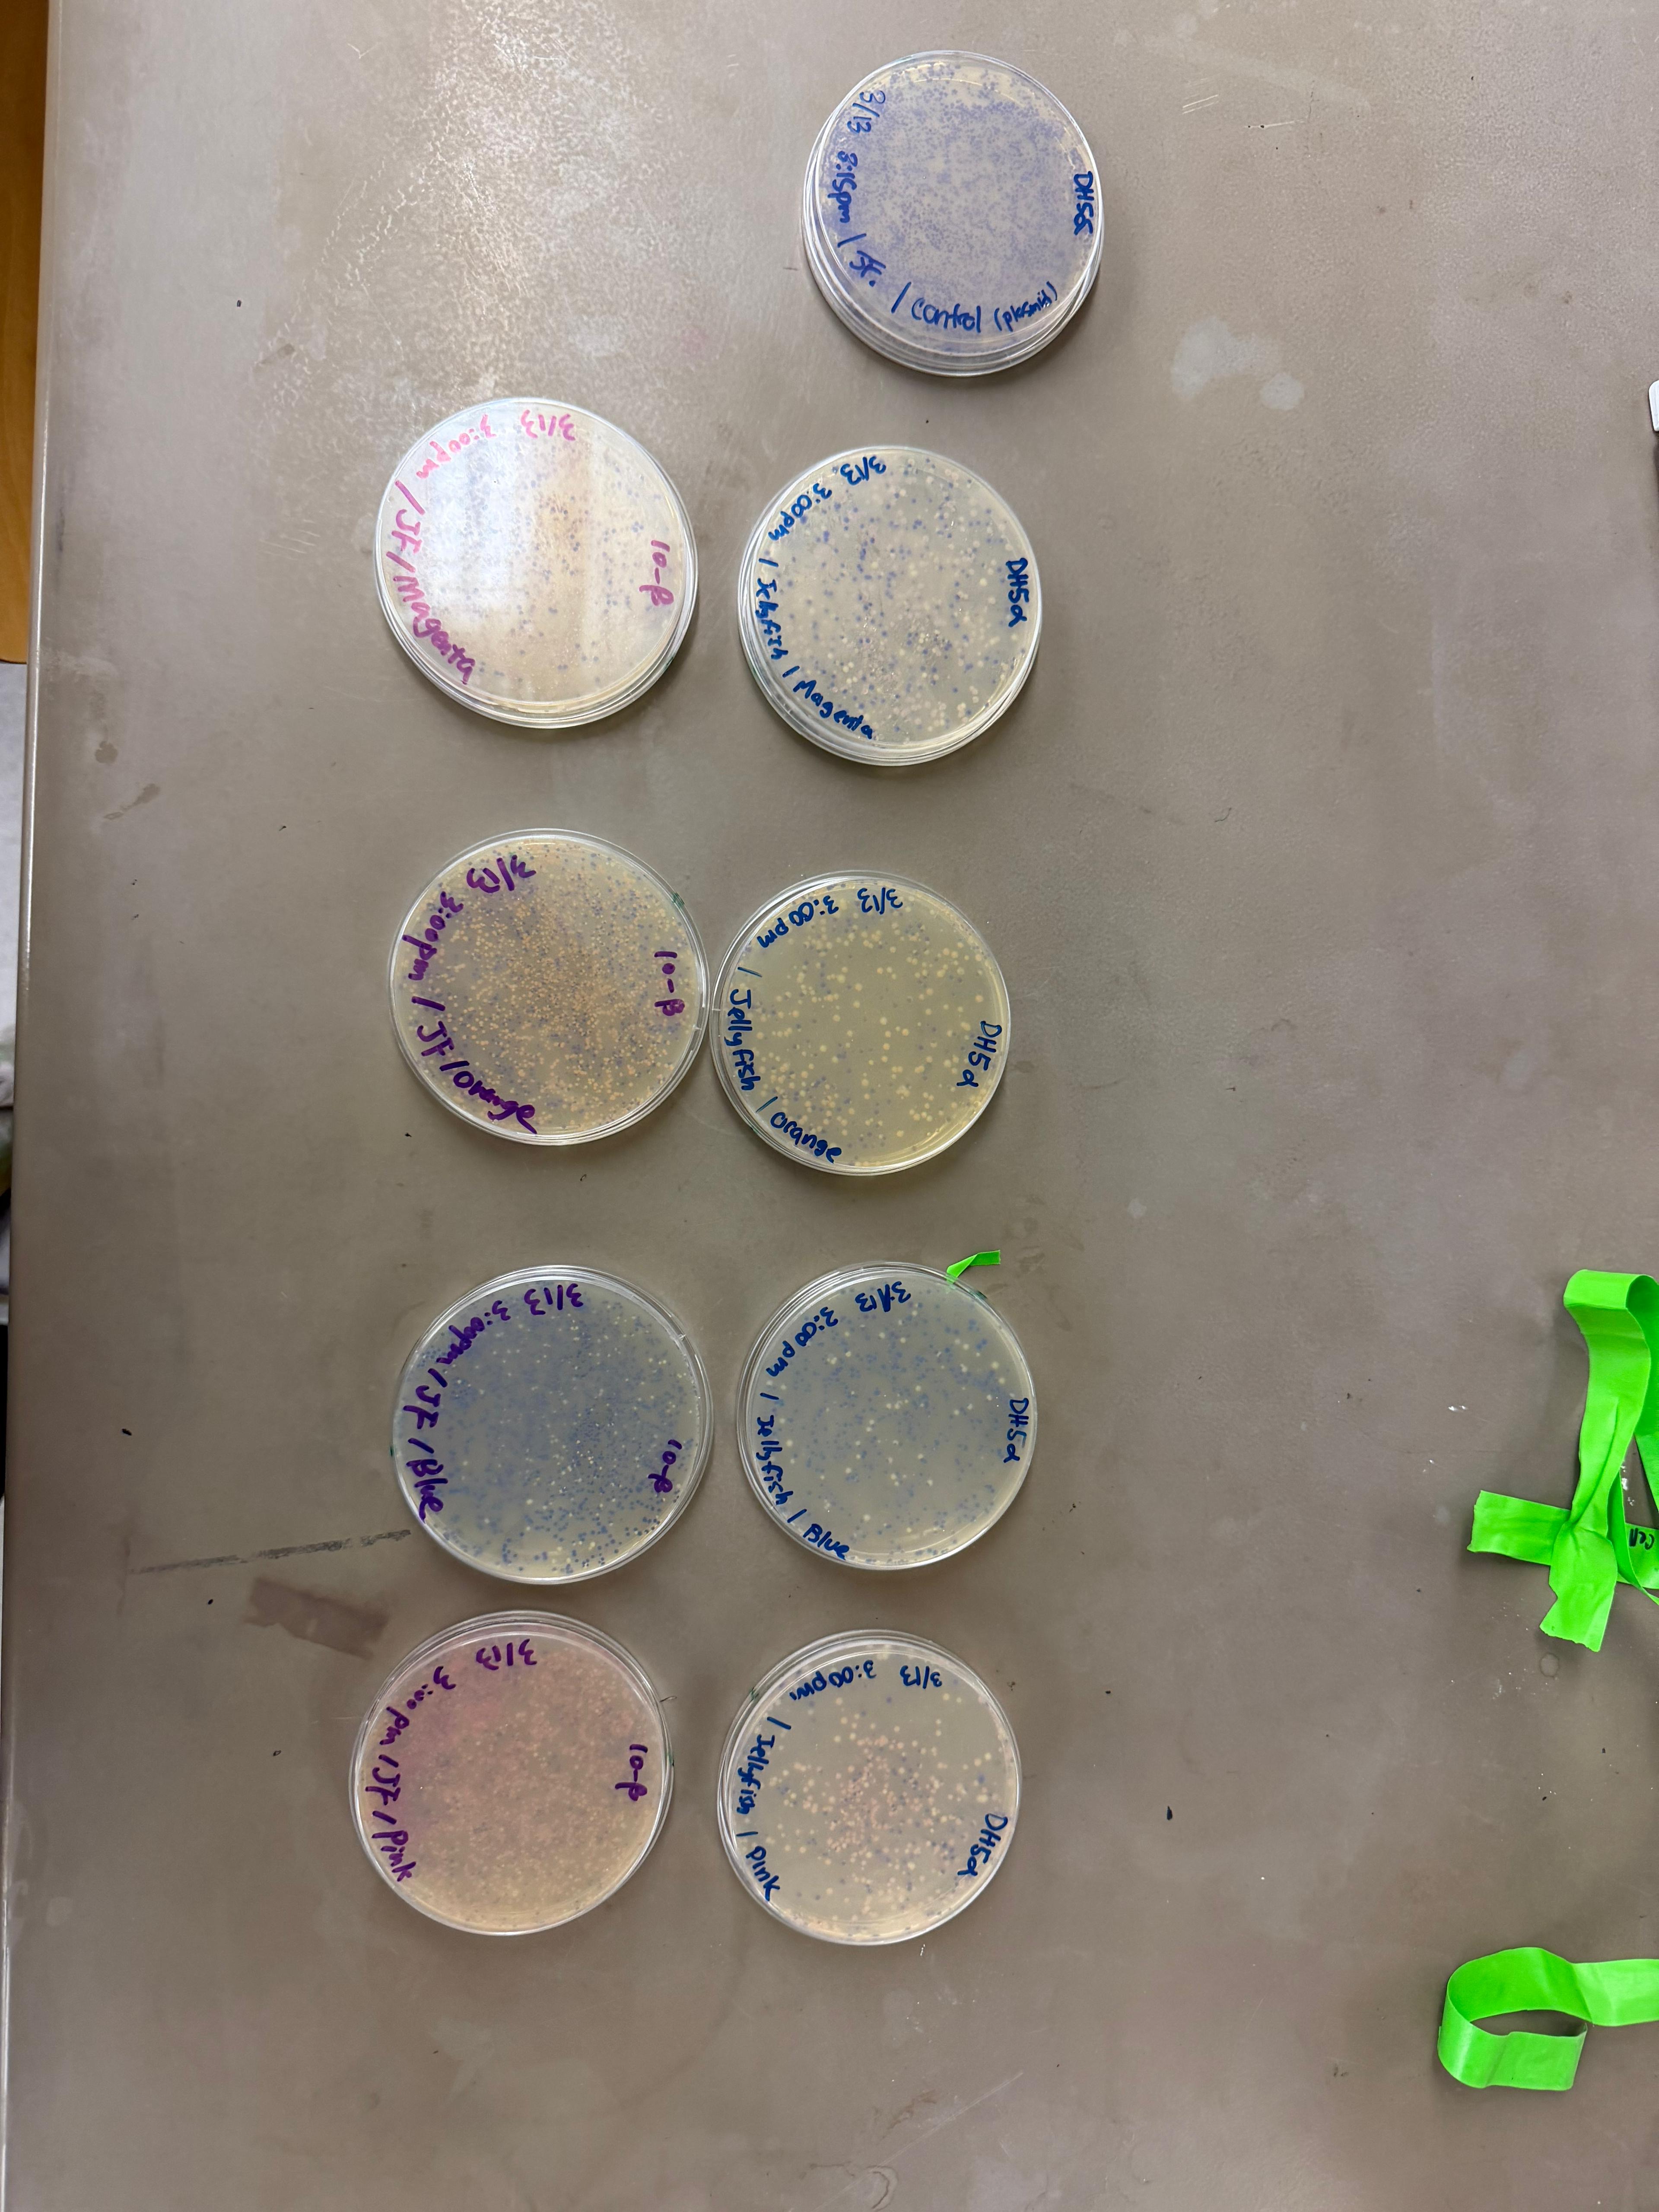
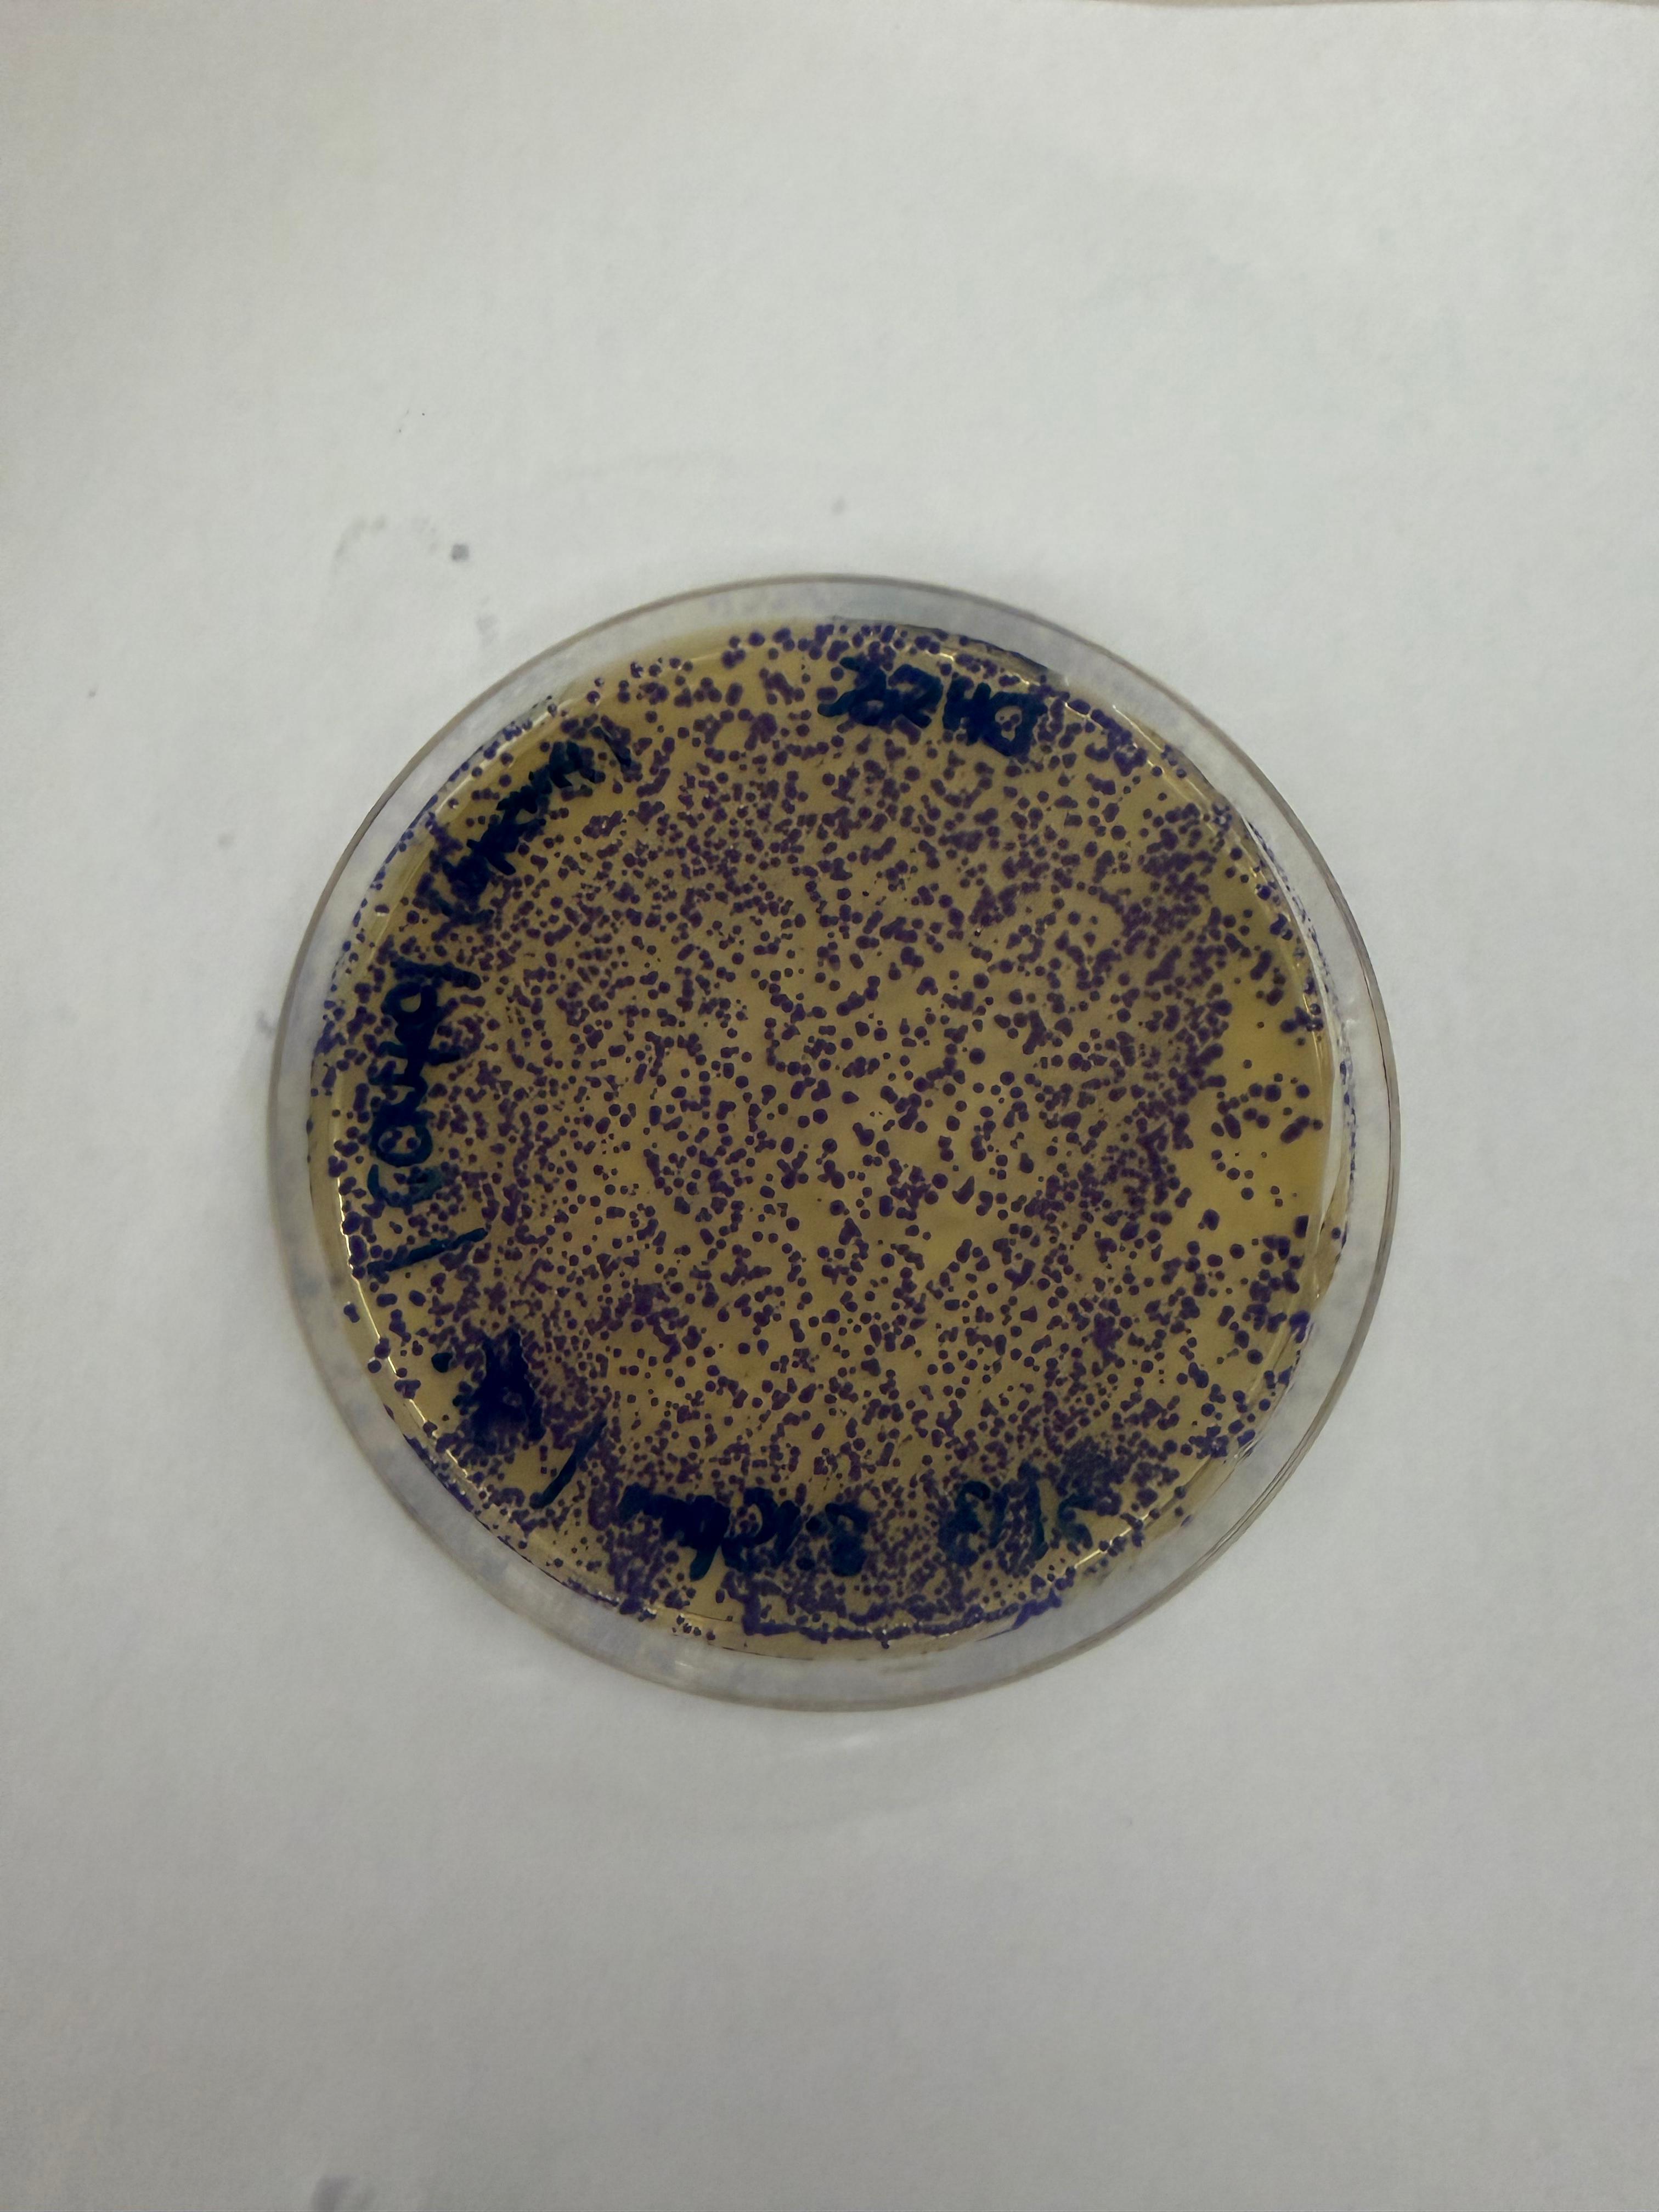
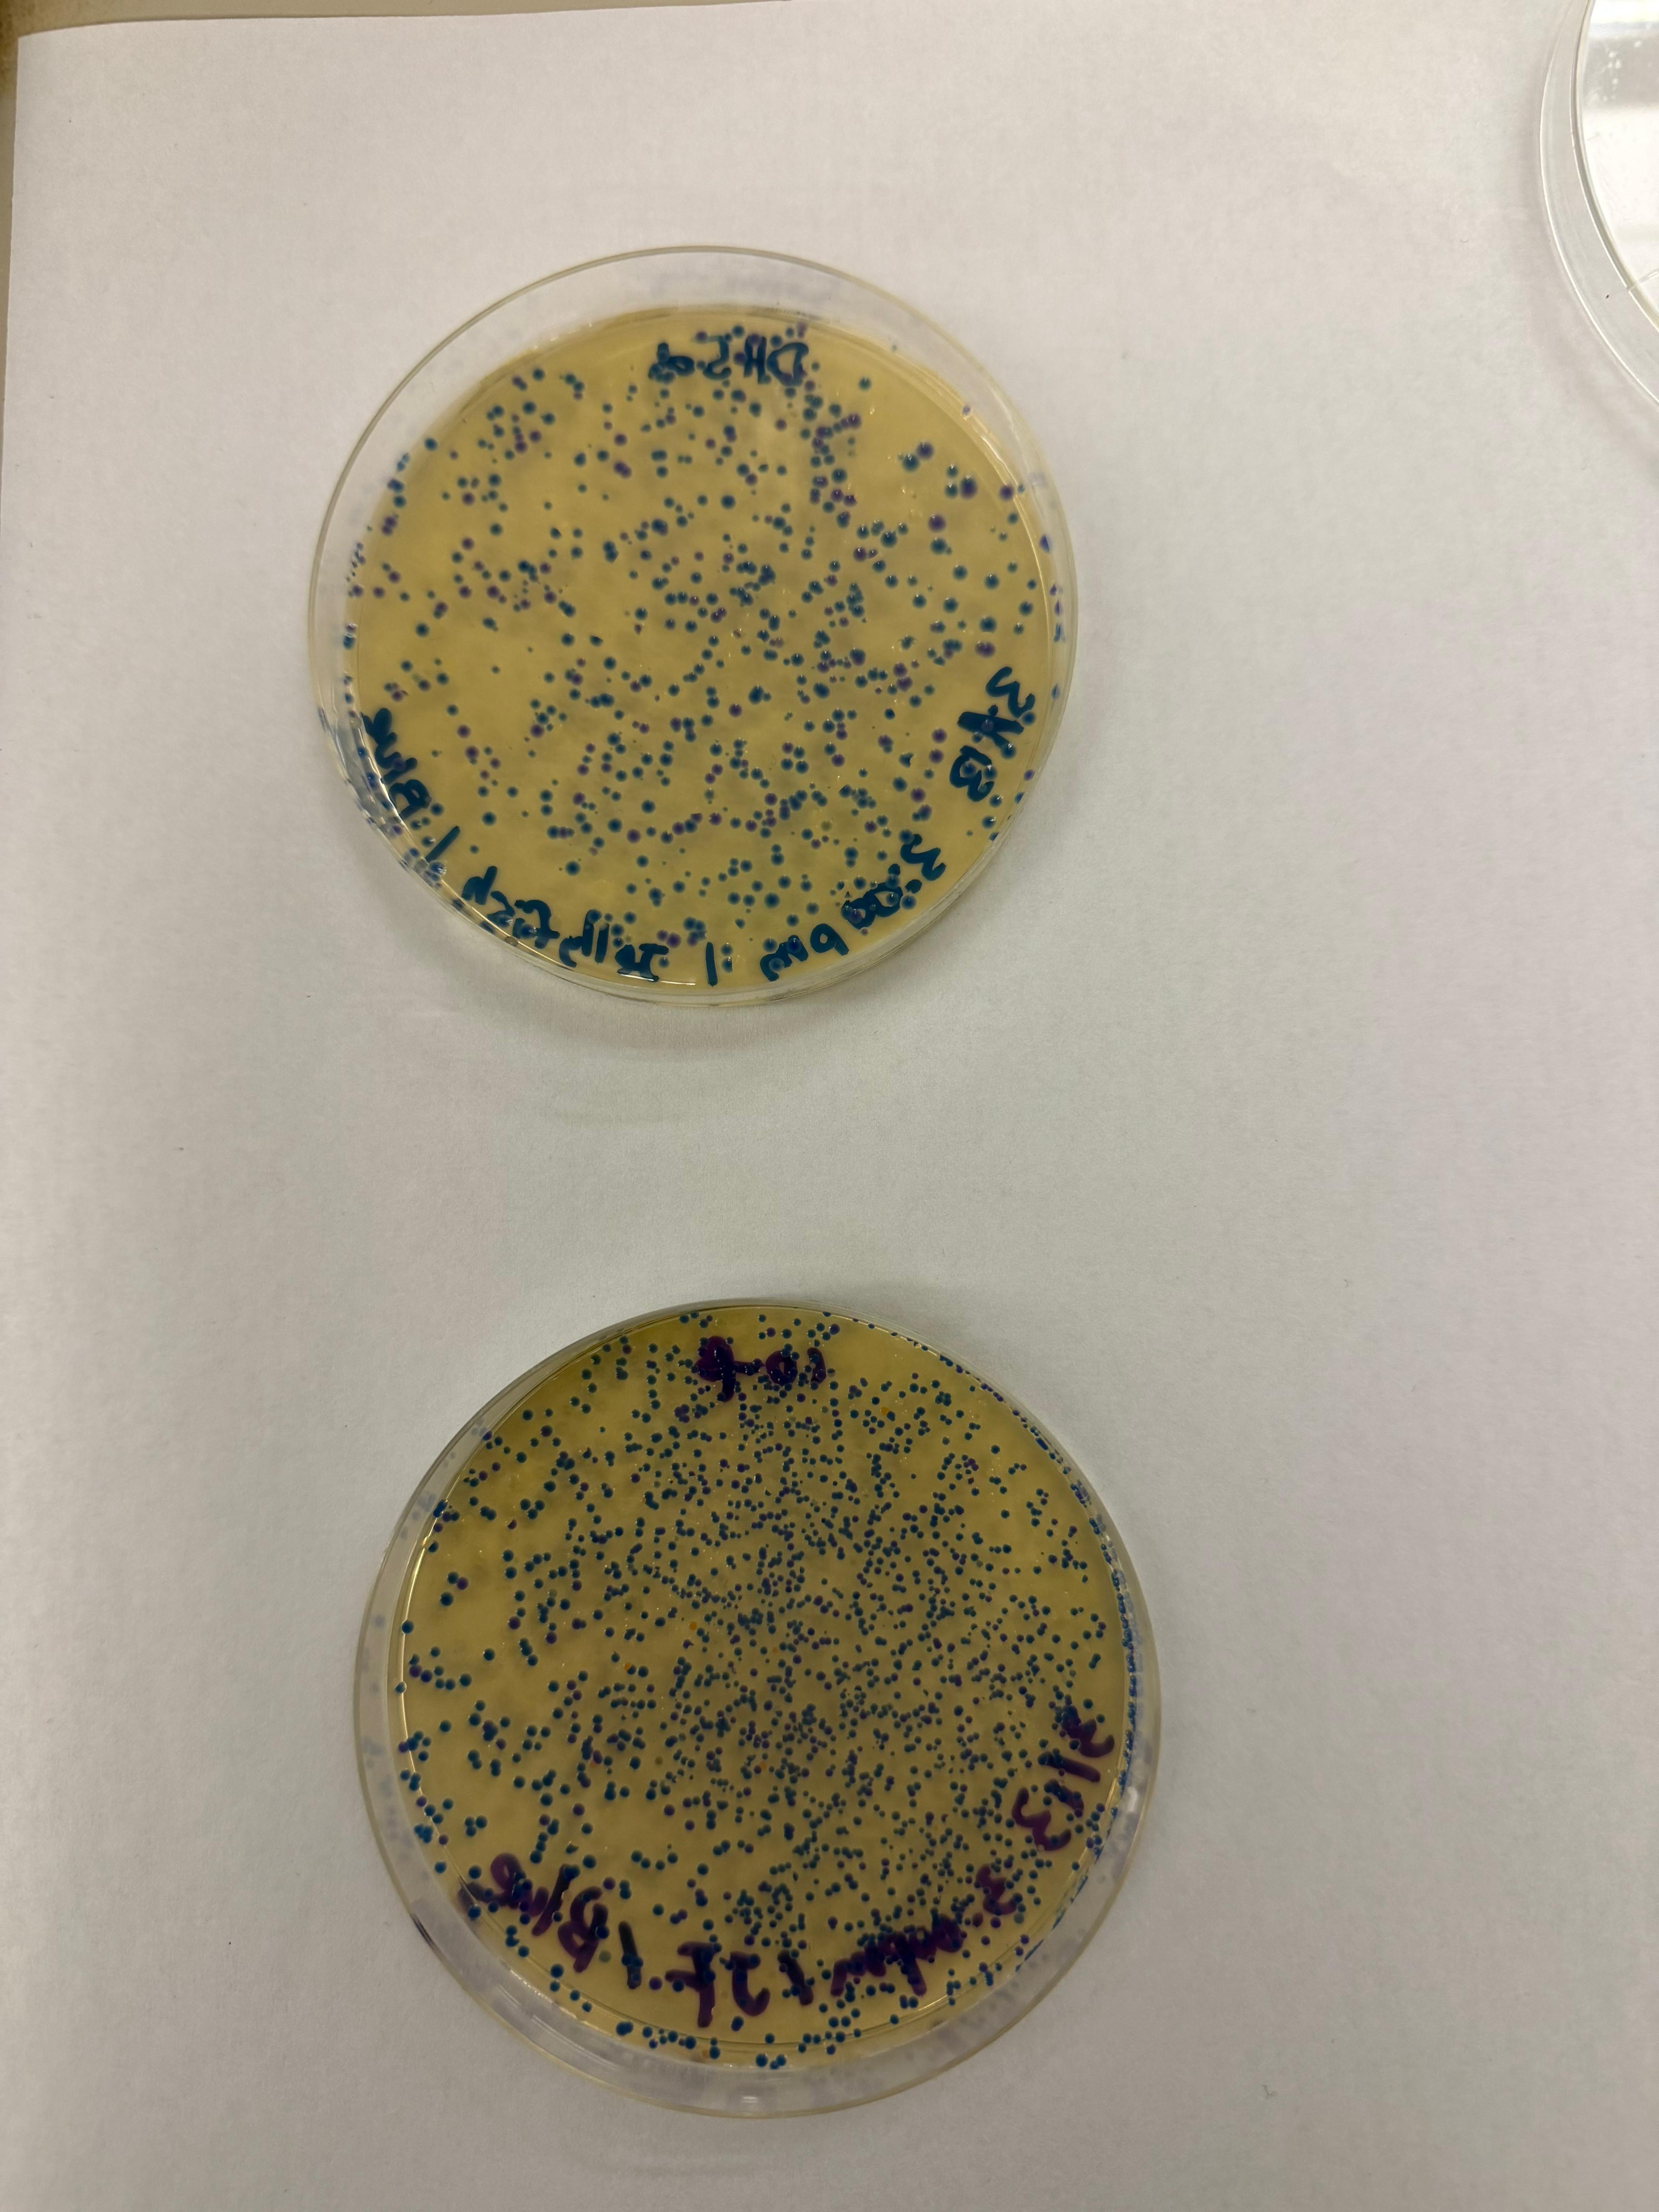
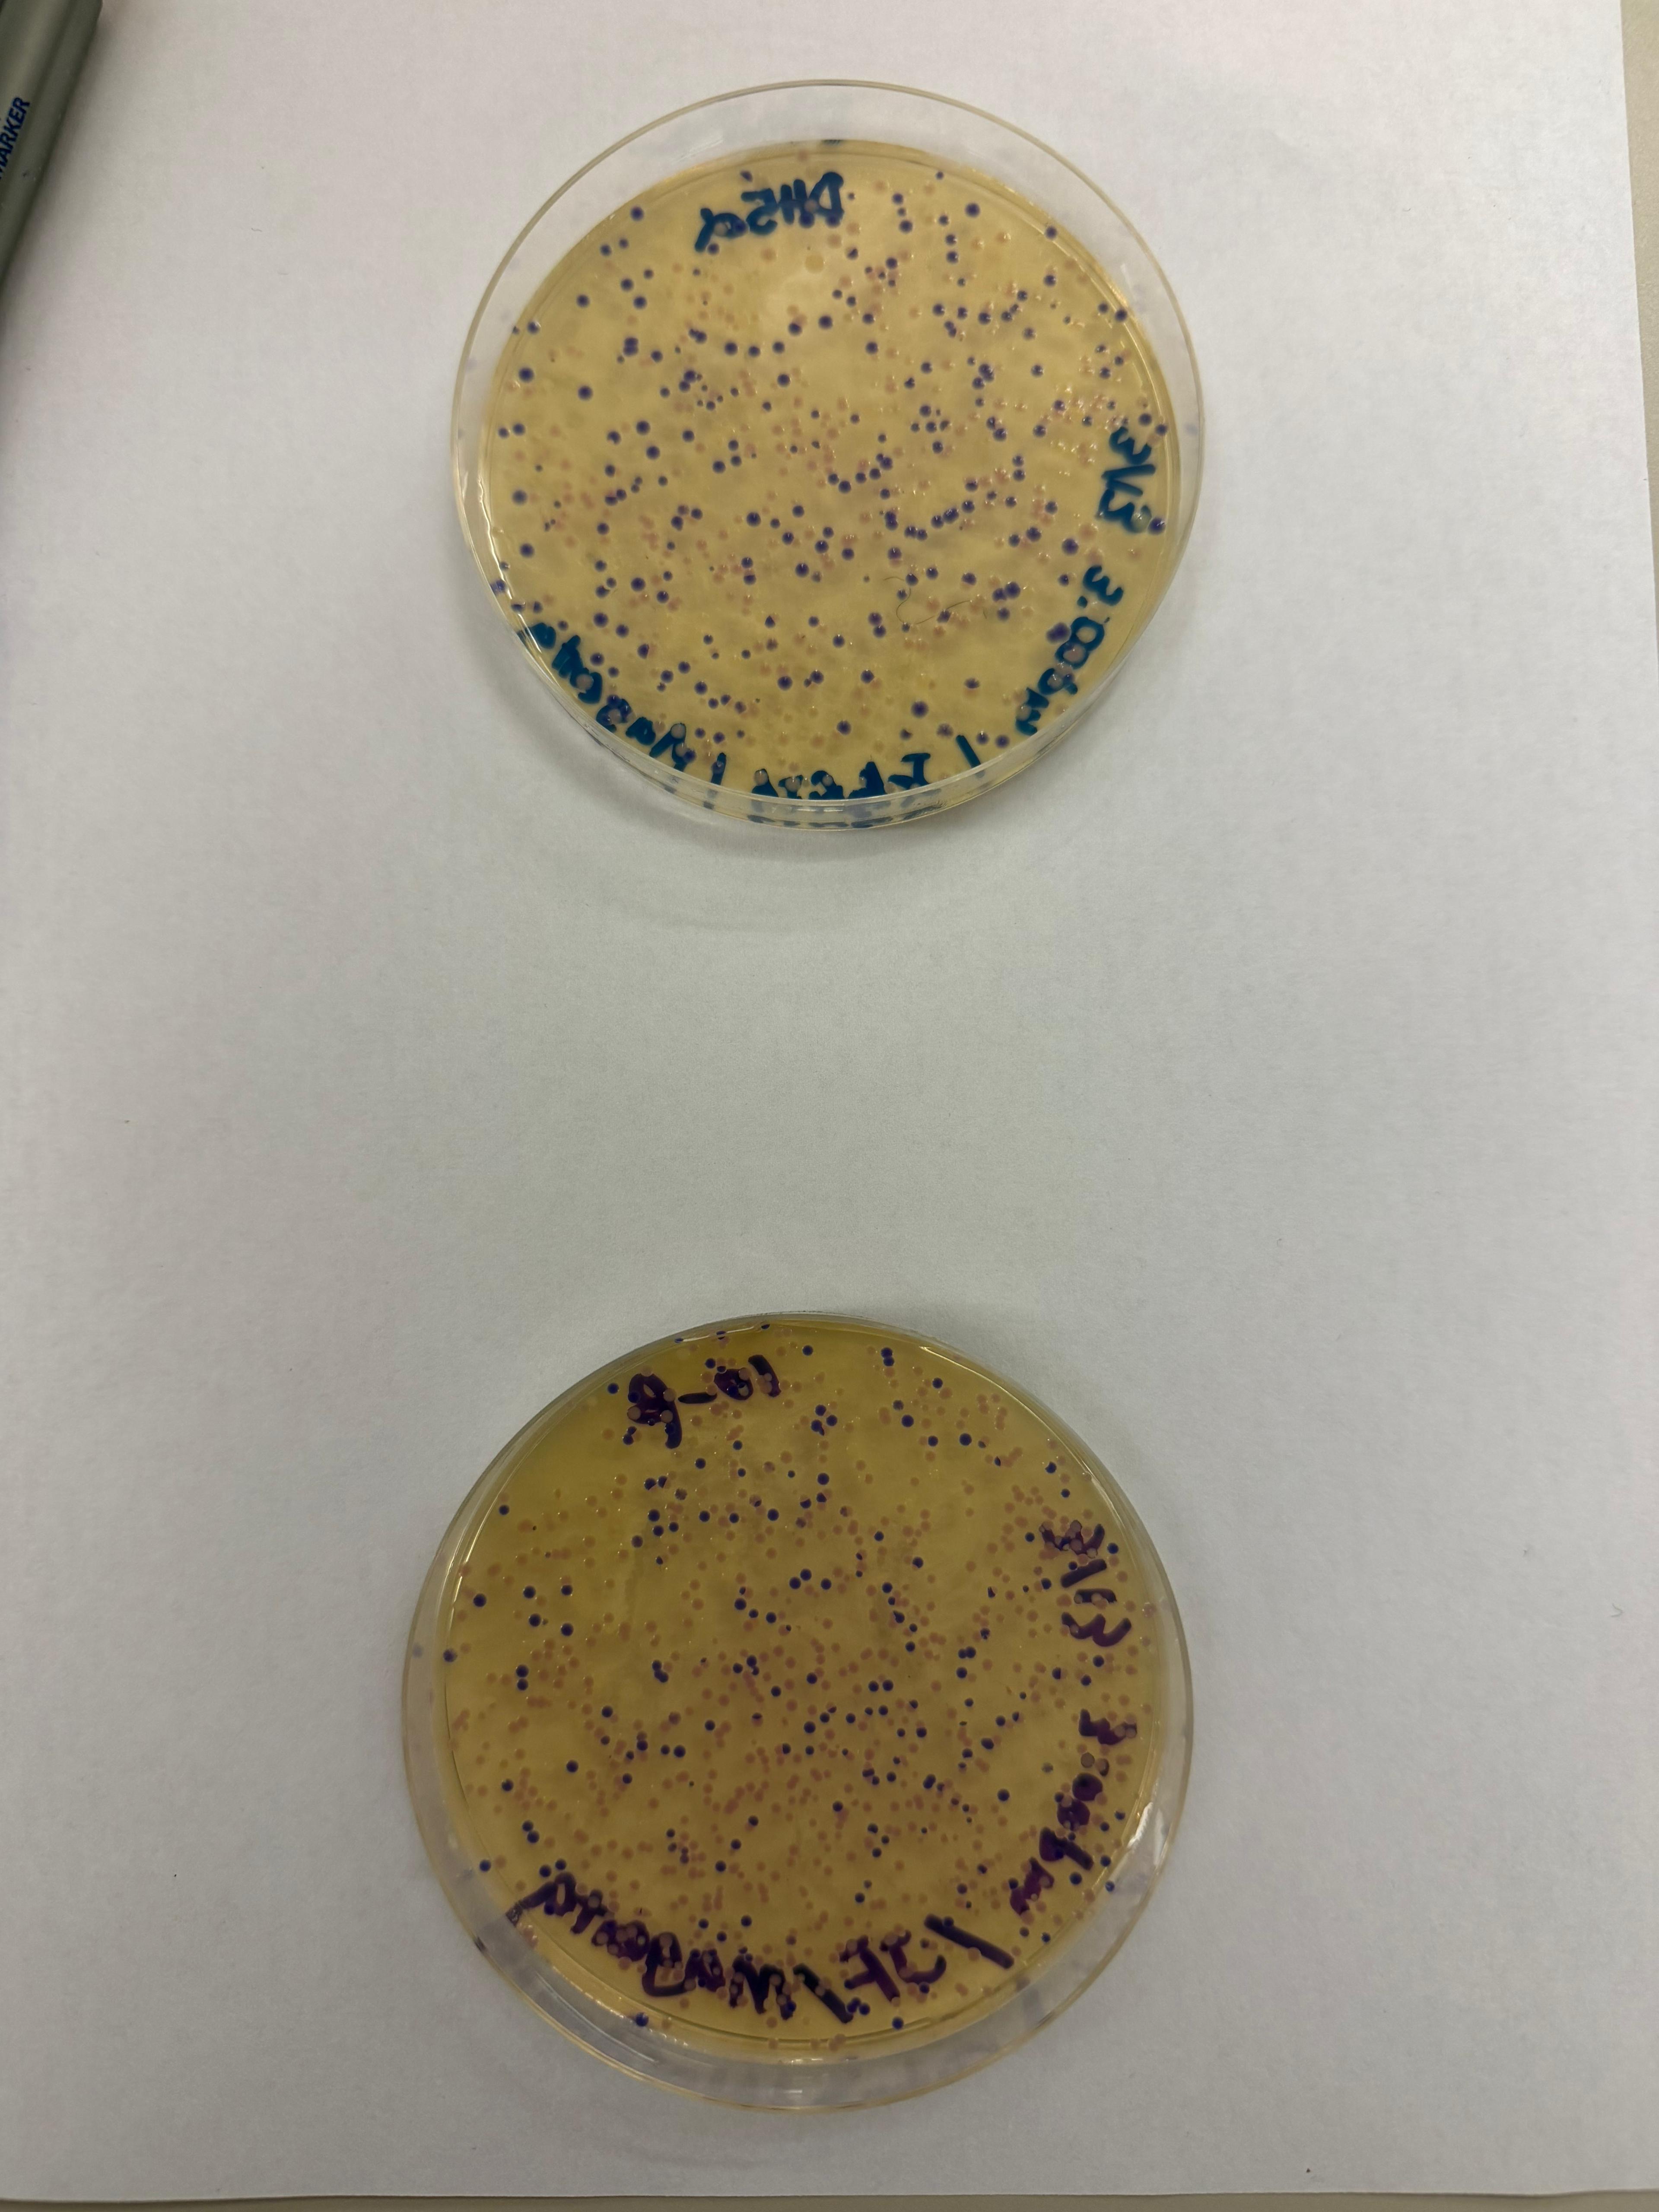
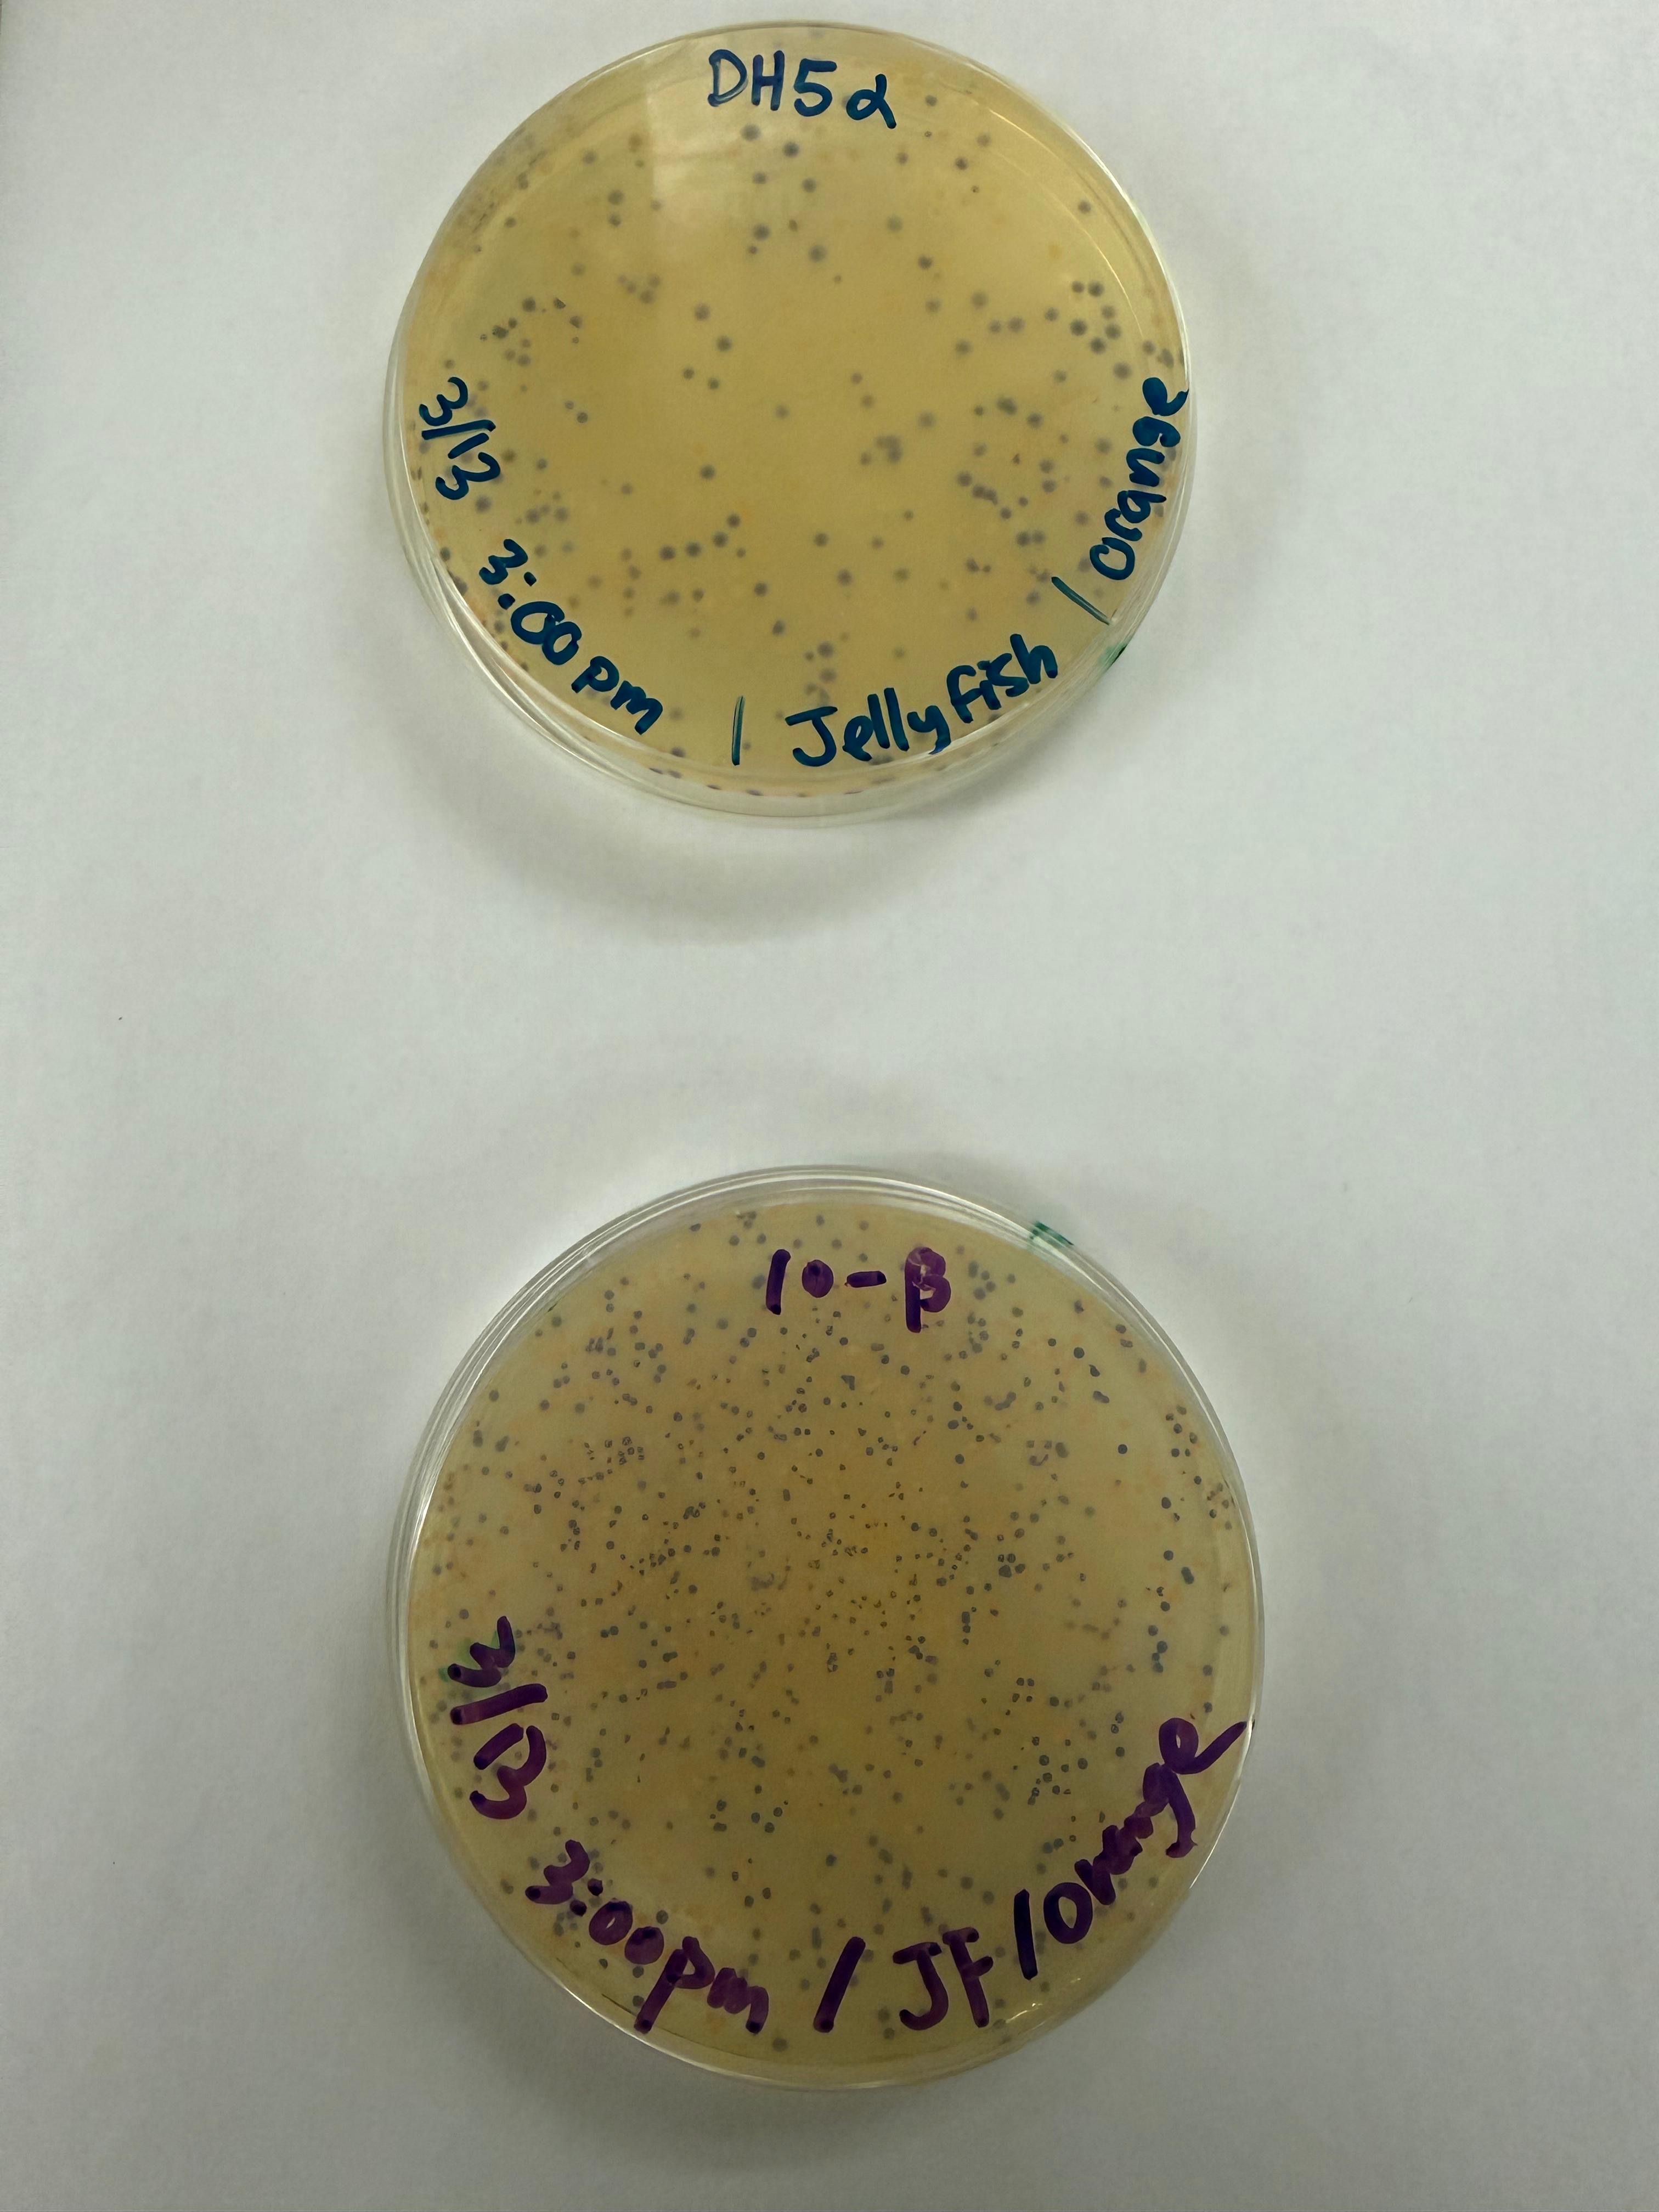
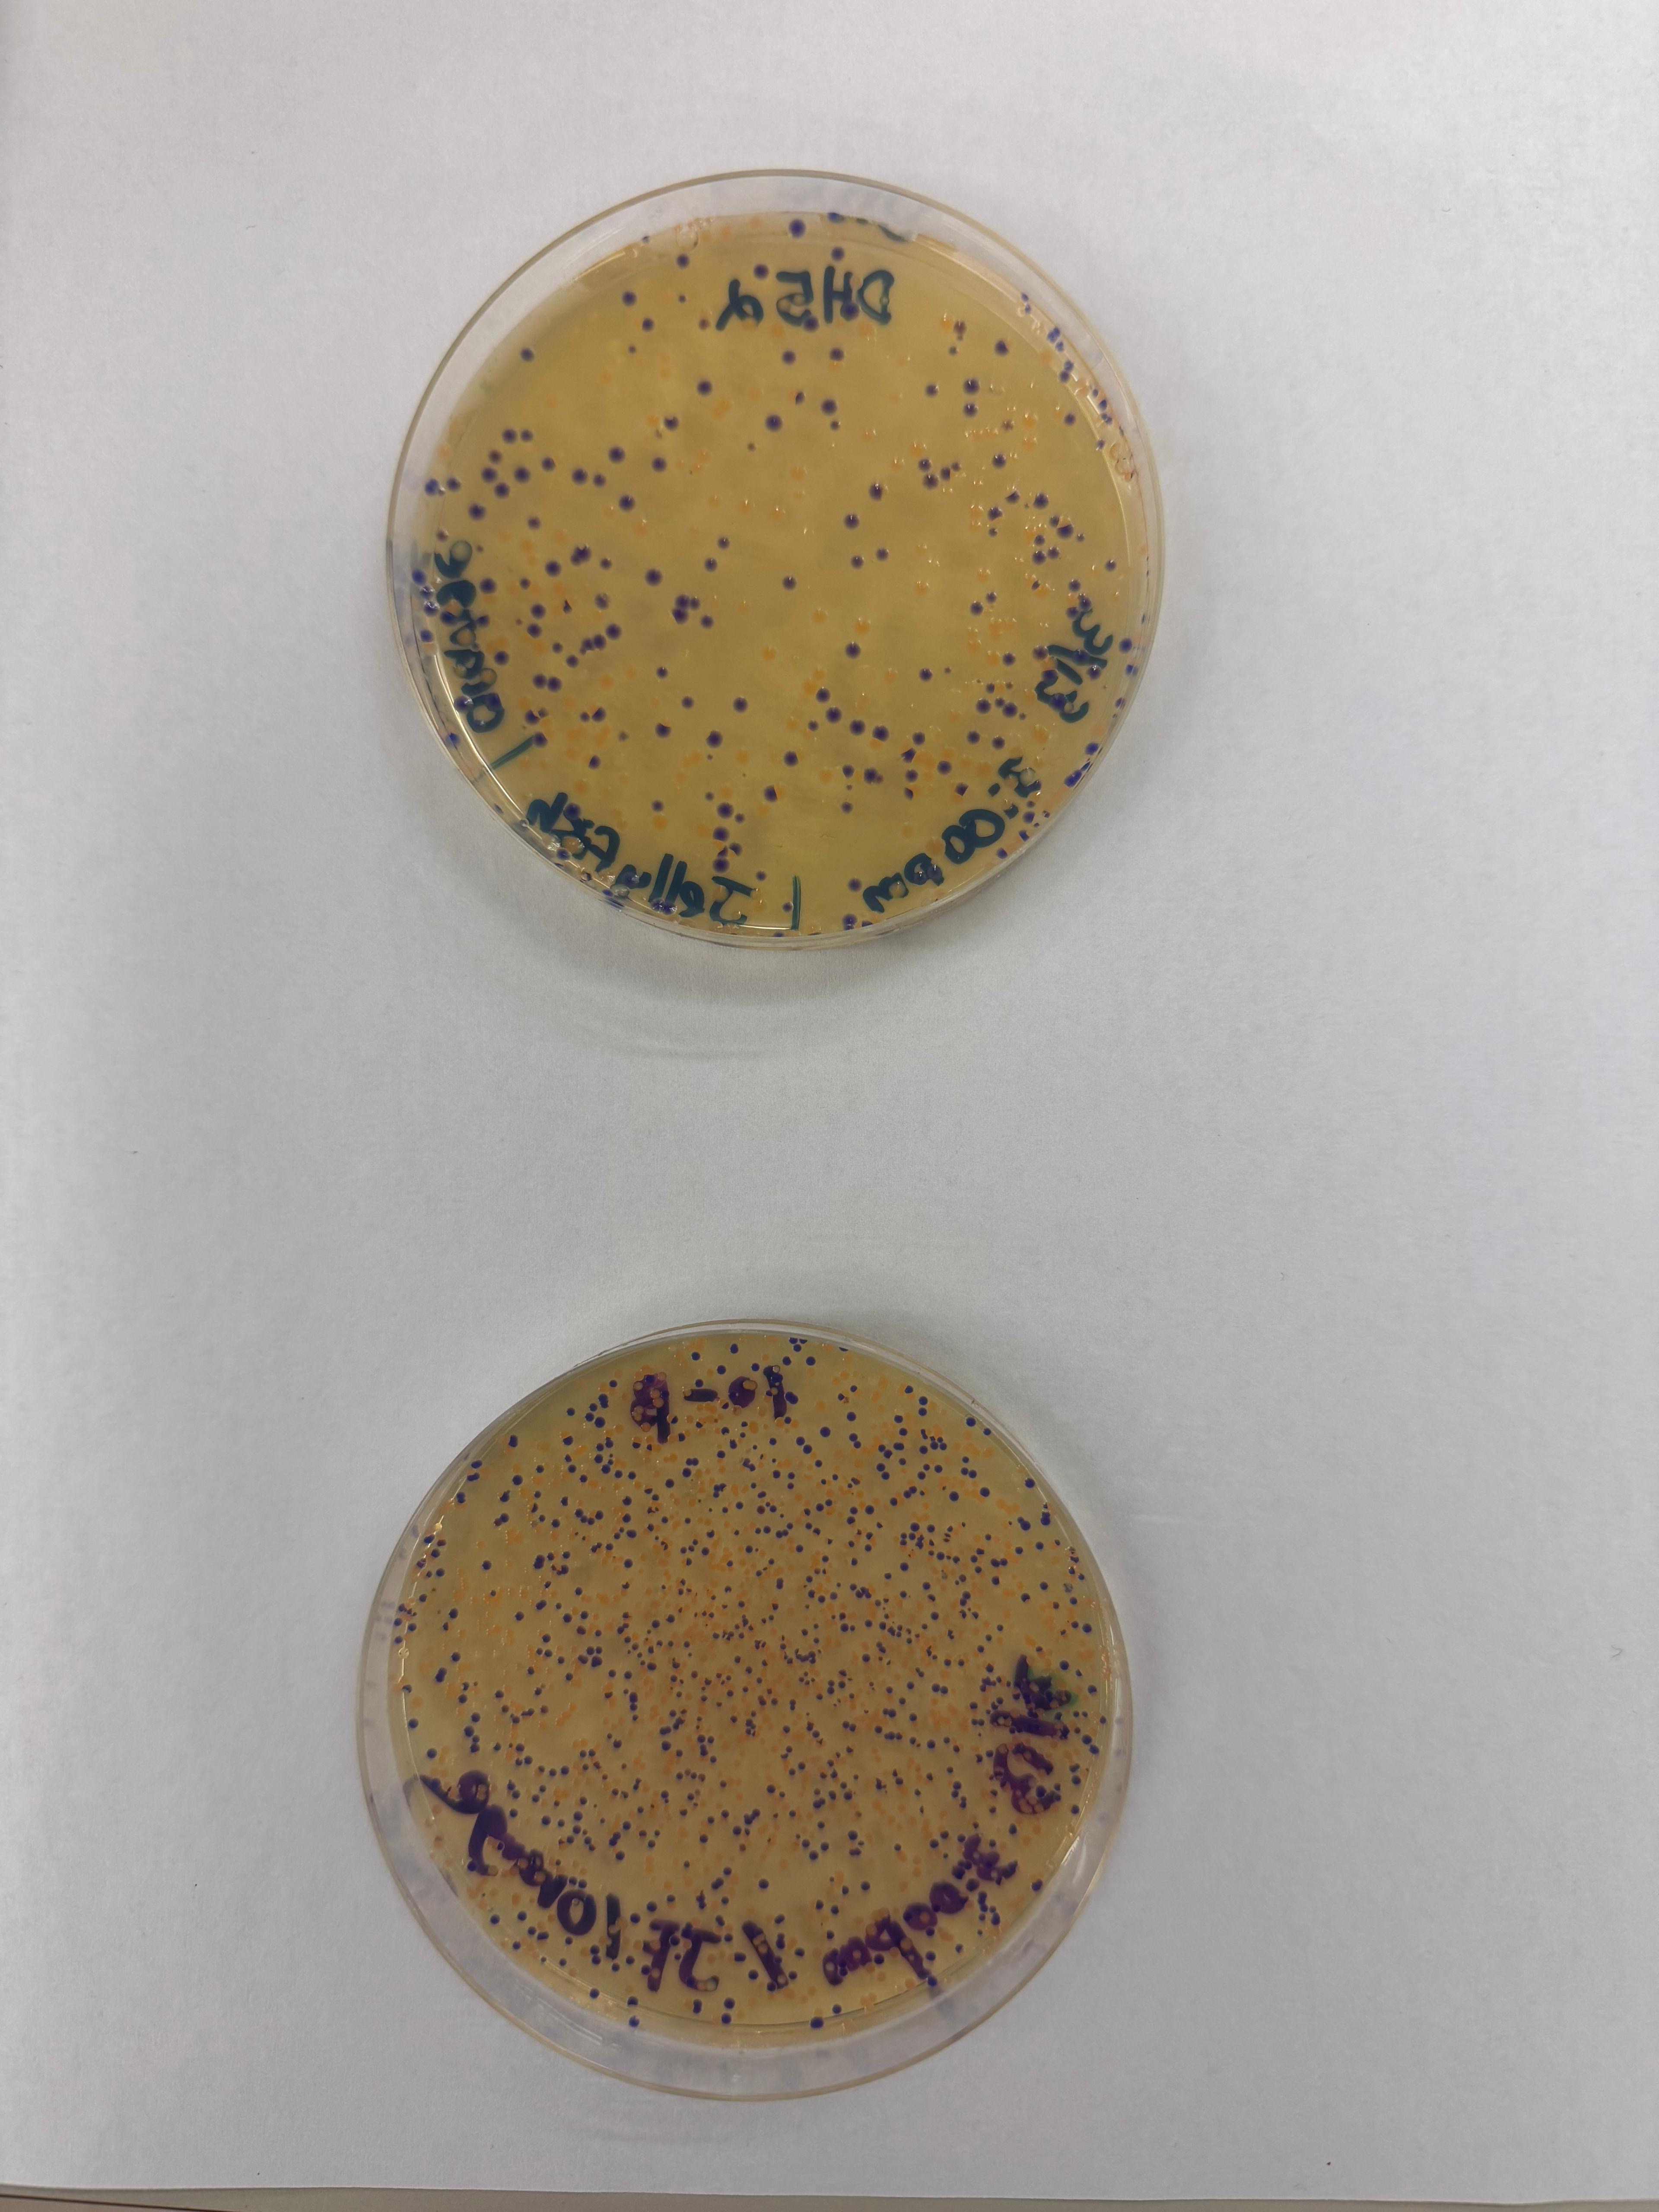
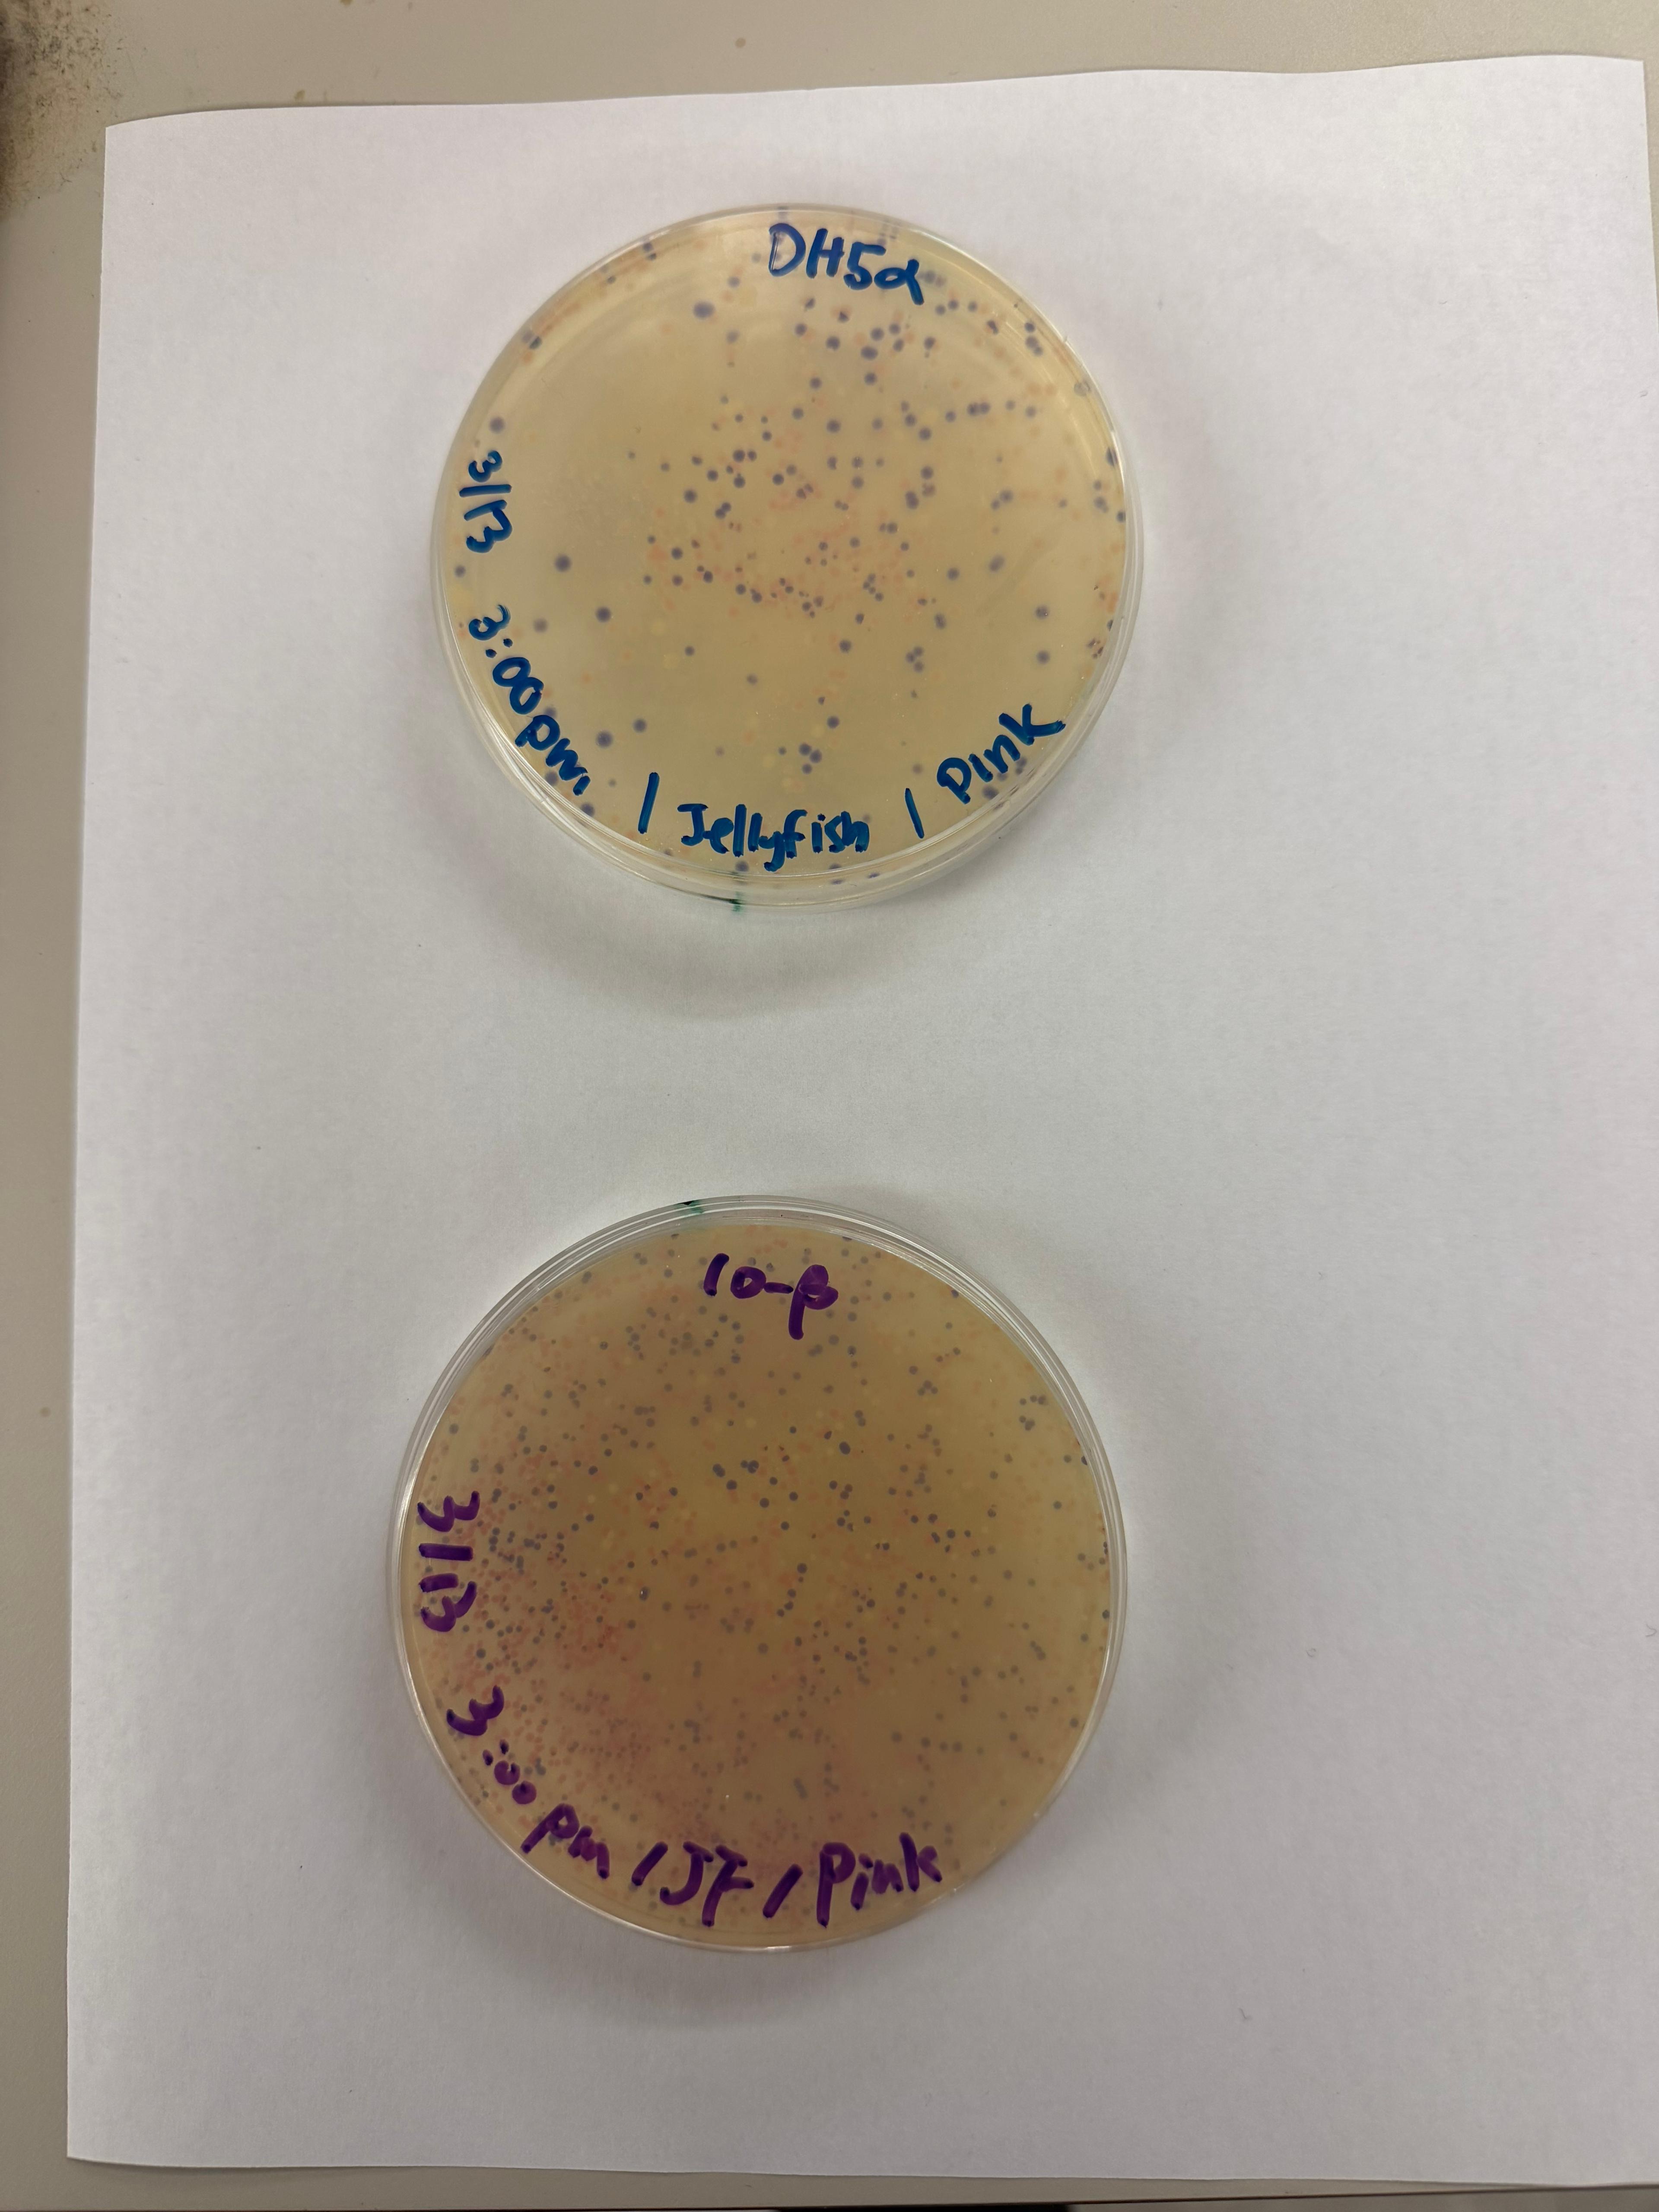
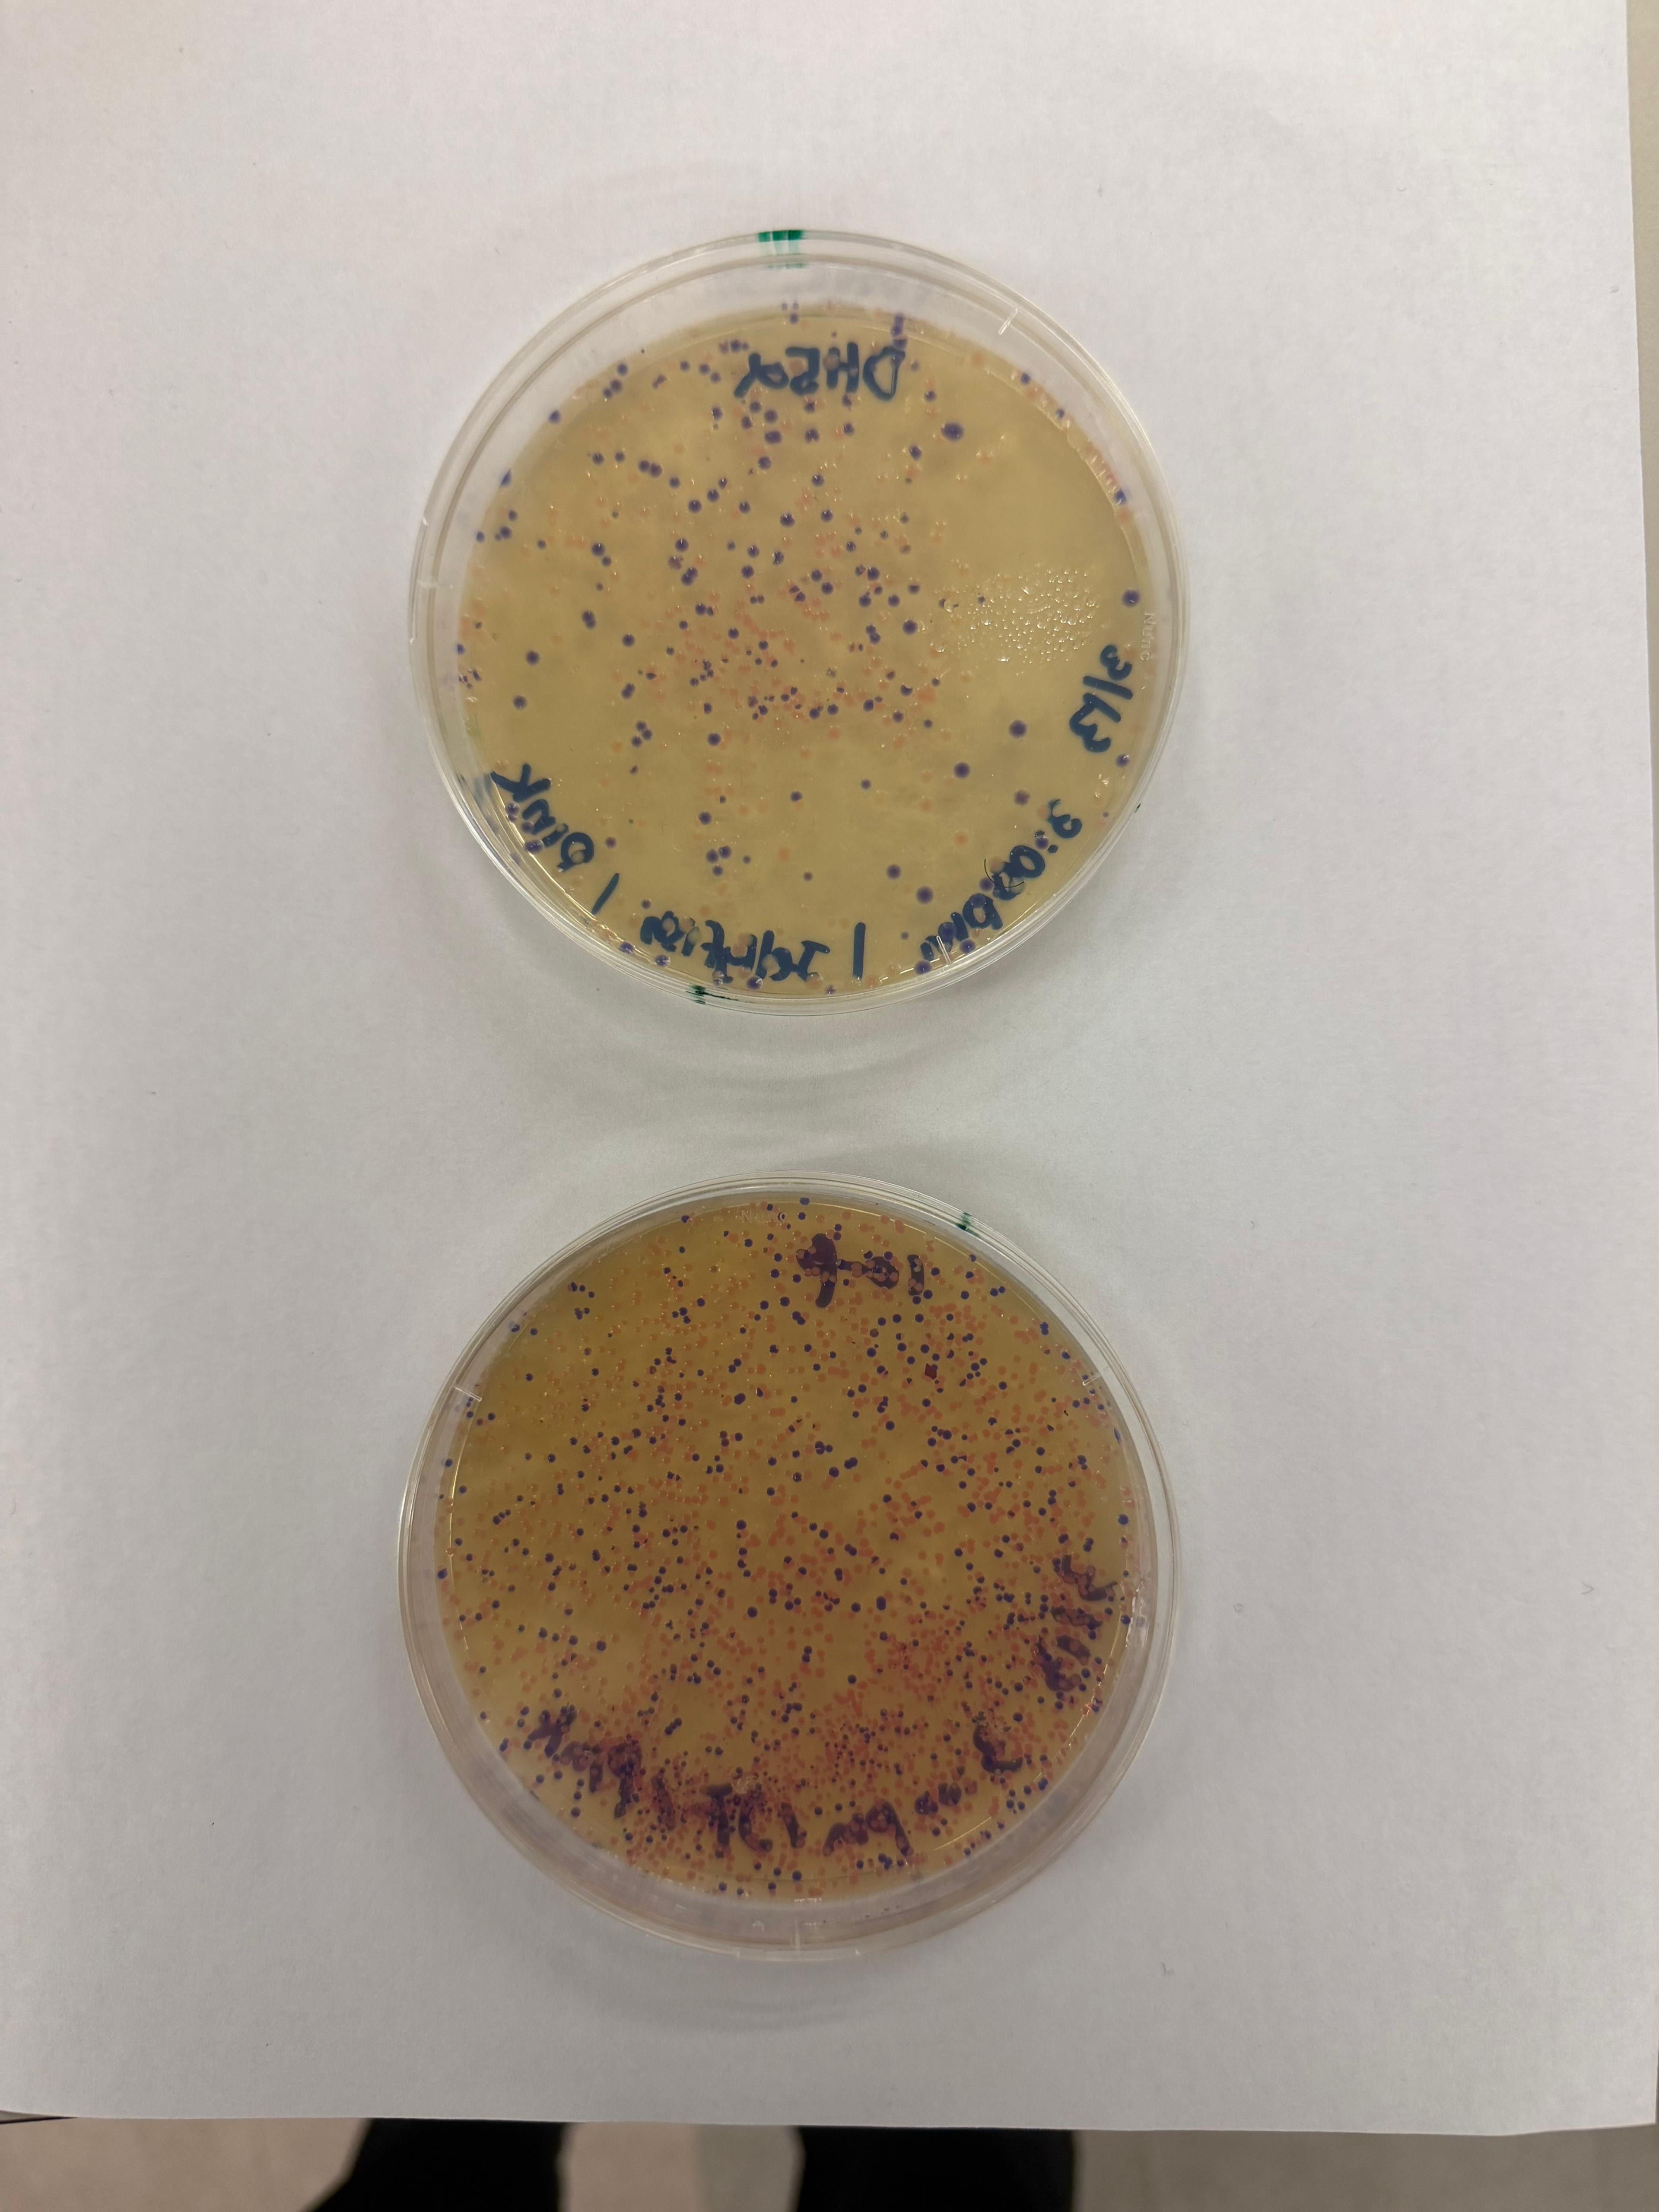
In this week’s lab, I made two custom Opentrons OT-2 protocols and used the liquid-handling robot to print Fluorescent E. coli onto black (charcoal) agar plates. I produced two pieces using different design workflows:
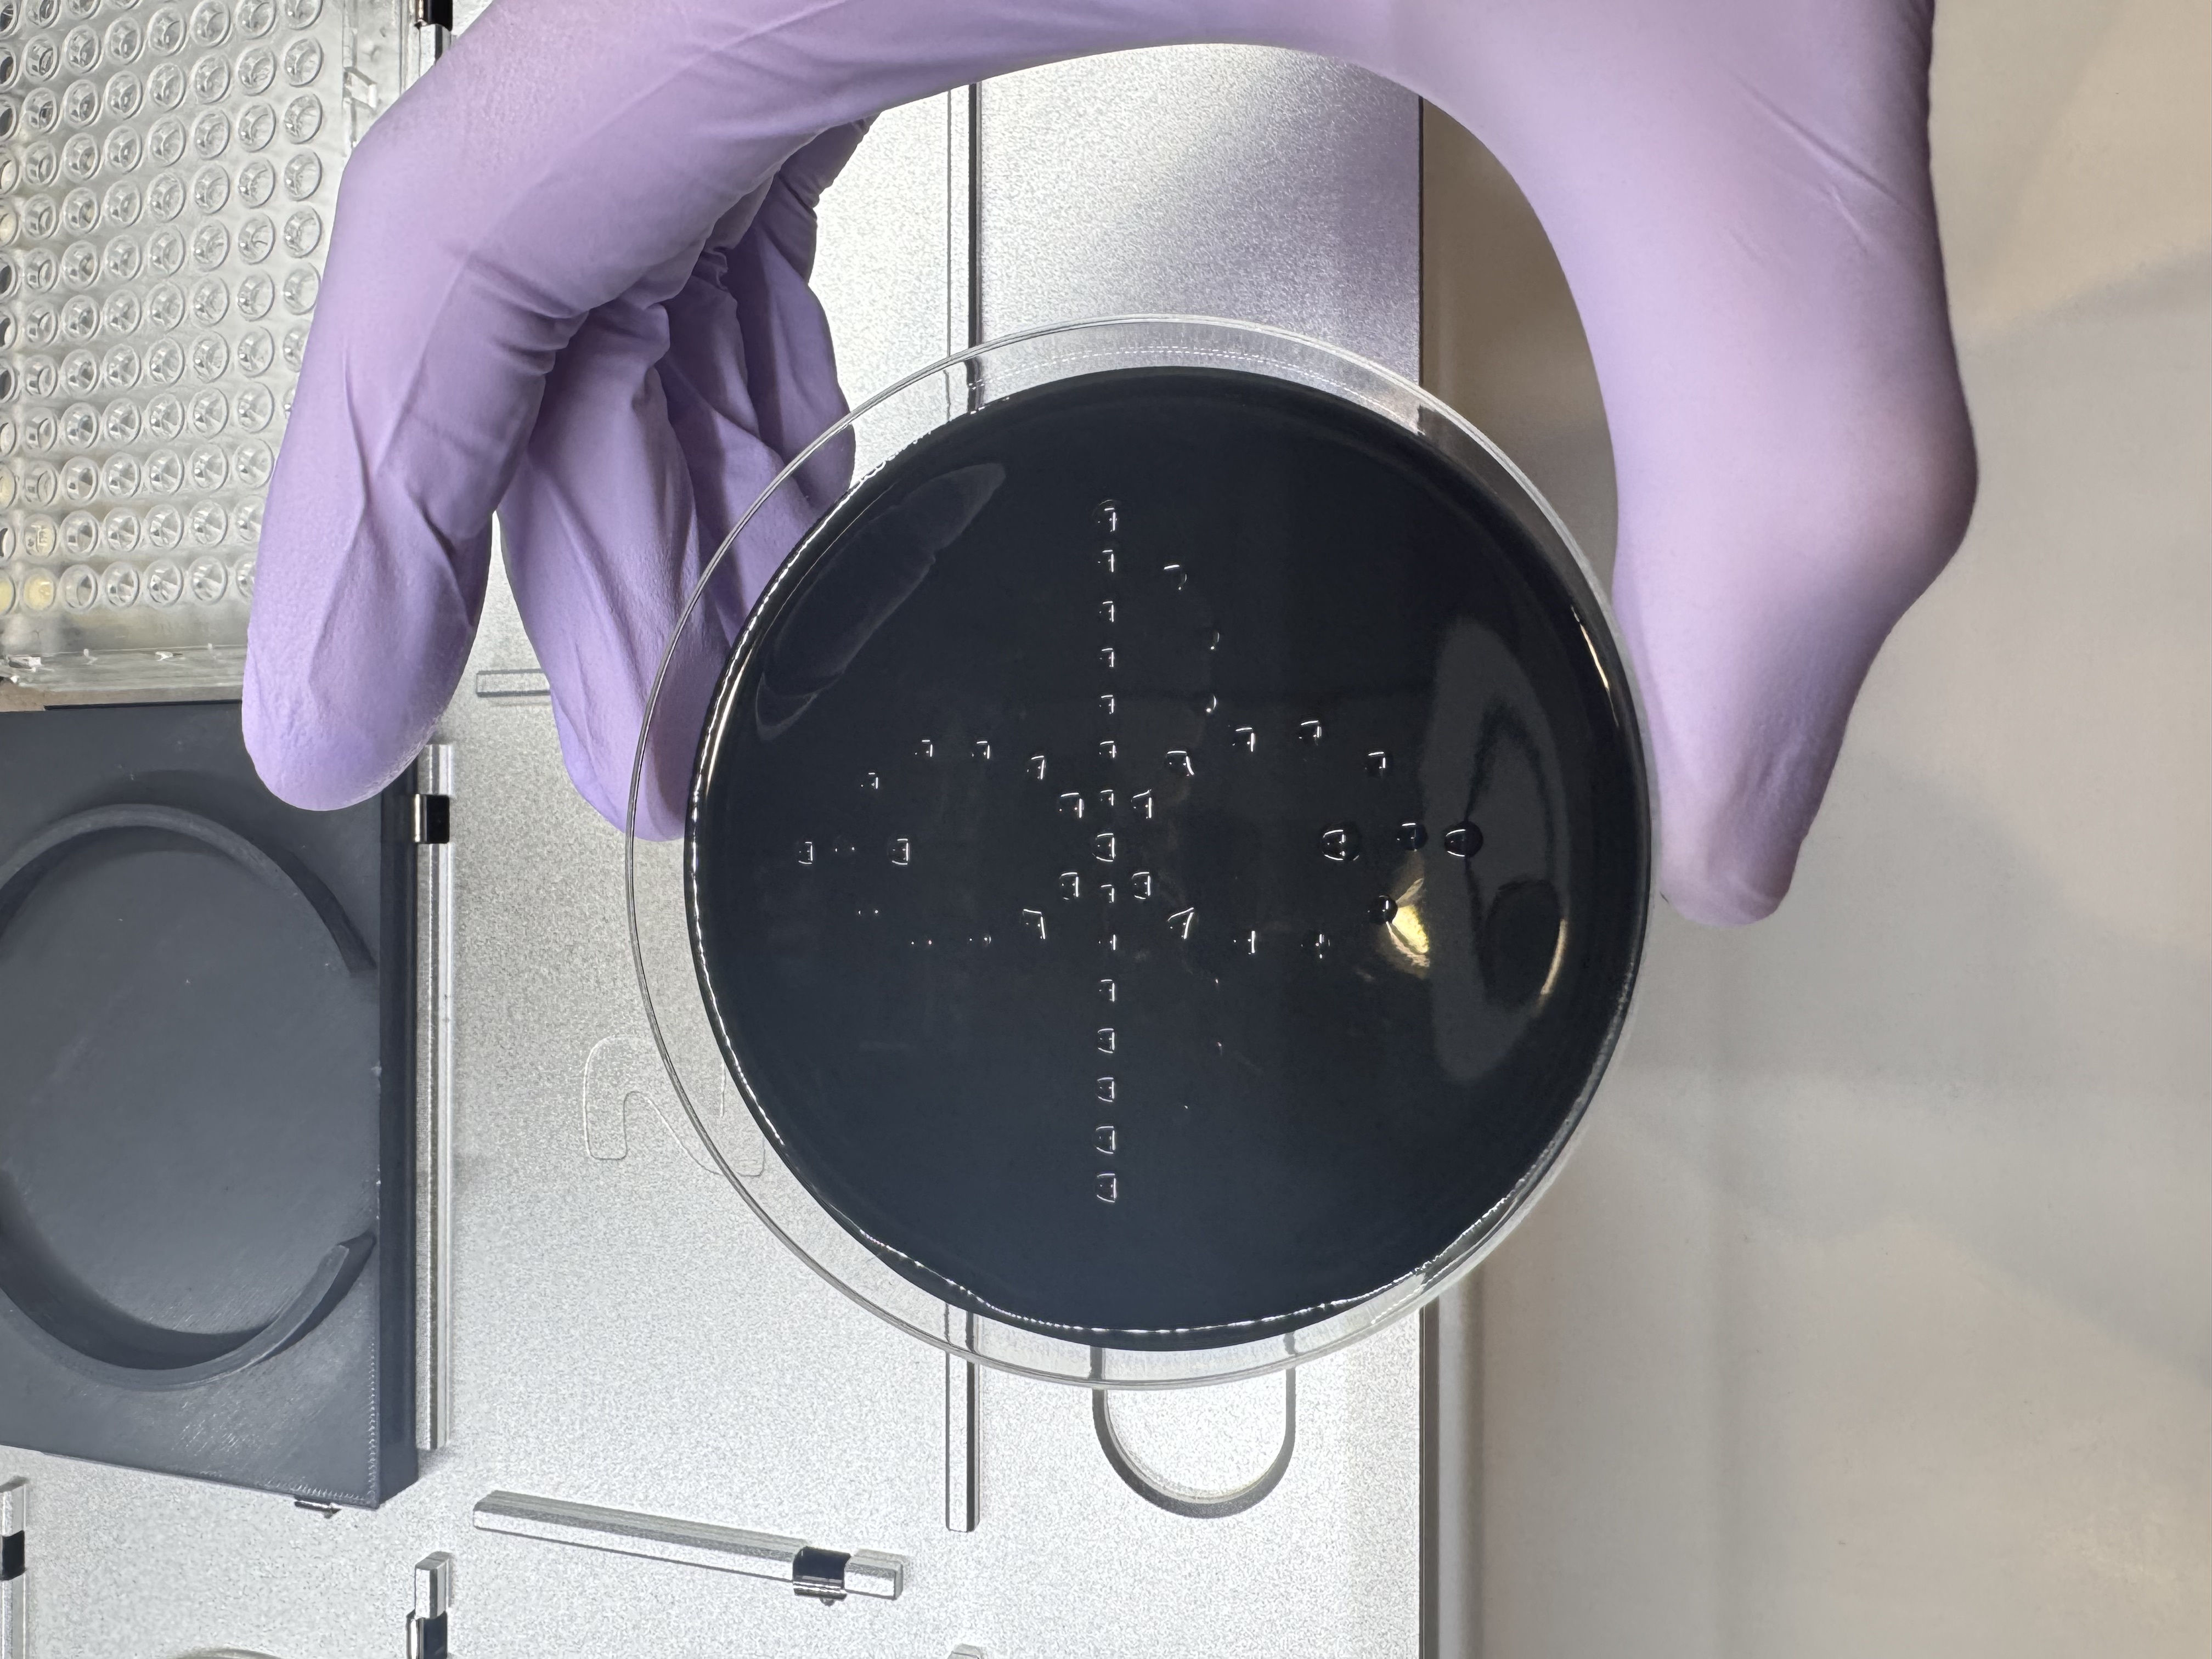
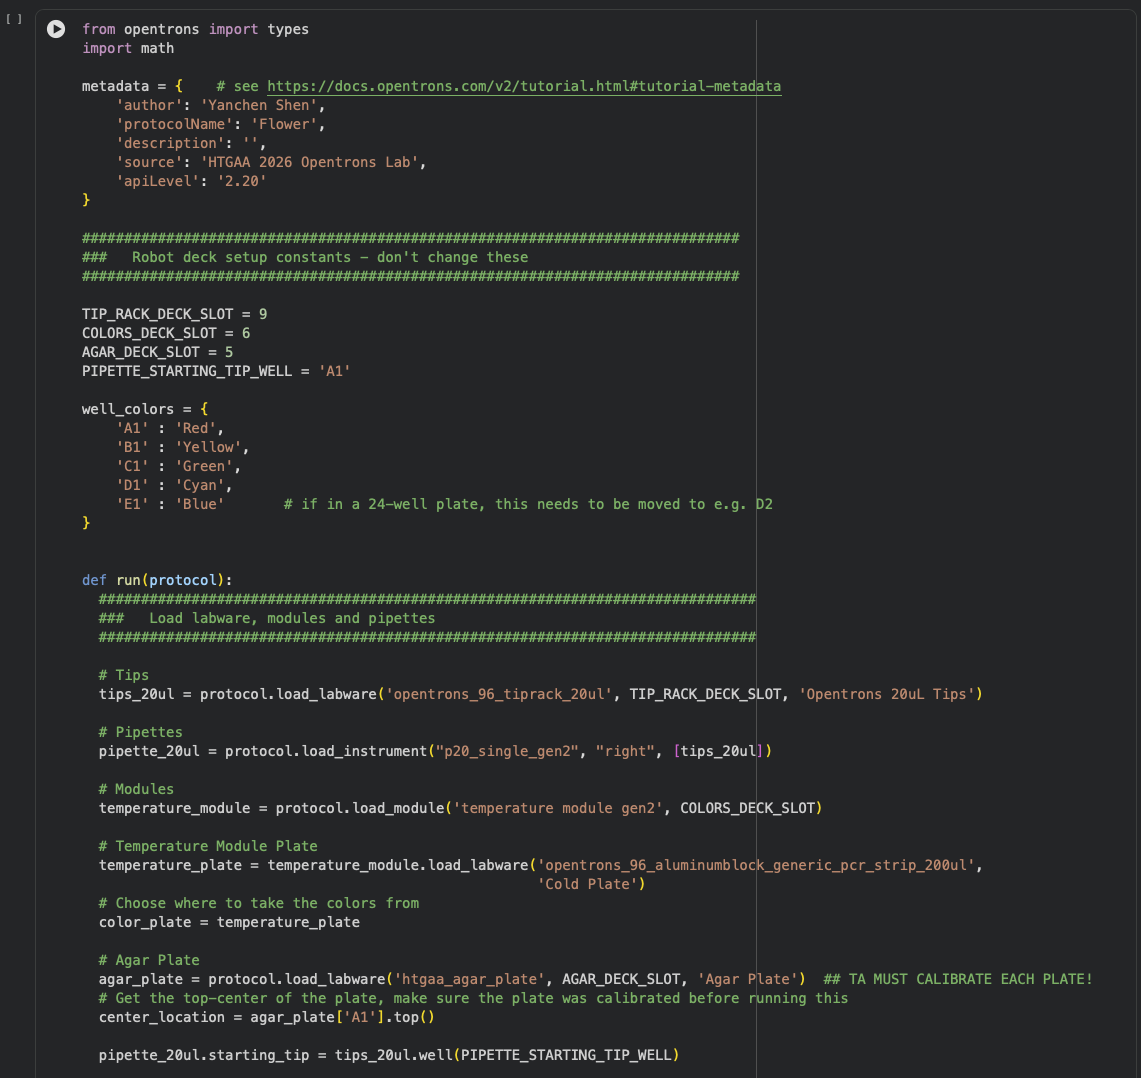
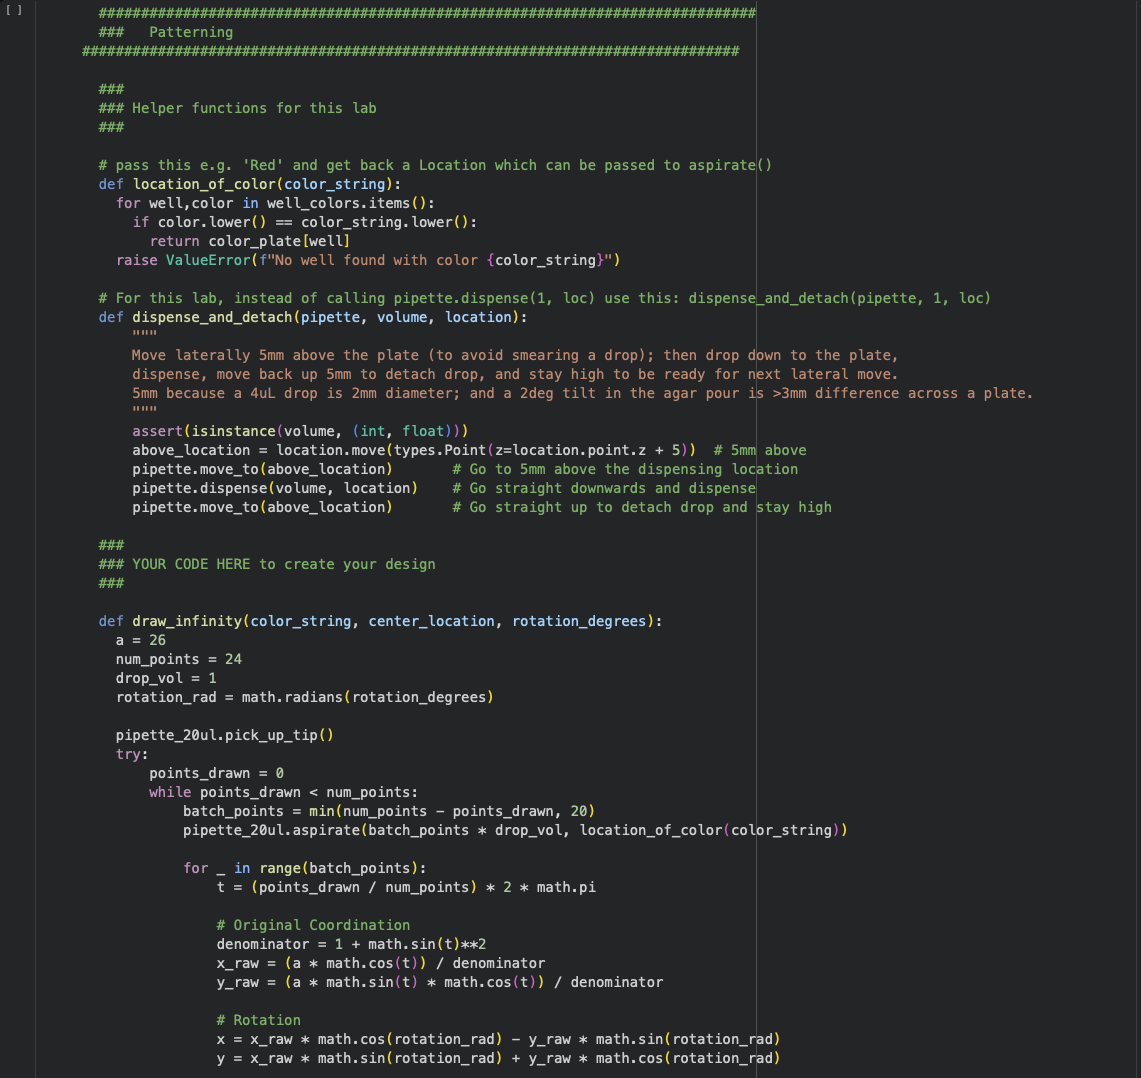
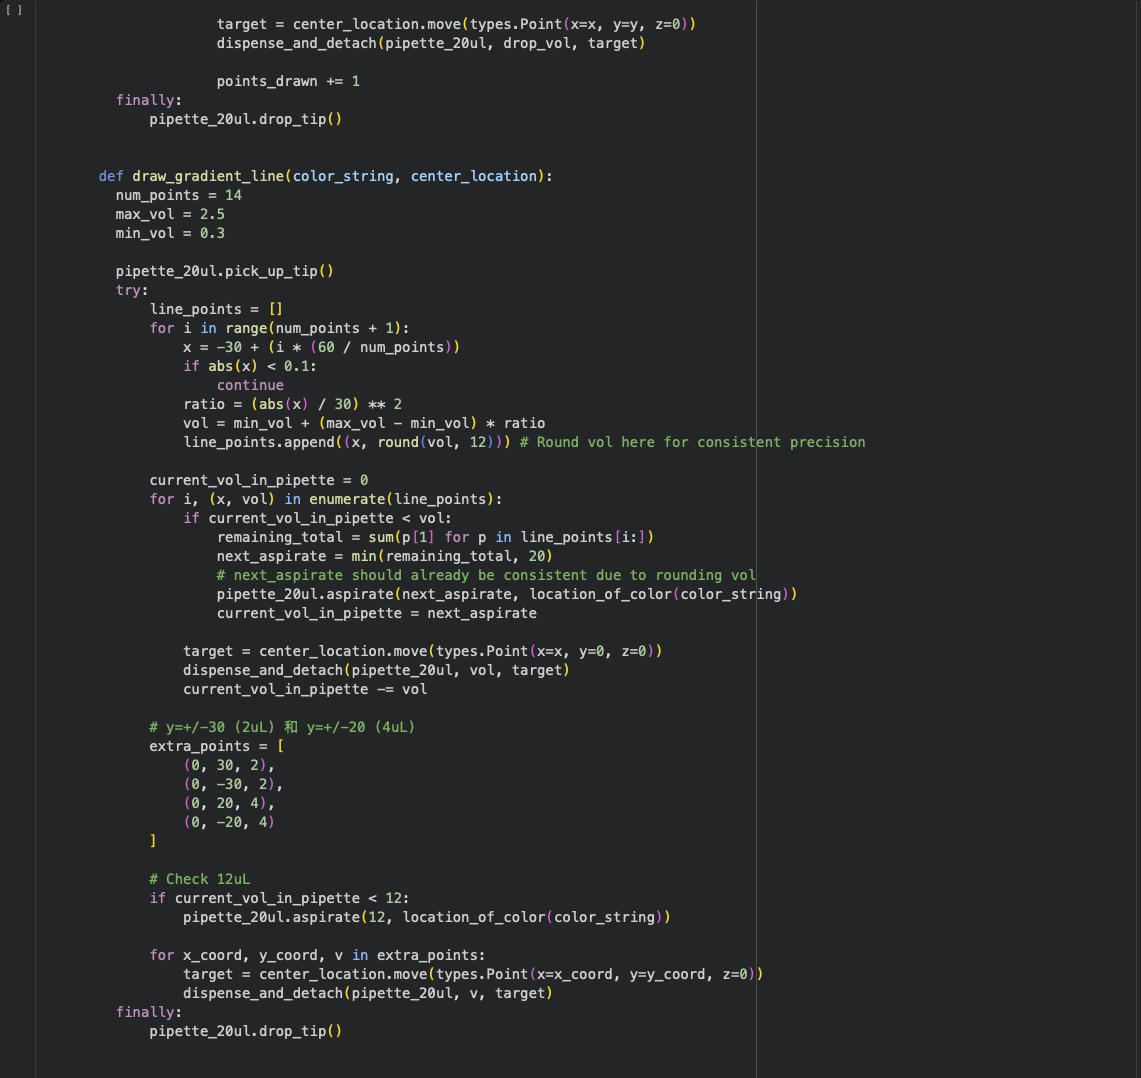
Design 1: Flower (Python protocol)
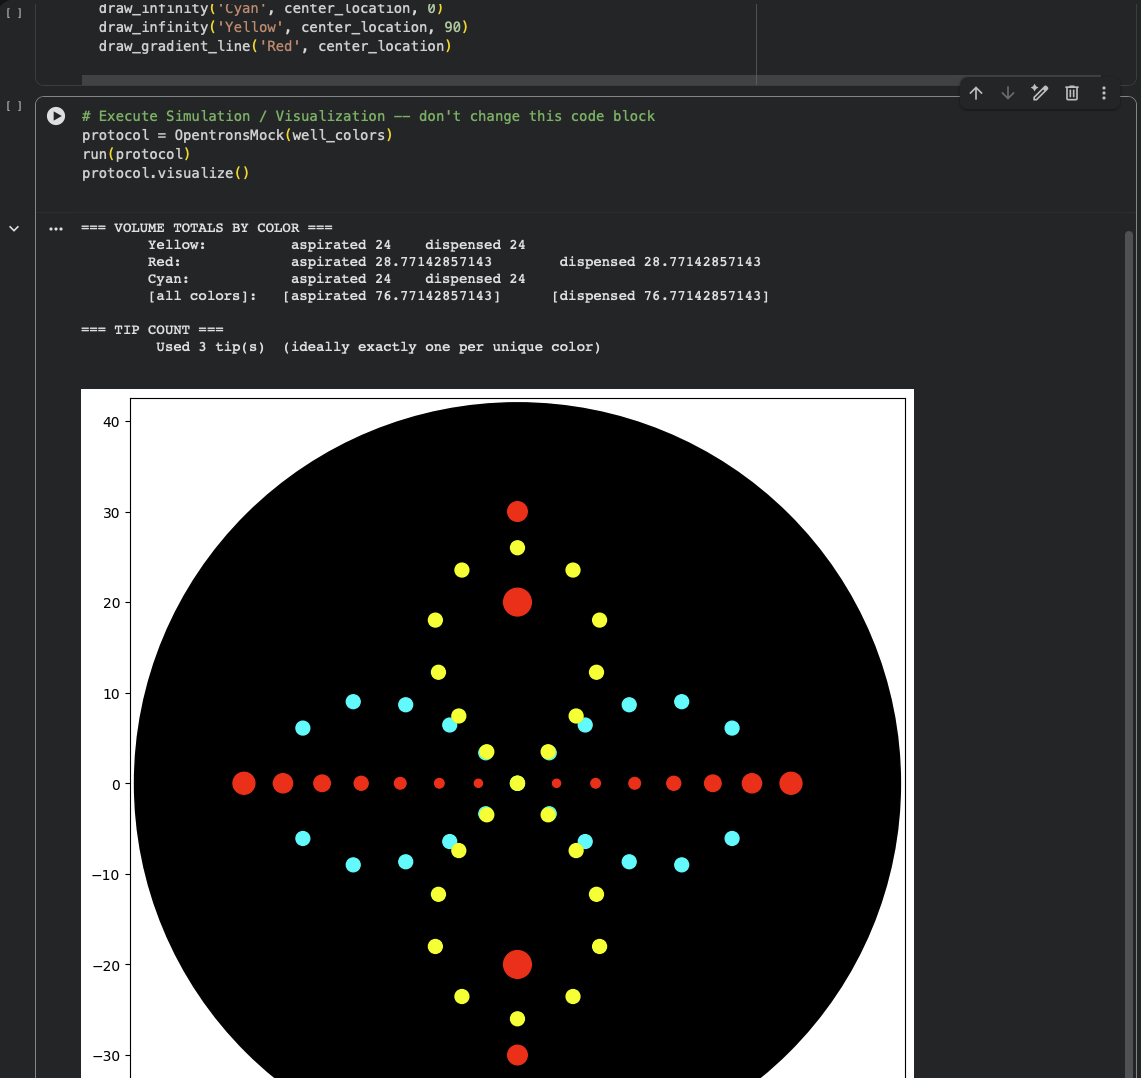
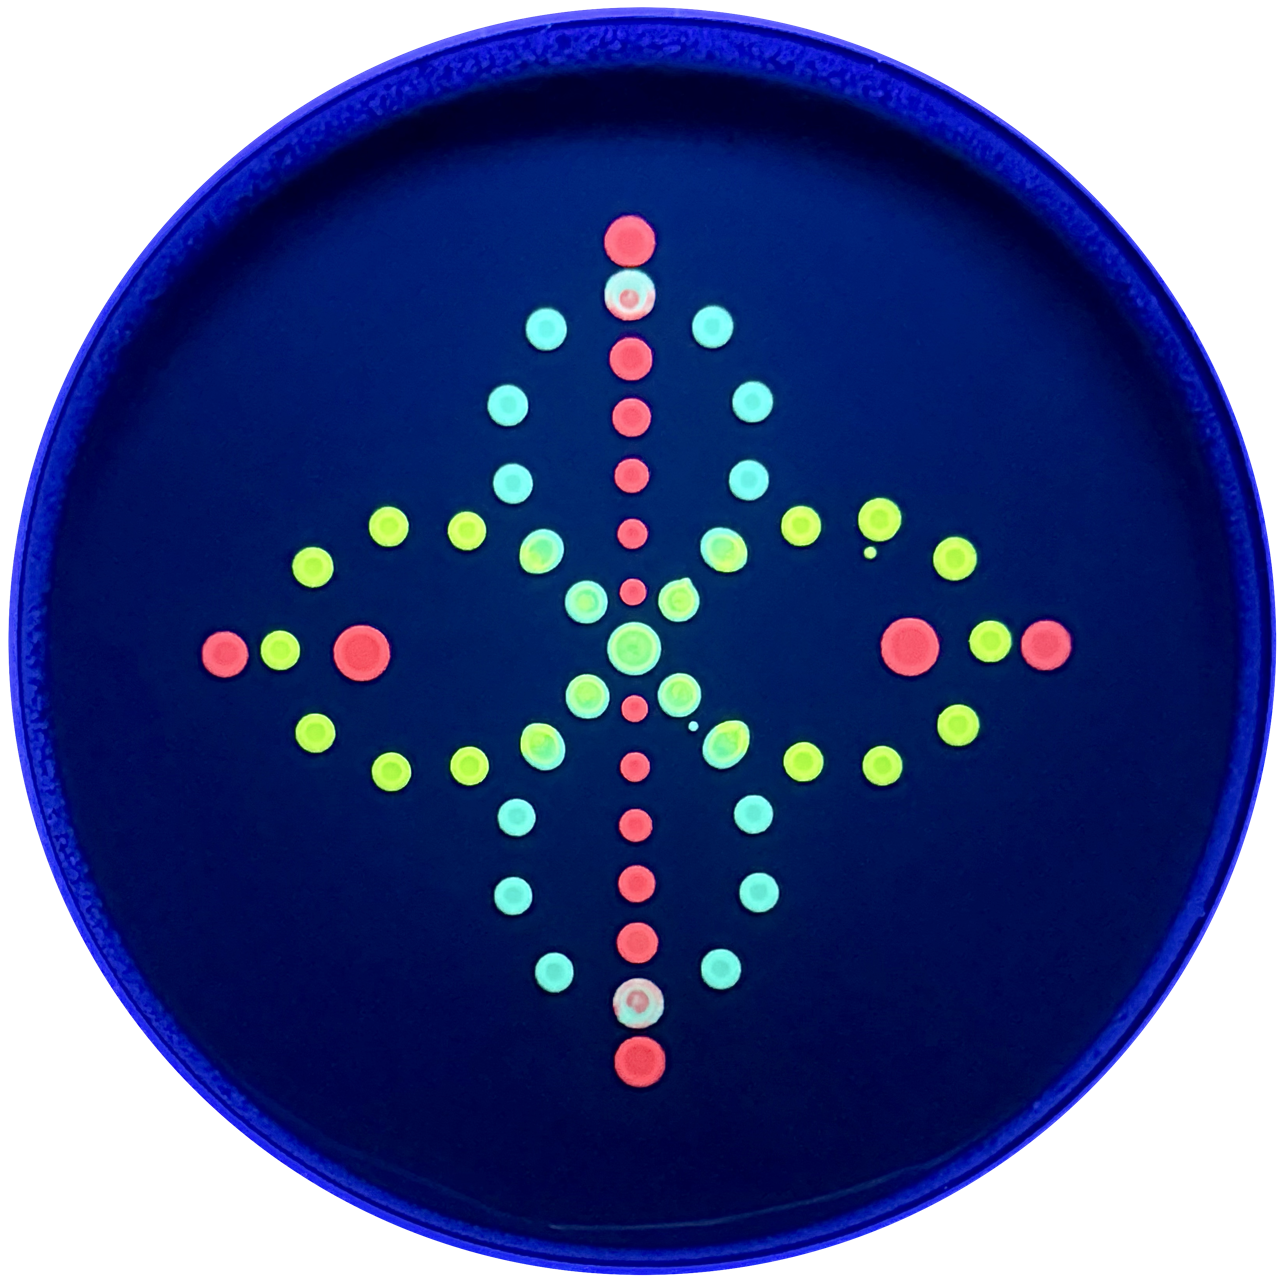
I explored how Python-defined coordinates translate into the OT-2 end-effector path, and how pipetting settings—especially volume—shape the deposited pattern and later bacterial growth. I used three fluorescent strains: Cyan (mTurquoise2), Yellow (Venus), and Red (mRFP). Cyan and Yellow followed two perpendicular ∞ (infinity) paths that together read as a flower-like form; their paths overlap at the center to test color mixing and spatial blending between strains. For Red, I mainly adjusted single-dispense volume to compare the “growth radius” suggested by the code with the actual colony spread on the plate. Two Red deposit points were placed to intersect with the Cyan/Yellow geometry to further test mixed-color effects at intersections.
Python Script:
Simulation:
UV-illuminated Petri Dish:
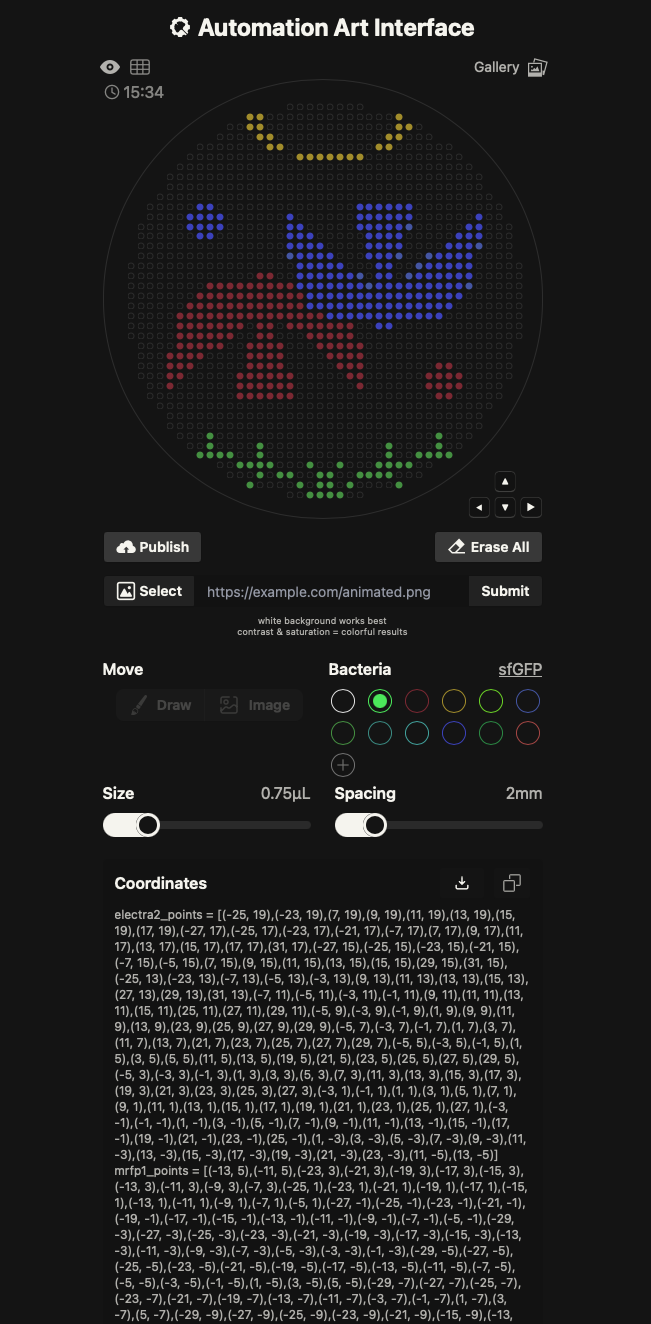
Design 2: Birds (Automation Art)
To learn the Opentrons Arts pipeline, I used the Automation Art Interface: I imported an illustration, adjusted it in the web editor, published the design to the gallery, and then had the TA download and run it in the Opentrons App for automated pipetting. This workflow let me compare the constraints and benefits of a GUI-based image-to-path process versus direct protocol scripting.
Automation Art Design & Simulation:
UV-illuminated Petri Dish:
Part 2: Post Lab Questions
Q1: Find and Describe
HYdrogel Dispensing method with Robotic Automation (HYDRA) for HTS-compatible hydrogels.
In this publication, the authors show how liquid handling automation can be used as a fabrication method, not just as a pipetting convenience. They introduce an automated workflow called HYDRA that makes thin and planar hydrogel films directly inside standard multiwell plates, so the resulting cell culture substrate is compatible with high throughput screening and imaging.
HYdrogel Dispensing method with Robotic Automation (HYDRA) for HTS-compatible hydrogels. Torchia, E., Di Sante, M., Horda, B. et al. Fabrication of cell culture hydrogels by robotic liquid handling automation for high-throughput drug testing. Commun Eng 4, 222 (2025). https://doi.org/10.1038/s44172-025-00575-3
Research Question
High-throughput screening (HTS) usually uses rigid plastic/glass, which reduces physiological relevance. Hydrogels improve biomimicry, but in multiwell plates they often form curved menisci that interfere with uniform seeding and microscopy, and many hydrogel approaches end up too thick for high-resolution imaging.
Lab Automation
HYDRA’s key trick is a dispense + immediate re-aspiration routine: the robot dispenses a sub-contact volume of hydrogel precursor (avoiding sidewall wetting), then re-aspirates to “pin” the contact line and leave a uniform micrometric film on the well bottom (reported ~10–50 µm). This produces meniscus-free coatings that remain compatible with standard 96- and 384-well workflows.
In their methods, the authors explicitly use an OT-2 as an “entry-level” open-source platform to demonstrate accessibility for academic labs: they implement casting via Opentrons Protocol Designer, using controlled dispense/aspirate heights and flow rates (e.g., dispensing at hundreds of microns above the bottom and aspirating closer to the surface) to reliably leave a thin residual layer that later crosslinks.
Biological Application
They fabricate fish-gelatin hydrogels crosslinked with microbial transglutaminase, then validate the platform with imaging-based dose–response assays (e.g., nocodazole and paclitaxel) on engineered epithelial cells, showing the hydrogel substrates support long-term holographic imaging and fluorescence microscopy while preserving expected pharmacological readouts.
Q2: Lab Automation Plan for Final Project
For my final project on improving extreme-environment tolerance for moss-based DNA storage, I plan to use a cloud laboratory workflow (Ginkgo Nebula) to run a high-throughput screening matrix with strong reproducibility and minimal manual pipetting.
Cloud-lab automation plan:
To systematically identify the most resilient variants and protective environments for our moss-based sensors, I utilize an automated screening workflow to test multiple tolerance-enhancement conditions in parallel:
Precision Arraying (Echo Transfer): I will use the Echo Acoustic Liquid Handler to precisely array various tolerance-enhancement sets—including diverse pHluorin variants, protective additives (e.g., trehalose), and specific cofactors—into designated wells of 96 or 384-well plates.
Stressor Distribution (Bravo & MultiFlo): The Bravo Automated Liquid Handling Platform and MultiFlo FX Dispenser are employed to distribute master mixes and stressor reagents (such as $H_2O_2$ for oxidative stress) across the plates, creating controlled gradients of UV, desiccation, and chemical stressors.
Environmental Control (PlateLoc & Inheco): Plates are sealed using the PlateLoc Thermal Microplate Sealer to prevent evaporation, followed by incubation in Inheco modules. This ensures rigorous control over temperature and timing during both the stress-induction and recovery phases.
Automated Access (XPeel): Between multi-step stages, transitioning from stress to recovery or preparing for measurement, the XPeel system automates the removal of seals, allowing for seamless integration without manual intervention.
Performance Analysis (PHERAstar): Finally, the PHERAstar Plate Reader measures fluorescence (specifically the pH-dependent excitation shifts of pHluorin) and absorbance. This serves as a post-stress performance proxy, allowing me to rank conditions based on signal retention and metabolic recovery.
Week 6 Lab: Gibson Assembly
Gibson Assembly
Week 7 Lab: Fungal Materials and Neuromorphic Circuits
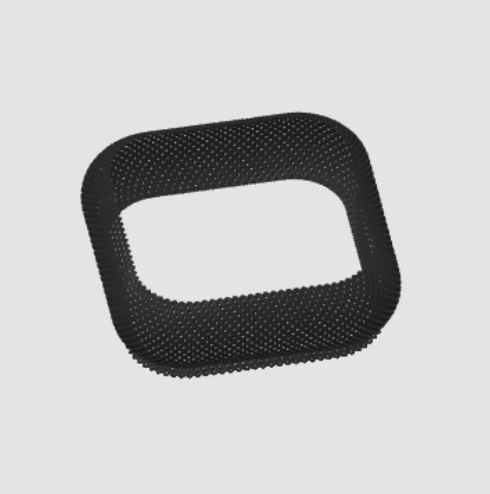
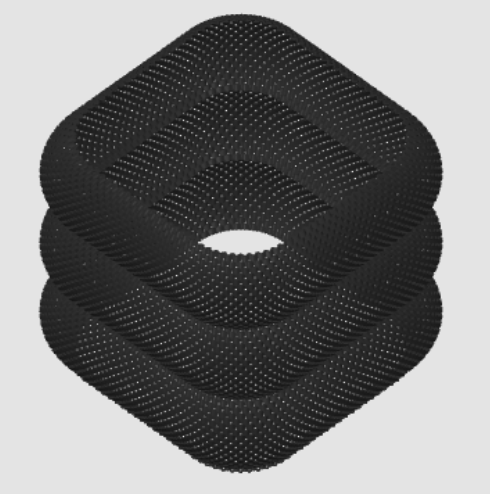
Part 1: Fungal Materials
In Week 7 Fungal Materials Lab, my goal is to experiment with the combination of 3D printed PLA molds and fungal materials.