Week 2 Lab: DNA Gel Art
Gel Art: Restriction Digests and Gel Electrophoresis
Overview | Objective
The goal of this 3-hour lab is to immerse you in the practical world of DNA gel electrophoresis and restriction enzyme-based DNA manipulation. You’ll create stunning DNA gel art while mastering essential techniques used in scientific research! Inspired by Paul Vanouse’s Art project and his Latent Figure Protocol, this lab offers a unique opportunity to blend creativity with molecular biology. By visualizing DNA fragments of varying lengths, you’ll gain firsthand experience in a process critical for verifying DNA sequences.
While the outcome of this lab is primarily artistic, gel electrophoresis is a fundamental tool in molecular biology for verifying DNA sequences. It allows you to confirm that the DNA you have obtained—whether purchased, purified, or constructed—matches your expectations. By comparing the lengths of DNA fragments observed on the gel to your predictions, you can assess whether the DNA sequence is correct. Although sequencing provides definitive confirmation, it is significantly more expensive, making gel electrophoresis an essential and cost-effective preliminary step in DNA analysis.
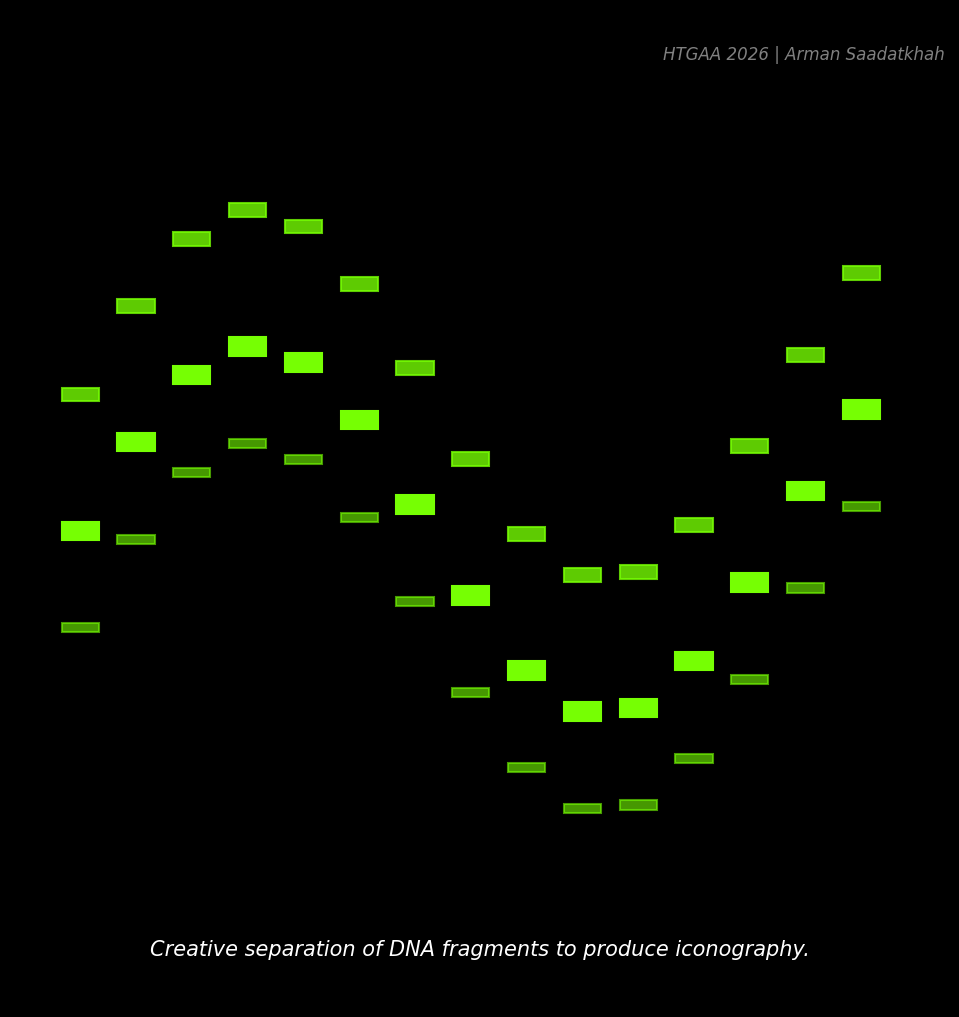 “The America Project”, Paul Vanouse, 2016. (Simulated iconographic Gel Art)
Overview | Concepts Learned & Skills Gained
This lab aims to enhance your understanding of core molecular biology concepts, including the mechanism of gel electrophoresis, the function of restriction enzymes, and the interpretation of DNA banding patterns. Through hands-on experience, you will gain skills in:
- Benchling Tools: Importing and analyzing DNA sequences, simulating restriction digests, and designing gel layouts.
- Restriction Digest Setup: Preparing precise enzyme reactions for targeted DNA fragment generation.
- Agarose Gel Preparation: Calculating and casting 1% agarose gels with appropriate buffers and DNA stains.
- Gel Electrophoresis Execution: Loading samples with accuracy, setting up electrophoresis apparatus, and troubleshooting common issues.
- DNA Visualization: Using a blue light transilluminator to image and document gel results effectively.
Pre-Lab | Reading
(1) How does Gel Electrophoresis Work?
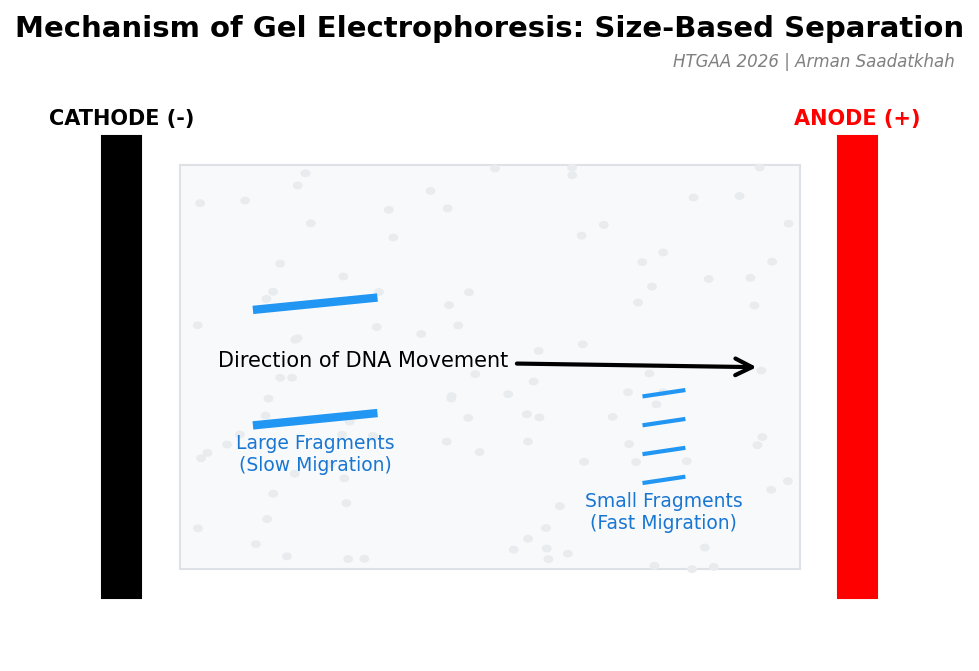
In gel electrophoresis, we place DNA samples in a semi-solid gel called agarose. The gel acts as a molecular mesh. DNA has a negative charge due to the phosphate groups in its sugar-phosphate backbone. When placed in an electric field, DNA fragments move towards the positively charged electrode (the anode).

When an electric current is applied, the DNA fragments are pulled through the gel. However, their movement is influenced by size:
- Smaller DNA fragments navigate through the pores more easily and move faster toward the anode.
- Larger DNA fragments experience more resistance, slowing their progress.
(2) DNA Gel Ladders
Gel electrophoresis separates DNA fragments based on length only. DNA Ladders serve as molecular weight markers (biological rulers) providing standardized DNA sizes for comparison.
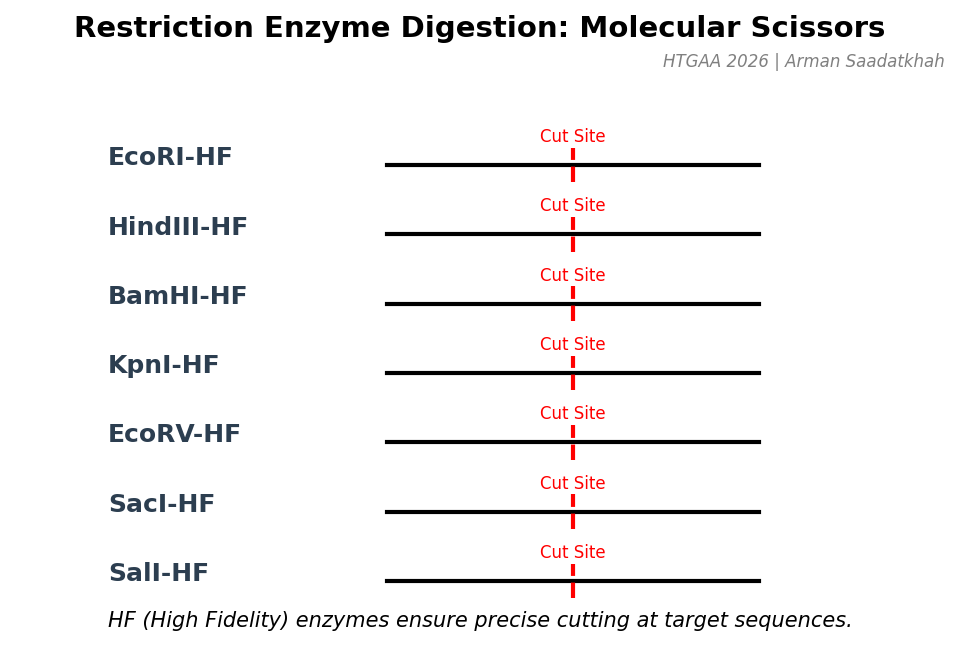
(3) Restriction enzymes
Restriction enzymes, or endonucleases, cut DNA at specific sequences called restriction sites. Each enzyme recognizes a unique nucleotide sequence, often palindromic. We used High Fidelity (HF) enzymes for precision.
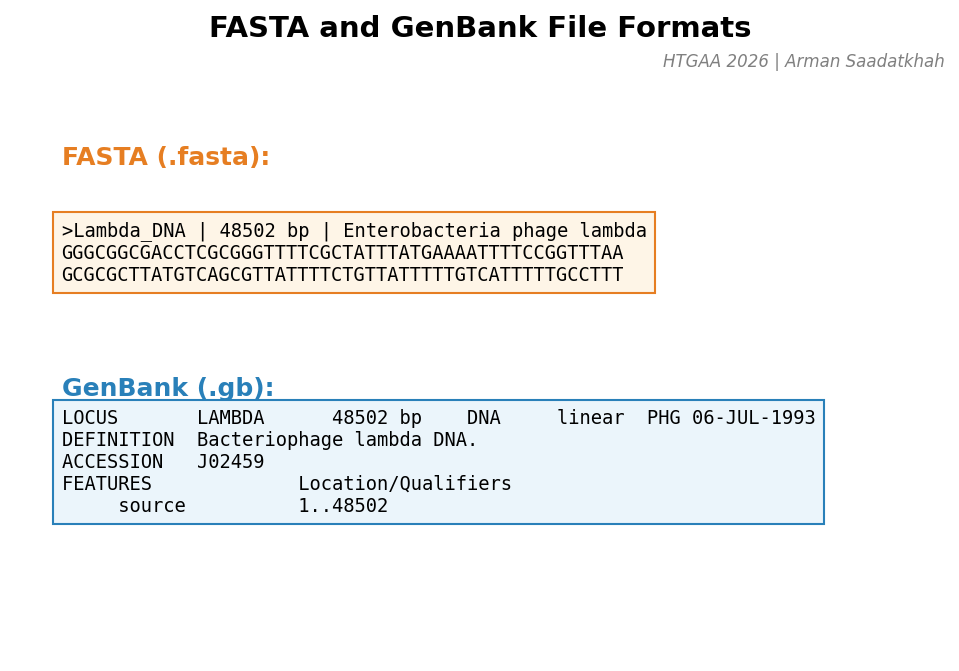
(4) GenBank and FASTA file formats
To run a virtual digest, DNA sequences are stored in FASTA or GenBank file formats. FASTA files have a simple format (sequence ID followed by the sequence), while GenBank files contain additional annotations.
Protocol | Part 0: Designing your Gel Art
Time Estimate: 1 hour
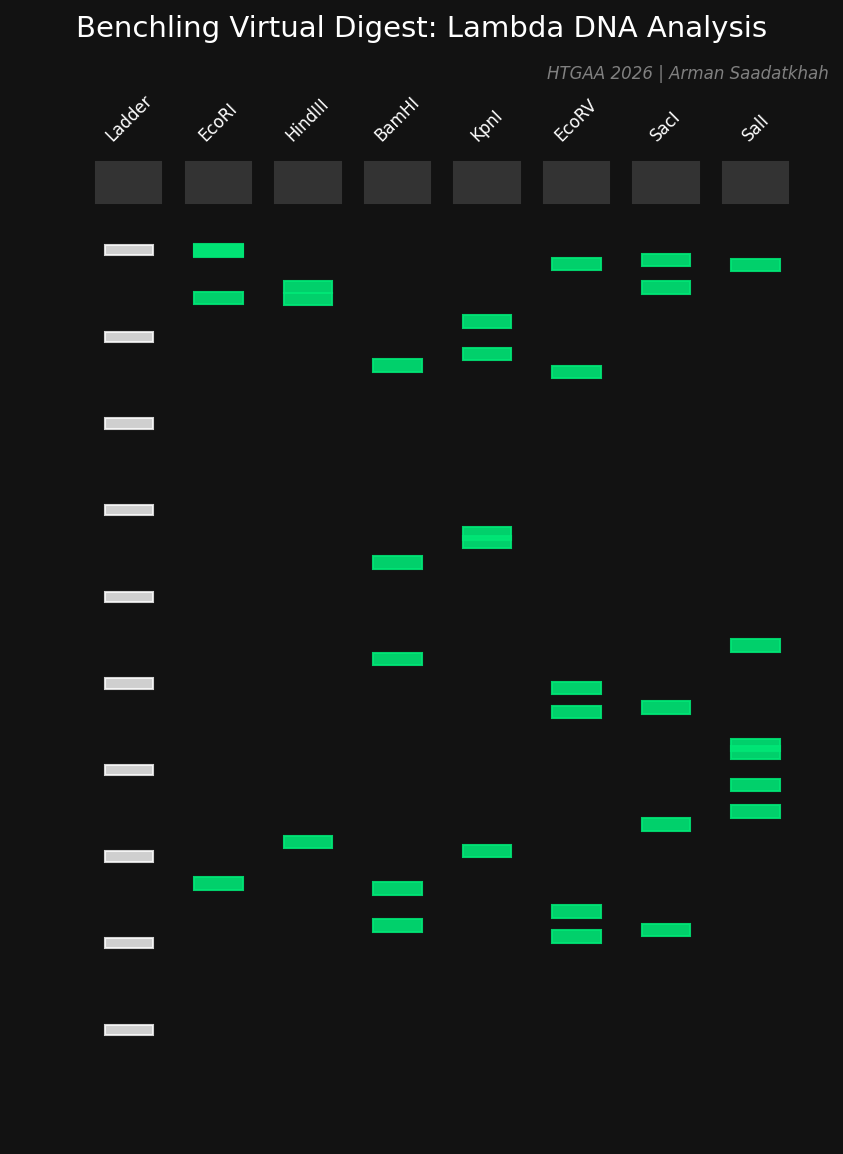
Use Benchling to design your gel art and run your virtual digest. The distinct bands formed from gel electrophoresis can be used to create pictures.
Protocol | Part 1a: Preparing a 1% agarose electrophoresis gel
Time Estimate: 20 minutes prep, 30 minute wait
- Add 0.75 g of agarose and 75 mL of 1x TAE buffer to a microwavable flask (1% w/v).
- Heat in a microwave until dissolved.
- Allow to cool to ~50 ºC, then add 7.5 μL of SYBR Safe DNA stain.
- Pour into tray with comb and let solidify for 30 minutes.
Protocol | Part 1b: Restriction Digest
Time Estimate: 15 minutes prep, 20 minute wait
| Reagent | Desired conc/amount | Stock conc/amount | Volume |
|---|---|---|---|
| Lambda DNA | 1.5 ug | 0.5 ug/uL | 3 uL |
| Enzyme-specific Buffer | 1x | 10x | 2 uL |
| Restriction Enzyme | 15 units | 20 units/uL | 1 uL (per enzyme) |
| Nuclease-free water | n/a | n/a | up to 20 uL |
| Total | 20 uL |
Protocol | Part 2: Gel Run
Time Estimate: 15 minutes setup, 1 hour wait
Loading the wells correctly is very important and requires a steady hand. Make sure the pipette tip hovers at the top of the well.
- Load 20 uL of each sample into the wells.
- Run the gel at 80V - 115V for around 45 minutes.
Protocol | Part 3: Imaging Your Results
Time Estimate: 5 minutes
Place the gel on the blue light transilluminator. Turn on the light, turn off room lights, and capture a clear image of the bands.
Supplemental | Troubleshooting
- Nonfunctional electrophoresis lane: Excessive DNA concentration or high voltage causing smearing.
- Bleeding trails: Human error in mixing or incorrect incubation.
- Samples not migrating: Check if water was used instead of TAE buffer (lack of conductivity).
HTGAA 2026 | Arman Saadatkhah | Reference: Paul Vanouse “The America Project”